Greenhouse Container Gardening with Gooseberries, Currants, Elderberries, and Goji Berries: A Complete Growing Guide and Update

Greenhouse Container Gardening with Gooseberries, Currants, Elderberries, and Goji Berries: A Complete Growing Guide and Update

If you’ve ever dreamed of growing a variety of berries right in your backyard — without worrying about harsh weather, poor soil, or space limitations — greenhouse container gardening might be the perfect solution. With the right setup, you can cultivate flavorful and nutrient-rich fruits like gooseberries, currants, elderberries, and goji berries all year round.

In today’s post, inspired by the YouTube video “Greenhouse Container Garden Gooseberry, Currant, Elderberry, & Goji Berry Updates!”, we’ll explore how these four berry types thrive in containers inside a greenhouse environment. You’ll learn the secrets to keeping them healthy, productive, and vibrant—from soil mix and watering tips to pruning and harvesting. Whether you’re a beginner or an experienced gardener, this guide will help you create a greenhouse berry paradise that keeps producing season after season.


Why Grow Berries in a Greenhouse?

Growing berries in a greenhouse offers several advantages that open-field planting can’t match:

  1. Extended Growing Season:
    A greenhouse allows you to protect your plants from frost and extreme heat, extending your harvest period and allowing year-round production in some climates.
  2. Pest and Disease Control:
    Berries are often attacked by birds, aphids, and fungal diseases. Inside a greenhouse, you can better control these problems with netting, ventilation, and organic sprays.
  3. Better Soil and Moisture Management:
    Container gardening makes it easy to tailor the soil mix and moisture level to each plant’s needs, ensuring optimal root health and fruit yield.
  4. Space Efficiency:
    Even if you have limited outdoor space, containers and grow bags allow you to cultivate multiple berry varieties side by side.
  5. Cleaner, More Manageable Harvests:
    Berries grown in pots stay cleaner, ripen evenly, and are easier to harvest without bending or crawling through garden beds.

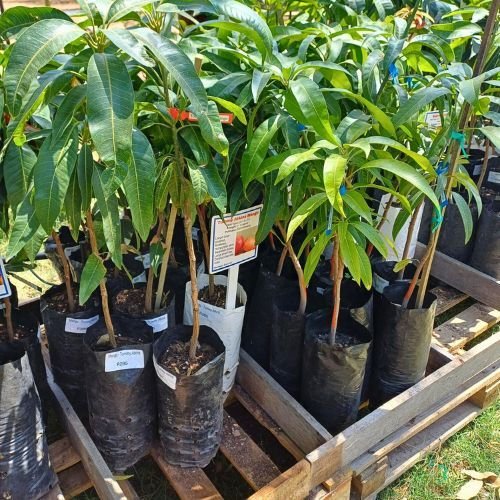
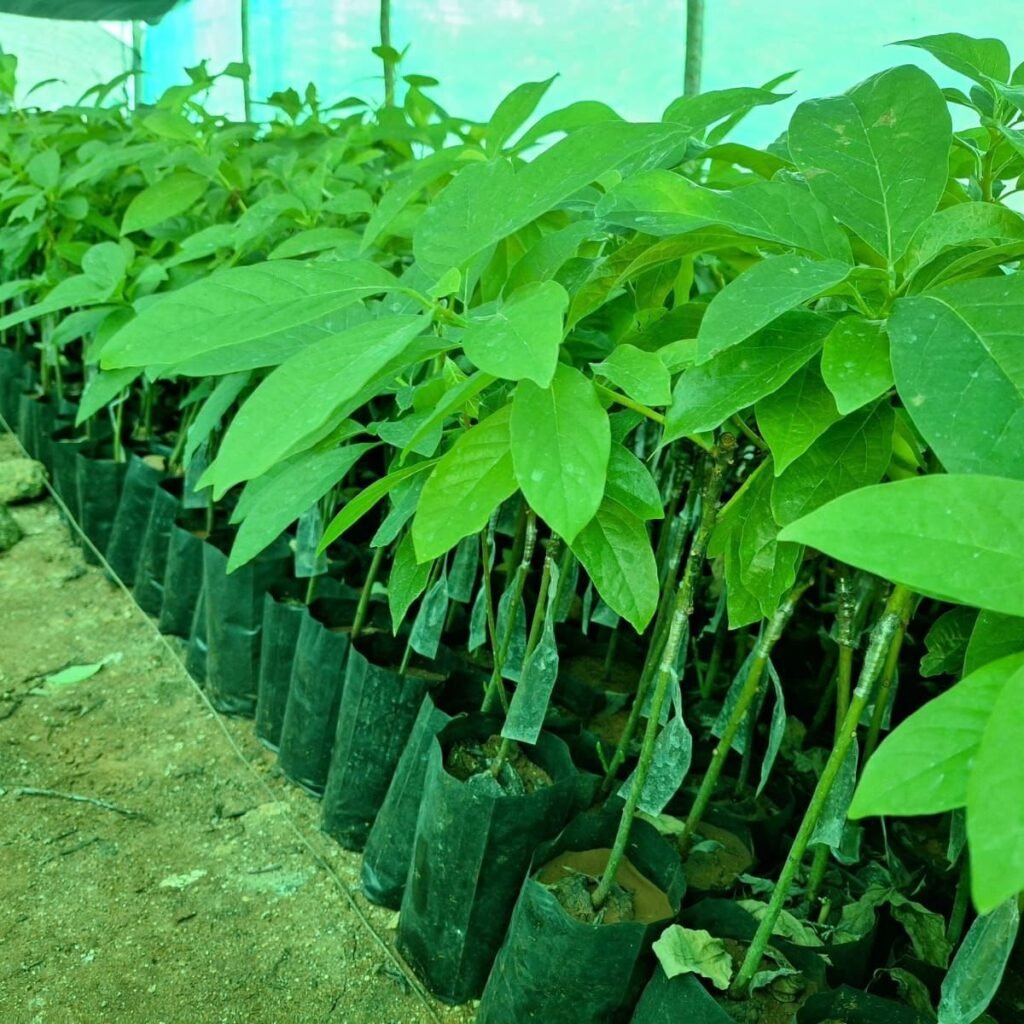
Choosing the Right Containers

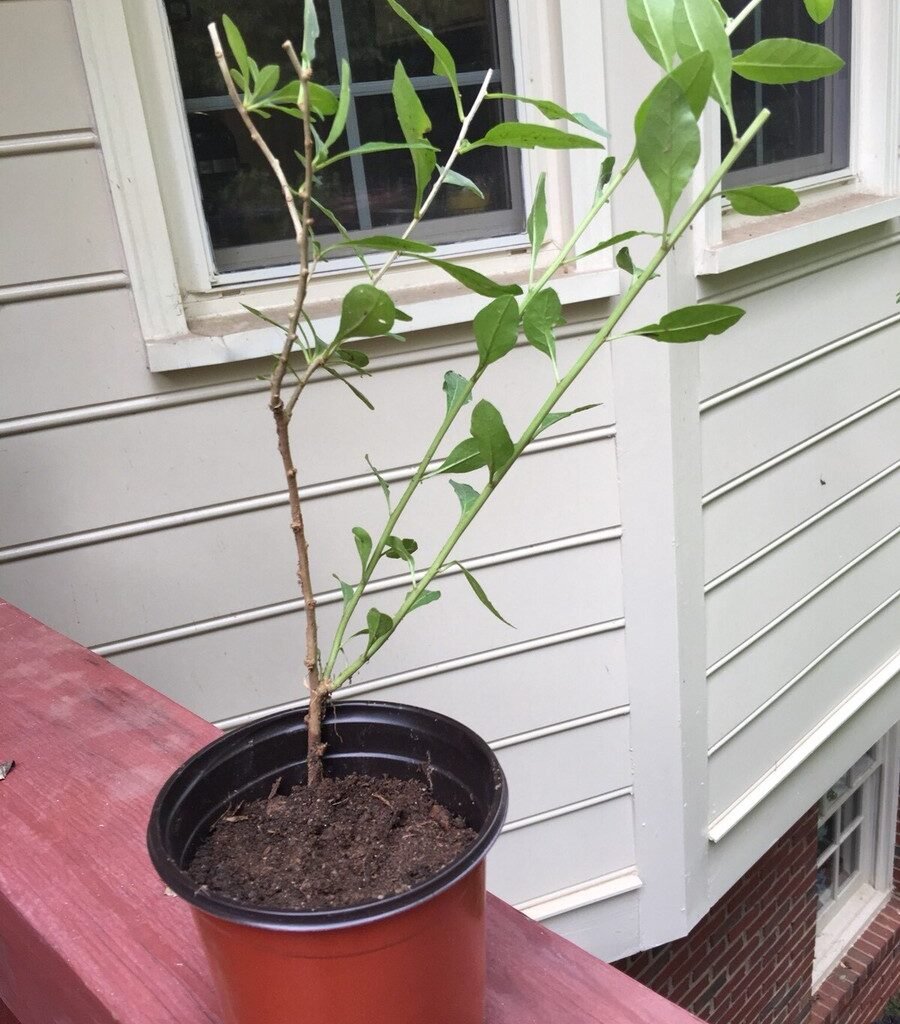
Each berry variety has its own preferences, but generally, you’ll want containers that are large enough for root development, well-drained, and durable for long-term use.

  • Gooseberries: Minimum 15-gallon pots with a width of at least 18 inches.
  • Currants: Thrive in 10-15 gallon containers.
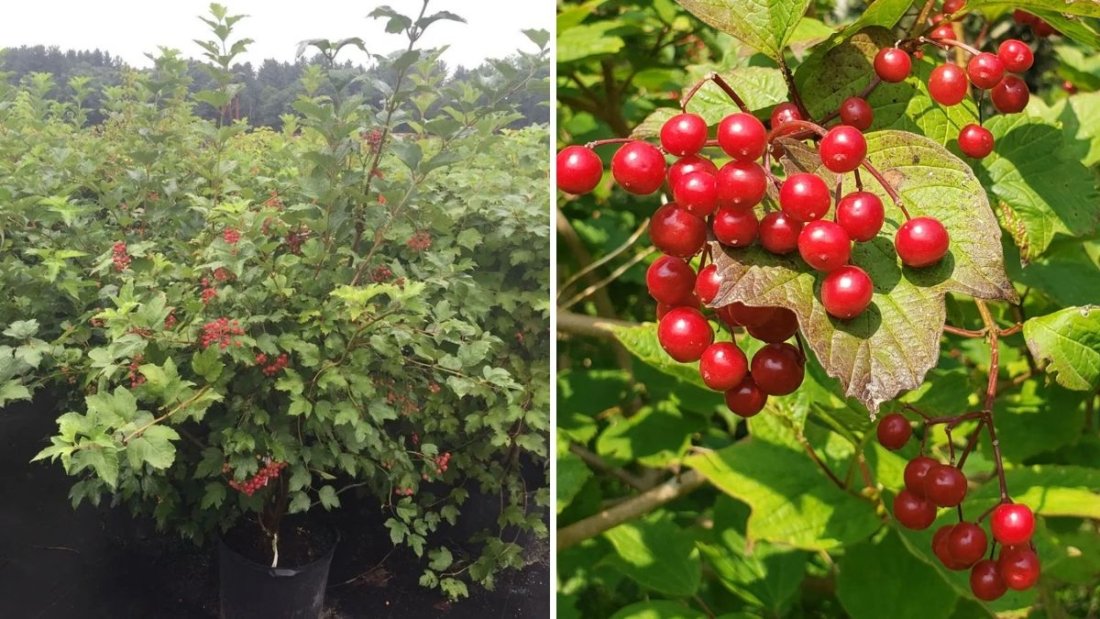
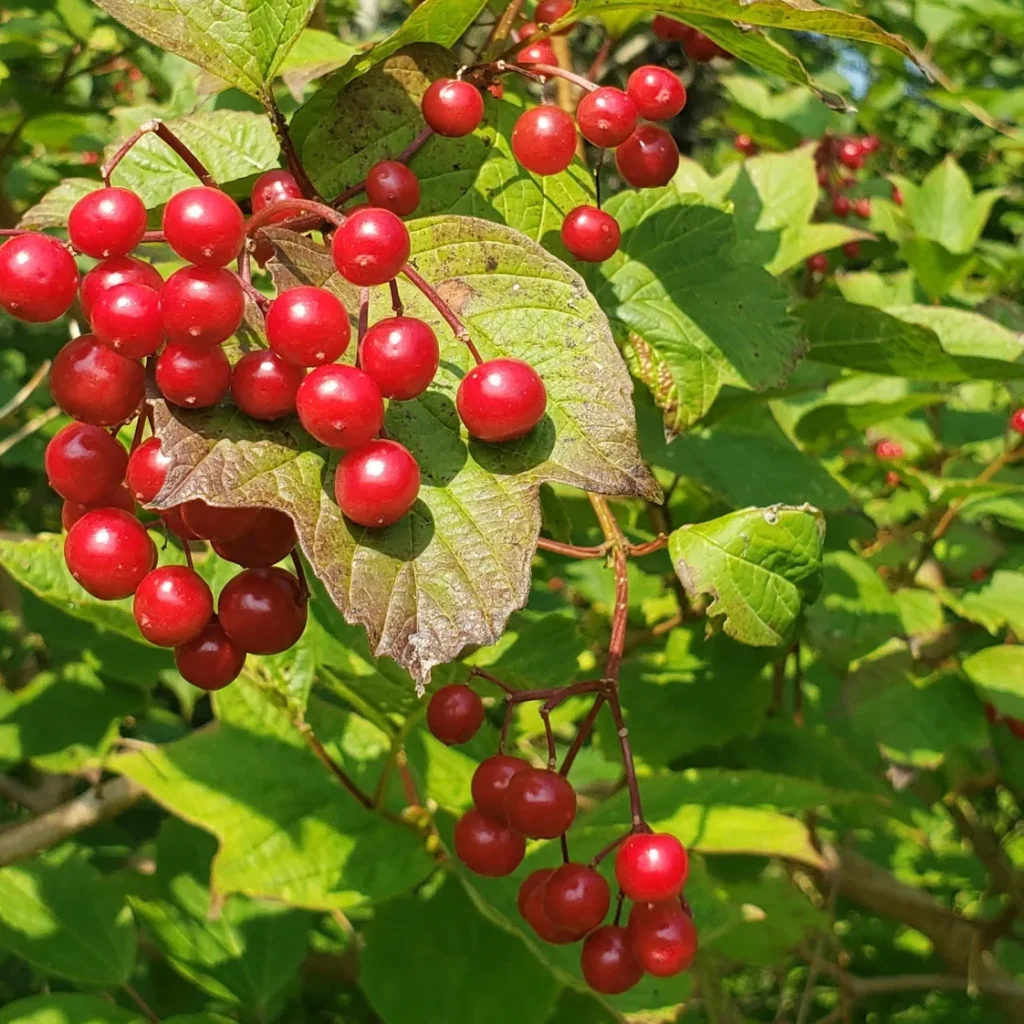
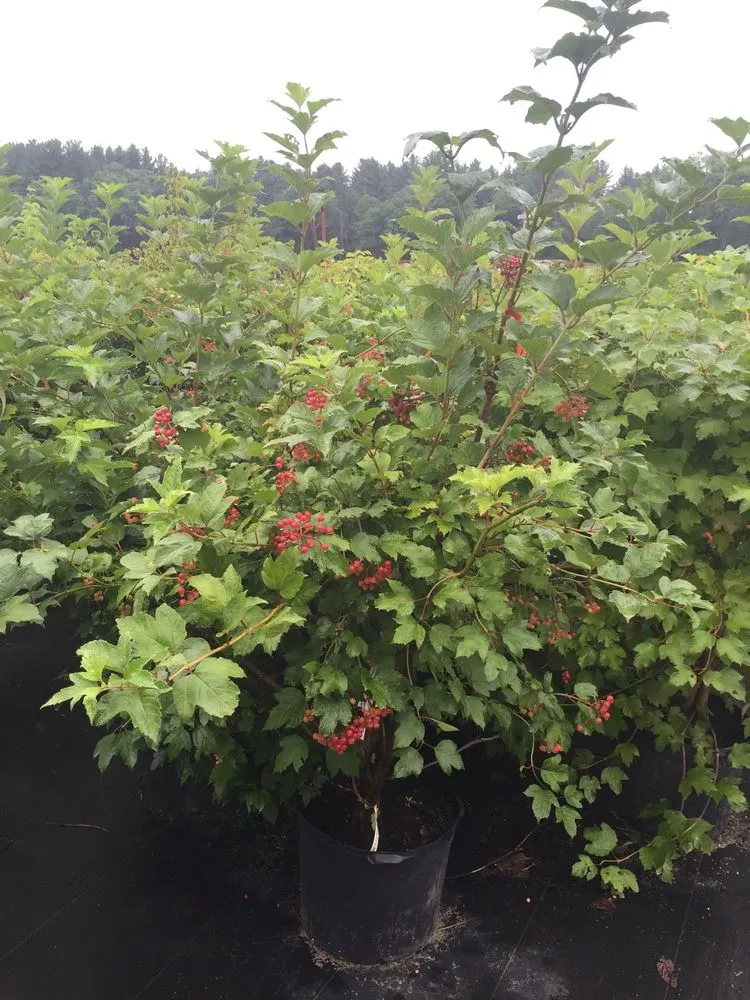
  • Elderberries: Need deeper pots (20 gallons or more) due to their vigorous root systems.
  • Goji berries: Do best in 10-20 gallon containers with sturdy drainage holes.

Always choose containers with drainage holes to prevent root rot, and consider placing them on raised stands or trays for better airflow beneath the pots.


Ideal Soil Mix

All these berry plants love rich, well-draining soil that retains some moisture without becoming soggy. A good general mix is:

  • 40% organic compost
  • 40% high-quality potting soil
  • 20% perlite or coarse sand for aeration

For pH levels:

  • Gooseberries, currants, and elderberries prefer slightly acidic to neutral soil (6.0–7.0).
  • Goji berries like it a bit more alkaline (around 7.0–8.0).

Adding slow-release organic fertilizer or composted manure every few months will keep nutrients balanced and promote continuous fruiting.


Watering and Feeding

Greenhouse-grown berries tend to dry out faster because of the warmer environment, so consistent watering is crucial.

  • Watering frequency: 2–3 times a week, depending on humidity and temperature.
  • Deep watering: Ensure water reaches the root zone but avoid overwatering.
  • Mulch: Add a 2-inch layer of organic mulch to retain moisture and regulate soil temperature.

For feeding:

  • Apply a balanced berry fertilizer (10-10-10 or similar) during spring and mid-summer.
  • For elderberries and currants, a nitrogen boost early in the season promotes strong shoot growth.
  • For goji berries, reduce nitrogen to encourage fruiting rather than foliage.

Light and Temperature Requirements

Since greenhouses can trap heat, maintaining optimal temperature and light levels is key.

  • Light: All four berry plants thrive with at least 6–8 hours of sunlight daily. If sunlight is limited in winter, use full-spectrum grow lights.
  • Temperature:
    • Gooseberries and currants prefer cooler conditions (60–75°F).
    • Elderberries and goji berries tolerate slightly warmer temperatures (up to 85°F).
  • Ventilation: Keep air circulating to prevent mold, mildew, and pests. Open vents or use small fans for steady airflow.

Greenhouse Layout and Spacing

When growing multiple berry types in a shared greenhouse, organization and spacing matter.

  • Place taller shrubs like elderberries at the back or along the sides.
  • Position medium-height plants such as currants and gooseberries in the middle.
  • Keep compact or climbing goji berries near trellises or support stakes.

Maintain at least 2–3 feet of space between containers to allow air movement and easy access for pruning and harvesting.


Caring for Each Berry Type

Let’s dive deeper into the specific needs of each berry plant in your greenhouse setup.
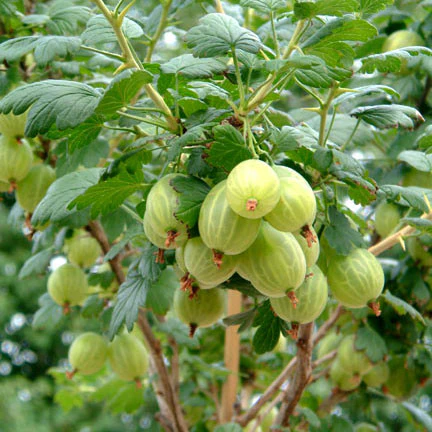
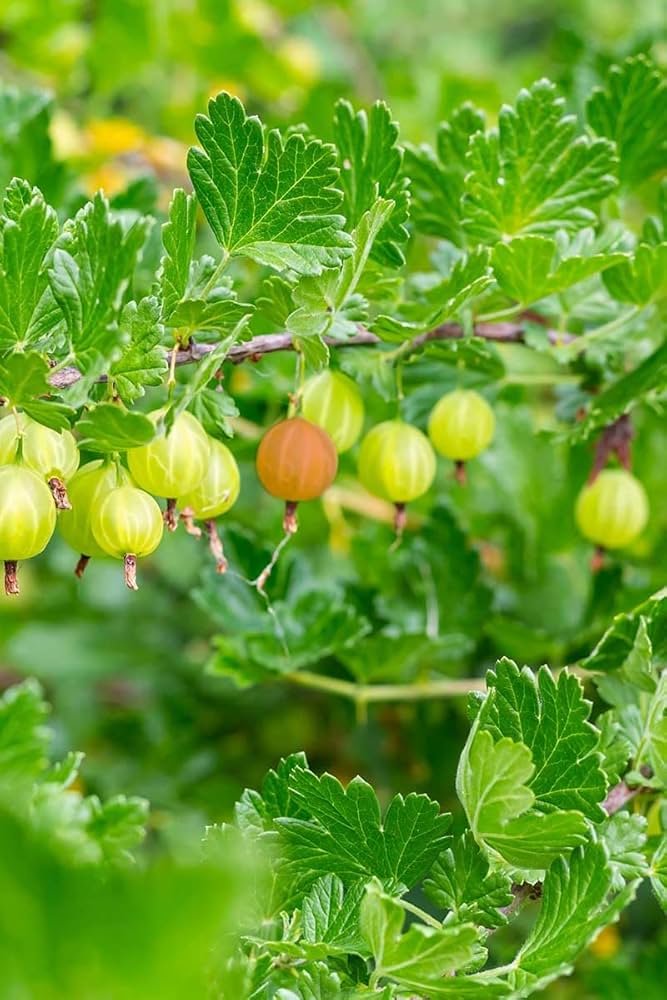
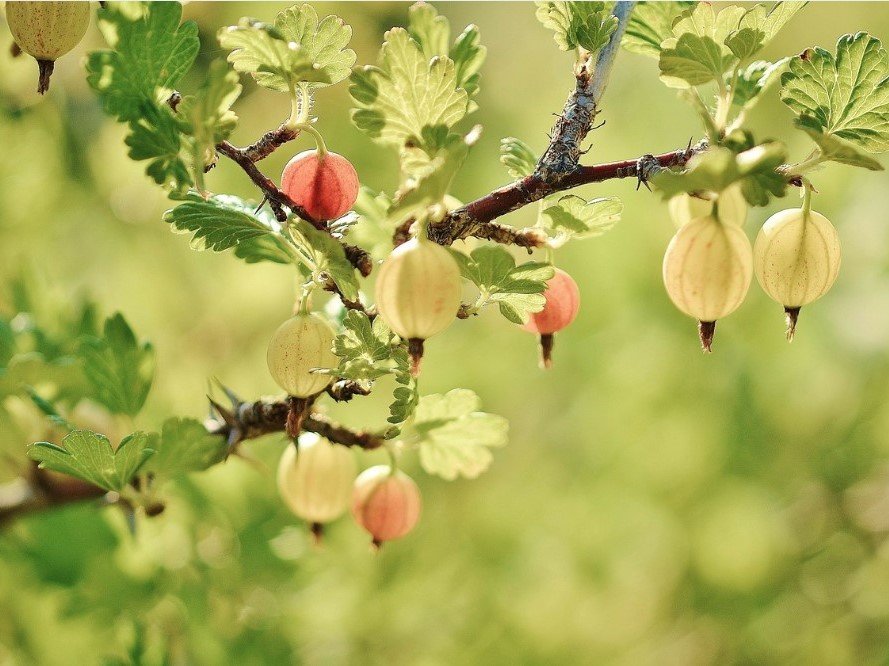
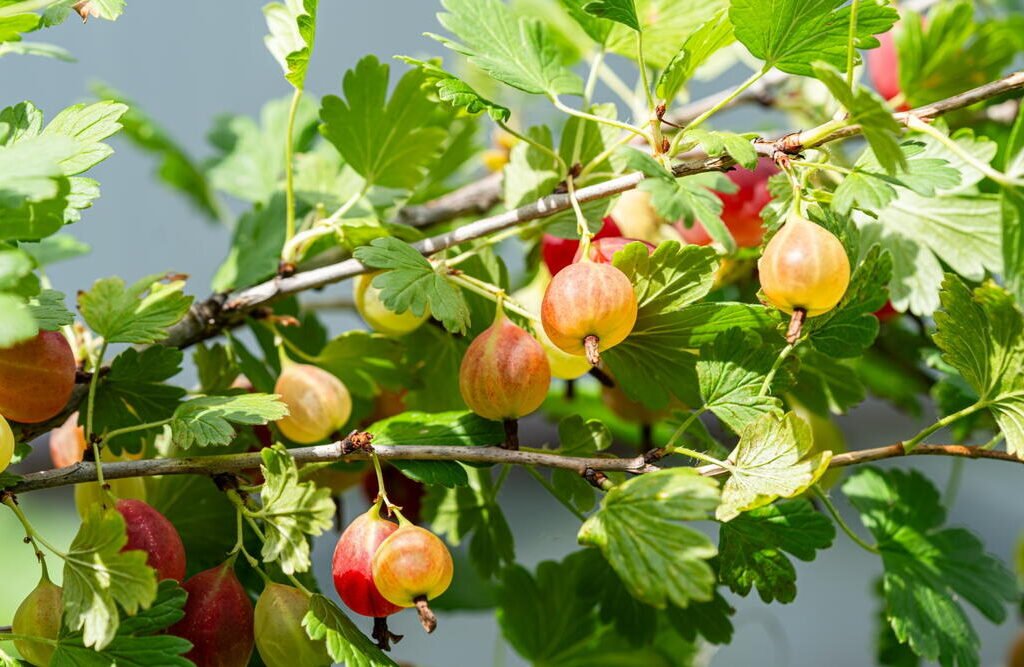

Gooseberries

Highlights: Small, round berries with a tart flavor, great for jams and pies.

  • Light: Partial to full sun.
  • Pruning: Remove old canes each winter to encourage new, productive shoots.
  • Watering: Keep soil evenly moist, especially when fruiting.
  • Feeding: Apply compost tea or organic berry fertilizer every 6–8 weeks.
  • Harvest: Late spring to midsummer, when berries turn translucent and slightly soft.

Gooseberries are naturally resistant to cold but thrive beautifully in a greenhouse where temperature fluctuations are minimized.
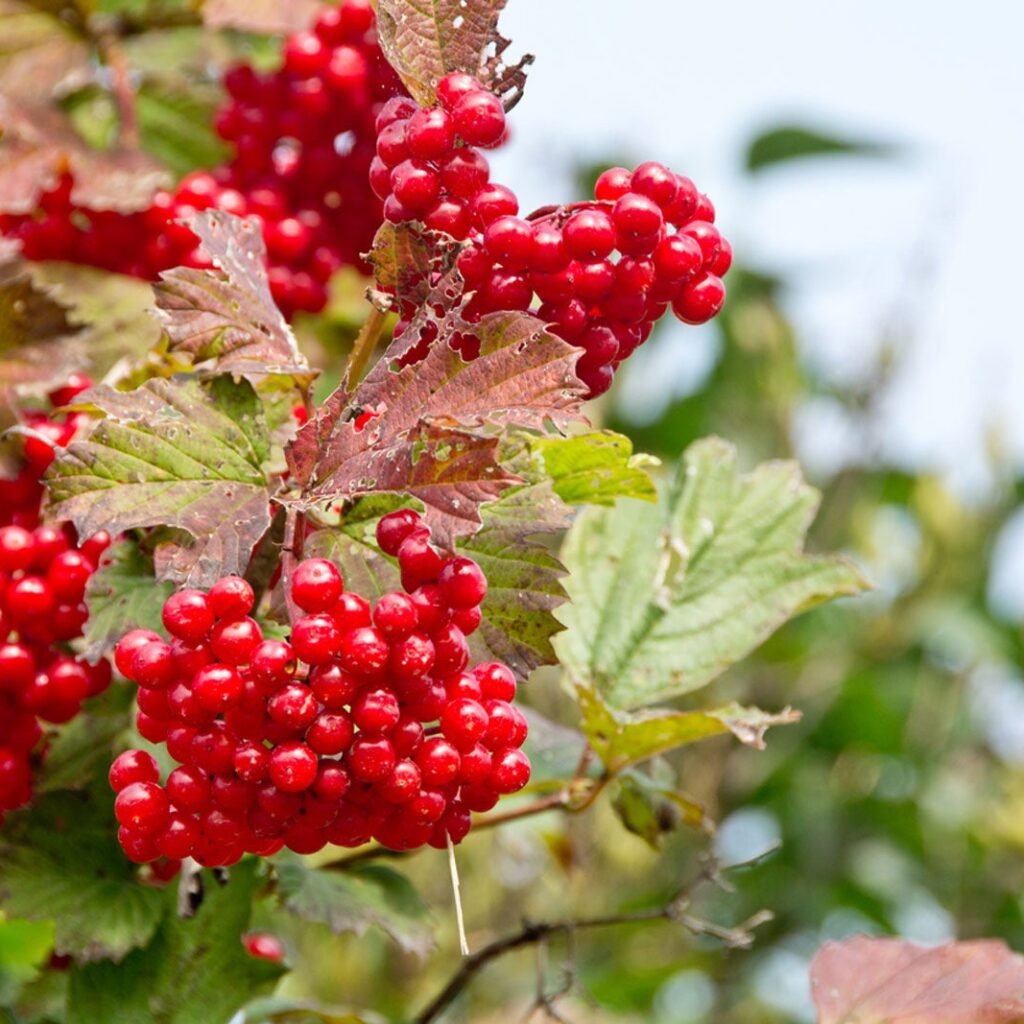
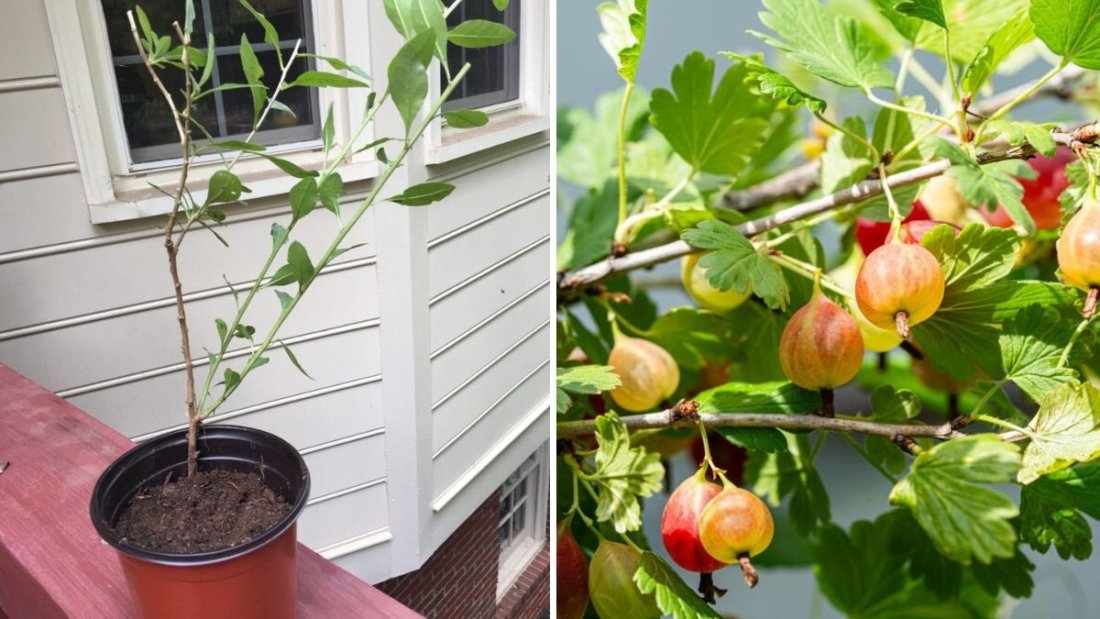

Currants

Highlights: Clusters of glossy red, white, or black berries with a tangy taste.

  • Light: Full sun to light shade.
  • Pruning: Prune after harvest to remove dead wood and shape the plant.
  • Watering: Regular watering is vital—dry roots can reduce berry size and sweetness.
  • Feeding: Top-dress with compost in early spring and again in midsummer.
  • Harvest: Typically in mid to late summer; berries ripen in clusters.

Currants do exceptionally well in containers and are very productive when properly pruned and fed.
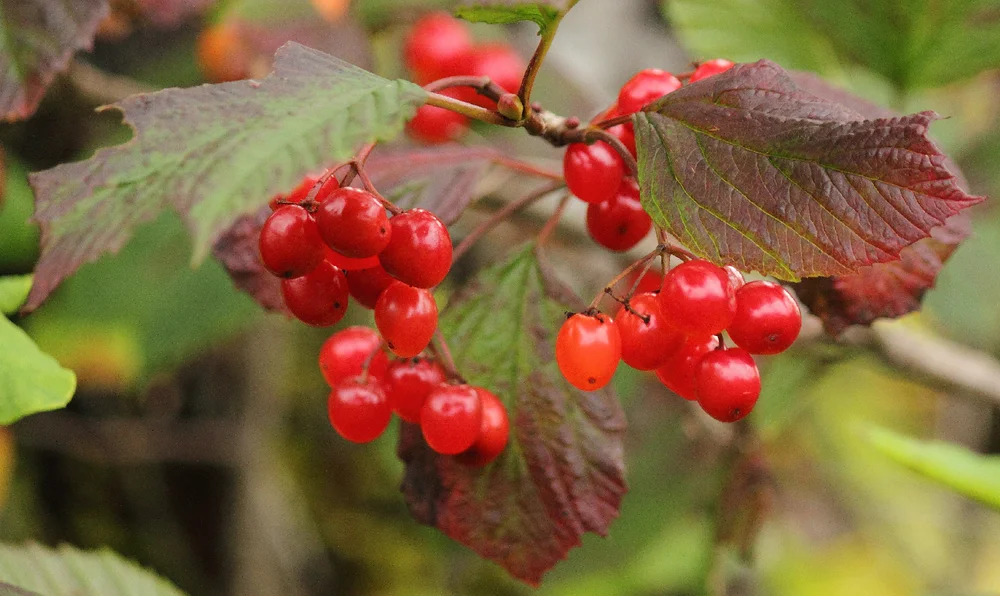

Elderberries

Highlights: Famous for their medicinal value—rich in antioxidants and used for syrups, wines, and immune-boosting tonics.

  • Light: Full sun is best for maximum flower and fruit production.
  • Watering: Prefer consistently moist soil; never let them dry out completely.
  • Pruning: Remove older canes each spring to encourage new, vigorous growth.
  • Feeding: Compost or slow-release fertilizer once in spring.
  • Harvest: Late summer to early fall when berries are deep purple or black.

Important: Elderberries must be cooked before consumption as raw berries can be mildly toxic.

Because elderberries can grow tall, prune regularly to keep them compact and manageable in the greenhouse.


Goji Berries

Highlights: Known as the “superfruit,” goji berries are packed with antioxidants and have a mildly sweet, tangy flavor.

  • Light: Full sun is essential for fruiting.
  • Pruning: Trim long, vining stems to maintain shape and promote branching.
  • Watering: Moderate; allow the top inch of soil to dry between waterings.
  • Feeding: Light feeding every 6 weeks during the growing season.
  • Harvest: Late summer through fall; berries turn bright orange-red when ripe.

Goji berries grow like small shrubs or vines, so providing stakes or a small trellis helps support the plant as it matures.


Common Greenhouse Berry Problems and Solutions

  1. Aphids or Spider Mites:
    Use organic neem oil or insecticidal soap; keep humidity levels moderate to deter pests.
  2. Powdery Mildew:
    Improve airflow and avoid overhead watering. Prune overcrowded stems.
  3. Root Rot:
    Prevent by using well-draining soil and pots with proper drainage holes.
  4. Poor Pollination:
    Gently shake flowers or use a small brush to hand-pollinate if natural pollinators are limited inside the greenhouse.

Harvesting and Enjoying Your Berries

Once your greenhouse berry plants mature, you’ll be rewarded with colorful, nutrient-packed fruits throughout the year.

  • Gooseberries: Pick when soft and slightly translucent. Great for pies and chutneys.
  • Currants: Harvest whole clusters when berries are fully colored. Ideal for jellies and wine.
  • Elderberries: Collect ripe clusters and cook into syrup or jam.
  • Goji berries: Pick fresh for snacking or dry them for smoothies and teas.

After harvesting, prune lightly to encourage new growth and maintain plant shape. Regular feeding and watering will prepare them for the next productive cycle.


Final Thoughts

A greenhouse container berry garden is a rewarding, space-efficient, and visually stunning way to enjoy a continuous supply of homegrown fruits. With the right combination of care, patience, and passion, you can cultivate gooseberries, currants, elderberries, and goji berries side by side—even in small spaces or challenging climates.

Each of these berry plants brings something unique to your greenhouse ecosystem: gooseberries add tangy zest, currants bring vibrant color, elderberries offer immune-boosting benefits, and goji berries deliver superfood power. Together, they create a lush, fruitful environment that thrives year after year.

If you’ve ever wanted a garden that’s both beautiful and bountiful, start your greenhouse container berry project today—you’ll soon be harvesting nature’s healthiest treasures right from your own backyard!

How to Grow and Care for the American Cranberry Bush (Highbush Cranberry): A Complete Gardener’s Guide

How to Grow and Care for the American Cranberry Bush (Highbush Cranberry): A Complete Gardener’s Guide

If you’re looking for a stunning ornamental shrub that also offers edible, tart red berries loved by wildlife, the American Cranberry Bush (Viburnum trilobum)—also known as Highbush Cranberry—is a perfect addition to your garden. Despite its name, it’s not a true cranberry but a species of viburnum native to North America. This hardy, low-maintenance shrub is admired for its attractive white spring blossoms, vibrant fall foliage, and clusters of bright red berries that persist well into winter.

Whether you want to plant it for its beauty, wildlife value, or even its jelly-making potential, this guide covers everything you need to know about growing and caring for the American Cranberry Bush in your home garden.


What Is the American Cranberry Bush?

The American Cranberry Bush, scientifically known as Viburnum trilobum, is a deciduous shrub native to the northern United States and Canada. It typically grows between 8 to 12 feet tall with a similar spread, making it ideal for hedges, windbreaks, or as a standout landscape feature.

This plant is often mistaken for its European cousin, Viburnum opulus, but the American variety tends to be more cold-hardy and better adapted to North American climates. It thrives in USDA zones 2 through 7, tolerating chilly northern winters exceptionally well.

Key features include:

  • Clusters of white flowers in late spring (May–June).
  • Glossy red berries in late summer through winter.
  • Brilliant red and orange fall foliage.
  • Strong wildlife attraction—berries feed birds, while flowers attract pollinators like bees and butterflies.

Why Grow the American Cranberry Bush?

Gardeners love the Highbush Cranberry for both its aesthetic appeal and ecological benefits. Here are a few compelling reasons to add it to your landscape:

  1. Four-Season Beauty:
    The plant looks beautiful year-round. In spring, its delicate white blooms brighten the garden. In summer, lush green foliage provides shade and texture. By fall, the leaves turn a fiery red or orange, and during winter, bright red berries hang like jewels against the snow.
  2. Attracts Birds and Pollinators:
    The Highbush Cranberry is a haven for wildlife. Its flowers provide nectar for pollinators, while the berries are an important food source for birds such as cedar waxwings, robins, and grosbeaks.
  3. Edible and Useful Fruits:
    Though tart when fresh, the berries can be cooked down into jams, jellies, or sauces that have a pleasant cranberry-like flavor. They are also rich in vitamin C and antioxidants.
  4. Low Maintenance and Hardy:
    Once established, this shrub requires minimal care. It’s drought-tolerant, cold-hardy, and adaptable to a variety of soils, making it a great choice for beginner gardeners.

Ideal Growing Conditions

To get the most out of your American Cranberry Bush, plant it in conditions that mimic its natural environment.

1. Sunlight:
The shrub grows best in full sun to partial shade. It will produce more flowers and fruit when it gets at least 6 hours of direct sunlight each day.

2. Soil:
This plant isn’t too fussy but prefers moist, well-drained, loamy soil. It can tolerate slightly acidic to neutral pH levels (5.5–7.0). Avoid overly dry or sandy soils unless you can supplement with organic compost.

3. Watering:
Keep the soil consistently moist, especially during the first year after planting. Once established, it can handle brief dry spells but performs best with regular watering during hot summers.

4. Climate:
The Highbush Cranberry thrives in cooler climates and does best in USDA zones 2–7. It can tolerate cold winters, making it a good fit for northern regions.


Planting Guide

1. Choosing a Location:
Pick a spot that gets plenty of sunlight and has enough space for the mature shrub to spread—about 10 feet in diameter.

2. Preparing the Soil:
Loosen the soil and mix in compost or aged manure to improve fertility and drainage.

3. Planting:

  • Dig a hole twice as wide as the root ball and just as deep.
  • Place the shrub in the hole, making sure the root crown is level with the soil surface.
  • Backfill with soil, tamp it down gently, and water thoroughly.

4. Mulching:
Apply a 2–3 inch layer of mulch (like shredded bark or leaf compost) around the base to retain moisture and suppress weeds.


Watering and Fertilizing

During the first growing season, water regularly to help the roots establish. Afterward, watering once a week during dry spells is sufficient.

As for feeding, apply a balanced slow-release fertilizer in early spring, or top-dress with compost to encourage healthy growth and flowering. Avoid over-fertilizing, as it can promote leafy growth at the expense of blooms and berries.


Pruning and Maintenance

Pruning is simple but essential to keep the American Cranberry Bush looking its best.

  • When to Prune: Late winter or early spring before new growth begins.
  • How to Prune: Remove dead or crossing branches, and thin out older wood to improve air circulation.
  • Shaping: If you want a neat hedge, trim lightly after flowering to maintain its shape.

This shrub generally resists most pests and diseases, but occasionally you might encounter aphids or viburnum beetles. Neem oil or insecticidal soap can help control these problems naturally.


Propagation

You can propagate the American Cranberry Bush through seeds, softwood cuttings, or suckers.

Seed Propagation:
Seeds need a cold stratification period (a simulated winter) to germinate. Collect ripe berries in the fall, extract the seeds, clean them, and store them in moist sand in the refrigerator for about 3 months before planting.

Cuttings:
Take softwood cuttings in late spring or early summer. Dip the cut ends in rooting hormone and plant them in a moist growing medium until roots form.


Common Problems and Solutions

  1. Viburnum Leaf Beetle:
    This pest can defoliate shrubs if left unchecked. Prune off infested twigs and destroy eggs during winter.
  2. Powdery Mildew:
    Caused by poor air circulation or damp conditions. Prune to increase airflow and avoid overhead watering.
  3. Fruit Drop or Poor Yield:
    This can happen due to lack of sunlight or cross-pollination issues. Plant multiple shrubs to improve fruit production.

Harvesting the Berries

The red berries ripen in late summer or early fall and can remain on the plant into winter. For the best flavor, harvest them after the first frost, which helps reduce their natural tartness.

To use them:

  • Rinse the berries thoroughly.
  • Boil them with sugar and a bit of lemon juice to make cranberry jelly or syrup.
  • They can also be dried or frozen for later use.

Keep in mind that while they are edible, the berries have a strong, tangy flavor—best enjoyed when cooked or sweetened.


Landscape Uses

The American Cranberry Bush fits beautifully into a variety of landscape designs:

  • Hedge or Privacy Screen: Its dense growth makes it a natural living fence.
  • Wildlife Garden: Provides shelter and food for birds and pollinators.
  • Specimen Plant: Use it as a focal point for seasonal color.
  • Erosion Control: Its strong root system helps stabilize soil along slopes or stream banks.

Final Thoughts

The American Cranberry Bush (Viburnum trilobum) is a fantastic all-rounder shrub for home gardens. It delivers year-round beauty, supports wildlife, and even provides fruit for homemade jams and jellies. Its hardiness and adaptability make it a reliable choice for both experienced gardeners and beginners alike.

If you’re looking for a plant that combines ornamental value, ecological benefit, and practical use, the Highbush Cranberry is a truly rewarding addition to your landscape. With just a little care and attention, it will reward you with decades of beauty and bounty.


How to Grow a Florida Red Mulberry Tree: A Complete Guide to Planting, Care, and Harvesting

How to Grow a Florida Red Mulberry Tree: A Complete Guide to Planting, Care, and Harvesting

Mulberry trees are among the most rewarding fruit trees to grow — and the Florida Red Mulberry (Morus rubra) stands out as one of the tastiest and most beautiful varieties. Known for its rich red-to-purple berries and fast growth, this native fruit tree thrives in warm climates and rewards gardeners with delicious, antioxidant-rich fruit every year.

If you’ve come across the video “Planting Florida Red Mulberry Tree”, you’ve probably seen how effortlessly this tree can become the centerpiece of your home garden. In this detailed guide, we’ll go step by step through how to plant, grow, and care for the Florida Red Mulberry Tree, ensuring you get bountiful harvests and a healthy, thriving plant for years to come.


What Is the Florida Red Mulberry Tree?

The Florida Red Mulberry (scientific name Morus rubra) is a deciduous fruit tree native to North America, particularly the southeastern United States. It can grow up to 30–50 feet tall under the right conditions and produces sweet, reddish-black berries that resemble elongated blackberries.

What makes this tree special is its adaptability — it can thrive in both urban and rural settings, tolerate heat and humidity, and grow in various soil types. The berries are packed with vitamin C, iron, potassium, and anthocyanins, which give them their deep color and antioxidant power.


Step-by-Step Guide: How to Plant a Florida Red Mulberry Tree

1. Choosing the Right Spot

Mulberry trees love full sunlight, so choose a location that receives at least 6–8 hours of direct sun daily. Make sure the area has well-draining soil — mulberries dislike soggy roots.

Since these trees can grow quite large, give them plenty of space. Ideally, plant them 15–25 feet away from other trees or buildings to allow for proper air circulation and canopy spread.

Tip: Avoid planting mulberries too close to driveways or walkways — their falling berries can create stains when ripe.


2. Preparing the Soil

Mulberries aren’t too picky, but they perform best in loamy or sandy soil that’s slightly acidic to neutral (pH 5.5–7.0).

Before planting:

  • Loosen the soil about 2 feet deep and 3 feet wide.
  • Mix in organic compost or aged manure to improve fertility.
  • Avoid adding chemical fertilizers during planting — young roots are delicate and can burn easily.

3. Planting the Tree

If you’re planting a young nursery tree or a sapling, follow these steps:

  1. Dig a hole twice as wide as the root ball and just as deep.
  2. Gently remove the tree from its container, keeping the root ball intact.
  3. Place the tree in the center of the hole so that the top of the root ball is level with the soil surface.
  4. Fill the hole with the soil-compost mix and lightly press to eliminate air pockets.
  5. Water thoroughly after planting to help settle the soil.

Tip: Mulberry trees establish faster when planted in spring or early summer, as this allows roots to grow vigorously before winter.


4. Watering and Mulching

In the first few months, consistent watering is key. Keep the soil moist but not soggy — about 1 inch of water per week is ideal during the establishment phase. Once mature, the Florida Red Mulberry becomes drought-tolerant, needing only occasional watering during dry spells.

Add a 2–3 inch layer of mulch around the base to retain moisture, regulate temperature, and suppress weeds. Just make sure the mulch doesn’t touch the trunk to prevent rot.


5. Fertilizing for Growth

For the first year, your tree will focus on developing roots rather than producing fruit. Use organic fertilizers such as compost or fish emulsion once every 3–4 months during the growing season.

In later years, you can switch to a balanced fertilizer like 10-10-10 NPK, applied in early spring before new growth begins. Avoid over-fertilizing — too much nitrogen promotes leafy growth instead of fruiting.


Pollination and Fruit Production

The Florida Red Mulberry is self-fertile, meaning it can produce fruit on its own without a second tree. However, having more than one tree nearby can increase fruit yield and improve pollination efficiency.

The tree begins fruiting as early as 2–3 years after planting. Its berries start green, turn red as they ripen, and finally become dark purple or nearly black when fully mature. The fruits are soft, juicy, and incredibly sweet — perfect for eating fresh, drying, or using in pies and jams.


Harvesting Florida Red Mulberries

Mulberry fruiting season in Florida typically runs from April to June. You’ll know the berries are ready when they’re deeply colored and easily detach from the branches.

To harvest:

  • Gently shake the branches over a tarp or sheet to collect ripe berries.
  • Avoid picking unripe ones — they’re sour and can upset your stomach.

Mulberries are best consumed fresh, but you can also freeze or dehydrate them to enjoy year-round.

Fun Fact: Mulberry fruits are excellent for smoothies, jams, cobblers, or even homemade mulberry wine!


Pruning and Maintenance Tips

Regular pruning helps your tree stay productive and healthy.

  • When to prune: Late winter or early spring, before new growth starts.
  • How to prune: Remove dead or crossing branches, shape the canopy, and thin overcrowded areas to let in more sunlight.
  • Avoid heavy pruning in the growing season, as it can reduce fruit production.

If your tree grows too tall for easy harvesting, cut back the top branches to maintain a manageable height of around 10–12 feet.


Pests and Disease Control

While Florida Red Mulberries are generally hardy, a few pests and diseases can occasionally appear:

Common Pests:

  • Whiteflies
  • Scale insects
  • Spider mites

Spray affected areas with neem oil or insecticidal soap to control infestations.

Common Diseases:

  • Leaf spot – caused by fungal infections; remove affected leaves and improve air circulation.
  • Root rot – due to overwatering; ensure soil drains well.

Pro Tip: Healthy soil and proper watering habits are your best defense against most mulberry diseases.


Seasonal Care Guide

Here’s a quick seasonal breakdown for growing a strong, fruitful Florida Red Mulberry tree:

Spring

  • Fertilize and prune lightly.
  • Watch for early pest activity.
  • Begin watering more frequently as growth starts.

Summer

  • Maintain consistent moisture.
  • Harvest ripe berries regularly to encourage more fruiting.

Fall

  • Reduce watering slightly.
  • Clean up fallen leaves and fruits to prevent pest buildup.

Winter

  • Minimal care needed.
  • Protect young trees from frost by mulching heavily around the base.

Why Grow a Florida Red Mulberry Tree?

  1. Delicious, nutritious fruit – Packed with vitamins, fiber, and antioxidants.
  2. Low-maintenance – Drought-tolerant and adaptable once established.
  3. Fast-growing – Provides shade and fruit in just a few years.
  4. Wildlife-friendly – Birds and pollinators love the berries.
  5. Beautiful tree – Adds charm with its broad canopy and glossy leaves.

Final Thoughts

Planting a Florida Red Mulberry Tree is one of the most rewarding choices for home gardeners in warm climates. With just a little care in the early stages — proper planting, regular watering, and occasional pruning — this tree can reward you with decades of shade, beauty, and delicious fruit.

Whether you’re growing it for personal harvests, wildlife, or ornamental beauty, the Florida Red Mulberry truly deserves a spot in your backyard. Once it starts producing those sweet, ruby-colored berries, you’ll understand why this native tree is such a cherished gem in Southern gardens.

Planting the Black Beauty Mulberry: How Millipede Castings Boosted Its Growth Naturally

Planting the Black Beauty Mulberry: How Millipede Castings Boosted Its Growth Naturally

If you’re a fruit lover and garden enthusiast, there’s something special about planting a mulberry tree—especially one as rich and flavorful as the Black Beauty Mulberry. This incredible fruit tree is known for its dark, luscious berries that are not only delicious but also packed with nutrients. In this post, we’ll dive into how to successfully plant and care for a Black Beauty Mulberry and explore the secret boost provided by millipede castings—a natural, organic soil enhancer that promotes vigorous growth and sweeter fruits.


Understanding the Black Beauty Mulberry

The Black Beauty Mulberry (Morus nigra) is one of the most sought-after varieties among fruit growers. It produces deep purple to black berries that are incredibly sweet, slightly tart, and bursting with juice. Unlike the fast-growing White or Red Mulberry, the Black Beauty is a more compact tree, making it ideal for home gardens and small spaces.

Key characteristics:

  • Height: 10–15 feet when mature (manageable size)
  • Fruit flavor: Deep, rich, and sweet with a hint of blackberry-like tang
  • Harvest season: Late spring to early summer
  • Hardiness zones: 7–10
  • Sunlight requirement: Full sun (at least 6–8 hours per day)

This tree isn’t just a fruit producer—it’s also an ornamental beauty. Its broad leaves, spreading branches, and seasonal fruit make it a showpiece in any edible landscape.


Step-by-Step Guide to Planting a Black Beauty Mulberry

1. Choosing the Right Location

Mulberries thrive in full sunlight, so pick a spot that gets plenty of direct sun. The soil should be well-draining but rich in organic matter. Although mulberries can tolerate poor soil, they produce the best fruit in fertile conditions.

Avoid planting too close to driveways or patios—the ripe berries can stain concrete and other surfaces when they fall.

2. Preparing the Soil

Before planting, loosen the soil and mix in some organic compost or well-rotted manure. The goal is to create a nutrient-rich environment that encourages root establishment.

This is where millipede castings come into play.


The Magic of Millipede Castings in Mulberry Planting

Millipede castings are often overlooked in the gardening world, but they’re a natural powerhouse of nutrients and beneficial microorganisms. Similar to worm castings, these decomposed organic particles help improve soil fertility, moisture retention, and aeration.

Benefits of using millipede castings:

  • Enhanced nutrient content: Packed with nitrogen, phosphorus, and potassium.
  • Better soil structure: Helps create a loamy, crumbly texture perfect for root growth.
  • Moisture retention: Reduces the need for frequent watering.
  • Natural pest resistance: The microbial life in the castings helps deter soil-borne pests.

To use them effectively:

  • Mix about 2–3 handfuls of castings into the planting hole.
  • Blend them with native soil and compost.
  • Sprinkle a thin layer on top as mulch after planting.

The result? Stronger roots, greener leaves, and faster growth.


Planting Process

  1. Dig the hole:
    Make it twice as wide and just as deep as the tree’s root ball.
  2. Amend the soil:
    Mix your native soil with compost and millipede castings.
  3. Set the tree:
    Place the Black Beauty Mulberry in the center of the hole. Ensure that the top of the root ball is level with the ground.
  4. Backfill and firm:
    Gently fill the hole with the soil mix and press down lightly to remove air pockets.
  5. Water thoroughly:
    Give the tree a deep watering right after planting to help it settle and establish roots.
  6. Mulch the base:
    Add a 2–3 inch layer of mulch (wood chips, straw, or shredded leaves) around the base to retain moisture.

Watering and Early Care

In the first few weeks after planting, keep the soil evenly moist but not waterlogged. Once established, mulberries are relatively drought-tolerant, but consistent watering during dry spells promotes better fruit quality.

Pro Tip:
Water deeply once or twice a week instead of shallow, frequent watering. This encourages deep root growth and resilience.


Fertilizing Your Black Beauty Mulberry

For the first year, avoid heavy fertilization. The millipede castings and compost will supply enough nutrients. After that, apply a balanced organic fertilizer (such as 10-10-10) once a year in early spring to promote new growth.

You can also top-dress with more millipede or worm castings annually. These act as a slow-release fertilizer and help sustain soil health long-term.


Pruning and Maintenance

The Black Beauty Mulberry grows into a small, spreading tree with a natural rounded canopy. However, light pruning helps maintain shape and fruiting efficiency.

Pruning tips:

  • Remove any dead or crossing branches.
  • Thin out crowded areas to improve airflow.
  • After fruiting season, trim lightly to encourage fresh shoots.

Avoid excessive pruning—it can reduce next year’s fruit yield.


Harvesting Your Mulberries

You can expect your tree to start producing fruit within 2–3 years if grown from a young sapling. The berries ripen gradually, so harvest them as they turn deep purple-black.

To collect the fruit easily:

  • Lay a tarp or sheet under the tree.
  • Gently shake the branches—the ripe berries will fall naturally.

Fresh mulberries are delightful eaten straight from the tree, but they can also be used in smoothies, pies, jams, jellies, or even fermented into homemade wine.


Common Problems and Natural Solutions

Although the Black Beauty Mulberry is generally hardy, here are a few things to watch for:

  • Leaf yellowing: Often due to overwatering or poor drainage. Fix by improving soil aeration.
  • Pests (aphids, spider mites): Use neem oil or insecticidal soap sprays.
  • Birds: They love ripe mulberries. Consider using bird netting during harvest season.

Using millipede castings from the start also helps strengthen the plant’s immune system, making it less prone to pests and diseases.


Why Grow a Black Beauty Mulberry?

There’s a special joy in growing your own fruit tree—and the Black Beauty Mulberry rewards you in more ways than one:

  • Abundant harvests of sweet, antioxidant-rich fruit
  • Low maintenance once established
  • Adaptable growth, perfect for small yards or large containers
  • Wildlife attraction, bringing bees, butterflies, and songbirds to your garden

This tree offers beauty, bounty, and biodiversity all in one.


Final Thoughts

Planting a Black Beauty Mulberry is an easy and rewarding gardening project—especially when you give your soil an organic boost with millipede castings. From planting and watering to harvesting your first handful of sweet, glossy berries, the process is a deeply satisfying experience for any gardener.

So if you’ve ever dreamed of enjoying fresh mulberries straight from your backyard, there’s no better time to start. With the right care and a little natural help from millipede castings, your Black Beauty Mulberry will thrive and bring delicious harvests for years to come.

How to Grow Ataulfo Mango Trees from Seeds: Step-by-Step Guide for Sweet Tropical Success

How to Grow Ataulfo Mango Trees from Seeds: Step-by-Step Guide for Sweet Tropical Success

The Ataulfo mango, often called the Honey Mango or Champagne Mango, is one of the sweetest and creamiest mango varieties you can grow at home. With its buttery flesh, rich flavor, and minimal fiber, this Mexican variety has earned a loyal following among mango lovers around the world.

Inspired by the video “Episode 28: Planting the Ataulfo Mango Seeds,” this detailed guide will walk you through the entire process of growing Ataulfo mango trees from seed — from selecting the perfect mango, preparing and planting the seed, to nurturing your young tree into a fruit-bearing beauty. Whether you’re a tropical fruit enthusiast or a beginner gardener, this step-by-step blog will help you turn a simple mango seed into a thriving fruit tree.


1. Meet the Ataulfo Mango: The Honey of All Mangoes

The Ataulfo mango originated in Mexico and is prized for its smooth, creamy texture, small pit, and intensely sweet flavor. When ripe, the fruit is golden yellow, slightly kidney-shaped, and fits perfectly in the palm of your hand.

Unlike larger and fibrous varieties like Tommy Atkins, Ataulfo mangoes are velvety and rich, almost melting in your mouth. Their smaller size and tropical aroma make them ideal for fresh eating, smoothies, or desserts.

Growing one at home not only gives you access to these delicious fruits but also lets you enjoy a tropical tree that adds beauty and lush greenery to your garden or patio.


2. Why Grow Mangoes from Seed?

While grafted mango trees produce fruit faster, growing mangoes from seed has its own charm and benefits:

  • It’s cost-effective: You can start with a mango you bought from the grocery store or farmer’s market.
  • It’s educational: You’ll get to witness each growth stage — from seed germination to fruit-bearing maturity.
  • It’s rewarding: Watching a mango tree grow from a seed you planted yourself is incredibly satisfying.

Keep in mind that Ataulfo mangoes are polyembryonic, meaning one seed can produce several seedlings. This gives you a higher chance of getting a tree identical to the parent fruit — a big advantage over monoembryonic varieties!


3. Collecting and Preparing the Seed

The first step in growing your Ataulfo mango is preparing the seed properly.

Step 1: Choose a ripe mango

Select a ripe Ataulfo mango with smooth, unblemished skin and rich yellow color. The riper the fruit, the more mature the seed inside.

Step 2: Extract the seed

After enjoying the sweet flesh, clean the seed thoroughly. Remove any remaining pulp and fiber by rinsing it under warm water and scrubbing gently with a soft brush.

Step 3: Open the husk

Ataulfo mango seeds are encased in a tough outer shell. Use a knife or scissors to carefully open the husk — be cautious not to cut the inner seed. Inside, you’ll find one or more small, bean-shaped embryos.

Step 4: Dry and inspect

Let the seed dry for 1–2 days in a shaded area to reduce excess moisture. Inspect it for mold or rot before planting.


4. Pre-Germination Method (Optional but Effective)

For faster sprouting, you can pre-germinate the seed before planting.

Paper Towel Method:

  1. Wrap the cleaned seed in a damp paper towel.
  2. Place it inside a plastic bag or container to maintain humidity.
  3. Keep it in a warm, dark place (around 75–85°F or 24–29°C).
  4. Check every few days to ensure the towel remains moist but not soggy.

In about 7–14 days, you’ll notice a tiny root sprouting from the seed. Once it’s about an inch long, the seed is ready to be planted.


5. Planting the Ataulfo Mango Seed

Now that your seed is prepared or germinated, it’s time to plant!

What You’ll Need:

  • A large pot (10–12 inches deep) or garden space with good drainage
  • Well-draining soil mix (garden soil + compost + coarse sand)
  • Watering can or spray bottle
  • Sunlight — at least 8 hours per day

Planting Steps:

  1. Fill the pot with your prepared soil mix.
  2. Plant the seed flat or slightly tilted, with the sprout facing upward and about 1 inch deep.
  3. Water lightly to moisten the soil — avoid overwatering.
  4. Place the pot in full sunlight or near a bright window if indoors.
  5. Keep the soil consistently moist but never soggy during the first few weeks.

In 2–4 weeks, you’ll see a green shoot pushing through the soil — the beginning of your Ataulfo mango tree!


6. Caring for Your Young Mango Plant

Once your seedling is established, it needs consistent care to grow strong and healthy.

Sunlight

Mango trees thrive in full sunlight. Make sure your plant gets at least 8–10 hours of direct sun every day. If grown indoors, place it near a bright south-facing window or under a grow light.

Watering

During the early stages, keep the soil moist but not soaked. Once the plant grows larger, reduce watering frequency to once every 5–7 days. Overwatering can lead to root rot — one of the most common problems for young mango plants.

Fertilization

Use a balanced fertilizer (10-10-10) every 4–6 weeks during the growing season. Once the tree matures, switch to a fertilizer higher in potassium and phosphorus to encourage flowering and fruiting.

Pruning

Prune your young plant when it’s about 2–3 feet tall to encourage branching and create a sturdy canopy. Remove any dead or crossing stems to promote healthy growth.

Transplanting

When the plant becomes 2–3 feet tall, it can be transplanted into the ground or a larger container. Choose a sunny, sheltered spot with well-draining soil.


7. Growing Mango Trees Outdoors vs. Indoors

If you live in a tropical or subtropical area (like Florida, southern California, or Hawaii), you can plant your Ataulfo mango tree directly in the ground. It will grow faster and larger, potentially reaching up to 15–20 feet tall.

For cooler climates, container growing is the best option. Choose a 25–30 gallon pot and move it indoors during the winter to protect it from frost. Mango trees prefer temperatures above 50°F (10°C) and cannot tolerate freezing conditions.


8. Flowering and Fruiting: The Rewarding Phase

Ataulfo mango trees grown from seed typically take 5–8 years to bear fruit, though some may produce earlier depending on care and environment.

When your tree matures, it will produce small, fragrant panicles of yellowish flowers in late winter or early spring. These flowers attract pollinators, and soon after, small green mangoes begin to develop.

As they mature, the fruits gradually turn golden yellow, indicating ripeness. Ataulfo mangoes are usually ready for harvest between April and August, depending on your climate.


9. Harvesting and Enjoying Your Ataulfo Mangoes

The moment you’ve been waiting for — harvest time!

You’ll know your mangoes are ready when:

  • Their skin turns deep yellow and slightly wrinkles.
  • The fruit feels soft when gently squeezed.
  • A sweet aroma is noticeable near the stem.

Harvest the mangoes carefully by twisting or clipping them from the tree. Let them ripen for a few days at room temperature before enjoying their creamy sweetness.

Ataulfo mangoes are perfect for:

  • Smoothies and shakes
  • Fresh fruit salads
  • Tropical desserts and salsas
  • Frozen treats and ice creams

10. Common Problems and Solutions

Even healthy mango plants can encounter a few issues. Here’s how to handle them:

  • Yellowing leaves: Usually caused by overwatering. Reduce watering and ensure good drainage.
  • Pests: Watch for aphids or scale insects; use neem oil or insecticidal soap.
  • Fungal infections: Improve air circulation and avoid wetting the leaves. Copper-based fungicides can help if needed.
  • Slow growth: Check for compacted soil or lack of nutrients. Repot or fertilize as necessary.

11. Patience Pays Off

Growing a mango tree from seed requires patience — it’s not a fast process, but it’s an incredibly rewarding one. Over time, you’ll witness your seed transform into a lush tropical tree that might one day produce the same golden fruits you once enjoyed.

Even if your seed-grown tree doesn’t yield identical fruit to the parent, the experience and beauty it brings to your home garden are worth every effort.


Final Thoughts

Planting Ataulfo mango seeds is more than just a gardening project — it’s a journey of growth, learning, and tropical joy. From selecting a ripe mango to nurturing a young seedling and watching it mature, the process connects you deeply with nature.

Whether you’re in a tropical region or growing in a container on your balcony, your Ataulfo mango tree will reward you with beauty, shade, and perhaps — after a few patient years — a taste of pure, homegrown sweetness.

Homegrown Tommy Atkins Mangoes: Growing Florida’s Favorite Tropical Fruit at Home

Homegrown Tommy Atkins Mangoes: Growing Florida’s Favorite Tropical Fruit at Home

If you’ve ever dreamed of harvesting ripe, juicy mangoes right from your backyard, the Tommy Atkins mango tree is one of the best ways to make that dream come true. Known for its vibrant red-and-yellow color, firm texture, and excellent shelf life, the Tommy Atkins mango has become one of the most popular varieties grown across Florida and other tropical regions of the world.

In this blog post, inspired by the video “Homegrown Fruits on the Tree: Tommy Atkins Mangoes | GardenQ 00247 20170919U Florida Tropical Fruits,” we’ll take a deep dive into how you can grow, care for, and enjoy this tropical fruit tree in your own garden. Whether you’re a Florida gardener or simply a fruit enthusiast living in a warm climate, this step-by-step guide will show you everything you need to know about cultivating delicious Tommy Atkins mangoes at home.


1. Meet the Tommy Atkins Mango: Florida’s Pride

The Tommy Atkins mango is one of the most widely grown mango varieties in the United States, particularly in Florida. It was first selected in the 1920s and became commercially popular because of its attractive color, firmness, and long shelf life.

Unlike softer mangoes like Kent or Keitt, Tommy Atkins mangoes are known for their fibrous texture, making them ideal for slicing, smoothies, and fruit salads. Their sweet, mildly tangy flavor makes them perfect for both fresh eating and culinary use.

When fully ripe, these mangoes feature a beautiful red blush over a golden-yellow base, making them as ornamental as they are delicious.


2. Why Grow Mangoes at Home?

Homegrown mangoes have an unmatched flavor that simply can’t be compared to store-bought fruit. The fragrance, sweetness, and juiciness of freshly picked mangoes are something every tropical fruit lover should experience.

Here are a few key reasons why gardeners in Florida and similar climates choose to grow mango trees at home:

  • Fresh, organic produce: You control how your mangoes are grown — free from synthetic pesticides or chemicals.
  • Decorative value: Mango trees are evergreen and provide lush shade and beauty all year round.
  • Sustainability: Growing your own fruit reduces carbon footprint and food transportation costs.
  • Satisfaction: Harvesting a basket of mangoes from your own backyard is one of the most rewarding gardening experiences.

3. Choosing the Right Spot for Your Mango Tree

Location is everything when it comes to growing mango trees successfully. Mangoes thrive in full sunlight — at least 8 hours of direct sun daily — and prefer a warm, frost-free climate.

If you live in Florida, southern Texas, or coastal California, your garden likely offers suitable conditions. However, even in slightly cooler regions, mango trees can be grown in large containers and moved indoors during cold spells.

Ideal growing conditions include:

  • Temperature: Mango trees prefer warm weather between 70°F–90°F (21°C–32°C).
  • Sunlight: At least 8 hours of direct sunlight each day.
  • Soil: Well-drained sandy or loamy soil with a pH between 5.5 and 7.5.
  • Drainage: Avoid planting in areas with standing water; mango roots dislike “wet feet.”

4. Planting a Tommy Atkins Mango Tree

You can start with either a grafted tree from a nursery or grow your own from seed. Grafted mango trees are recommended because they produce fruit faster (in 2–4 years) and maintain the characteristics of the parent plant.

Planting Steps:

  1. Prepare the site: Dig a hole that’s about twice as wide as the root ball and slightly deeper.
  2. Amend the soil: Mix in compost or aged manure to enrich the planting area.
  3. Position the tree: Place the tree so the top of the root ball is level with the ground surface.
  4. Backfill and water: Fill the hole with soil, gently firm it down, and water thoroughly.
  5. Mulch: Apply a 2–3 inch layer of mulch around the base, keeping it away from the trunk to retain moisture and suppress weeds.

5. Caring for Your Mango Tree

Mango trees are relatively low-maintenance once established, but young trees do require some attention.

Watering

During the first year, water your mango tree deeply once or twice a week. Once mature, mango trees become drought-tolerant and only need watering during prolonged dry spells. Overwatering can lead to root rot, so ensure good drainage.

Fertilizing

Fertilize mango trees three times a year — in spring, summer, and early fall — using a balanced fertilizer (such as 10-10-10) enriched with micronutrients like magnesium and zinc. Avoid over-fertilizing as this can reduce fruit quality.

Pruning

Prune your mango tree lightly to maintain shape and improve sunlight penetration. Remove dead or crossing branches and trim any excessive vertical growth. The best time to prune is right after harvest.

Pest and Disease Control

Mango trees are fairly resilient, but keep an eye out for common issues like:

  • Anthracnose: A fungal disease causing black spots on leaves and fruit. Prevent by improving airflow and applying copper fungicide when necessary.
  • Mango hoppers and scale insects: Manage with neem oil or horticultural soap sprays.

6. Flowering and Fruit Development

Tommy Atkins mango trees typically bloom in late winter to early spring. The small yellowish flowers form in large clusters, attracting bees and other pollinators.

Once pollinated, the flowers turn into small fruits that gradually mature over several months. Depending on your region, Tommy Atkins mangoes are usually ready to harvest between May and August.

A mature mango tree can produce hundreds of fruits per season under ideal conditions.


7. Harvesting Ripe Mangoes

Knowing when to pick your mangoes is key to getting the best flavor. Tommy Atkins mangoes are usually harvested when they start to change color — from green to a mix of red, orange, and yellow.

Here are a few signs of ripeness:

  • The fruit gives slightly when gently squeezed.
  • The skin develops a vibrant blush of red and gold.
  • A sweet aroma is noticeable near the stem end.

Once picked, allow mangoes to ripen at room temperature for a few days before refrigerating or eating.


8. Storing and Using Your Mangoes

Fresh mangoes can be enjoyed in countless ways — from smoothies and salsas to desserts and salads. If you have a bumper harvest, consider preserving them for later use:

  • Freezing: Slice mangoes and freeze them for smoothies or desserts.
  • Drying: Dehydrate slices to make chewy mango snacks.
  • Canning or pureeing: Turn mango pulp into sauces or jams.

Ripe Tommy Atkins mangoes can last up to a week at room temperature or up to two weeks when refrigerated.


9. Growing Mangoes in Containers

Don’t have much space? No problem! Mango trees can thrive in large containers with proper care.

Choose a 25–30 gallon pot with good drainage and use a well-draining potting mix. Keep the tree in full sun and prune annually to maintain a manageable size. Container mango trees may need more frequent watering and fertilization compared to those planted in the ground.

When temperatures drop below 40°F (4°C), move the plant indoors or to a sheltered area to protect it from frost damage.


10. The Joy of Homegrown Tropical Fruits

Watching your Tommy Atkins mango tree bloom, fruit, and finally offer you sweet, sun-ripened mangoes is a deeply rewarding experience. It’s not just about growing food — it’s about nurturing life, connecting with nature, and enjoying the fruits of your effort (literally!).

For Florida gardeners, this variety is a top choice because it combines beauty, productivity, and resilience. Even if you’re new to tropical fruit gardening, Tommy Atkins mangoes are forgiving and easy to manage once established.


Final Thoughts

Growing Tommy Atkins mangoes at home lets you bring a piece of tropical paradise right to your backyard. From selecting the right spot to nurturing your tree through its growth stages, the journey is filled with learning and joy.

Whether you enjoy your mangoes fresh off the tree or turned into sweet treats, one thing is certain — there’s nothing quite like the taste of a sun-warmed, homegrown mango from your own garden.

How to Successfully Plant a White Guava in a Container: Step-by-Step Guide and Expert Tips

How to Successfully Plant a White Guava in a Container: Step-by-Step Guide and Expert Tips

Growing fruit trees in containers has become increasingly popular among gardeners who have limited space or want better control over their plant’s growth. One of the best fruit trees for container gardening is the White Guava — a tropical delight known for its aromatic fragrance, smooth white flesh, and sweet flavor. If you’ve ever wanted to grow guava but don’t have a large yard, container growing is the perfect solution.

In this comprehensive guide, we’ll walk you through how to plant and grow a White Guava in a container step-by-step, explain why container cultivation is beneficial, and share practical care tips to help your plant thrive and fruit abundantly.


Why Grow White Guava in a Container?

White Guava (Psidium guajava) is a tropical fruit tree that naturally grows quite large, but it adapts surprisingly well to container life. There are several advantages to planting your White Guava in a pot rather than directly in the ground:

  1. Space Efficiency:
    Perfect for urban gardeners, patios, balconies, or small backyards. Even if you live in an apartment, you can still enjoy growing this tropical fruit.
  2. Mobility:
    Containers allow you to move your guava tree to the best spots for sunlight during different seasons, or protect it from frost and strong winds.
  3. Soil Control:
    You can customize the soil mix for better drainage and nutrient balance, reducing the risk of root rot and disease.
  4. Pest and Disease Management:
    Growing in containers makes it easier to monitor for pests and apply organic treatments quickly if needed.
  5. Faster Fruit Production:
    Potted guavas often fruit earlier than ground-planted ones because of the controlled environment and stress-free root conditions.

Step 1: Choosing the Right Container

The first and most important decision is selecting the correct pot.

  • Size: Start with a 20- to 25-gallon container (around 18–24 inches in diameter). This provides enough space for the guava’s root system to expand without becoming root-bound too quickly.
  • Material: Choose plastic, clay, or fiber containers with proper drainage holes. Plastic pots retain moisture better, while clay pots provide more breathability.
  • Drainage: Ensure your pot has at least 3–5 large drainage holes. Guava roots do not tolerate waterlogging.

You can also elevate the pot slightly on bricks or pot feet to encourage water to flow out freely.


Step 2: Preparing the Perfect Soil Mix

Guava trees love well-draining, slightly acidic soil rich in organic matter. A heavy or compact mix can suffocate roots, so use a blend that’s light and airy.

Here’s an ideal soil mix recipe for potted guava:

  • 40% garden soil or compost
  • 30% coco peat or peat moss
  • 20% perlite or coarse sand
  • 10% well-rotted cow manure or organic compost

Mix everything thoroughly before filling the pot. Add a layer of small pebbles or broken pottery at the bottom to further improve drainage.


Step 3: Selecting and Planting the White Guava

When choosing your plant, opt for a healthy nursery sapling or grafted guava. Grafted varieties mature faster and produce fruit earlier than seed-grown ones.

Planting Steps:

  1. Fill your pot about halfway with the soil mix.
  2. Place the guava plant in the center, keeping the root ball intact.
  3. Adjust the soil level so that the top of the root ball sits about 1 inch below the rim of the container.
  4. Fill around the roots with the remaining soil and gently press it down.
  5. Water thoroughly until it begins to drain out of the bottom holes.

Tip: After planting, add a layer of organic mulch (like dried leaves, straw, or coco husk) to help retain moisture and regulate temperature.


Step 4: Light and Temperature Requirements

Guava is a sun-loving tropical plant that thrives in 6–8 hours of direct sunlight daily. If you’re growing indoors or on a balcony, place it near the sunniest window or outdoors during the day.

Ideal temperature range: 65°F to 95°F (18°C–35°C)
Protect your guava from frost by bringing it indoors during cold months or covering it with a frost cloth.


Step 5: Watering Your White Guava Plant

Watering is key to healthy growth, but balance is crucial. Guavas dislike soggy soil, yet they should never dry out completely.

Watering schedule:

  • Water deeply once or twice a week during the growing season.
  • Reduce watering slightly in winter when growth slows down.
  • Always check the top 2 inches of soil — if it feels dry, it’s time to water.

To prevent fungal issues, water the base of the plant rather than the leaves.


Step 6: Fertilizing for Optimal Growth

Container-grown guava plants rely entirely on you for nutrients. Feed your plant regularly to encourage lush growth and fruiting.

Fertilizer schedule:

  • Use a balanced fertilizer (10-10-10 NPK) every 4–6 weeks during spring and summer.
  • Alternatively, apply organic compost, seaweed extract, or vermicompost every month.
  • During the flowering and fruiting stage, supplement with potassium-rich fertilizer to improve fruit sweetness and size.

Tip: Flush the soil every few months with plain water to remove salt buildup from fertilizers.


Step 7: Pruning and Maintenance

Regular pruning helps shape your tree, improve air circulation, and increase fruit yield.

How to prune:

  1. Trim away any dead or weak branches.
  2. Cut off shoots growing inward or crossing each other.
  3. After fruiting, lightly prune to maintain shape and encourage new growth.

Container guava trees can be maintained at 4–6 feet tall for easy management and harvesting.


Step 8: Common Pests and How to Handle Them

Even in containers, guava plants may attract certain pests like aphids, mealybugs, and fruit flies.

Organic pest control tips:

  • Spray neem oil or insecticidal soap once every two weeks during active growth.
  • Introduce natural predators like ladybugs if available.
  • Remove fallen leaves or overripe fruits promptly to prevent infestations.

Keep your plant well-fed and healthy — strong plants naturally resist most pest problems.


Step 9: Flowering and Fruiting Stage

White Guava trees typically flower within 12–18 months of planting (sometimes earlier for grafted plants). The small white blossoms give way to round fruits that mature in about 4–6 months.

To encourage fruiting:

  • Maintain consistent watering and sunlight exposure.
  • Avoid over-fertilizing with nitrogen during flowering, as it may promote leaves over fruit.
  • Hand-pollinate flowers using a soft brush if you’re growing indoors or in an area with few pollinators.

Once mature, the guava fruits turn slightly soft and emit a gentle, sweet aroma — a sign that they’re ready to harvest!


Step 10: Repotting and Long-Term Care

Your White Guava tree will eventually outgrow its container. Every 2–3 years, check the roots — if they start circling the pot, it’s time to repot.

Repotting steps:

  1. Choose a container one size larger.
  2. Gently loosen the root ball and trim any long, coiled roots.
  3. Replant using fresh soil mix and water thoroughly.

Continue regular pruning and feeding, and your guava tree can live productively for over 10 years in a container!


Final Thoughts: Why Container Guava Growing Is Worth It

Planting a White Guava in a container is not just practical — it’s deeply rewarding. You get the joy of nurturing a tropical fruit tree right on your patio or balcony and the satisfaction of harvesting fresh, homegrown guavas with rich flavor and nutrition.

Whether you’re an urban gardener or simply love experimenting with fruit trees, this method offers flexibility, beauty, and productivity. With a little care, sunlight, and patience, your potted White Guava will thrive — producing delicious fruits year after year.


In summary:

  • Choose a large, well-drained pot.
  • Use light, organic-rich soil.
  • Give 6–8 hours of sunlight daily.
  • Water deeply but avoid waterlogging.
  • Feed and prune regularly for best results.

By following these simple steps, you’ll enjoy the tropical sweetness of homegrown White Guava — all from the comfort of your own container garden.

Guava Pink Barbie Harvest and Planting Guide: How to Grow This Sweet Tropical Delight at Home

Guava Pink Barbie Harvest and Planting Guide: How to Grow This Sweet Tropical Delight at Home

If you’re looking for a vibrant, tropical fruit tree that delivers beauty, fragrance, and sweet rewards, the Guava Pink Barbie is a perfect choice. Known for its striking pink flesh, irresistible aroma, and compact growth, this guava variety has become a favorite among home gardeners and fruit lovers alike.

In this comprehensive guide, we’ll explore everything you need to know about the Pink Barbie Guava—from how to plant and care for it to harvesting and enjoying its delicious fruit. Whether you’re growing it in your backyard or a large container, this tropical gem can thrive beautifully with just a bit of attention and care.


What Makes Pink Barbie Guava Special?

The Pink Barbie Guava (often referred to as Psidium guajava ‘Pink Barbie’) is a tropical guava variety prized for its deep pink, sweet flesh and pleasant, floral aroma. It has a thin yellowish-green skin, juicy texture, and balanced flavor—sweet with a hint of tartness.

This variety is fast-growing and compact, making it perfect for smaller gardens or patio spaces. It also produces fruit quickly—sometimes within the first year if grown from a young plant rather than seed.

Key Features of Pink Barbie Guava

  • Flesh color: Vibrant pink
  • Flavor: Sweet, aromatic, and slightly tangy
  • Fruit size: Medium to large (3–4 inches in diameter)
  • Growth habit: Compact and bushy (ideal for pruning and container growing)
  • Harvest season: Late summer through early winter, depending on climate

It’s also rich in vitamin C, fiber, and antioxidants—making it not just delicious but also incredibly nutritious.


Ideal Growing Conditions for Guava Pink Barbie

Guavas thrive in warm, tropical to subtropical climates, and Pink Barbie is no exception. However, it’s quite adaptable and can be grown successfully in many regions, including warm temperate zones, provided there’s no severe frost.

Sunlight

Guava plants love sunlight. Ensure your Pink Barbie gets at least 6–8 hours of direct sunlight daily. Full sun exposure is key for vigorous growth and abundant fruiting.

Temperature

Ideal temperatures range between 70°F to 90°F (21°C–32°C). The plant can tolerate mild cold but needs protection when temperatures drop below 40°F (4°C).

Rainfall and Humidity

Guava thrives in moderate humidity. While it appreciates moisture, it does not tolerate soggy roots. Balanced watering and good drainage are crucial.


How to Plant Pink Barbie Guava

You can grow Pink Barbie Guava from seeds, cuttings, or grafted saplings. For faster and more reliable fruit production, start with a grafted plant or cutting-grown sapling.

Step 1: Choose the Right Spot or Container

  • Select a sunny location with good airflow.
  • If growing in a container, pick a 20–25-gallon pot with proper drainage holes.
  • Use a light, well-draining potting mix made of garden soil, compost, and perlite or sand.

Step 2: Prepare the Soil

Guava prefers slightly acidic to neutral soil with a pH of 5.5–7.0. Enrich the soil with organic compost or aged manure to boost fertility.

If you’re planting in the ground:

  • Dig a hole twice the width and the same depth as the root ball.
  • Mix compost into the soil before planting.

Step 3: Planting

  1. Gently remove the sapling from its container.
  2. Place it in the hole so that the root collar sits level with the ground.
  3. Backfill with soil and gently press down to remove air pockets.
  4. Water thoroughly to help the plant settle.

For potted plants, ensure the container drains freely after watering.


Watering and Mulching

Guavas love consistent moisture but cannot tolerate waterlogging.

  • Water the plant 2–3 times per week during dry, hot months.
  • In cooler seasons, water once a week or when the top inch of soil feels dry.
  • Apply a 2–3 inch layer of organic mulch (like straw or shredded leaves) around the base. This helps retain moisture and suppress weeds.

Tip: Avoid watering directly on the leaves or fruit to reduce fungal problems. Instead, water at the base of the plant.


Fertilizing for Healthy Growth

Pink Barbie Guava grows fast and bears fruit heavily, so it benefits from regular feeding.

Fertilizing Schedule

  • Young plants: Feed monthly with a balanced 10-10-10 fertilizer.
  • Mature plants: Apply organic compost or slow-release fertilizer every 2–3 months.
  • During fruiting season: Switch to a high-potassium fertilizer (like 5-10-10) to enhance fruit flavor and sweetness.

Organic Alternatives

  • Banana peel compost or wood ash for potassium.
  • Fish emulsion or seaweed extract for micronutrients.
  • Worm castings for long-lasting soil enrichment.

Pruning and Maintenance

Pruning is essential for maintaining a manageable size and encouraging more branching, which means more flowers and fruit.

How to Prune:

  • After harvesting, prune back about one-third of the branches.
  • Remove dead, weak, or crossing branches to improve air circulation.
  • Regularly pinch off new shoots to shape the plant and promote bushier growth.

Pink Barbie Guava tends to flower and fruit on new growth, so pruning directly supports future yields.


Pollination and Flowering

Guava flowers are self-pollinating, but they can also be pollinated by insects such as bees and butterflies. The flowers are white, delicate, and fragrant, appearing before the fruit sets.

If growing indoors or in a protected area, you can hand-pollinate using a small brush to transfer pollen between flowers. This ensures better fruit set and size.


Guava Pink Barbie Harvest Time

The real joy of growing Pink Barbie Guava comes during harvest time. Typically, the fruits are ready 3–4 months after flowering, depending on climate and care.

How to Know When to Harvest

  • The skin turns from green to light yellowish-green.
  • The fruit emits a sweet, tropical aroma.
  • It feels slightly soft when gently pressed.

Cut the fruit from the tree with pruning shears to avoid damaging the branch. Handle gently—ripe guavas can bruise easily.


Post-Harvest Tips and Storage

After harvesting:

  • Wash fruits and allow them to dry.
  • You can store ripe guavas at room temperature for 3–5 days or refrigerate for up to a week.
  • To speed up ripening, place guavas in a paper bag with a banana or apple.

Bonus tip: If you have a bumper harvest, Pink Barbie guavas make excellent jams, jellies, juices, and desserts. Their pink flesh also looks stunning in fruit salads.


Propagating Pink Barbie Guava

If you want to grow more guava plants, try propagation.

From Cuttings:

  1. Take 6–8 inch semi-hardwood cuttings from healthy, fruiting branches.
  2. Dip the cut end in rooting hormone powder.
  3. Plant in a moist, well-draining potting mix.
  4. Cover with a plastic dome or bag to retain humidity until roots form (2–4 weeks).

From Seeds:

You can also grow from seeds, but keep in mind:

  • Plants may not be true to type (fruit quality may vary).
  • Seedlings take 2–3 years to bear fruit.

For reliable results, grafting or air-layering from a healthy parent tree is preferred.


Common Pests and Diseases

Like most fruit trees, guavas can attract pests, but with regular monitoring, they’re easy to manage.

Common Pests:

  • Fruit flies – Use fruit fly traps or harvest early to prevent infestation.
  • Aphids and whiteflies – Control with neem oil spray.
  • Scale insects – Wipe off with cotton dipped in soapy water.
  • Mealybugs – Use insecticidal soap or horticultural oil.

Common Diseases:

  • Anthracnose (fruit rot): Avoid overhead watering; prune to increase airflow.
  • Leaf spot: Remove affected leaves and apply organic fungicides if needed.
  • Root rot: Ensure proper drainage and avoid overwatering.

Growing Pink Barbie Guava in Containers

For gardeners with limited space or cooler climates, growing guava in containers is an excellent solution.

Tips for container success:

  • Choose a large pot (at least 20 gallons).
  • Use a lightweight, nutrient-rich potting mix.
  • Fertilize monthly during the growing season.
  • Move the pot to a sunny, sheltered area during winter to protect from frost.

Container-grown Pink Barbie Guavas can still produce plenty of fruits and look ornamental with their glossy green leaves and bright pink harvests.


Enjoying the Fruits of Your Labor

Once your Pink Barbie Guava harvest is ready, there are endless ways to enjoy this tropical delight:

  • Eat fresh – slice and enjoy the naturally sweet flavor.
  • Blend into smoothies for a refreshing, vitamin-packed drink.
  • Make guava jam or jelly – perfect for spreading on toast.
  • Add to salads or desserts – pairs beautifully with citrus and mint.
  • Make guava juice or sorbet – a cooling treat in summer.

Every bite is a taste of the tropics—right from your garden.


Final Thoughts

Growing the Guava Pink Barbie variety is a rewarding experience for any gardener. It’s beautiful, productive, and adaptable—whether you have a spacious garden or a sunny balcony. With proper sunlight, regular watering, and thoughtful pruning, you can enjoy an abundance of pink, fragrant guavas year after year.

From the moment you plant it to the time you harvest those first rosy fruits, the Pink Barbie Guava rewards your care with a burst of tropical sweetness that’s simply irresistible.

So, plant your Pink Barbie today, nurture it with love, and soon you’ll be harvesting the prettiest—and tastiest—guavas right from your own home garden.

Growing Hawaiian Solo “Sunrise” Papaya in Southern California: A Complete Guide to Success

Growing Hawaiian Solo “Sunrise” Papaya in Southern California: A Complete Guide to Success

If you’ve ever dreamed of harvesting sweet, tropical papayas right from your backyard in Southern California, the Hawaiian Solo “Sunrise” variety might be your perfect match. Known for its luscious flavor, deep orange-red flesh, and compact growth habit, this tropical fruit can surprisingly thrive in the warm microclimates of Southern California—with the right care and attention.

In this comprehensive guide, we’ll walk through everything you need to know about growing Hawaiian Solo “Sunrise” papaya, from planting and soil preparation to watering, fertilizing, and harvesting. Whether you’re an experienced gardener or a curious beginner, this tropical gem can become a rewarding addition to your home garden.


What Makes Hawaiian Solo “Sunrise” Papaya Special?

The Hawaiian Solo “Sunrise” papaya is one of the most popular papaya varieties worldwide—and for good reason. Developed in Hawaii, this variety produces medium-sized, pear-shaped fruits weighing around 16–24 ounces. Its skin turns a beautiful golden yellow when ripe, and the flesh inside glows a deep salmon-red, with a rich, sweet, and slightly musky flavor.

Here’s why it’s ideal for home gardeners in Southern California:

  • Compact size: The “Sunrise” papaya tree usually grows between 6 to 10 feet tall, perfect for small yards or even large containers.
  • Early fruiting: It can start producing fruit as early as 9–12 months after planting.
  • Self-pollinating types available: Hermaphrodite plants can produce fruit on their own without the need for a separate male tree.
  • Heat-tolerant: It loves the warmth and sun typical of Southern California’s coastal and inland valleys.

Can You Really Grow Papaya in Southern California?

Yes, you can—if you pick the right variety and create the right conditions. Papayas are tropical by nature, but Southern California’s Mediterranean climate—with its warm summers and mild winters—can be suitable for papaya growth when protected from frost and cold winds.

The Hawaiian Solo “Sunrise” variety performs particularly well in coastal and inland zones where temperatures stay above 60°F most of the year. With extra care during cooler months, you can enjoy year-round growth and even multiple harvests.

Key requirements for success:

  • Plenty of sunlight (6–8 hours daily)
  • Well-draining soil (papayas hate soggy roots)
  • Protection from frost and strong winds
  • Regular watering and feeding during the growing season

Step-by-Step Guide to Growing Hawaiian Solo “Sunrise” Papaya

1. Choosing the Right Location

Select the warmest, sunniest spot in your garden. Papayas love heat and thrive in full sun. Choose a south-facing area that gets sunlight all day. If you live near the coast, that’s ideal—the ocean moderates temperature swings and reduces frost risk.

If you’re growing in a container, choose a pot that’s at least 20–25 gallons in size and made of a heat-retaining material like black plastic or ceramic. Place it against a warm wall for added protection.


2. Preparing the Soil

Papayas prefer light, well-drained soil with a slightly acidic to neutral pH (around 6.0–7.0). They dislike clay-heavy or waterlogged soil. To create the perfect growing medium:

  • Mix garden soil, compost, and perlite or sand in equal parts.
  • Add organic matter such as composted manure or worm castings to boost fertility.
  • If planting in the ground, make a raised mound (1–2 feet high) to ensure proper drainage.

3. Planting the Papaya

You can start papayas from seeds or nursery plants. If starting from seed, make sure the seeds come from a ripe Hawaiian Solo “Sunrise” fruit.

To start from seed:

  1. Wash the seeds and let them dry for a day or two.
  2. Plant 3–4 seeds about ½ inch deep in a pot or directly in the garden.
  3. Keep the soil consistently moist but not soggy.
  4. Thin out the seedlings once they’re about 6 inches tall, keeping the strongest one.

If using a nursery-grown papaya, plant it at the same depth as its original container. Be careful not to damage the roots—they’re quite sensitive.


4. Watering and Mulching

Papayas need regular watering, especially during dry spells. Keep the soil evenly moist but never waterlogged, as too much moisture can lead to root rot.

  • Water deeply 2–3 times a week during summer.
  • In cooler months, reduce watering but don’t let the soil dry completely.
  • Add a 3-inch layer of mulch (such as straw or shredded leaves) around the base to retain moisture and regulate soil temperature.

5. Feeding and Fertilization

Papayas are heavy feeders. They need a steady supply of nutrients to support their fast growth and constant fruiting.

Feeding schedule:

  • Every 2 weeks: Apply a balanced liquid fertilizer (such as 10-10-10 or organic compost tea).
  • Every 2–3 months: Add slow-release fertilizer or organic compost around the base.
  • During flowering and fruiting: Switch to a high-potassium fertilizer (like 5-10-10) to promote fruit sweetness and size.

6. Temperature and Frost Protection

While papayas love warmth, they’re sensitive to cold. Temperatures below 50°F can slow growth, and frost can kill young plants.
To protect your Hawaiian Solo “Sunrise” papaya in winter:

  • Cover it with frost cloth or plastic sheeting during cold nights.
  • Wrap the trunk with burlap or old blankets for insulation.
  • Move container plants indoors or into a greenhouse if temperatures drop below 45°F.

7. Pollination and Flowering

The Hawaiian Solo “Sunrise” is typically hermaphroditic, meaning it has both male and female parts in the same flower. That makes it self-pollinating, though bees and wind can enhance fruit set.

If you grow papayas from seed, you may get male, female, or hermaphrodite plants. Only the hermaphrodite and female plants bear fruit, so once flowers appear, you can identify and keep those.


8. Common Pests and Diseases

Papayas are relatively low-maintenance but can attract a few common pests.

Watch out for:

  • Aphids and whiteflies: These can be managed with neem oil or insecticidal soap.
  • Spider mites: Regular misting helps, as they thrive in dry air.
  • Root rot: Avoid overwatering and ensure good drainage.
  • Anthracnose or powdery mildew: Prune for airflow and apply copper fungicide if needed.

9. Harvesting Hawaiian Solo “Sunrise” Papaya

You’ll know your papayas are ready when their skin turns yellow-orange and the fruit softens slightly to the touch.
Harvest by cutting the fruit with a sharp knife, leaving a small stem attached to prevent rot.

Each papaya tree can produce 30–100 fruits per year, depending on its health and growing conditions. After a few years, fruiting slows down, and it’s best to start new plants to maintain production.


10. Storing and Enjoying Your Harvest

Freshly harvested “Sunrise” papayas can ripen at room temperature within a few days. Once ripe, store them in the refrigerator for up to a week.

These papayas are delicious fresh, but you can also:

  • Blend them into smoothies or tropical juices
  • Add to fruit salads or salsas
  • Use in papaya chutney, jams, or desserts
  • Even enjoy them with a squeeze of lime for a refreshing snack

Growing in Containers: Perfect for Patio or Balcony Gardens

If space is limited, growing Hawaiian Solo “Sunrise” papaya in a container is an excellent option. Use a large 25-gallon pot with good drainage holes and fill it with a light potting mix. Keep it on a sunny patio or balcony where it receives at least six hours of sunlight daily.

Container papayas might be slightly smaller but often produce sweeter fruit due to the controlled environment.


Final Tips for Success

  • Prune lightly to remove dead or yellowing leaves for better airflow.
  • Rotate your plants every few years to maintain productivity.
  • Avoid transplanting mature papayas—their roots are delicate and don’t recover well from disturbance.
  • Grow multiple plants together to increase pollination and ensure a steady supply of fruit.

Conclusion

Growing Hawaiian Solo “Sunrise” papaya in Southern California is not only possible—it’s an incredibly rewarding experience. With the region’s abundant sunshine and mild climate, this tropical beauty can thrive and produce mouthwatering fruit right in your backyard or patio.

By providing the right care—warmth, good soil, regular feeding, and a bit of frost protection—you’ll be rewarded with an abundant harvest of delicious, sweet papayas. Whether enjoyed fresh, juiced, or in tropical desserts, your homegrown “Sunrise” papayas will bring a taste of Hawaii straight to your Southern California garden.


How to Rescue a Sickly Bacon Avocado Tree: Bare-Rooting and Effective Treatment Tips

How to Rescue a Sickly Bacon Avocado Tree: Bare-Rooting and Effective Treatment Tips

Avocado trees are an incredibly rewarding addition to any garden, offering lush foliage and creamy fruit right from your backyard. However, even experienced gardeners can encounter challenges — like a struggling or sickly tree. In this guide, inspired by the video “Avocado Bacon, investigating my very sickly plant and appropriate treatment (bare rooting),” we’ll take a deep dive into understanding why your Bacon avocado might be declining, how to diagnose problems, and step-by-step techniques to revive it — including the effective method of bare-rooting.

Whether you’re a first-time avocado grower or have years of experience, this comprehensive guide will give you the tools to bring a stressed tree back to life.


Understanding the Bacon Avocado Tree

The Bacon avocado is a versatile, cold-hardy variety prized for its smooth, light-green flesh and mild flavor. Named after its discoverer rather than the breakfast staple, the Bacon avocado is a Type B flowering variety, making it an excellent pollinator companion for Type A avocados like Fuerte or Hass.

Key Features of Bacon Avocado:

  • Cold tolerance: Can survive temperatures as low as 28°F (-2°C).
  • Fruit: Medium-sized, creamy, mild-flavored, and great for salads or guacamole.
  • Tree growth: Medium-sized, with an upright canopy that spreads naturally.
  • Growth preference: Thrives in well-draining soil, full sun, and moderate watering.

Despite its resilience, Bacon avocados are not immune to stress, disease, or poor growing conditions. Recognizing the early signs of trouble is essential for effective treatment.


Common Causes of a Sickly Bacon Avocado

A sickly avocado tree can display yellowing leaves, drooping foliage, stunted growth, or poor fruiting. Here are common causes:

1. Poor Soil Drainage

Avocado trees are highly sensitive to waterlogged soil. Roots can suffocate in standing water, leading to root rot (Phytophthora cinnamomi), one of the most common and deadly avocado diseases.

2. Nutrient Deficiencies

Avocados require nitrogen, potassium, magnesium, zinc, and iron for healthy growth. Deficiencies can cause:

  • Yellow leaves: Often nitrogen or iron deficiency.
  • Brown leaf edges: Possible potassium or magnesium deficiency.
  • Weak growth: Lack of essential micronutrients.

3. Overwatering or Underwatering

Both extremes stress the tree. Overwatering encourages root rot, while underwatering causes wilting and leaf drop.

4. Pests and Disease

Common pests include spider mites, thrips, and root aphids. Disease threats include fungal infections and sunburn on the trunk or branches.

5. Environmental Stress

  • Sudden temperature changes
  • Frost or extreme heat
  • Wind damage
  • Transplant shock or poor planting techniques

If your Bacon avocado is showing multiple symptoms, it may be a combination of these factors.


Step 1: Inspect and Diagnose

Before rushing into treatment, carefully inspect your tree:

  • Leaves: Check for yellowing, spots, curling, or holes.
  • Branches: Look for dieback, cracks, or weak growth.
  • Roots: If visible, roots that are brown, mushy, or smell rotten indicate root rot. Healthy roots should be white or cream-colored and firm.
  • Soil: Check moisture levels, drainage, and soil compaction.

Accurate diagnosis is critical. Misidentifying the problem can make treatment less effective or even harmful.


Step 2: Bare-Rooting the Bacon Avocado

Bare-rooting is a powerful method to revive a sickly avocado tree. It involves removing the tree from the soil, inspecting, and treating the roots, then replanting in optimal conditions.

Why Bare-Rooting Helps

  • Removes diseased or damaged roots.
  • Reduces the risk of soil-borne pathogens.
  • Allows you to apply treatments directly to the root system.
  • Gives the tree a fresh start in well-prepared soil.

Step-by-Step Bare-Rooting Process

  1. Preparation:
    • Water the tree a day before bare-rooting to reduce stress.
    • Gather tools: sharp pruning shears, a clean bucket, fungicide (if needed), and fresh soil or potting mix.
  2. Remove the Tree:
    • Dig carefully around the root zone, about 1–2 feet from the trunk.
    • Lift the tree gently, keeping as many roots intact as possible.
  3. Inspect and Prune Roots:
    • Remove any brown, mushy, or rotten roots.
    • Trim minor damaged roots to encourage new growth.
    • If root rot is present, soak the roots in a fungicide solution according to label instructions.
  4. Prepare a Healthy Planting Site:
    • Choose a well-draining location in full sun.
    • Amend soil with compost and perlite or sand to improve aeration.
    • If planting in a container, use a mix designed for citrus or succulents.
  5. Replanting:
    • Place the tree so that the root crown is slightly above soil level.
    • Backfill with fresh soil, gently pressing around roots to remove air pockets.
    • Water deeply to settle the soil and reduce transplant shock.

Bare-rooting is stressful for the tree, so careful aftercare is essential.


Step 3: Post-Bare-Root Care

After bare-rooting, your Bacon avocado will need extra attention:

Watering

  • Water consistently, keeping soil moist but not soggy.
  • For the first two weeks, monitor daily to prevent drying out.
  • Gradually reduce watering frequency as roots re-establish.

Sunlight and Shelter

  • Provide partial shade for 1–2 weeks if the tree was stressed by heat.
  • Protect from strong wind or frost during recovery.

Fertilization

  • Avoid heavy fertilization immediately after bare-rooting.
  • After 3–4 weeks, apply a balanced avocado fertilizer with micronutrients.
  • Ensure trace elements like zinc and magnesium are included, as they support new growth.

Monitoring Growth

  • Watch for new leaves and shoots as indicators of recovery.
  • Remove any dead or dying branches to focus energy on healthy growth.

Step 4: Preventing Future Problems

Once your tree is healthy again, implement these practices to maintain its vigor:

  1. Proper Watering: Adjust to seasonal needs; reduce watering during cool or rainy periods.
  2. Mulching: Apply a 3–4 inch layer of organic mulch to retain soil moisture and suppress weeds.
  3. Nutrient Management: Conduct soil tests every 1–2 years to fine-tune fertilization.
  4. Pest and Disease Monitoring: Regularly inspect for signs of spider mites, aphids, or fungal infections.
  5. Pruning: Remove weak, crossing, or dead branches to encourage strong structure and airflow.

Step 5: Patience and Observation

Recovering a sickly Bacon avocado tree takes time. Expect several months for visible improvement. Key signs of recovery include:

  • New leaf growth
  • Strong, green shoots
  • Reduced leaf drop
  • Improved root vigor

Patience and careful observation are essential. Treat minor issues early and avoid overreacting with chemicals, which can further stress the tree.


Bonus Tips for Container-Grown Bacon Avocados

Many gardeners grow avocados in pots, which makes bare-rooting a bit easier and helps control soil quality:

  • Use a 20–25 gallon container with drainage holes.
  • Avoid compacted potting soil; a mix of compost, perlite, and sandy loam works well.
  • Fertilize with liquid avocado food every 6–8 weeks.
  • Rotate the pot to ensure even sunlight exposure.
  • Move indoors or provide frost protection during winter if you live in a cooler climate.

Container-grown trees respond well to bare-rooting since you can inspect roots without extensive digging.


Final Thoughts

A sickly Bacon avocado tree is not a lost cause. With careful diagnosis, proper bare-rooting, and attentive aftercare, you can bring your tree back to health and enjoy years of delicious, creamy fruit.

Key takeaways:

  • Identify the root cause of stress before treating.
  • Bare-rooting is an effective method to remove diseased roots and rejuvenate growth.
  • Provide consistent water, balanced nutrients, and proper shelter during recovery.
  • Monitor carefully and practice preventive care to avoid future issues.

By following these steps, your Bacon avocado can recover, grow strong, and eventually reward you with bountiful harvests — making all the effort worthwhile.

Healthy roots mean a healthy tree, and a healthy Bacon avocado tree means creamy, delicious fruit straight from your garden!