How to Grow Custard Apple from Seed: A Complete Guide to Growing Sugar Apple at Home

How to Grow Custard Apple from Seed: A Complete Guide to Growing Sugar Apple at Home

The custard apple, also known as sugar apple, sweetsop, or sitaphal, is one of the most delightful tropical fruits you can grow at home. Known for its soft, creamy flesh and sweet fragrance, this fruit is loved across the world for its refreshing flavor and nutritional benefits. The good news is—you can easily grow a custard apple tree from seed right in your home garden or even in containers with a bit of patience and care.

In this comprehensive DIY guide, you’ll learn how to grow custard apple from seed step-by-step—from seed preparation and germination to transplanting, care, and harvesting. With the right techniques, you can turn those glossy black seeds into a lush, fruit-bearing tree within a few years.


1. Why Grow Custard Apple at Home?

Growing custard apple from seed is not only rewarding but also fun for home gardeners. Here’s why it’s worth the effort:

  • Easy to Grow: The tree requires minimal maintenance once established.
  • Fast Growth: It can start producing fruits within 3–4 years under the right conditions.
  • Tropical Beauty: With its lush, green leaves and unique fruits, the tree adds ornamental value to your garden.
  • Nutritional Benefits: The fruit is rich in vitamin C, magnesium, potassium, and dietary fiber.
  • Sustainable Gardening: Growing from seeds encourages self-sufficiency and reduces dependency on nurseries.

Whether you have a backyard or a sunny balcony, the custard apple can adapt well and reward you with delicious, homegrown fruits.


2. Understanding the Custard Apple Tree

Before planting, it’s helpful to understand the nature of this tropical plant. The custard apple (Annona squamosa) belongs to the Annonaceae family and thrives in warm, dry climates.

Key characteristics:

  • Grows up to 3–6 meters tall (manageable even for small gardens).
  • Has oval, light-green leaves and fragrant flowers.
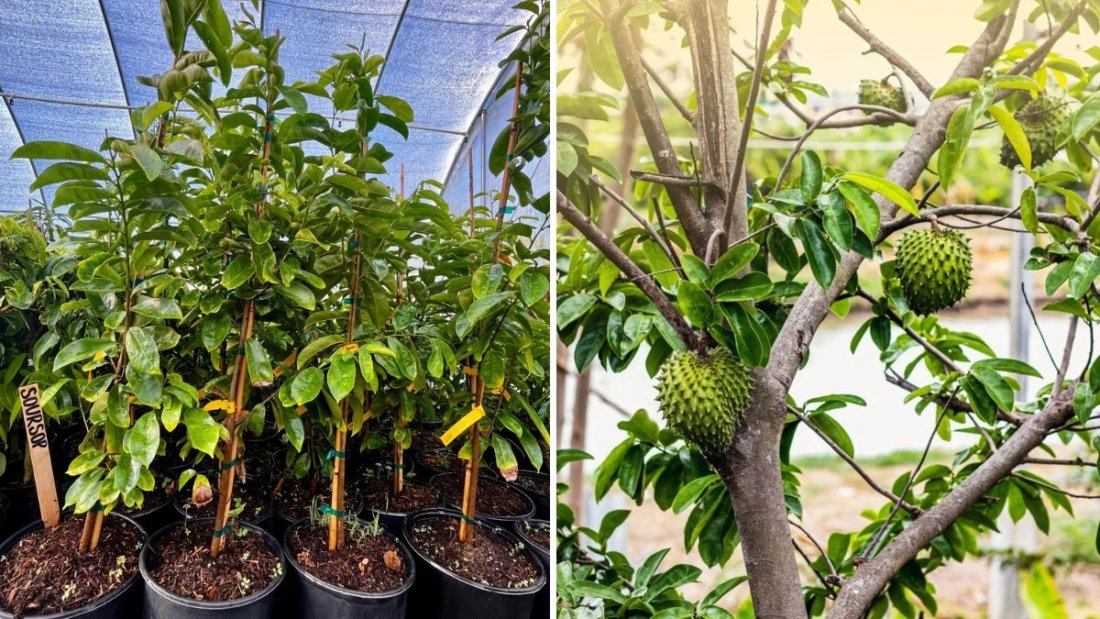
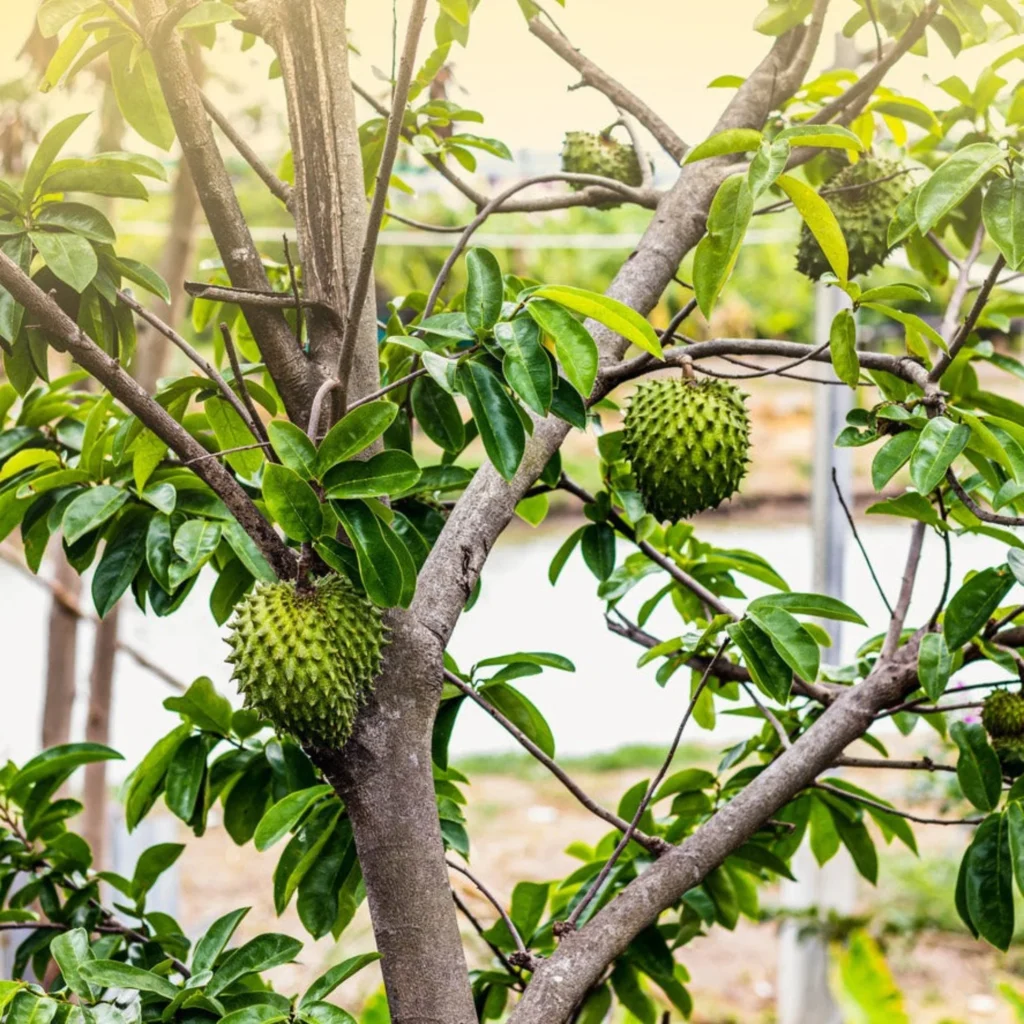
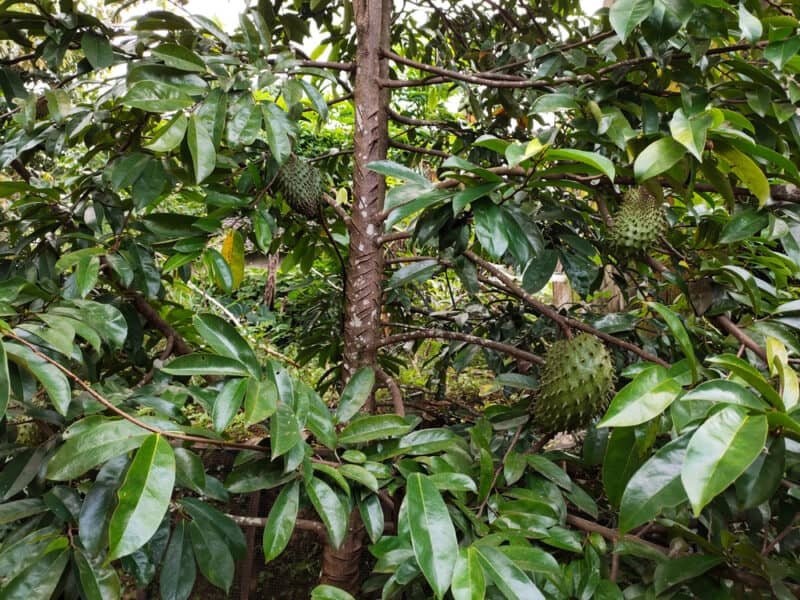
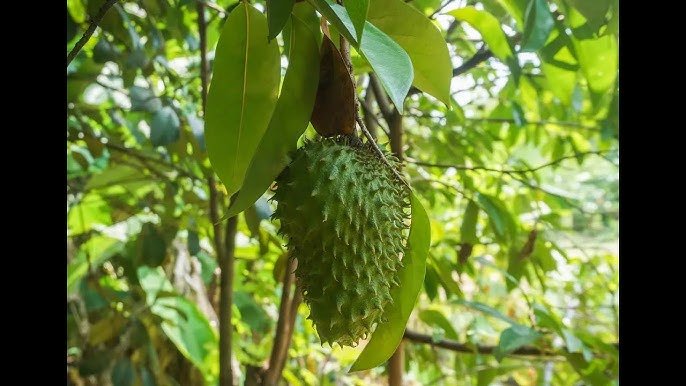
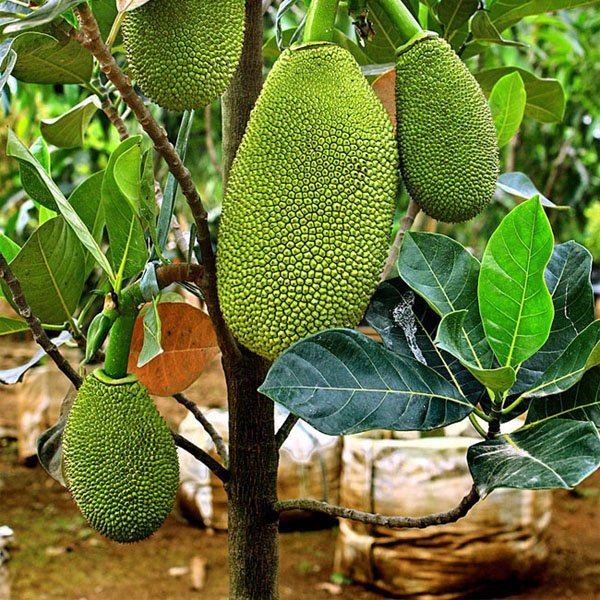
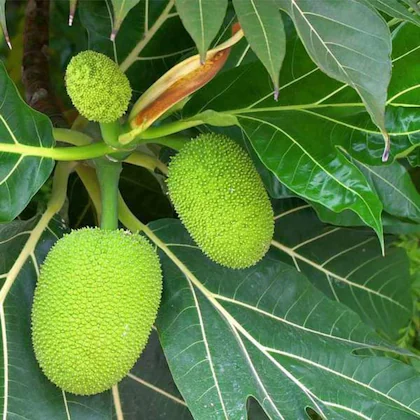
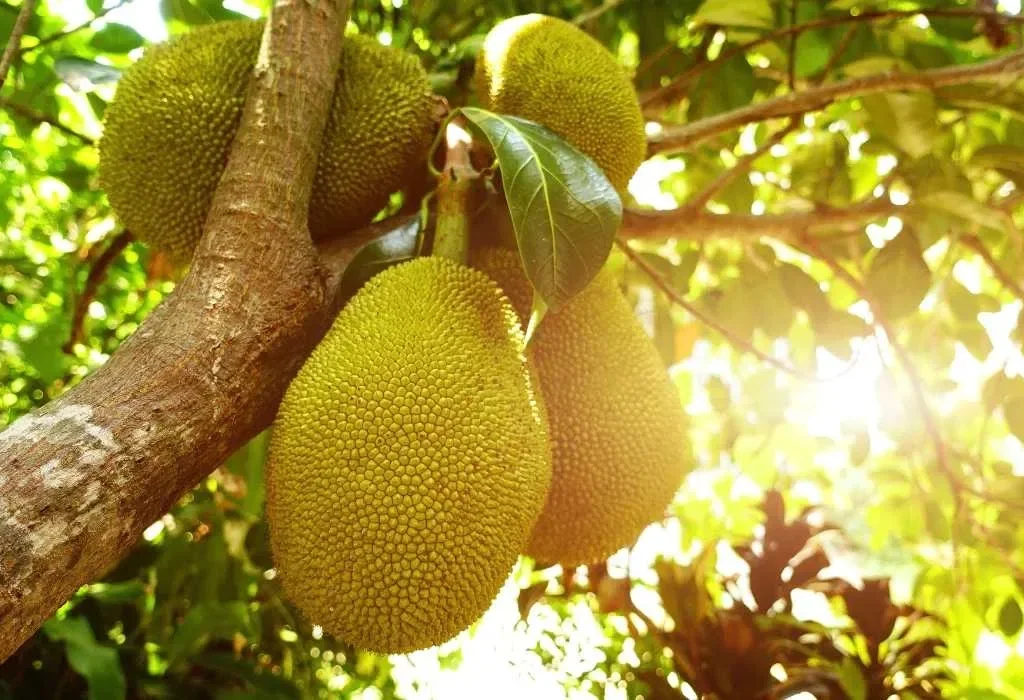
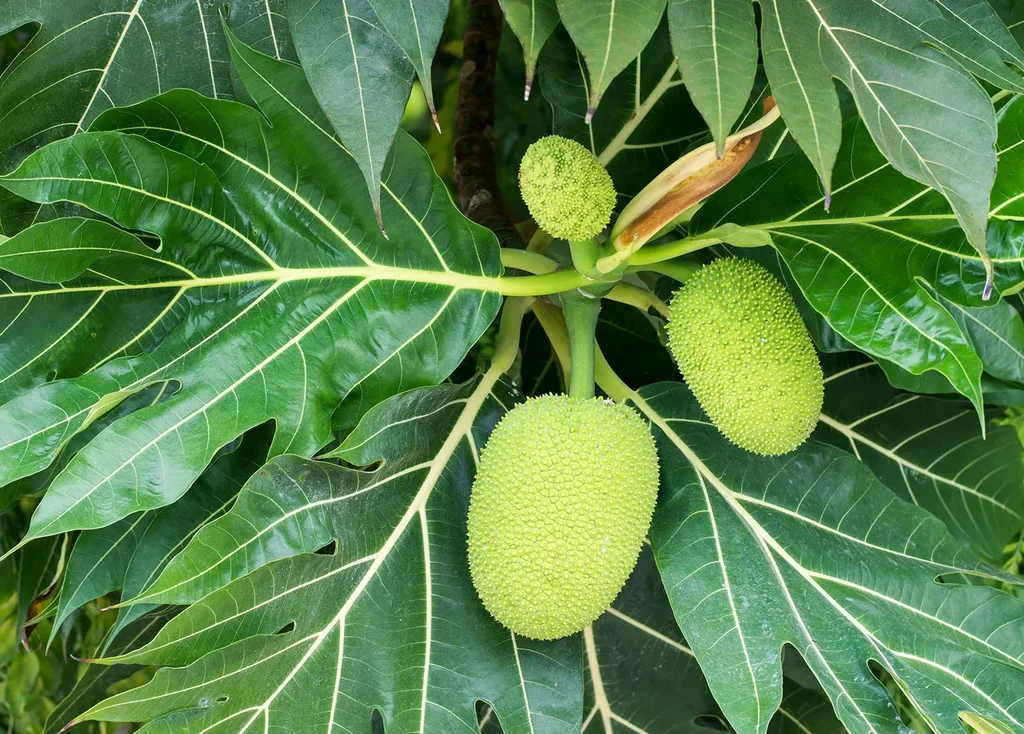
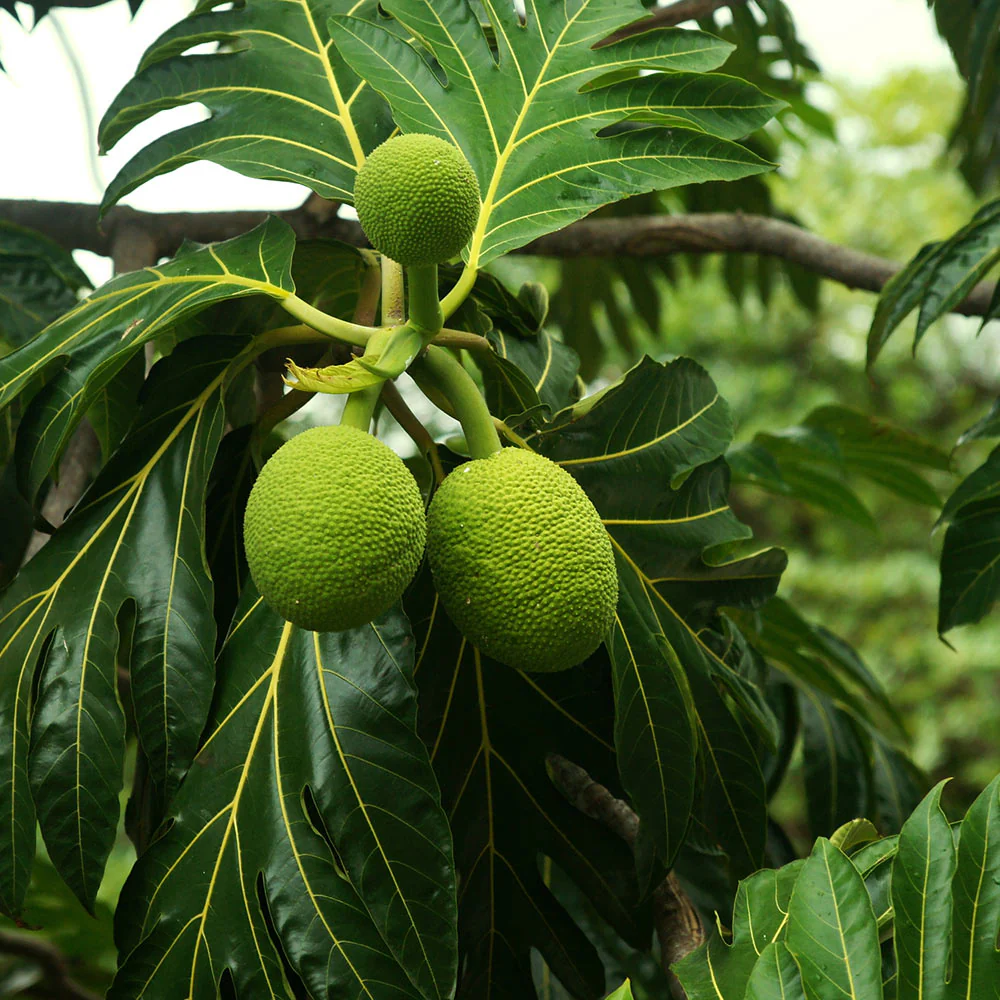
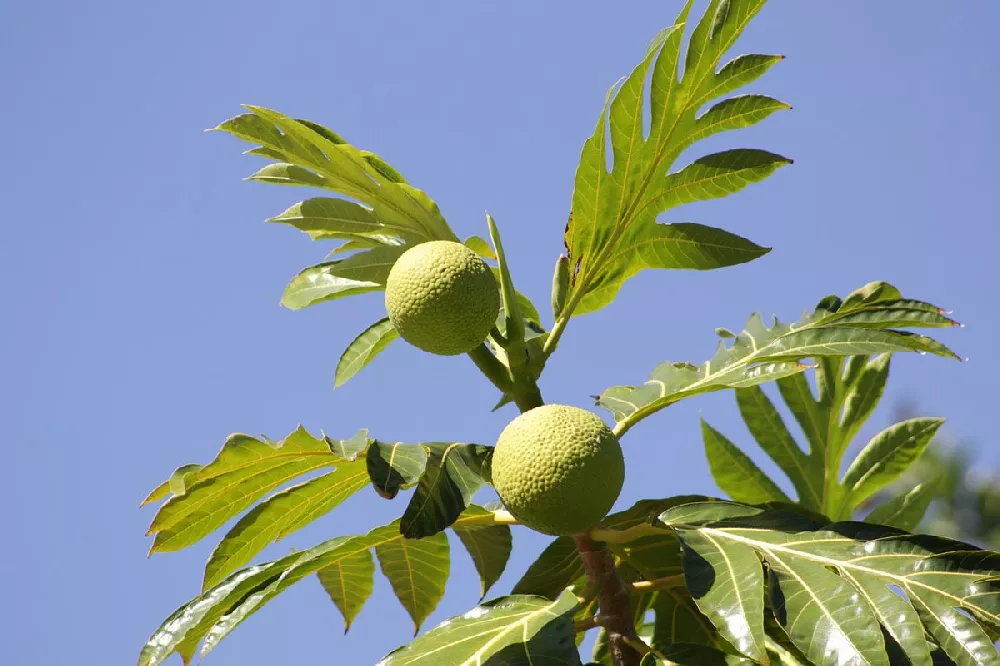
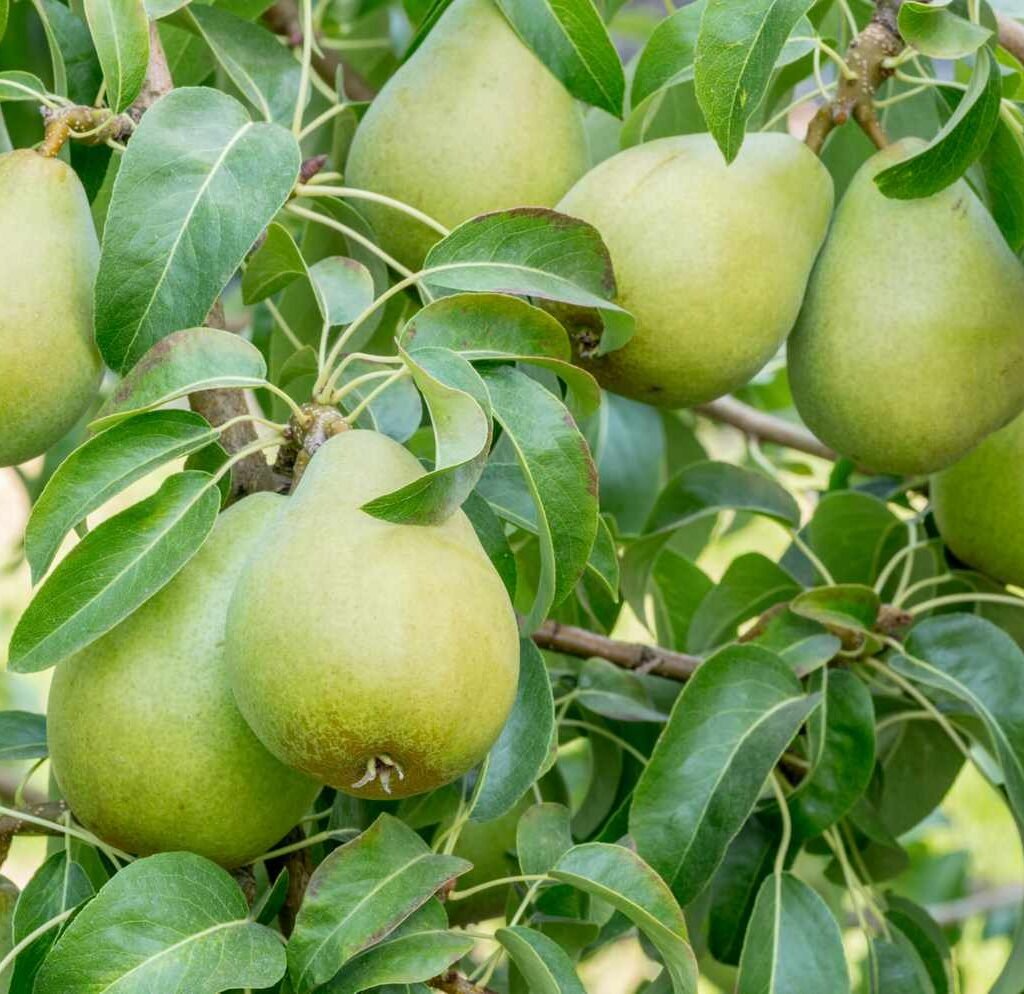
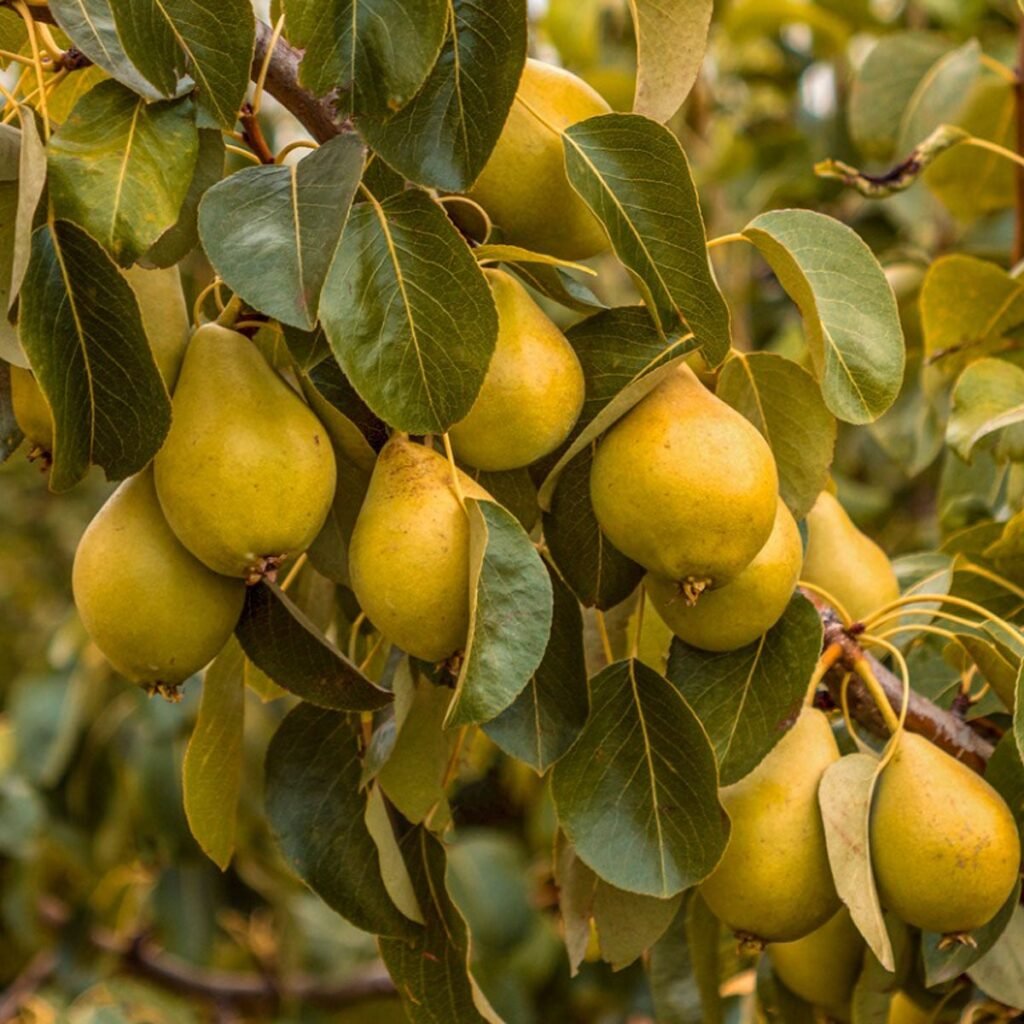
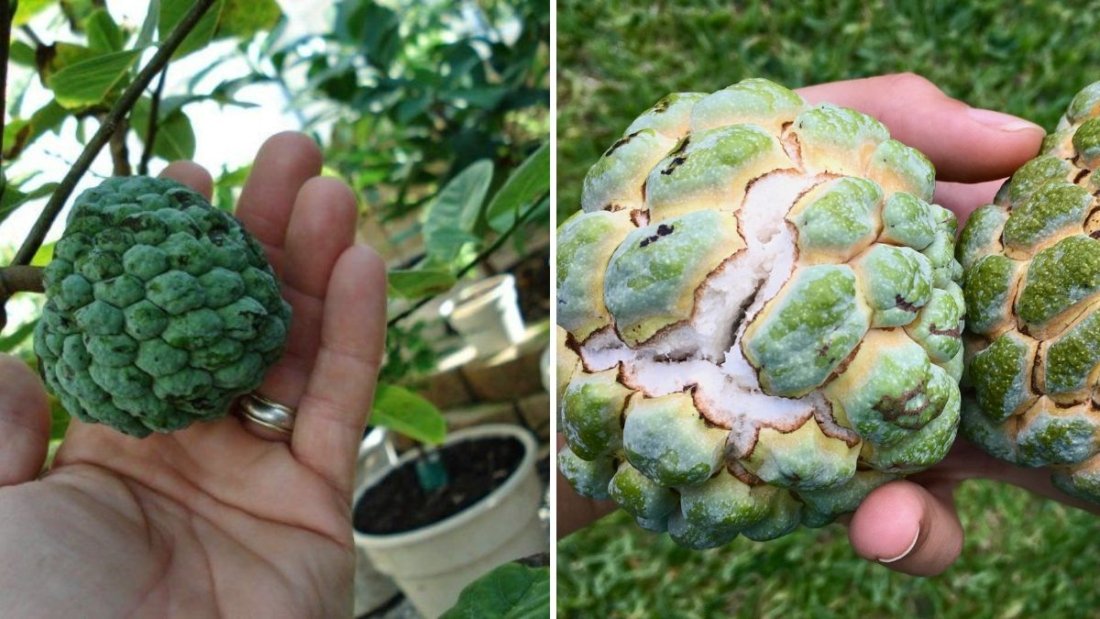
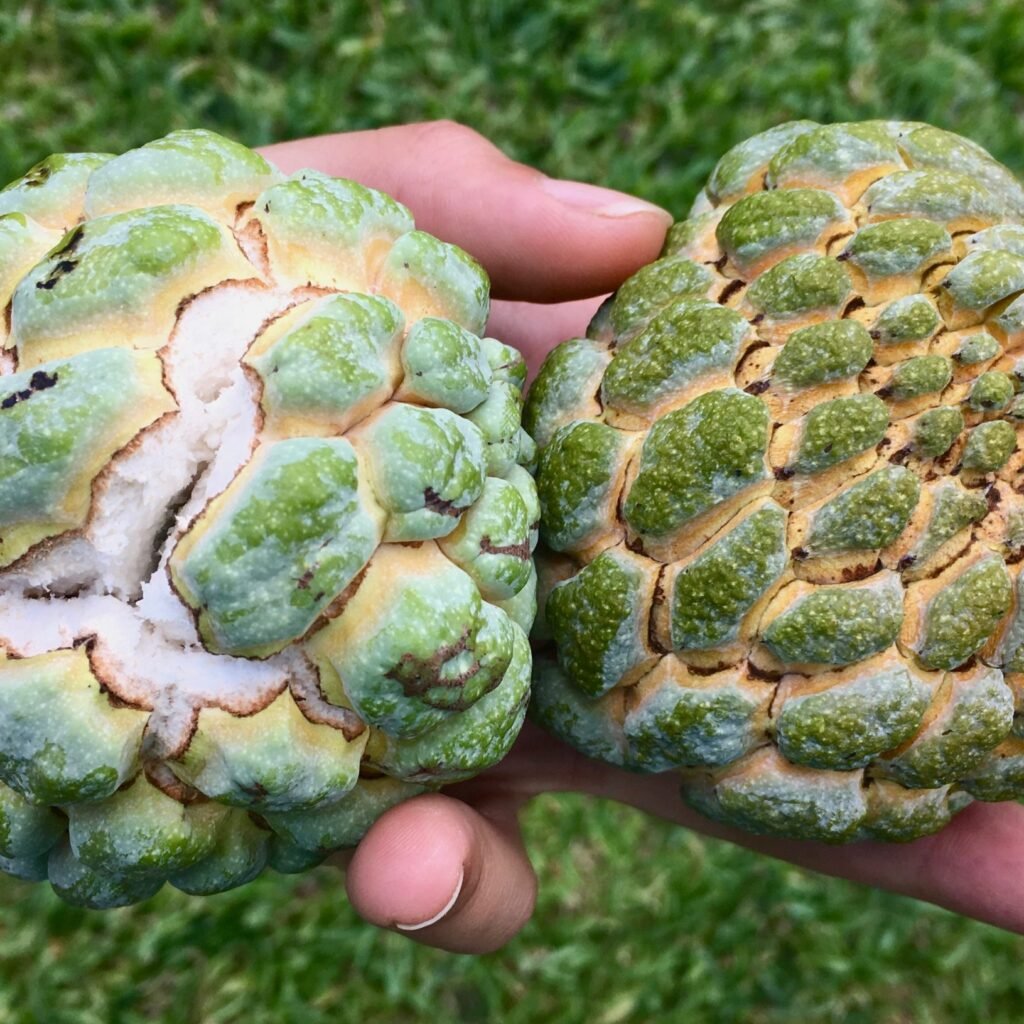
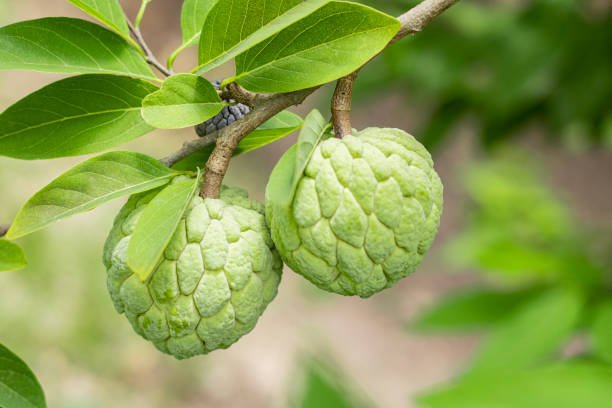
  • Produces knobby green fruits that turn slightly yellow when ripe.
  • Prefers full sunlight and well-drained soil.

Different regions may call it by various names—sugar apple, sweetsop, or sitaphal—but all refer to the same fruit-bearing plant known for its custard-like sweetness.


3. Choosing and Preparing the Seeds

The first step to growing custard apple successfully is choosing fresh, healthy seeds.

How to collect seeds:

  1. Choose a ripe, soft custard apple fruit with sweet aroma and good flavor.
  2. Scoop out the flesh and separate the seeds from the pulp.
  3. Rinse the seeds under running water to remove any remaining fruit.
  4. Allow the seeds to dry in shade for 2–3 days—avoid direct sunlight to prevent damage.

Seed preparation for faster germination:
Custard apple seeds naturally have a hard outer coat that slows down germination. To speed up the process:

  • Soak the seeds in warm water for 24 hours before planting.
  • Alternatively, you can lightly rub the seed coat with sandpaper or nick it gently with a knife to help water penetrate.

These small steps can reduce germination time from 30 days to just 10–15 days.


4. Choosing the Right Soil and Pot

Custard apple thrives in light, well-drained soil with good organic content. If you’re growing it at home, you can start the seeds in small pots or seed trays.

Ideal soil mix:

  • 40% garden soil
  • 30% compost or cow manure
  • 20% sand or perlite for drainage
  • 10% cocopeat or leaf mold for aeration

The mixture should be slightly acidic to neutral (pH 6.0–7.0). If your soil tends to retain too much water, add extra sand or gravel to prevent root rot.

Container requirements:

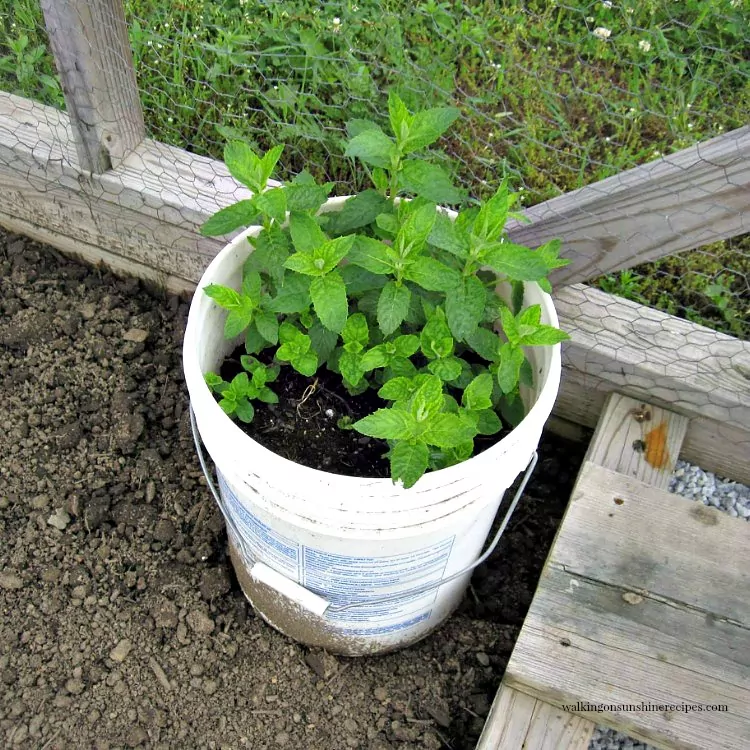
  • For seed germination: Use small pots or nursery bags (6 inches deep).
  • For transplanting later: Use a pot that’s at least 16–18 inches in diameter if growing in containers permanently.

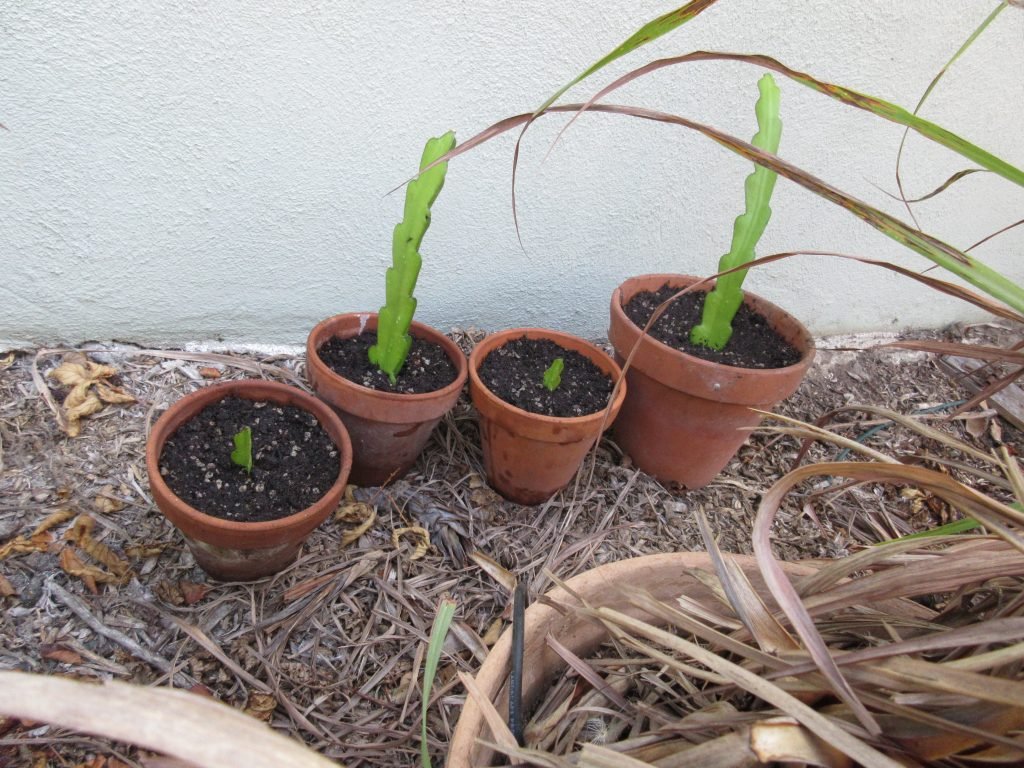
5. Germinating Custard Apple Seeds

Step-by-step germination guide:

  1. Fill pots or seed trays with the prepared soil mix, leaving about an inch of space at the top.
  2. Plant the seeds about 2–3 cm deep. Cover them lightly with soil—do not bury too deep.
  3. Water gently to moisten the soil without making it soggy.
  4. Cover with plastic wrap or a clear lid to retain humidity and warmth.
  5. Place in a warm, sunny location with indirect light.

Ideal temperature for germination: 25°C–30°C (77°F–86°F).

Germination time: 10–30 days, depending on seed quality and temperature.

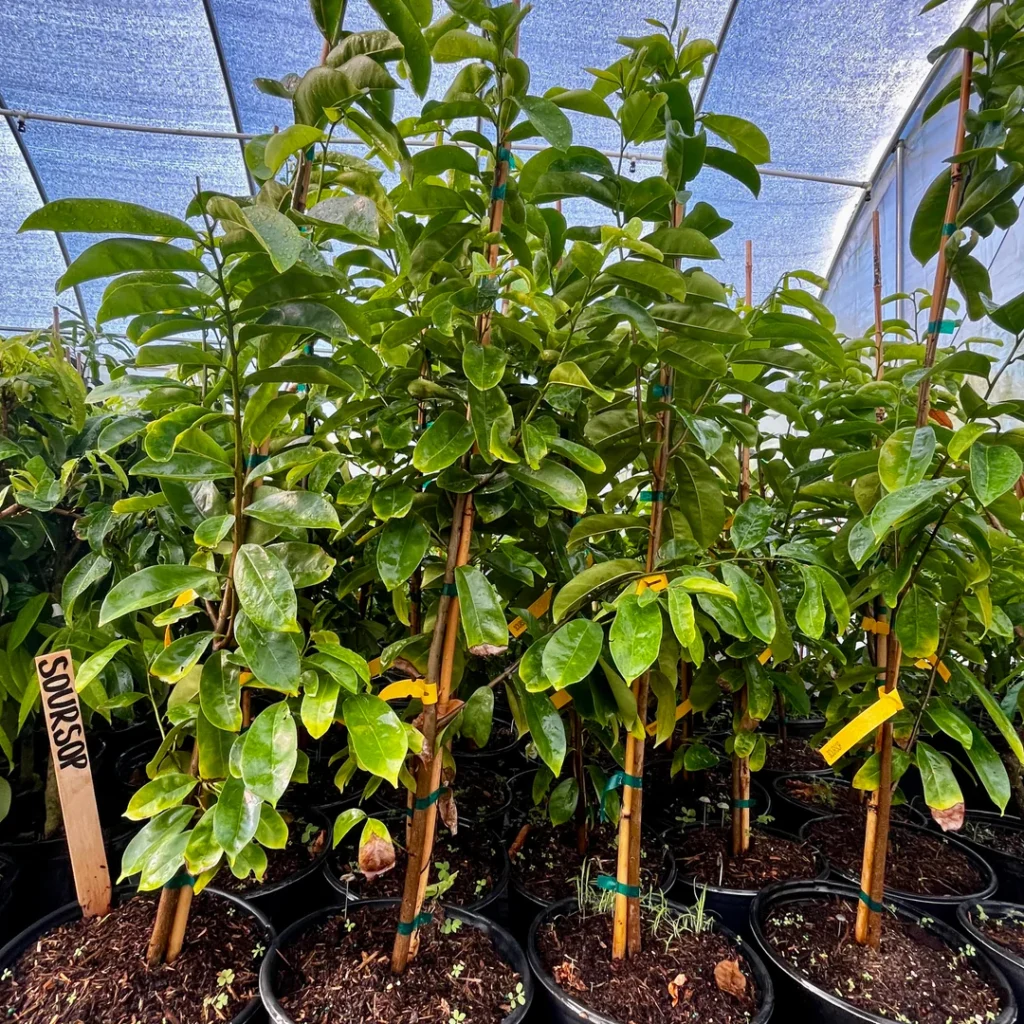
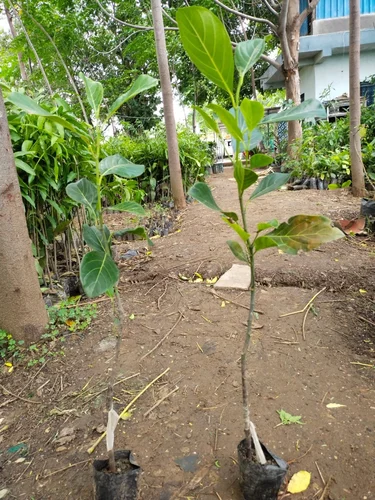
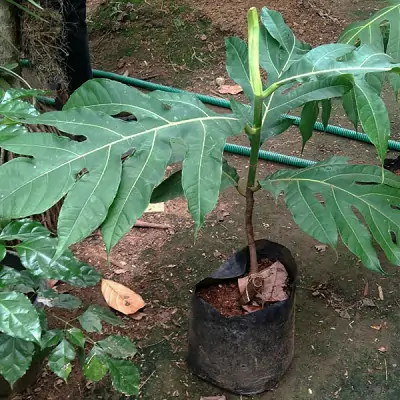
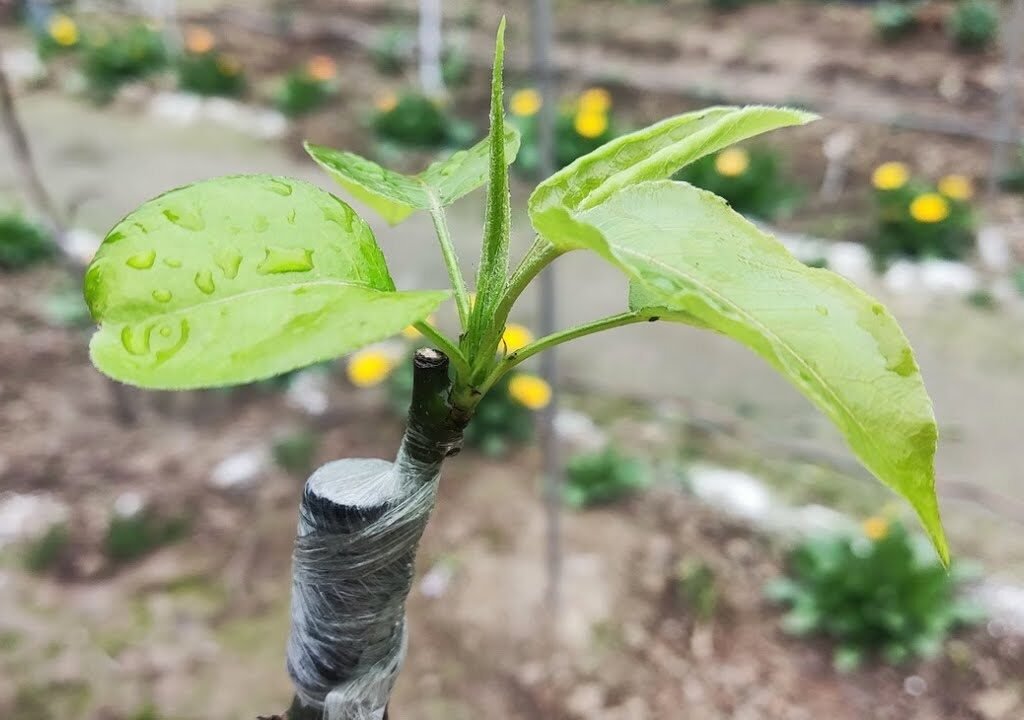
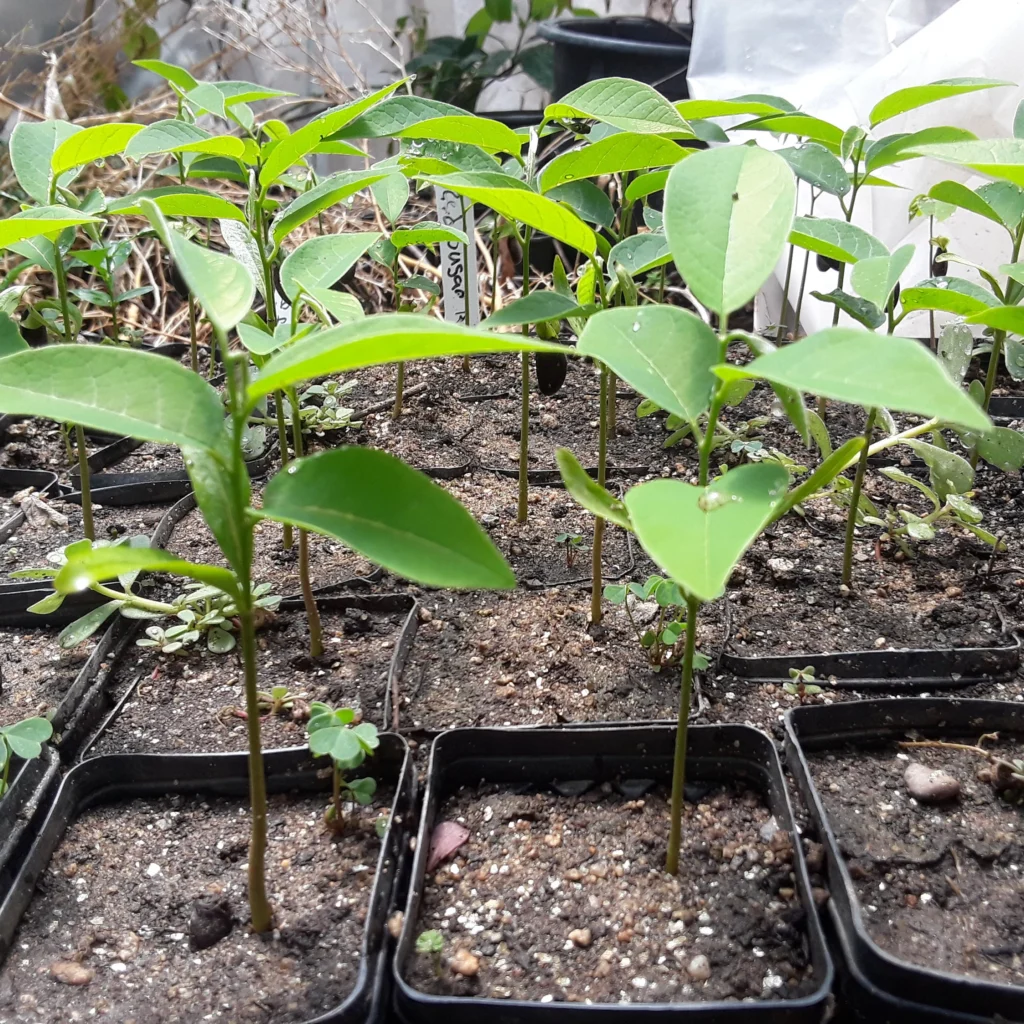
Once the seedlings emerge and reach about 10–15 cm tall, they are ready for transplantation.


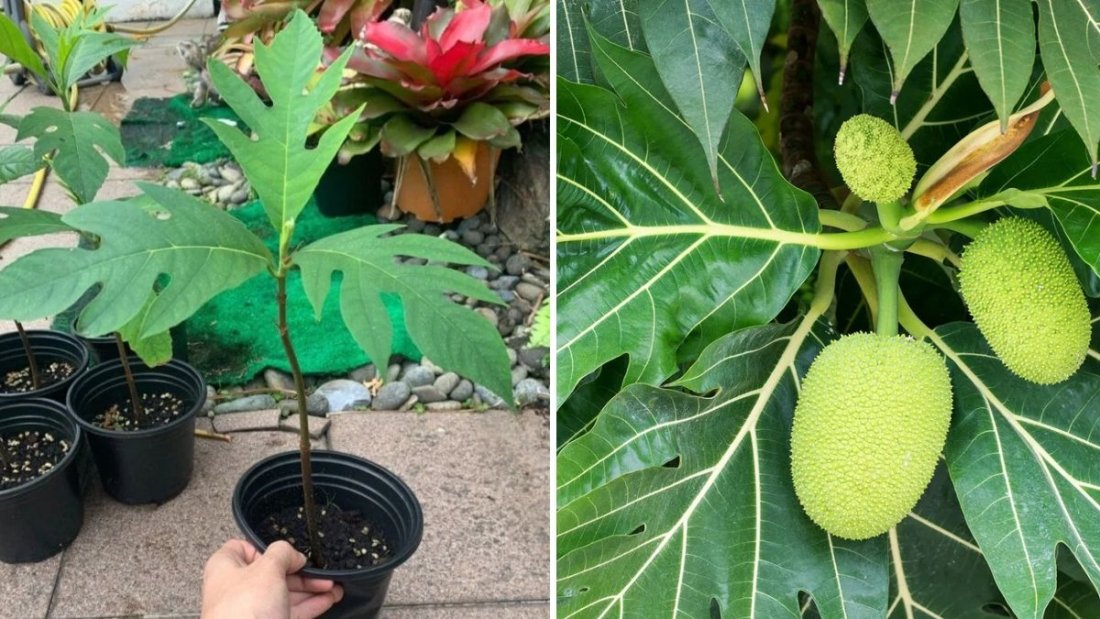
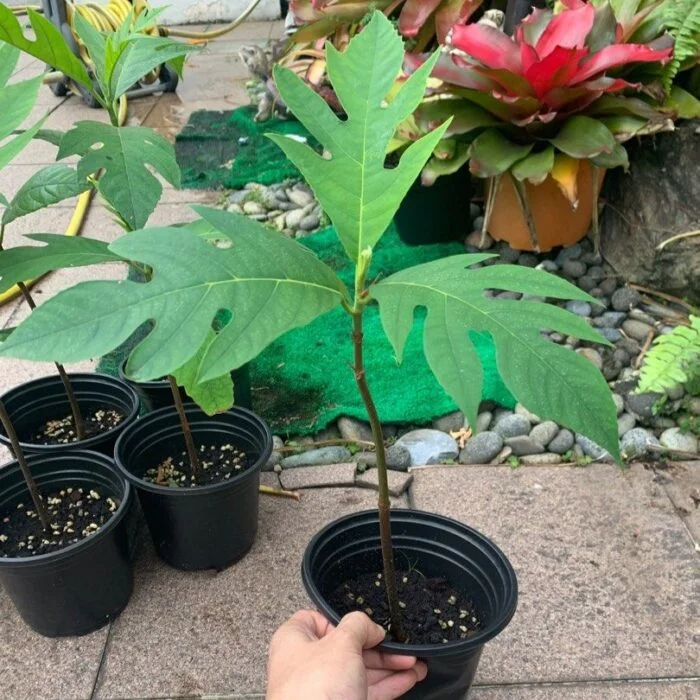
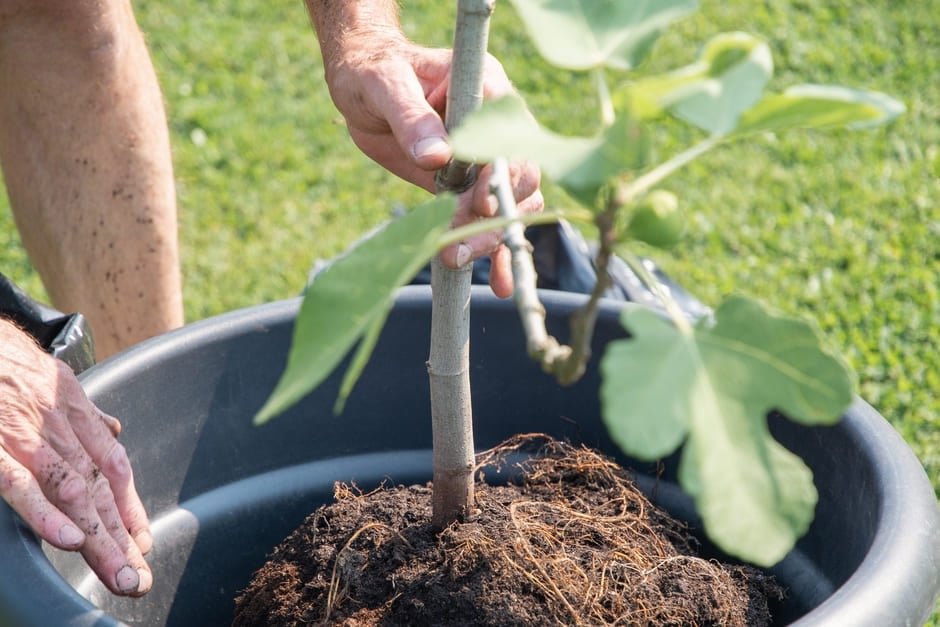
6. Transplanting the Seedlings

When your young custard apple plants develop 4–6 healthy leaves, it’s time to move them to a bigger space—either a large container or directly into the ground.

Steps for transplanting:

  1. Choose a sunny spot that receives at least 6–8 hours of sunlight daily.
  2. Dig a hole about 30–40 cm deep and wide.
  3. Mix compost or organic manure into the soil at the bottom of the hole.
  4. Carefully remove the seedling from its nursery pot without disturbing the roots.
  5. Place it in the hole, ensuring the root ball is level with the ground.
  6. Fill in the soil and press lightly to remove air pockets.
  7. Water thoroughly and apply a layer of mulch (dry leaves or straw) around the base.

If growing in a container, ensure it has multiple drainage holes to prevent waterlogging.


7. Watering and Sunlight Requirements

Custard apple trees prefer moderate but consistent watering. The key is to keep the soil slightly moist but never soggy.

Watering tips:

  • Water 2–3 times a week during dry seasons.
  • Reduce watering during rainy periods.
  • In hot climates, add mulch to conserve moisture.

Sunlight is crucial for healthy growth. The plant should get at least 6 hours of direct sunlight daily, though partial shade during extremely hot afternoons is beneficial for young plants.


8. Fertilizing for Strong Growth

Fertilization helps your custard apple tree grow faster and bear fruit earlier.

For young plants (first 6 months):

  • Use organic compost or vermicompost every 6–8 weeks.
  • Apply a diluted liquid fertilizer like fish emulsion or seaweed extract once a month.

For mature trees:

  • Apply an NPK fertilizer (10-10-10) every 3–4 months.
  • Add bone meal or wood ash to promote flowering and fruiting.
  • Mix compost into the soil before the rainy season to improve nutrient content.

Remember: Over-fertilizing can harm young roots. Always water well after applying fertilizer.


9. Pruning and Maintenance

Regular pruning ensures a healthy, well-shaped custard apple tree that produces more fruit.

How to prune:

  • In the first year, pinch off the growing tip when the plant is about 1 meter tall to encourage branching.
  • Remove any weak, dead, or overcrowded branches.
  • Maintain an open canopy so sunlight can reach all parts of the tree.

Pruning after the fruiting season stimulates new growth for the next cycle.


10. Pest and Disease Control

Custard apple plants are generally hardy but can occasionally attract pests like aphids, mealybugs, or fruit borers.

Natural pest control methods:

  • Spray neem oil or garlic extract every two weeks.
  • Remove any affected leaves or fruits promptly.
  • Maintain cleanliness around the plant base to prevent fungal infections.

If fungal issues like powdery mildew appear, apply an organic fungicide or a mild baking soda spray.


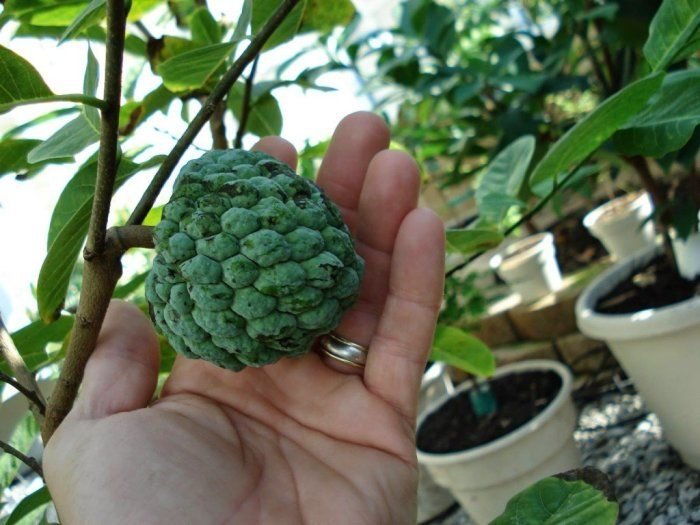
11. Flowering and Fruit Development

Custard apple trees usually start flowering within 2–3 years when grown from seed. The flowers are pale yellow-green and appear in clusters along the branches.

Encourage flowering by:

  • Providing consistent sunlight.
  • Reducing nitrogen fertilizers before the flowering season.
  • Ensuring good drainage and moderate watering.

Pollination can be a challenge since the flowers open at different times for male and female phases. Hand pollination can help increase fruit set:

  • Collect pollen from male flowers (open in the morning).
  • Use a small brush to transfer it to female flowers (open in the evening).

Within a few weeks, you’ll notice tiny green fruits beginning to form.


12. Harvesting Custard Apples

Custard apples are typically ready to harvest 3–4 months after flowering.

Signs of ripeness:

  • The fruit turns from dark green to light green or yellowish.
  • The knobs on the skin become more prominent and slightly separated.
  • The fruit feels slightly soft when pressed gently.

Harvest carefully using pruning shears—do not pull the fruit from the branch. Once picked, let it ripen fully at room temperature for a few days before eating.

Fresh, ripe custard apples can be enjoyed as-is or used in smoothies, desserts, and ice creams.


13. Additional Tips for Success

  • Spacing: If planting multiple trees, keep at least 3 meters between them.
  • Companion planting: Grow herbs like lemongrass or marigold nearby to deter pests.
  • Climate protection: In cooler regions, protect young plants with plastic covers or keep them indoors during winter.
  • Mulching: Regularly replenish mulch to maintain soil moisture and temperature.

Conclusion

Growing a custard apple tree from seed is one of the most satisfying gardening projects you can undertake. With patience, care, and the right conditions, those tiny black seeds can grow into lush, productive trees that provide shade, beauty, and delicious fruits for years to come.

From preparing the seeds and nurturing the seedlings to enjoying your first harvest, every step of this process brings joy and connection to nature. So start planting your sugar apple seeds today—and in a few years, you’ll be savoring the sweet, creamy rewards of your own tropical paradise right at home.

DIY Guide: Planting My “Giant” Soursop (Guanabana) Tree in the Ground – A Complete Step-by-Step Journey

DIY Guide: Planting My “Giant” Soursop (Guanabana) Tree in the Ground – A Complete Step-by-Step Journey

The soursop tree, also known as guanabana or graviola, is a tropical gem celebrated for its spiky green fruit and sweet, creamy pulp. Its distinct flavor—a mix of strawberry, pineapple, and citrus—makes it a favorite for juices, desserts, and natural remedies. Growing your own “giant” soursop tree in the ground is not only rewarding but also surprisingly simple when done with the right preparation and care.

In this comprehensive DIY guide, I’ll share a detailed journey of planting and growing a giant soursop tree directly in the ground—from choosing the right location and soil preparation to watering, fertilizing, and protecting the plant. Whether you’re a tropical fruit enthusiast or a first-time grower, this guide will help you cultivate your own thriving guanabana tree at home.


1. Why Grow a Giant Soursop Tree?

Soursop (Annona muricata) isn’t just a fruit tree—it’s a powerhouse of nutrition and natural health benefits. The fruit contains high levels of vitamin C, antioxidants, and unique compounds believed to boost immunity and energy. Beyond its health benefits, the soursop tree also brings lush greenery and tropical beauty to your garden.

Growing a giant soursop means cultivating a tree that can eventually reach up to 20 feet tall with strong, productive branches that bear multiple large fruits. When planted directly in the ground instead of containers, the roots have more room to spread, allowing faster growth, stronger structure, and higher fruit yield.

So, if you’re ready to grow your own “giant,” it’s time to get your hands in the soil!


2. Choosing the Perfect Location

The first and most critical step in growing soursop successfully is location selection. Soursop thrives in tropical and subtropical climates where the temperature stays consistently warm throughout the year.

Ideal conditions include:

  • Sunlight: Full sun exposure for at least 6–8 hours daily.
  • Temperature: 25°C to 32°C (77°F to 90°F). Avoid frost-prone or extremely cold areas.
  • Wind Protection: Soursop trees have large, delicate leaves that can tear easily in strong winds. Choose a spot shielded by a wall, fence, or other trees.
  • Drainage: The area must not retain water after heavy rainfall; waterlogging can quickly lead to root rot.

If your garden has heavy clay soil, it’s best to plant on a slightly elevated mound to improve drainage.


3. Preparing the Planting Site

Once you’ve chosen the perfect location, it’s time to prepare the ground for your soursop tree. The preparation step ensures the roots can expand easily and absorb the nutrients they need for healthy growth.

Step 1: Clear the area
Remove any weeds, grass, or debris from the planting site. Clear an area of at least 1.5 meters (5 feet) in diameter.

Step 2: Dig the planting hole
Dig a hole that’s about 60–70 cm deep and 60–70 cm wide. The size of the hole is crucial because it gives the roots space to spread and helps you fill it with nutrient-rich soil.

Step 3: Prepare the soil mix
Soursop trees prefer loamy, slightly acidic soil (pH 5.5–6.5). If your native soil is too heavy or sandy, improve it with organic matter.

Mix the following ingredients:

  • 50% garden soil
  • 30% compost or aged manure
  • 10% sand or perlite for aeration
  • 10% cocopeat or leaf mold for moisture retention

Add a handful of bone meal or wood ash to boost calcium and potassium levels, which promote healthy root growth and strong stems.


4. Selecting the Right Soursop Seedling

Choose a healthy, disease-free soursop seedling from a reputable nursery. You can grow soursop from seeds, but grafted or nursery-grown seedlings are preferred because they:

  • Bear fruit earlier (in 3–4 years instead of 5–6).
  • Are more resilient against pests and diseases.
  • Have predictable fruit size and quality.

Inspect the plant carefully:

  • The leaves should be glossy and dark green.
  • The stem should be sturdy and upright.
  • There should be no visible signs of fungus or root damage.

5. Planting the Soursop Tree in the Ground

Now comes the most exciting part—planting your giant soursop!

Step 1: Gently remove the seedling from its pot without disturbing the roots. If it’s root-bound, lightly loosen the roots with your fingers.

Step 2: Place the seedling in the center of the hole. Make sure the root ball is level with the surrounding soil—don’t bury it too deep.

Step 3: Fill the hole with your prepared soil mix, pressing lightly to remove air pockets. Leave a small basin-like depression around the base to collect water.

Step 4: Water the plant deeply right after planting. This helps settle the soil and provides moisture to the roots.

Step 5: Apply a thick layer (5–8 cm) of organic mulch (like straw, dried leaves, or coconut husk) around the base. This helps retain moisture, regulate soil temperature, and suppress weeds.


6. Watering and Early Care

During the first year, your soursop tree will focus mainly on root and branch development. Consistent watering is vital, especially in hot weather.

Watering tips:

  • Water deeply 2–3 times a week during dry seasons.
  • Reduce watering during the rainy season, ensuring soil doesn’t stay soggy.
  • Always water at the base, avoiding wetting the leaves to prevent fungal growth.

A DIY drip irrigation system using a plastic bottle can also help maintain steady moisture. Poke a few small holes in the cap, fill the bottle with water, and place it upside down near the roots—this allows slow, continuous watering.


7. Fertilizing for Strong Growth

Fertilization plays a key role in helping your soursop grow large, healthy, and fruitful. Use a balanced mix of organic and mineral nutrients.

First year (young plant):

  • Apply compost or organic fertilizer every 6–8 weeks.
  • Use an NPK fertilizer (10-10-10) to encourage leaf and root development.

After the second year:

  • Switch to fertilizers higher in potassium and phosphorus (5-10-15 or 8-12-20) to promote flowering and fruiting.
  • Add micronutrients like magnesium and calcium through dolomite lime or seaweed extract.

Avoid over-fertilizing—too much nitrogen can cause excessive leafy growth but delay flowering.


8. Pruning and Maintenance

Regular pruning ensures your “giant” soursop grows strong and manageable.

Pruning steps:

  • In the first year, pinch off the top of the main stem once it reaches about 1.2 meters to encourage side branches.
  • Remove any weak, crossing, or inward-growing branches.
  • Keep the canopy open for sunlight penetration and air circulation.

Pruning also helps the tree channel its energy into fruit production rather than unnecessary leaf growth.


9. Pest and Disease Control

Soursop trees can be prone to pests like fruit flies, aphids, and mealybugs, as well as fungal diseases in humid environments.

Natural pest control methods:

  • Spray neem oil or garlic extract every 2–3 weeks.
  • Use sticky traps to catch fruit flies.
  • Keep the area around the tree clean and free from fallen leaves or fruit.

If you notice black spots or powdery mildew, prune the affected parts and apply a mild organic fungicide.


10. Flowering and Fruiting Stage

Your soursop tree typically starts to flower within 3–4 years (earlier if grafted). Flowers are yellowish-green and have a strong, sweet scent that attracts pollinators.

Encourage flowering by:

  • Providing full sunlight.
  • Reducing nitrogen fertilizer before the flowering season.
  • Maintaining consistent watering during bud formation.

Once pollinated, the fruits develop slowly and mature in 4–5 months. Each fruit can weigh between 2 to 6 kilograms, depending on variety and care—truly a “giant” reward for your patience!


11. Harvesting Your Giant Soursop

Knowing when to harvest is crucial for the best taste and texture. Soursop fruits are ready to pick when:

  • The green skin turns slightly yellowish.
  • The spines become softer.
  • The fruit gives slightly when pressed gently.

Always harvest by cutting the stem instead of pulling the fruit. Handle it carefully, as soursop bruises easily.

After harvesting, you can refrigerate it for up to a week or use it immediately for smoothies, ice cream, or juice.


12. Long-Term Care and Sustainability Tips

Your soursop tree can live and produce for over 10 years with proper maintenance.

Here’s how to ensure long-term success:

  • Reapply compost around the base every 6 months.
  • Replace mulch regularly to maintain soil health.
  • Water consistently during fruiting seasons.
  • Allow bees and natural pollinators to access the flowers—avoid using chemical sprays.

Planting companion plants like lemongrass or marigold nearby can help repel pests naturally and improve biodiversity.


Conclusion

Planting a giant soursop (guanabana) tree in the ground is more than just a gardening project—it’s a journey of patience, nurturing, and reward. With proper care, your tree can become a lush centerpiece in your garden, offering shade, beauty, and delicious fruits season after season.

From soil preparation to harvesting, every step contributes to building a strong foundation for a fruitful future. So roll up your sleeves, grab your shovel, and start planting your very own “giant” soursop today—you’ll soon enjoy the satisfaction of tasting tropical sweetness straight from your backyard.

How to Grow a Small Durian Tree Using Drip Irrigation from Plastic Bottles: A Complete Guide for Home Gardeners

How to Grow a Small Durian Tree Using Drip Irrigation from Plastic Bottles: A Complete Guide for Home Gardeners

Durian, often called the “King of Fruits,” is famous for its rich aroma and creamy, flavorful flesh. Traditionally, durian trees are known to grow large and require vast spaces and tropical conditions to thrive. However, with modern gardening techniques, it’s now possible to grow small durian trees right at home—even in containers—using an innovative drip irrigation system made from recycled plastic bottles. This method not only conserves water but also promotes steady, healthy growth.

In this article, we’ll dive into the complete process of growing a small durian tree—from seed to fruit—using a homemade plastic bottle drip irrigation system. You’ll learn about choosing the right variety, preparing soil, managing nutrients, and maintaining ideal watering conditions to achieve strong and productive growth.


1. Why Grow a Small Durian Tree at Home?

Growing a small durian tree has become increasingly popular among gardeners who have limited space but still wish to enjoy fresh, homegrown durians. Mini or dwarf durian varieties are now available that are well-suited for containers and small backyards.

Some key benefits include:

  • Space Efficiency: Dwarf durian trees can be kept under 2–3 meters tall, perfect for patios or small gardens.
  • Water Conservation: Drip irrigation ensures efficient water use, minimizing waste and overwatering.
  • Sustainability: Using recycled plastic bottles helps reduce environmental waste.
  • Convenience: Container-grown durians are easier to maintain, prune, and harvest.

With the right techniques, you can enjoy durians from your own small-scale setup even if you live in an urban area.


2. Selecting the Right Durian Variety

Choosing the right variety is essential for successful small-scale cultivation. Look for dwarf or early-fruiting varieties, which are known to adapt better to confined environments and produce fruits faster.

Recommended small or compact varieties:

  • D197 (Musang King): Compact, flavorful, and a favorite among durian lovers.
  • D24 (Sultan): Moderate height and excellent fruit quality.
  • Monthong: Large fruit with creamy texture; manageable in pots when pruned correctly.
  • Chanee: Known for strong disease resistance and good adaptability.

When buying seedlings, choose grafted durian plants instead of seeds. Grafted plants bear fruit faster (within 4–6 years) and have consistent fruit quality.


3. Preparing the Ideal Growing Environment

Durian trees thrive in warm, humid tropical climates with well-draining soil. For small-scale or potted cultivation, it’s important to recreate these conditions as much as possible.

Key conditions:

  • Sunlight: At least 6–8 hours of direct sunlight daily.
  • Temperature: Between 25°C and 35°C (77°F–95°F).
  • Humidity: Moderate to high (70%–90%).

Container selection:
Use a large, durable pot—at least 50–70 cm in diameter and 50 cm deep. Ensure the pot has multiple drainage holes to prevent waterlogging.

Soil mix:
Durian roots dislike compact, soggy soil. Create a mix that’s rich yet well-draining:

  • 40% loamy garden soil
  • 30% compost or well-rotted manure
  • 20% sand or perlite
  • 10% cocopeat or rice husk for aeration

Add a handful of bone meal or organic fertilizer at the bottom of the pot to support root development.


4. Planting Your Small Durian Tree

  1. Fill the container two-thirds full with your soil mix.
  2. Remove the seedling from its nursery bag carefully without disturbing the roots.
  3. Place the plant in the center and fill the pot, leaving a 5–7 cm gap from the rim for watering space.
  4. Water thoroughly to help the soil settle around the roots.
  5. Place the pot in a partially shaded area for a few days before moving it into full sun.

Keep the young plant sheltered from strong winds or heavy rain during its first few months.


5. Creating a Drip Irrigation System from Plastic Bottles

Water management is crucial for durian growth. Overwatering can cause root rot, while underwatering can stress the tree. The drip irrigation system made from plastic bottles offers a simple, eco-friendly, and effective way to maintain consistent moisture.

You will need:

  • 1 or 2 large plastic bottles (1.5–2 liters each)
  • A sharp needle or thin nail
  • A string or wire for hanging the bottle (optional)

Step-by-step setup:

  1. Wash and clean the bottles thoroughly.
  2. Puncture 2–3 small holes near the bottle’s cap using a heated needle.
  3. Fill the bottle with water.
  4. Invert the bottle and place it near the base of the durian tree, with the holes facing downward.
  5. Adjust the hole size or number to control the drip rate (1–2 drops per second is ideal).

Alternatively, you can suspend the bottle above the plant and run a small tube or straw to the soil surface for a steady drip.

This system slowly releases water directly to the root zone, maintaining consistent soil moisture and preventing water loss through evaporation.


6. Watering Schedule and Fertilization

Watering:
Durian trees prefer slightly moist soil at all times but not waterlogged conditions. The drip irrigation system ensures steady hydration without excess. Check the soil regularly—if the top 2–3 cm feels dry, refill the bottle.

Fertilization:
Feed your durian tree every 4–6 weeks using organic or slow-release fertilizers.

Recommended feeding schedule:

  • Young plants (1–2 years): Balanced NPK fertilizer (15-15-15) for vegetative growth.
  • Mature plants (3+ years): Low nitrogen, higher phosphorus and potassium (10-20-20) to promote flowering and fruiting.
  • Supplement with compost tea, seaweed extract, or fish emulsion every few weeks for micronutrients.

Avoid over-fertilizing, as excessive nutrients may cause root burn or excessive vegetative growth at the expense of fruiting.


7. Pruning and Maintenance

Pruning helps control the height and shape of your durian tree, keeping it small yet productive.

Tips:

  • Prune the main stem when the tree reaches around 1 meter to encourage side branching.
  • Remove weak, dead, or crossing branches regularly.
  • Maintain 3–4 main branches for a balanced structure.
  • Ensure good airflow through the canopy to prevent fungal issues.

Regular pruning also makes it easier to manage light exposure and improves fruit quality later on.


8. Pest and Disease Management

Like other tropical fruit trees, durian can face pests such as aphids, mealybugs, and leaf miners, as well as fungal diseases like root rot and anthracnose.

Preventive care:

  • Keep the soil well-drained at all times.
  • Spray neem oil or garlic extract monthly as a natural pest deterrent.
  • Remove fallen leaves and debris from the base to prevent fungal buildup.
  • Rotate organic fungicides like copper sulfate if necessary.

Regular inspection helps catch issues early before they harm your young plant.


9. Flowering and Fruit Development

Durian trees grown in containers can start flowering within 4–6 years, depending on the variety and growing conditions. Flowering usually occurs during the dry season, followed by fruiting in the rainy season.

To encourage flowering:

  • Slightly reduce watering for 1–2 weeks before the flowering season.
  • Provide more sunlight exposure.
  • Apply potassium-rich fertilizer to support bud formation.

When flowers appear, maintain consistent soil moisture and avoid moving the pot, as durian flowers are sensitive to stress.


10. Harvesting Your Small Durian Tree

Durian fruits take about 90–120 days to mature after flowering. The fruits are typically ready when:

  • The outer husk turns slightly yellow or brown.
  • The aroma becomes stronger.
  • Some cracks appear near the fruit stem.

Cut the fruit carefully using garden shears or wait for it to drop naturally. Always handle the fruit gently to avoid damaging the spikes.


11. Advantages of Using Plastic Bottle Drip Irrigation

This simple technique offers several benefits:

  • Conserves water by delivering moisture slowly and directly to the roots.
  • Reduces plant stress caused by irregular watering.
  • Improves nutrient absorption due to consistent soil moisture.
  • Eco-friendly reuse of plastic waste materials.
  • Low cost and easy to set up with everyday items.

For small-scale home gardeners, this system makes durian cultivation more accessible and sustainable.


Conclusion

Growing a small durian tree using a plastic bottle drip irrigation system is an excellent way to combine innovation, sustainability, and tropical fruit gardening. With the right care, pruning, and water management, your small durian tree can thrive and bear delicious fruits right in your backyard or balcony.

This method proves that with creativity and patience, even the majestic durian—once thought to be exclusive to large orchards—can now be a part of your home garden. Start small, stay consistent, and enjoy the pride of harvesting your very own homegrown durians, nurtured drop by drop.

Unique Planting Jackfruit in Plastic Bottle with Natural Hormone | Growing Jackfruit Made Easy

Unique Planting Jackfruit in Plastic Bottle with Natural Hormone | Growing Jackfruit Made Easy

Growing a jackfruit tree doesn’t always require large plots of land or big garden spaces. Thanks to innovative and sustainable methods, it’s now possible to grow jackfruit right at home — even in a plastic bottle! This creative planting technique not only promotes recycling but also ensures better control over early-stage growth. When combined with a natural rooting hormone, it can significantly increase germination rates and produce healthy, fast-growing seedlings.

In this detailed guide, we’ll explore how to grow jackfruit in a plastic bottle using natural hormone, step-by-step, and learn how this simple, eco-friendly method can lead to great results — from seed germination to healthy plant growth.


Understanding the Jackfruit Tree

The jackfruit (Artocarpus heterophyllus) is one of the largest fruits that grow on trees, native to tropical regions like India, Bangladesh, and Southeast Asia. Known for its massive size, sweet aroma, and versatile use, the jackfruit is both a fruit crop and a food security plant due to its high yield and nutritional value.

Jackfruit trees thrive in warm, humid climates and well-drained soil. While traditional cultivation requires space, this project proves that you can start your own jackfruit tree in a plastic bottle, making it ideal for urban gardeners or those experimenting with small-scale propagation.


Why Use a Plastic Bottle for Planting?

Using a plastic bottle as a container has several advantages for growing jackfruit:

  1. Eco-Friendly Recycling: It’s a great way to reuse waste plastic bottles, reducing environmental impact.
  2. Mini Greenhouse Effect: The bottle traps heat and moisture, creating a humid environment perfect for germination.
  3. Root Observation: The transparent walls allow you to monitor root growth and moisture levels.
  4. Portability: You can easily move the setup to adjust sunlight exposure.
  5. Cost-Effective: It’s an affordable alternative to nursery trays or pots.

With a little creativity, you can turn a discarded bottle into a seed germination chamber for jackfruit!


Step 1: Collecting Jackfruit Seeds

Start with fresh, healthy jackfruit seeds. After enjoying the fruit, wash the seeds thoroughly to remove all pulp or sugary residue, as this can cause fungal growth.

Tips for seed preparation:

  • Select seeds from a fully mature jackfruit.
  • Avoid shriveled or damaged seeds.
  • Dry the seeds in shade for 24 hours — not under direct sunlight — to prevent cracking.

Remember: Jackfruit seeds lose viability quickly. It’s best to plant them within a few days of extraction.


Step 2: Preparing Natural Rooting Hormone

A natural rooting hormone helps stimulate faster and stronger root development. You can easily make it at home using common kitchen ingredients or plant extracts.

Popular natural hormone recipes:

  1. Aloe Vera Gel:
    • Scoop out fresh aloe vera gel and mix with water (1 part gel to 4 parts water).
    • Soak seeds in this solution for 4–6 hours.
    • Aloe vera contains enzymes and hormones that encourage cell growth and root formation.
  2. Coconut Water:
    • Use tender coconut water as a natural growth booster.
    • Soak the seeds overnight to enhance germination speed.
  3. Willow Water (optional):
    • Made by soaking young willow twigs in water for 24 hours.
    • It contains salicylic acid, a natural growth stimulator.

These natural hormones not only improve germination rates but also help the young seedlings resist stress and disease.


Step 3: Creating the Plastic Bottle Planter

Materials you’ll need:

  • 1 large plastic bottle (1.5 to 2 liters)
  • Sharp knife or scissors
  • Small stones or pebbles for drainage
  • Potting mix (garden soil + compost + sand)
  • Jackfruit seeds

Instructions:

  1. Cut the Bottle:
    • Cut the upper part of the plastic bottle about one-third from the top.
    • Keep the top part as a removable lid for humidity control.
  2. Add Drainage:
    • Place a layer of small stones or gravel at the bottom to prevent waterlogging.
  3. Prepare the Soil Mix:
    • Mix 40% garden soil, 40% compost, and 20% river sand for proper drainage and nutrition.
    • Fill the bottle with this potting mix, leaving 2 inches of space at the top.
  4. Plant the Seeds:
    • Soak the seeds in your natural rooting hormone solution.
    • Plant each seed 1 inch deep, flat side down.
    • Water lightly after planting.
  5. Cover the Bottle:
    • Place the top part of the bottle back on to create a greenhouse effect.
    • Punch a few small holes in the lid for ventilation.

Step 4: Caring for Your Seedlings

Light and Temperature:
Place the bottle in a warm, bright spot, but out of direct midday sunlight. Jackfruit seeds prefer temperatures between 25°C to 30°C (77°F to 86°F) for optimal germination.

Watering:
Keep the soil moist but not soggy. Excess moisture can cause rot. A spray bottle works best to maintain even humidity.

Ventilation:
Open the cap for 10–15 minutes daily to allow airflow and prevent mold formation inside the bottle.

Germination Period:
You’ll notice sprouts within 10 to 20 days. The natural hormone treatment helps speed up this process compared to untreated seeds.


Step 5: Transplanting the Seedlings

Once your jackfruit seedlings reach 4–6 inches tall and develop a strong root system, they are ready for transplantation.

Transplanting process:

  1. Carefully cut the bottle along the side to remove the seedling without damaging the roots.
  2. Prepare a larger pot or garden bed with rich, well-draining soil.
  3. Transplant the seedling, ensuring the root ball stays intact.
  4. Water immediately and keep the plant in partial shade for a few days to help it acclimate.

Step 6: Long-Term Care for Jackfruit Plant

As your jackfruit plant grows, follow these essential care tips to ensure healthy development:

1. Watering:
Water regularly, especially during dry spells. The soil should remain slightly moist but not waterlogged.

2. Sunlight:
Once established, jackfruit trees thrive in full sun — about 6–8 hours of direct sunlight daily.

3. Fertilizing:
Feed your plant every 4–6 weeks with a balanced organic fertilizer or compost tea. Nitrogen-rich fertilizers help in leafy growth during early stages, while potassium and phosphorus support fruiting later.

4. Pruning:
Trim weak or overlapping branches to improve airflow and shape the tree.

5. Pest and Disease Control:
Keep an eye out for aphids or mealybugs. Neem oil spray works effectively as a natural pesticide.

6. Re-Potting:
If growing in containers, re-pot every 1–2 years to allow root expansion and better growth.


Step 7: From Flower to Fruit

Jackfruit trees generally start flowering in 3 to 5 years, depending on care and growing conditions. With good nutrition and proper sunlight, the flowers will develop into the large, distinctive jackfruits.

Once mature, a healthy tree can yield 50 to 100 fruits per year, each weighing from 10 to 30 kilograms.


Benefits of Growing Jackfruit in Plastic Bottles

  • Space-Saving: Perfect for small gardens, balconies, or indoor experiments.
  • Eco-Conscious: Promotes upcycling and waste reduction.
  • Educational: A great project for students and plant enthusiasts.
  • Higher Germination Rate: Natural hormones boost success and plant vigor.

Final Thoughts

Growing a jackfruit tree in a plastic bottle with natural hormone is not just an innovative gardening experiment — it’s a symbol of sustainability and creativity. This method allows anyone, even those with limited space, to enjoy the journey of growing one of the world’s most fascinating fruit trees right from a humble seed.

With patience, care, and the right techniques, your small plastic bottle setup can become the beginning of a lush, fruit-bearing jackfruit tree — a true testament to the power of nature and human ingenuity combined.

Breadfruit Farming | How to Grow Breadfruit Tree for a Sustainable and Profitable Harvest

Breadfruit Farming | How to Grow Breadfruit Tree for a Sustainable and Profitable Harvest

The breadfruit tree (Artocarpus altilis) is one of the most fascinating and valuable tropical food trees in the world. Known for its high yield, nutritional value, and low maintenance, the breadfruit is gaining attention among home gardeners and commercial farmers alike. Whether you want to grow it for its delicious starchy fruit, its beautiful canopy, or its potential as a sustainable food crop, learning to cultivate breadfruit the right way is the first step toward success.

This guide will take you through everything you need to know about breadfruit farming — from propagation and planting to care, harvesting, and long-term maintenance.


1. Understanding the Breadfruit Tree

The breadfruit tree belongs to the Moraceae family, the same family as jackfruit and mulberry. It is native to the Pacific Islands but now grows widely across tropical regions like India, the Caribbean, Africa, and Southeast Asia.

Breadfruit trees are evergreen, fast-growing, and can reach 40–60 feet in height when mature. Their large, glossy leaves create a beautiful shade canopy, while the fruits — round, green, and spiky — can weigh 1–4 kg each. A single mature tree can produce up to 200 fruits per year, making it an excellent food source and an economic opportunity.


2. Climate and Growing Conditions

Breadfruit thrives in warm, humid tropical climates with consistent rainfall. To grow healthy trees, ensure these conditions:

  • Temperature: 21–32°C (70–90°F). The tree is sensitive to frost and cold winds.
  • Rainfall: Requires at least 1500–2500 mm of rainfall annually or supplemental irrigation.
  • Altitude: Performs best below 650 meters (2130 feet) above sea level.
  • Sunlight: Prefers full sun but can tolerate light shade during early growth.

Breadfruit trees do not tolerate drought or waterlogging for extended periods. They prefer consistent moisture but need well-drained soil to prevent root diseases.


3. Soil Requirements

Breadfruit grows best in deep, fertile, well-drained loamy soils. Avoid rocky or saline soils. The ideal pH range is 6.1–7.4 (slightly acidic to neutral).

If your soil is heavy clay, improve drainage by adding sand, compost, or organic matter. Raised beds or mounds can also help prevent water stagnation.

Before planting, enrich the soil with organic compost or well-decomposed manure. This boosts microbial activity and ensures strong root establishment.


4. Propagation Methods

There are several ways to propagate breadfruit, depending on your available resources and desired results:

(a) Root Cuttings (Most Common Method)

  • Select healthy root suckers (about 1 inch thick and 6–8 inches long) from a mature breadfruit tree.
  • Plant them horizontally in pots or directly in nursery beds, with 2 inches of soil covering them.
  • Keep the soil moist and shaded until shoots appear.
  • Transplant when they reach about 1 foot tall.

(b) Suckers from the Mother Tree

  • Dig around the base of a mature tree to find young shoots growing from roots.
  • Separate them with a portion of root attached.
  • Replant them in polybags with a mix of sand, compost, and soil.

(c) Air Layering

  • Select a healthy branch, remove a 1-inch ring of bark, and wrap it with moist sphagnum moss and plastic film.
  • After 6–8 weeks, roots form at the site.
  • Cut the branch and plant it in a nursery bed for hardening.

(Note: Breadfruit rarely produces viable seeds, so vegetative propagation ensures consistency in fruit quality and faster fruiting.)


5. Planting Breadfruit Trees

Once your seedlings are ready, it’s time to transplant them to the field or garden.

Step 1: Site Preparation

  • Choose an open, sunny area with fertile, well-draining soil.
  • Clear weeds and loosen the soil deeply (at least 2 feet).

Step 2: Spacing

  • Maintain spacing of 25–30 feet (7–9 meters) between trees.
  • In small gardens, you can plant closer (15–20 feet apart), but allow good airflow.

Step 3: Planting Hole Preparation

  • Dig holes about 60 cm wide and 60 cm deep.
  • Mix the topsoil with compost or organic manure before refilling.
  • Plant the seedling at the same depth as it was in the nursery pot.
  • Water immediately after planting.

Mulch around the base to retain moisture and prevent weeds.


6. Watering and Irrigation

During the first 1–2 years, young breadfruit trees require regular watering to establish strong roots.

  • Frequency: Water twice a week in dry weather, once a week during the rainy season.
  • Mature trees: Are drought-tolerant but still benefit from occasional deep watering during prolonged dry spells.

Avoid standing water around the roots — it can cause fungal diseases or root rot.


7. Fertilization and Soil Management

Breadfruit trees respond well to organic fertilizers. Apply compost, cow dung, or green manure regularly to maintain fertility.

For more targeted feeding:

  • Young trees: Apply a balanced fertilizer (10-10-10 NPK) every 3–4 months.
  • Mature trees: Use fertilizers rich in phosphorus and potassium (5-10-15 NPK) to enhance flowering and fruiting.

Apply fertilizers around the drip line (edge of the canopy) and lightly mix into the soil.

Keep the base mulched with dry leaves or grass to conserve moisture and suppress weeds.


8. Pruning and Maintenance

Proper pruning helps maintain tree shape, improves sunlight penetration, and encourages fruiting.

  • Formative Pruning: Start when the tree is young. Maintain a single main trunk and remove low branches.
  • Maintenance Pruning: Annually remove dead, weak, or crossing branches.
  • Height Control: Limit height to 15–20 feet for easier harvesting and better management.

Remove any suckers growing from the base that divert energy from the main tree.


9. Pests and Diseases

Breadfruit trees are relatively hardy but can occasionally face pest and disease issues.

Common Pests:

  • Fruit flies: Cause fruit damage. Use traps or harvest early to prevent infestation.
  • Mealybugs and scale insects: Suck sap from leaves and stems. Control with neem oil or insecticidal soap.

Common Diseases:

  • Root rot: Caused by poor drainage. Ensure proper aeration and avoid overwatering.
  • Leaf spot or mildew: Remove affected leaves and spray organic fungicides if necessary.

Regular monitoring and maintaining a clean orchard help prevent problems naturally.


10. Flowering and Fruiting

Breadfruit trees usually begin to bear fruit within 3–5 years of planting (from root cuttings or air-layered plants).

  • Flowering: Occurs once or twice a year, depending on climate.
  • Pollination: Breadfruit trees are generally self-pollinating, though wind and insects can assist.
  • Fruiting Season: In most tropical areas, fruits ripen between June and October.

Each tree can yield 50–200 fruits annually, and once mature, production continues for decades.


11. Harvesting Breadfruit

Timing the harvest is essential for flavor and texture.

  • Mature green stage: Ideal for cooking like potatoes or plantains.
  • Fully ripe stage: The skin turns yellowish and starts to split, revealing soft, sweet flesh suitable for desserts.

To harvest:

  • Use a long-handled cutter or pole to gently twist fruits off the branch.
  • Avoid dropping the fruit, as it bruises easily.

Fresh breadfruit has a short shelf life — it lasts about 3–5 days at room temperature but can be refrigerated or processed into chips, flour, or baked goods.


12. Economic and Nutritional Value

Breadfruit farming holds significant promise both economically and nutritionally.

  • Nutritional Benefits: Breadfruit is rich in complex carbohydrates, fiber, potassium, and vitamins A and C. It’s gluten-free and an excellent source of plant-based energy.
  • Economic Value: The fruits, leaves, and wood all have uses. The fruit can be sold fresh, processed into chips or flour, or used in traditional cuisines.

One mature tree can yield over 500 kg of fruit annually, providing excellent returns for small-scale farmers or agroforestry projects.


13. Sustainability and Future Potential

Breadfruit is often called a “Tree of the Future” because of its role in food security and environmental sustainability.

  • It requires minimal inputs once established.
  • Helps reduce soil erosion and improve biodiversity.
  • Offers consistent yields in tropical climates, even under changing weather patterns.

Many agricultural scientists see breadfruit as a climate-resilient crop capable of addressing food shortages in tropical nations.


14. Final Thoughts

Growing a breadfruit tree is an investment that pays back for generations. With its high productivity, low maintenance, and nutritional value, it’s a perfect addition to both home gardens and commercial farms.

Whether you’re a small-scale farmer or a home grower, all you need is a warm climate, a little care, and patience — and in a few years, you’ll enjoy an abundance of this versatile, sustainable superfruit.

So, plant a breadfruit tree today and watch it become a living legacy of nourishment, shade, and sustainability!

How to Grow Dragon Fruit in Containers: Easy Step-by-Step Guide from Stem to Harvest

How to Grow Dragon Fruit in Containers: Easy Step-by-Step Guide from Stem to Harvest

Dragon fruit, also known as pitaya, is one of the most exotic and visually stunning fruits you can grow at home. With its bright pink or yellow skin, speckled flesh, and refreshing sweetness, this tropical cactus plant not only produces delicious fruit but also adds a touch of beauty to your garden or balcony. The good news? You can grow dragon fruit easily in containers — even if you live in a small space or don’t have a backyard!

In this detailed, step-by-step guide, we’ll walk you through everything you need to know about growing dragon fruit from stem cuttings in containers, from preparation and planting to care and harvest.


1. Understanding the Dragon Fruit Plant

Dragon fruit comes from a climbing cactus species known as Hylocereus. It thrives in tropical and subtropical climates, but when grown in containers, it can adapt well to different environments with the right care.

There are three main types of dragon fruit:

  1. White-fleshed (Hylocereus undatus): Pink skin with white flesh — the most common type.
  2. Red-fleshed (Hylocereus costaricensis): Pink-red skin with deep red flesh and sweeter taste.
  3. Yellow dragon fruit (Selenicereus megalanthus): Yellow skin and white flesh — smaller but very sweet.

Dragon fruit plants are fast-growing, drought-tolerant, and can live for decades if maintained properly. Because they are climbing cacti, they need support to grow upward and produce more fruit.


2. Why Grow Dragon Fruit in Containers?

Growing dragon fruit in containers has several advantages:

  • Space-saving: Perfect for balconies, patios, or small gardens.
  • Easy to manage: You can move the pot for sunlight or protection during harsh weather.
  • Pest control: Easier to monitor and prevent pest infestations.
  • Controlled growth: Ideal for beginners or urban gardeners.

With the right setup and patience, you can enjoy multiple harvests every year once your plant matures.


3. Materials You’ll Need

Before you begin, gather these basic items:

  • A healthy dragon fruit stem cutting (12–15 inches long)
  • A large container (at least 15–20 inches deep and wide)
  • Well-draining potting mix (cactus mix or sandy loam soil)
  • Perlite or sand for aeration
  • A sturdy support pole or trellis
  • Watering can or spray bottle
  • Organic compost or fertilizer

If you’re using a recycled container, make sure it has good drainage holes at the bottom.


4. Preparing the Dragon Fruit Cutting

Growing dragon fruit from seed takes years, but using a stem cutting allows you to get fruit much faster — usually within 1–2 years.

Here’s how to prepare the cutting properly:

  1. Choose a Healthy Parent Plant:
    Look for a mature dragon fruit plant that’s free from pests and diseases.
  2. Cut a Healthy Segment:
    Using a sterilized knife, cut a 12–15 inch segment of the stem. The cutting should have at least 3–4 ribs or “arms.”
  3. Let It Heal:
    Place the cutting in a shaded, dry place for 5–7 days to allow the cut end to callous over.
    This step is essential — it prevents rot when planted in soil.

Once the cutting is dry and firm at the base, it’s ready for planting.


5. Preparing the Container and Soil

Dragon fruit prefers well-draining, slightly acidic soil (pH 6–7). Poor drainage can lead to root rot, so make sure your container and soil are both suitable.

Step 1: Choose the Right Container

  • Pick a large, deep pot (minimum 15 gallons) with several drainage holes.
  • You can use a plastic, ceramic, or concrete pot — just ensure it allows excess water to escape.

Step 2: Prepare the Soil Mix

Mix the following for best results:

  • 50% garden soil or cactus potting mix
  • 25% sand or perlite
  • 25% organic compost or coco peat

This combination keeps the soil light, aerated, and nutrient-rich.

Step 3: Add Support

Insert a wooden or concrete pole in the center of the container. Dragon fruit vines will climb this support as they grow. A trellis or a round frame at the top helps manage the plant’s weight during fruiting.


6. Planting the Cutting

Once your soil and container are ready, it’s time to plant the dragon fruit cutting.

  1. Insert the Cutting:
    Bury the calloused end of the cutting about 2–3 inches deep in the soil.
    Make sure it’s upright and close to the support pole.
  2. Firm the Soil:
    Gently press the soil around the base to keep the cutting stable.
  3. Initial Watering:
    Lightly water the soil — just enough to make it slightly moist.
    Avoid overwatering at this stage, as the cutting can rot before rooting.
  4. Placement:
    Keep the container in bright, indirect sunlight for the first two weeks.
    Once new growth appears, you can move it to a sunny location.

7. Caring for Your Dragon Fruit Plant

Proper care is crucial to help your dragon fruit grow strong and productive.

Watering:

  • Water once or twice a week.
  • Allow the soil to dry slightly between waterings.
  • Reduce watering during the winter or rainy season.

Sunlight:

  • Dragon fruit needs 6–8 hours of direct sunlight daily.
  • If growing indoors, place near a south-facing window or use grow lights.

Fertilizing:

  • Feed the plant with balanced fertilizer (10-10-10) once a month during the growing season.
  • You can also use organic compost or worm castings for natural nutrition.
  • Stop fertilizing during dormancy (usually winter months).

Pruning:

  • Prune excess side branches to encourage vertical growth.
  • Remove any damaged or diseased stems.
  • Once the plant reaches the top of the pole, allow it to branch out horizontally — this is where flowers and fruits form.

8. Supporting and Training the Vines

As a climbing cactus, dragon fruit needs strong support to grow upright and bear fruit efficiently.

  • Tie the main stem loosely to the pole using soft garden ties.
  • When it reaches the top, let the branches droop over the frame — this triggers flowering.
  • Avoid letting the vine sprawl uncontrolled, as it can lead to tangled, weak growth.

9. Flowering and Pollination

Dragon fruit plants typically start flowering within 8–12 months of planting. The large, fragrant white flowers bloom at night and last only one day — making them quite a sight!

  • Most varieties are self-pollinating, but some may require hand pollination.
  • To hand-pollinate, use a small brush to transfer pollen from the stamens (male part) to the stigma (female part).
  • Do this late at night or early morning while the flower is open.

Within a few weeks, the pollinated flowers will develop into small green fruits that gradually turn pink or yellow as they ripen.


10. Harvesting Dragon Fruit

Dragon fruits are usually ready for harvest 30–50 days after flowering. You’ll know they’re ripe when:

  • The fruit’s color changes to bright pink or yellow.
  • The small scales on the skin start to dry slightly.
  • The fruit gives a gentle yield when pressed.

Use garden scissors or a knife to cut the fruit off the stem — don’t twist or pull. Freshly harvested dragon fruits are juicy, mildly sweet, and packed with nutrients like vitamin C, magnesium, and antioxidants.


11. Common Problems and Solutions

ProblemCauseSolution
Stem rotOverwateringImprove drainage, water less frequently
Yellowing stemsToo much sunlight or nutrient deficiencyMove to partial shade, add organic compost
No flowers/fruitsLack of sunlight or pruningEnsure 6+ hours of light, prune to encourage flowering
Pests (aphids, ants)Poor airflow or excess moistureUse neem oil or organic insecticide spray

With the right care, dragon fruit plants are relatively low-maintenance and resilient.


12. Final Tips for Success

  • Always use a sturdy support system to manage growth and fruit load.
  • Keep pruning regularly to prevent overcrowding.
  • Repot your dragon fruit every 2–3 years to refresh the soil and encourage healthy root growth.
  • Be patient — mature plants can yield 20–30 fruits or more per year once established!

13. Conclusion

Growing dragon fruit in containers is one of the most rewarding gardening projects you can undertake. From the moment you plant a simple stem cutting to the day you harvest your first vivid pink fruit, every step of the journey is filled with excitement and satisfaction.

Whether you live in an apartment, on a balcony, or have limited outdoor space, this container-growing method ensures you can enjoy fresh, homegrown dragon fruits right at home. With proper care, sunlight, and a little patience, your dragon fruit plant will thrive for years, producing both beauty and bounty.

So go ahead — grab a healthy cutting, prepare your container, and start growing your own dragon fruit today! It’s easier than you think, and the results are absolutely delicious.

How to Grow Kiwi Plants from Kiwi Fruit in Water Using Plastic Bottles – Easy Step-by-Step Guide

How to Grow Kiwi Plants from Kiwi Fruit in Water Using Plastic Bottles – Easy Step-by-Step Guide

Growing your own kiwi plants at home might sound challenging, but it’s actually a fun and rewarding project you can do using just a few household materials. You don’t need a big garden or expensive supplies — just a ripe kiwi fruit, some water, and a few plastic bottles. In this detailed guide, we’ll walk you through the entire process of how to grow kiwi plants from kiwi fruit in water, right from seed extraction to germination and seedling care.

If you’ve ever wanted to grow your own kiwi vine at home, this step-by-step guide will show you how to do it easily, even in small spaces.


1. Understanding Kiwi Plants

Kiwi (Actinidia deliciosa) is a fast-growing, deciduous vine that produces delicious, fuzzy brown fruits with bright green, tangy flesh. Native to China and popular worldwide, kiwi plants thrive in temperate climates and require full sunlight, good drainage, and patience — as it can take 3 to 5 years for the vines to start producing fruits.

There are two main types of kiwi plants:

  • Fuzzy Kiwi (Actinidia deliciosa): The common supermarket kiwi.
  • Hardy Kiwi (Actinidia arguta): A smaller, smooth-skinned variety that tolerates colder climates.

The good news is — both can be grown from seeds if you’re patient and give them the right care.


2. What You’ll Need

Before you begin, gather these simple materials:

  • A ripe kiwi fruit
  • A knife and spoon
  • Water
  • Paper towels or tissue
  • A ziplock or small plastic container
  • Two transparent plastic bottles
  • Potting mix or soil (for transplanting later)
  • Spray bottle (for misting)
  • Sunlight or a bright window spot

All of these are inexpensive and easily available, making this an ideal DIY project for home gardeners.


3. Extracting Kiwi Seeds from the Fruit

  1. Cut the Kiwi: Slice your ripe kiwi fruit in half using a clean knife.
  2. Scoop Out the Pulp: Use a spoon to scoop out the seeds and pulp into a bowl.
  3. Separate the Seeds: Add some water to the bowl and swirl gently. The seeds will separate from the pulp.
  4. Rinse Thoroughly: Pour out the floating pulp and retain the seeds that sink to the bottom. Rinse them several times until they are clean and free from fruit residue.
  5. Dry the Seeds: Spread the clean seeds on a paper towel and allow them to dry for a few hours.

4. Germinating Kiwi Seeds in Water

Now comes the fun part — germinating the seeds using water bottles. This water propagation method is simple, efficient, and lets you watch the early stages of plant growth.

Step 1: Prepare the Plastic Bottle

  • Cut a plastic bottle in half.
  • Fill the bottom part with about 2 inches of clean water.
  • Make small holes or slits near the top edge for ventilation.

Step 2: Place the Seeds on a Wet Paper Towel

  • Wet a paper towel and squeeze out excess water.
  • Spread the kiwi seeds evenly on it.
  • Fold the towel gently so the seeds are sandwiched inside.

Step 3: Insert into the Bottle

  • Place the folded towel inside the top half of the bottle (inverted like a lid) so it stays moist from the humidity inside.
  • Cover loosely with the bottle cap or plastic wrap to maintain moisture.

Step 4: Keep Warm and Bright

  • Place your setup in a warm area with indirect sunlight.
  • Ideal temperature: 20–25°C (68–77°F).

Step 5: Wait for Germination

  • Check daily to ensure the towel stays moist.
  • In about 10–15 days, you’ll notice small white roots emerging.
  • When the roots are about 1 cm long, the seedlings are ready for transplanting.

5. Transplanting Kiwi Seedlings

Once your kiwi seeds have sprouted, they need to move into soil to grow stronger roots.

Step 1: Prepare Containers

  • Use the top portion of another plastic bottle or a small pot.
  • Fill it with well-draining potting soil (a mix of garden soil, compost, and sand works great).

Step 2: Plant Carefully

  • Use tweezers or your fingers to gently pick up each seedling.
  • Plant them about 1 cm deep in the soil, with the root facing downward.
  • Lightly cover and mist the soil.

Step 3: Water and Light

  • Keep the soil moist but never soggy.
  • Place the container in bright indirect sunlight or partial shade.

6. Caring for Young Kiwi Plants

Proper care at this stage ensures healthy vines later.

Watering:

  • Keep the soil consistently moist.
  • Water lightly once the top layer of soil starts drying.
  • Avoid overwatering, as kiwi seedlings are prone to rot.

Sunlight:

  • Kiwi seedlings need 6–8 hours of sunlight daily.
  • Gradually expose them to direct sunlight as they grow stronger.

Fertilizing:

  • After 4–6 weeks, feed the young plants with a diluted liquid fertilizer once every two weeks to promote healthy leaf growth.

Temperature:

  • Kiwi plants prefer a mild, frost-free environment.
  • Move them indoors if temperatures drop below 10°C (50°F).

7. Transferring to Bigger Containers or Ground

When your kiwi seedlings grow about 6–8 inches tall, it’s time to transplant them to a larger pot or garden bed.

For Containers:

  • Choose a large container (at least 18–24 inches deep).
  • Use rich, loamy soil with compost for nutrients.
  • Add a trellis or support pole since kiwi plants are climbers.

For Garden Planting:

  • Select a sunny, sheltered area.
  • Space plants about 10–12 feet apart.
  • Ensure good drainage and protection from strong winds.

8. Training and Supporting the Kiwi Vine

Kiwi vines grow rapidly and can spread widely. Training them on trellises, fences, or pergolas helps manage their growth.

  • Use garden twine or soft ties to guide stems upward.
  • Prune regularly to remove weak or tangled growth.
  • Encourage branching by pinching off the top of the main vine once it reaches the desired height.

9. Male and Female Kiwi Plants

Kiwi plants are usually dioecious, meaning male and female flowers grow on separate plants. To get fruit, you need at least:

  • One male plant for every 5–6 female plants.

Seed-grown plants don’t always show their gender early, so patience is key. Once flowering begins (usually after 3–5 years), you can identify them:

  • Female flowers: Have a central pistil.
  • Male flowers: Produce abundant pollen but no pistil.

If you only want to grow kiwi vines for greenery, a single plant is fine. But for fruit, you’ll need both sexes.


10. Harvesting Kiwi Fruits

If all goes well, your kiwi plants will begin flowering in about 3–5 years. The fruits usually ripen in late summer to early fall.

  • Harvest when they’re plump and slightly soft to the touch.
  • Store unripe fruits at room temperature; they’ll continue to ripen.
  • Fresh homegrown kiwis are sweeter and more aromatic than store-bought ones!

11. Common Problems and Solutions

ProblemCauseSolution
Seeds not germinatingLow temperature or drynessKeep warm and moist
Seedlings turning yellowOverwatering or lack of nutrientsImprove drainage and use mild fertilizer
Fungal growthExcess moisture or poor airflowSterilize containers and avoid overwatering
Slow growthInsufficient lightMove to a sunnier location

12. Final Thoughts

Growing kiwi plants from seeds in water using plastic bottles is an exciting way to bring life into your home gardening routine. It’s eco-friendly, inexpensive, and lets you witness every stage of plant growth — from tiny seeds to lush green vines.

While it takes patience and care to reach the fruiting stage, the joy of watching your own kiwi plant thrive is worth the wait. Whether you want to decorate your balcony with climbing greenery or eventually harvest your own homegrown kiwis, this simple propagation method is the perfect way to begin your journey.


How to Grow Persimmons in Containers: A Complete Guide to Sweet, Homegrown Fruit

How to Grow Persimmons in Containers: A Complete Guide to Sweet, Homegrown Fruit

Persimmons are among the most beautiful and delicious fruits you can grow at home. With their glossy leaves, bright orange fruits, and sweet, honey-like flavor, persimmon trees add both beauty and bounty to your garden. The best part? You don’t need a big yard to enjoy them — persimmons grow beautifully in containers, making them perfect for patios, balconies, and small gardens.

In this detailed 1200-word guide, we’ll walk you through everything you need to know about how to grow persimmons in containers, from choosing the right variety and pot to soil mix, watering, pruning, and fruiting care. By the end, you’ll have the confidence and know-how to enjoy your very own harvest of sweet, sun-ripened persimmons right at home.


1. Why Grow Persimmons in Containers?

Growing persimmons in containers is an excellent choice for gardeners with limited space or less-than-ideal soil conditions. Container growing allows you to control the soil type, watering, and sunlight exposure — and even move your tree indoors during extreme weather.

Here are some key benefits of growing persimmons in pots:

  • Space-saving: Ideal for balconies, terraces, and small gardens.
  • Mobility: You can move the container for sunlight, protection, or decoration.
  • Pest control: Easier to monitor and prevent pests or diseases.
  • Controlled growth: Container trees remain smaller and easier to manage.
  • Extended growing zones: You can grow persimmons in cooler regions by bringing the pot indoors during winter.

If you dream of growing your own fruit trees but lack space, persimmons are one of the best candidates for container gardening.


2. Choosing the Right Persimmon Variety

Not all persimmon trees are suitable for containers. You’ll want compact or dwarf varieties that thrive in limited root space and still produce well.

Persimmons come in two main types:

  • Astringent varieties – Must be fully ripe (soft) before eating. Example: Hachiya
  • Non-astringent varieties – Can be eaten while firm, like an apple. Example: Fuyu

For container growing, the non-astringent ‘Fuyu’ persimmon is the top choice. It’s compact, productive, and offers delicious, crisp fruit. Other good varieties include:

  • ‘Jiro’ – Compact tree with large, sweet fruit.
  • ‘Izu’ – Early ripening and suitable for smaller spaces.
  • ‘Saijo’ – Astringent type but grows well in pots.
  • ‘Suruga’ – Excellent sweetness and moderate size.

Choose a grafted tree from a reputable nursery — grafted trees bear fruit faster (usually within 2–3 years) compared to seed-grown ones.


3. Selecting the Right Container

Persimmon trees need space for their roots to spread, so choosing the right container is critical for healthy growth.

Container Requirements:

  • Size: Start with a pot at least 18–24 inches in diameter and depth. For mature trees, upgrade to a 25–30 gallon container.
  • Material: Choose plastic, ceramic, or wooden pots with good insulation. Avoid metal pots that overheat in sunlight.
  • Drainage: Ensure the pot has multiple drainage holes to prevent waterlogging. You can place a few stones or broken pottery at the bottom for better airflow.

If you’re growing in a cooler region, use lightweight containers (like plastic) so you can move them easily during winter.


4. The Ideal Soil Mix for Persimmons

Persimmons prefer well-draining, slightly acidic soil (pH 6.0–6.5). Good drainage is crucial because persimmon roots dislike sitting in soggy conditions.

Recommended Soil Mix:

  • 40% garden soil
  • 30% compost or aged manure
  • 20% coco peat or peat moss
  • 10% sand or perlite for drainage

You can also use a high-quality potting mix designed for fruit trees, enriched with organic matter. Before planting, mix in some slow-release organic fertilizer or bone meal for a nutrient boost.


5. Planting a Persimmon Tree in a Container

Here’s a step-by-step guide to planting your persimmon tree:

  1. Fill the pot halfway with your prepared soil mix.
  2. Position the tree in the center of the container. Make sure the graft union (a small bulge near the base) stays above soil level.
  3. Fill with soil around the roots, pressing gently to remove air pockets.
  4. Water thoroughly after planting to help the soil settle.
  5. Add mulch (like straw, leaves, or bark) on top to retain moisture and regulate temperature.

After planting, place the pot in a sunny location and ensure the soil remains consistently moist during the early weeks.


6. Sunlight and Temperature Requirements

Persimmons are sun-loving trees. They thrive in full sunlight — at least 6–8 hours of direct sun daily.

If you’re growing your persimmon tree indoors or on a shaded balcony, make sure it gets enough light. You can supplement with grow lights during shorter winter days.

Temperature needs:

  • Ideal range: 20°C to 35°C (68°F–95°F).
  • Mature trees can tolerate light frost, but young trees should be protected below -2°C (28°F).
  • In very hot climates, provide some afternoon shade to prevent leaf burn.

7. Watering Your Persimmon Tree

Container trees dry out faster than those planted in the ground, so consistent watering is key.

Watering guidelines:

  • Keep the soil evenly moist, especially during the growing season (spring to autumn).
  • Avoid overwatering — soggy soil leads to root rot.
  • Water deeply until it drains out of the bottom holes.
  • In winter, reduce watering as the tree goes dormant.

To check moisture, insert your finger into the soil — if the top 2 inches feel dry, it’s time to water.

Mulching also helps retain soil moisture and reduces the frequency of watering.


8. Fertilizing Container Persimmons

Persimmons are moderate feeders. They don’t need excessive fertilizer, but a balanced feeding schedule will support strong growth and fruiting.

Fertilizing schedule:

  • Spring: Apply a balanced fertilizer (10-10-10) or organic compost when new growth begins.
  • Summer: Feed once more with a potassium-rich fertilizer (like banana peel compost or bone meal) to encourage fruiting.
  • Autumn/Winter: Stop fertilizing as the tree enters dormancy.

Avoid high nitrogen fertilizers — they promote leafy growth instead of fruit production. Organic options like fish emulsion, compost tea, or well-rotted manure are perfect for container-grown persimmons.


9. Pruning and Training Your Persimmon Tree

Pruning is essential to shape your persimmon tree, improve airflow, and encourage fruiting.

When to prune:

  • Late winter or early spring, before new buds appear.

How to prune:

  1. Remove any dead, diseased, or crossing branches.
  2. Cut back long shoots to encourage side branching.
  3. Maintain an open, vase-shaped canopy to allow sunlight to reach all parts.
  4. For young trees, prune to establish 3–4 strong main branches.

If your tree becomes too tall for your container, trim the top to control its size. Regular pruning will keep it compact and productive.


10. Pollination and Flowering

Most modern persimmon varieties are self-pollinating, which means they don’t require another tree to produce fruit. However, having two trees nearby (even in separate pots) can sometimes increase yields.

Flowering time:
Persimmon trees typically bloom in late spring to early summer. The small, bell-shaped flowers develop into fruit by late summer or autumn.

To attract pollinators like bees, you can plant flowering herbs such as basil or marigold nearby.


11. Harvesting Your Persimmons

The wait for your first fruit is worth it! Container-grown persimmons usually start producing in 2–3 years (for grafted trees).

Harvest timing:

  • Astringent varieties (Hachiya): Harvest when soft and deep orange.
  • Non-astringent varieties (Fuyu, Jiro): Pick when firm and fully colored.

To harvest, twist the fruit gently or snip it off with pruning shears, leaving a short stem attached. Handle gently — ripe persimmons bruise easily.

Store ripe fruit in the refrigerator or dry them for long-lasting treats.


12. Common Problems and Solutions

1. Yellowing leaves: Overwatering or poor drainage. Improve soil aeration and adjust watering.
2. Fruit drop: Caused by stress, irregular watering, or high temperatures. Keep moisture consistent.
3. Pests: Watch for aphids, mealybugs, and scale insects. Treat with neem oil or insecticidal soap.
4. Leaf spots: Ensure good airflow and avoid overhead watering. Remove affected leaves.
5. No fruiting: Ensure sufficient sunlight and avoid overfertilizing with nitrogen.

With proper care, most problems can be prevented or corrected quickly.


13. Overwintering Container Persimmons

If you live in a region with cold winters, you’ll need to protect your persimmon tree from frost.

Winter protection tips:

  • Move the container to a sheltered location (garage, greenhouse, or indoors near a sunny window).
  • Reduce watering significantly — just enough to prevent the soil from drying out completely.
  • Mulch the base heavily with straw or leaves.
  • If kept outdoors, wrap the container with burlap or bubble wrap to insulate roots.

Once spring arrives, move the tree back outdoors gradually to re-acclimate it to sunlight.


14. Health Benefits of Persimmons

Homegrown persimmons aren’t just tasty — they’re also packed with nutrients.

Nutritional benefits include:

  • High in vitamin A and C, boosting immunity and eye health.
  • Rich in antioxidants, helping reduce inflammation.
  • Good source of fiber, aiding digestion.
  • Low in fat and cholesterol-free.

Enjoy them fresh, dried, or in smoothies, salads, and desserts for a naturally sweet treat that’s also healthy.


15. Final Thoughts

Growing persimmons in containers is easier than you might think. With the right variety, soil mix, and care routine, you can enjoy a thriving, compact fruit tree that rewards you with vibrant, sweet fruits year after year.

The key to success is consistency — provide sunlight, proper watering, and moderate feeding. Be patient, as persimmons take a little time to establish, but once they do, they’ll become one of your most cherished plants.

How to Plant a Fig Tree at Home: Everything You Need to Know for Fresh, Sweet Harvests

How to Plant a Fig Tree at Home: Everything You Need to Know for Fresh, Sweet Harvests

There’s nothing quite like plucking a ripe, juicy fig straight from your own garden. Fig trees (Ficus carica) are ancient fruit bearers that have been cultivated for thousands of years, prized for their delicious flavor, nutritional richness, and easy-growing nature. Whether you have a spacious backyard or a small patio, you can successfully plant and grow a fig tree right at home — and enjoy a fresh supply of figs season after season.

In this comprehensive 1200-word guide, we’ll walk you through everything you need to know before planting a fig tree, from choosing the right variety to soil preparation, planting, watering, pruning, and long-term care. Let’s get started on your journey to growing one of nature’s sweetest fruits!


1. Why Grow a Fig Tree at Home?

Figs are not just delicious — they’re also among the easiest fruit trees to grow, especially in warm and temperate climates. Here’s why growing a fig tree at home is such a rewarding experience:

  • Low maintenance: Fig trees adapt well to a variety of soils and require minimal care once established.
  • Fast fruiting: Many fig varieties begin to produce fruit within two years of planting.
  • Nutrient-rich fruit: Figs are packed with fiber, calcium, potassium, and antioxidants.
  • Compact and versatile: They grow beautifully in containers or directly in the ground, making them suitable for small spaces.
  • Decorative appeal: With their broad, lush leaves, fig trees add beauty and shade to any garden.

2. Choosing the Right Fig Variety

Before planting, you’ll need to select a fig variety suited to your local climate and growing space. There are two main types of figs: common figs (which self-pollinate) and Caprifigs (which require pollination by fig wasps — not ideal for home gardens).

For home gardeners, common fig varieties are best. Some popular choices include:

  • ‘Brown Turkey’: Cold-hardy, reliable, and produces sweet fruit with a light brown skin.
  • ‘Black Mission’: One of the most popular figs; dark purple skin with rich, honeyed flavor.
  • ‘Kadota’: Pale green-yellow skin with a mild, sweet taste — great for preserves.
  • ‘Celeste’: Small, brownish-purple fruit; very sweet and cold-tolerant.
  • ‘Chicago Hardy’: Extremely cold-hardy and productive — perfect for northern climates.

If you’re new to fig growing, start with one of these reliable, self-pollinating varieties.


3. Where to Plant a Fig Tree

Figs thrive in warm, sunny locations. When choosing a spot in your garden or balcony, keep the following in mind:

  • Sunlight: Choose a location that gets at least 6–8 hours of direct sunlight daily.
  • Shelter: Protect the tree from strong winds and frost. Plant near a wall or fence if possible, which also helps reflect heat.
  • Space: Figs can spread widely — if planting in the ground, give each tree 10–15 feet of space from other plants or structures.
  • Container growing: If you’re short on space, grow your fig in a large container (at least 18–24 inches wide and deep). Containers also help control size and make overwintering easier.

4. Preparing the Soil

Figs prefer well-draining soil that’s slightly acidic to neutral (pH 6.0–7.0). They don’t tolerate waterlogged roots, so proper soil preparation is key.

Steps for preparing the soil:

  1. Loosen the soil: Dig a hole about twice the size of the root ball.
  2. Add organic matter: Mix compost, aged manure, or leaf mold into the soil to improve fertility and drainage.
  3. Enhance drainage: If your soil is heavy clay, add sand or perlite to prevent water stagnation.
  4. In containers: Use a mix of garden soil, compost, and coco peat or perlite for lightness.

Tip: Avoid adding chemical fertilizers during planting, as they can burn young roots.


5. How to Plant a Fig Tree

Once your soil and location are ready, it’s time to plant your fig tree. Here’s how to do it step-by-step:

Step 1:
Dig a hole about 2–3 times wider and slightly deeper than the root ball of your fig plant.

Step 2:
Carefully remove the fig from its container and loosen the roots gently.

Step 3:
Place the tree in the hole so that the top of the root ball sits level with the ground surface.

Step 4:
Fill the hole with soil and gently firm it around the base.

Step 5:
Water thoroughly after planting to settle the soil around the roots.

Step 6:
Mulch around the base with dry leaves, straw, or wood chips to retain moisture and control weeds — but keep mulch away from the trunk to prevent rot.

If planting in a container, ensure there are drainage holes and place the pot in full sunlight.


6. Watering and Feeding

Figs love consistent moisture, especially during their growing and fruiting seasons (spring through early autumn). However, overwatering can cause root rot and fruit splitting.

Watering Tips:

  • Water deeply once or twice a week during dry spells.
  • Let the top inch of soil dry out between waterings.
  • Reduce watering in winter when the plant is dormant.

Feeding Tips:

  • Feed young fig trees with a balanced organic fertilizer (10-10-10) once a month during the growing season.
  • Mature trees usually need little feeding unless growth is poor.
  • Avoid excess nitrogen — it promotes leaf growth at the expense of fruiting.

Organic compost or seaweed extract can also provide slow-release nutrients naturally.


7. Pruning and Training Your Fig Tree

Pruning is essential for shaping your fig tree, improving air circulation, and encouraging fruiting.

When to prune:

  • In late winter or early spring, before new growth starts.
  • Remove dead, weak, or crossing branches.

How to prune:

  • For young trees, prune to establish 3–4 main branches forming an open, vase-like structure.
  • For older trees, cut back long shoots to control height and spread.
  • Remove suckers that emerge from the base, as they divert nutrients from fruit production.

Container-grown figs can be pruned more aggressively to maintain a compact shape.


8. Common Problems and How to Fix Them

Even though figs are relatively low-maintenance, you may encounter a few issues:

1. Dropping fruit: Often caused by overwatering, sudden temperature changes, or lack of pollination. Adjust watering and ensure consistent sunlight.

2. Yellowing leaves: May result from overwatering or nutrient deficiency. Check soil moisture and apply compost if needed.

3. Pests: Watch for fig wasps, scale insects, aphids, and spider mites. Use neem oil or organic insecticidal soap as needed.

4. Birds and squirrels: Cover ripening fruit with netting to protect your harvest.

5. Winter damage: In colder regions, wrap the trunk with burlap or move container figs indoors during winter.


9. Harvesting Fresh Figs

Fig trees usually produce fruit in late summer to early autumn, depending on variety and climate. Some trees even bear two crops — a small early crop (called the “breba” crop) and a main crop later in the season.

How to tell when figs are ready to harvest:

  • The fruit changes color (green to brown, purple, or yellow depending on variety).
  • Figs feel soft to the touch and droop slightly on their stems.
  • When picked, a small drop of nectar may appear at the fruit’s base.

To harvest, gently twist the fig from the branch — avoid pulling, as ripe figs are delicate and can tear easily.

Enjoy your figs fresh, or dry them for long-term storage. Fresh figs also make delicious additions to salads, desserts, or even savory dishes like roasted meats and cheese platters.


10. Propagating Fig Trees from Cuttings

Once you have a healthy fig tree, you can easily propagate new ones from cuttings. Here’s how:

  1. Take 6–8 inch cuttings from healthy branches during late winter.
  2. Dip the cut end in rooting hormone powder.
  3. Plant in a pot filled with a mixture of soil and sand or perlite.
  4. Keep the medium moist and warm (around 20–25°C).
  5. Roots should form within 4–6 weeks.

Once rooted, transfer the new plant into a larger pot or garden bed.


11. Growing Figs in Containers

If you live in a cold region or lack space, growing figs in containers is a perfect option.

Container Growing Tips:

  • Choose a large pot (at least 18 inches deep) with drainage holes.
  • Use well-draining soil mixed with compost.
  • Place in a sunny location — patios or balconies work great.
  • Water regularly but don’t let the roots sit in water.
  • Repot every 2–3 years to refresh soil and trim roots.

Container figs may need more frequent watering and feeding but are easier to protect during cold weather.


12. Health Benefits of Fresh Figs

Fresh figs are not only delicious but also highly nutritious. Eating home-grown figs provides:

  • Rich fiber content – supports digestion and gut health.
  • High potassium and calcium – strengthens bones and regulates blood pressure.
  • Natural sugars – provide instant energy.
  • Antioxidants – combat inflammation and boost immunity.

Adding fresh figs to your diet is a great way to enjoy sweetness naturally while gaining valuable nutrients.


13. Final Thoughts

Planting a fig tree at home is one of the most satisfying gardening projects you can undertake. These trees reward your care with shade, beauty, and sweet, luscious fruits that taste far superior to store-bought ones.

By choosing the right variety, preparing well-draining soil, providing consistent sunlight, and maintaining simple watering and pruning routines, you can enjoy a healthy, fruit-bearing fig tree for many years.

Whether you’re growing in a pot on your balcony or planting directly in your backyard, remember — figs thrive on a little love and plenty of sunshine. Soon, you’ll be savoring the joy of eating your very own fresh figs, straight from the tree to your table.

Grafting Update: Unwrapping Pear and Apple Grafts for Healthy Growth and Success

Grafting Update: Unwrapping Pear and Apple Grafts for Healthy Growth and Success

Grafting fruit trees is one of the most rewarding techniques in gardening. It allows you to combine the strengths of two plants—one providing a strong root system (rootstock) and the other offering desirable fruit qualities (scion). Apple and pear trees are among the most commonly grafted fruit trees because they share similar growth patterns and respond well to this propagation method.

If you’ve recently performed grafting and are now ready to unwrap your grafts, congratulations! You’ve reached one of the most exciting stages — checking whether your grafts have successfully bonded. In this detailed 1200-word guide, we’ll walk you through everything you need to know about unwrapping pear and apple grafts, understanding what successful grafting looks like, troubleshooting common problems, and ensuring healthy continued growth for your trees.


1. Understanding the Grafting Process

Before we dive into unwrapping, let’s quickly recap what grafting is and why it’s done.

Grafting is the process of joining two plant parts — the scion (a cutting from a desirable variety) and the rootstock (a young plant with a strong, disease-resistant root system). When done properly, the two parts fuse and grow as one.

For fruit trees like pears and apples, grafting helps gardeners:

  • Produce fruit faster than from seed-grown trees
  • Maintain desirable fruit qualities (taste, size, yield)
  • Combine disease resistance from the rootstock with the fruiting ability of the scion
  • Grow multiple varieties on a single tree (multi-graft trees)

Once you’ve completed grafting, you typically wrap the union point with grafting tape or a similar material to hold the scion and rootstock tightly together while the tissues bond.


2. The Importance of the Unwrapping Stage

Unwrapping is one of the most crucial steps after grafting because it determines the long-term success of your graft. After several weeks (usually 4–8 weeks, depending on temperature and humidity), the grafted area begins to heal. During this period, new tissues form at the joining point, connecting the vascular systems of both parts.

When the union is strong and stable, it’s time to remove the wrapping material. However, timing and technique are critical — unwrap too early, and the graft may separate; unwrap too late, and the wrapping may constrict growth, damaging the young tissue.


3. When to Unwrap Your Pear and Apple Grafts

The best time to unwrap grafts depends on several factors, including the type of graft, weather conditions, and growth rate. In general, most grafts can be unwrapped 6–8 weeks after grafting, or when you observe these signs:

  • New growth from the scion: Buds have started sprouting healthy leaves or shoots.
  • Swelling at the graft union: Indicates active tissue healing and fusion.
  • Firm attachment: When you gently press the scion, it feels secure and stable on the rootstock.
  • No signs of dieback: The scion wood remains green and alive.

For both apple and pear grafts, unwrapping is often done in late spring to early summer, depending on your climate. Avoid unwrapping during extremely hot or windy days, as this can cause the young graft to lose moisture quickly.


4. Step-by-Step Guide to Unwrapping Grafts

Unwrapping your grafts requires a gentle touch. Follow these careful steps to ensure success:

  1. Prepare your tools: Use clean, sharp scissors or a small blade to cut the grafting tape or rubber bands. Disinfect tools beforehand to prevent contamination.
  2. Inspect before cutting: Check for signs of growth and ensure the graft looks healthy. If the union is still soft or the scion appears loose, wait another week before unwrapping.
  3. Begin cutting gently: Start from the top of the graft and work your way down, carefully slicing through the wrapping without damaging the bark or the new tissues.
  4. Peel away slowly: Remove the wrapping material in small sections. If the tape sticks, moisten it slightly with water to loosen it.
  5. Inspect the union area: Once unwrapped, observe the graft closely. The joined area should appear slightly swollen, with smooth, calloused tissue forming around the union.
  6. Support if necessary: If the graft still seems weak or flexible, rewrap it loosely with biodegradable grafting tape to give it more time to strengthen.

5. Signs of a Successful Graft

After unwrapping, it’s important to assess whether your graft has taken successfully. Here are the key indicators:

  • Healthy new shoots: The scion is producing vigorous, green shoots and leaves.
  • Firmly joined union: The graft junction feels solid and stable when gently pressed.
  • Callus formation: A light, swollen ridge or callus tissue surrounds the graft area, sealing the joint.
  • No discoloration: The graft area remains green and fresh, with no signs of rot or dryness.

A successful graft indicates that the scion and rootstock are now sharing nutrients and water — essentially functioning as one plant.


6. What to Do If the Graft Has Failed

Not every graft will succeed, and that’s perfectly normal — even experienced gardeners see some grafts fail. Common reasons include poor alignment, temperature fluctuations, or insufficient humidity.

Signs of failure include:

  • The scion turns brown or shriveled.
  • No new growth after several weeks.
  • Graft area appears dry or cracked.
  • Scion easily detaches from the rootstock.

If a graft fails, remove the dead scion and clean the rootstock area. You can attempt re-grafting during the next growing season, ensuring better alignment and protection.


7. Aftercare Tips for Unwrapped Grafts

Once you’ve unwrapped your grafts, your young tree still needs attention to ensure continued success. Here’s how to care for your grafted pear and apple trees:

a. Provide Support

New grafts are still tender and can be damaged by wind or heavy rain. Use a small stake or support stick to stabilize the scion. Tie it gently with soft string or nursery tape.

b. Protect from Sunburn

The graft union and new growth can be sensitive to direct sunlight. If your area gets intense sun, provide partial shade for a few days after unwrapping.

c. Keep the Soil Moist

Maintain consistent soil moisture without overwatering. A layer of mulch around the base helps retain moisture and regulate soil temperature.

d. Watch for Suckers

Rootstocks often send out suckers (unwanted shoots from below the graft). Remove them immediately, as they divert nutrients from the scion.

e. Encourage Growth

Once the graft is strong, you can lightly fertilize with a balanced liquid fertilizer to encourage healthy foliage and root development.


8. Common Problems After Unwrapping and Their Solutions

Even after a successful graft, you may encounter a few challenges. Here’s how to handle them:

  • Cracking or splitting at the union: Rewrap gently for additional support and keep the area moist.
  • Excessive sap flow: This can happen in hot weather. Apply gentle shade or reduce watering slightly.
  • Weak new shoots: Pinch off weaker shoots to allow the main one to strengthen.
  • Pest attack (aphids, ants, or caterpillars): Spray neem oil or insecticidal soap to protect young growth.

Early observation and timely action can prevent long-term damage.


9. Differences Between Pear and Apple Graft Growth

While both pear and apple trees respond similarly to grafting, there are a few subtle differences in their behavior:

  • Pear grafts tend to grow more slowly initially but establish stronger unions. They prefer slightly warmer conditions during healing.
  • Apple grafts often sprout faster, producing new leaves sooner, but may require more careful handling during unwrapping as their new tissues are delicate.

For both, the success largely depends on matching compatible varieties and ensuring good cambium contact during grafting.


10. Long-Term Graft Maintenance

After your grafts have healed and started growing, ongoing maintenance will ensure a healthy, productive tree:

  • Prune regularly: Remove weak or crossing branches to shape the tree and promote airflow.
  • Fertilize annually: Apply compost or a balanced organic fertilizer in early spring.
  • Water deeply: Keep roots hydrated during dry periods, but avoid waterlogging.
  • Monitor for diseases: Watch for common fruit tree diseases like blight or mildew and treat promptly.

With proper care, your grafted pear and apple trees can start producing fruit within 2–4 years, depending on the variety and growing conditions.


11. Why Unwrapping Is a Milestone Moment

Unwrapping a graft is more than just removing tape — it’s a celebration of your plant’s resilience and your skill as a gardener. You’ve successfully guided two separate plant parts to grow as one, which is an incredible accomplishment.

This step also marks the beginning of a new growth phase. From here, the grafted scion can focus on expanding branches, producing leaves, and eventually setting fruit.


12. Final Thoughts

Unwrapping pear and apple grafts is a delicate but exciting process that reveals the success of your grafting work. When done carefully and at the right time, it sets the stage for strong, vigorous trees that will reward you with abundant fruit in the years ahead.

Remember — patience and observation are your best tools. If your grafts are alive, growing, and showing healthy new shoots, you’ve done an excellent job. Continue to nurture them, provide proper aftercare, and watch as your grafted apple and pear trees flourish into beautiful, fruit-bearing plants that stand as proof of your gardening skill and dedication.