Empire Apple Tasting: Discovering the Perfect Balance of Sweetness and Crunch

Empire Apple Tasting: Discovering the Perfect Balance of Sweetness and Crunch

When it comes to apples, few varieties achieve the perfect balance of flavor, texture, and aroma like the Empire apple. In this blog post inspired by the video “Empire Apple Tasting”, we’ll explore what makes this apple so special — from its origins and flavor profile to how it performs in the orchard and the kitchen. Whether you’re a grower, a home gardener, or simply a fruit enthusiast, understanding the Empire apple’s qualities will deepen your appreciation for this crisp, delicious fruit.


The Origin Story of the Empire Apple

The Empire apple was developed at Cornell University’s New York State Agricultural Experiment Station in Geneva, New York, in the 1960s. It’s a cross between two iconic varieties — McIntosh and Red Delicious. The goal was to create a fruit that combined the best traits of both: the juiciness and aroma of McIntosh with the sweetness, firmness, and longer storage life of Red Delicious.

This breeding success resulted in an apple that quickly became a favorite among growers and consumers alike. Its ability to maintain quality over time made it an excellent choice for both fresh eating and commercial sales. Even decades later, the Empire remains a staple in many orchards across North America.


What Makes the Empire Apple Unique

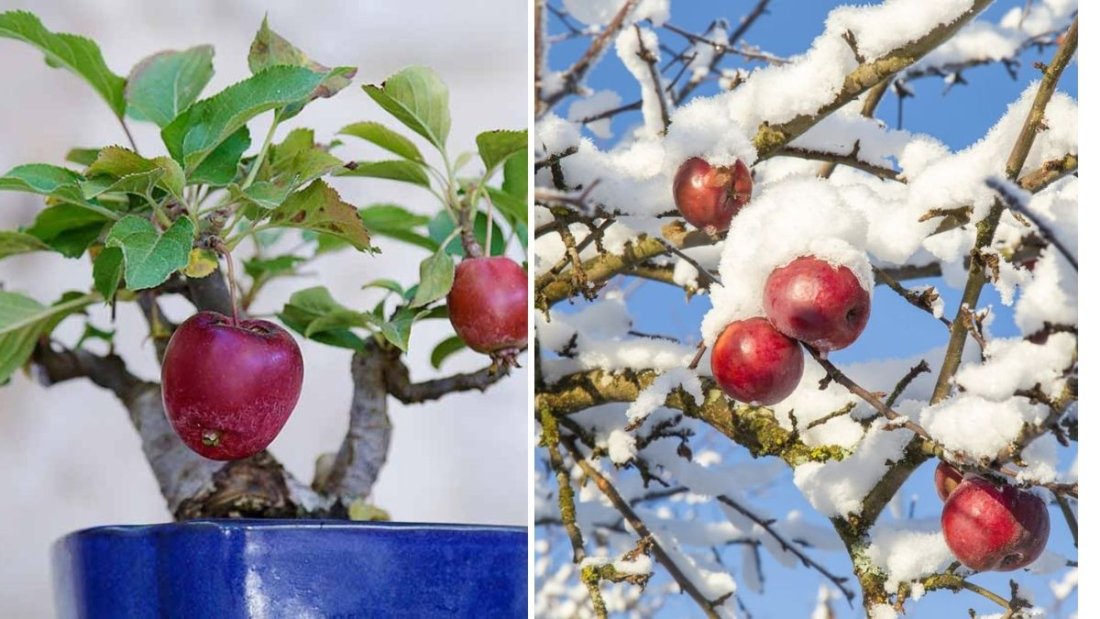
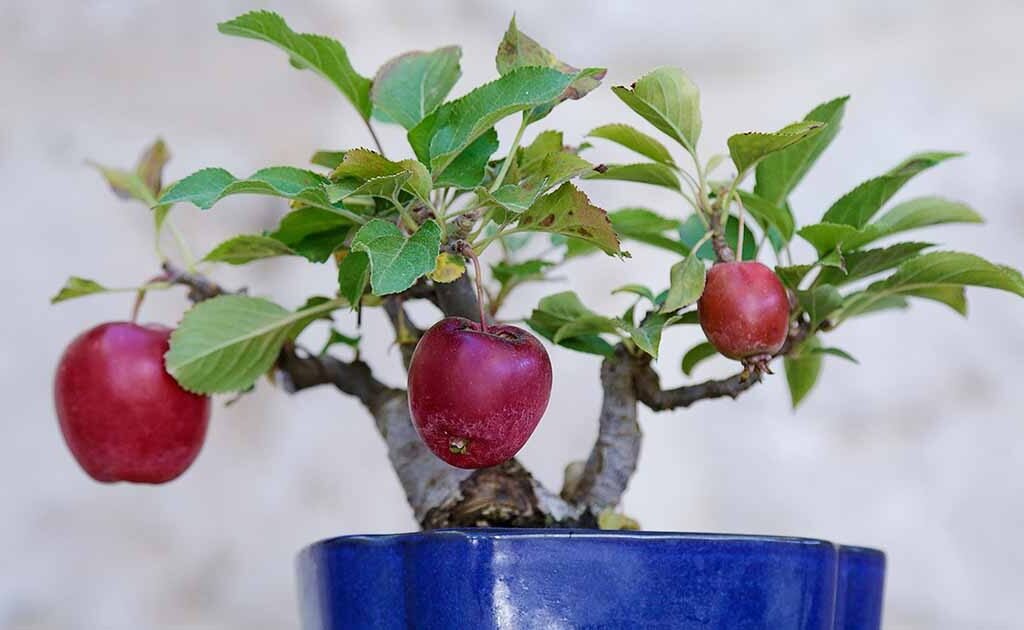
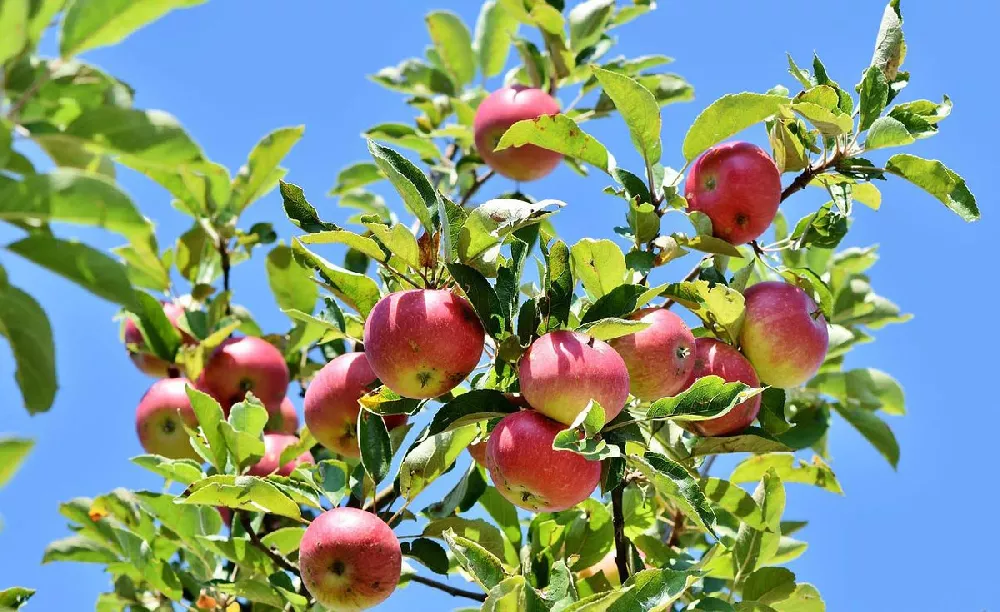
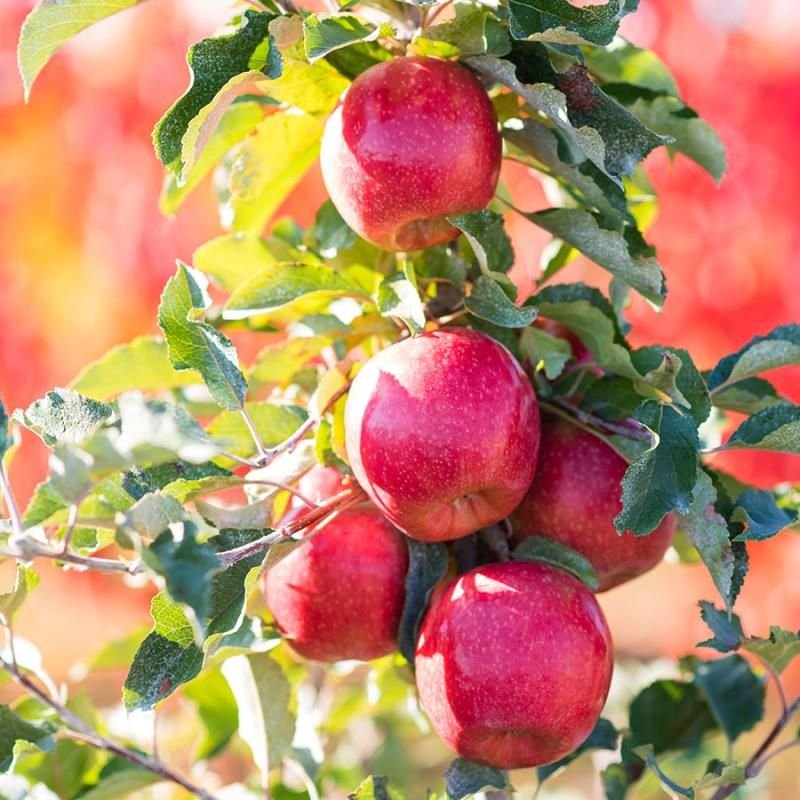
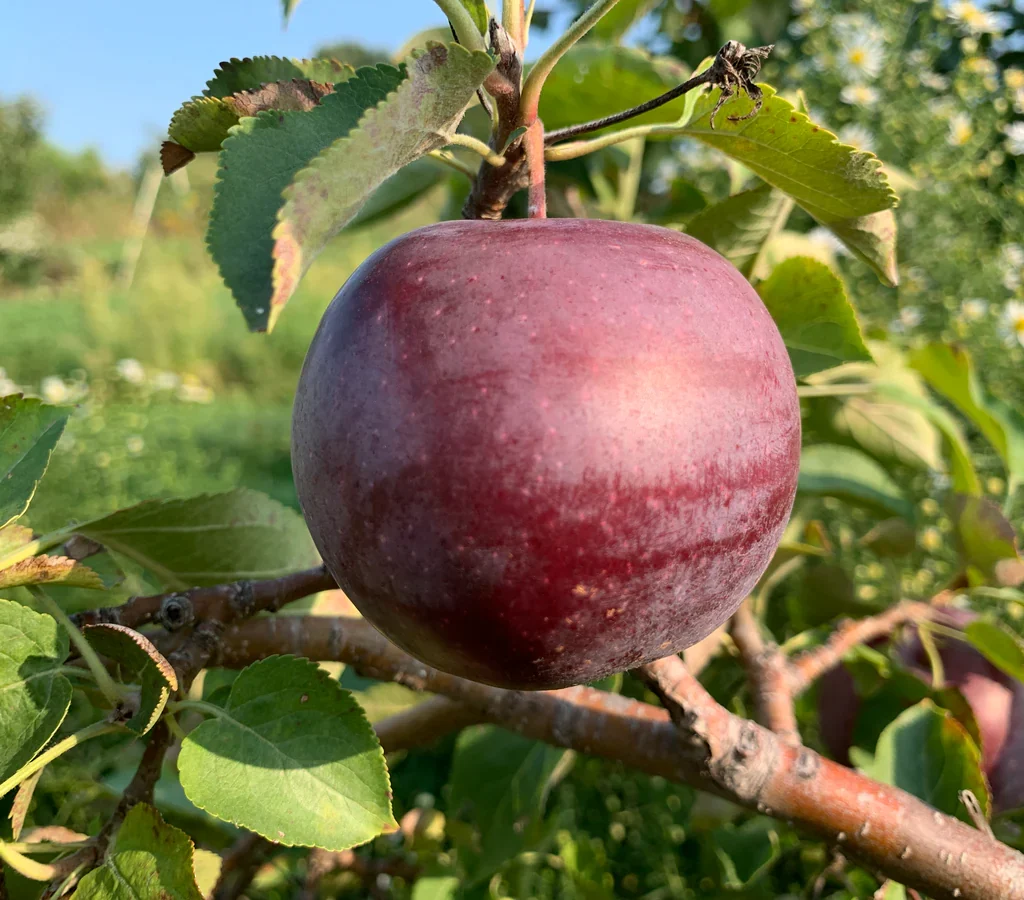
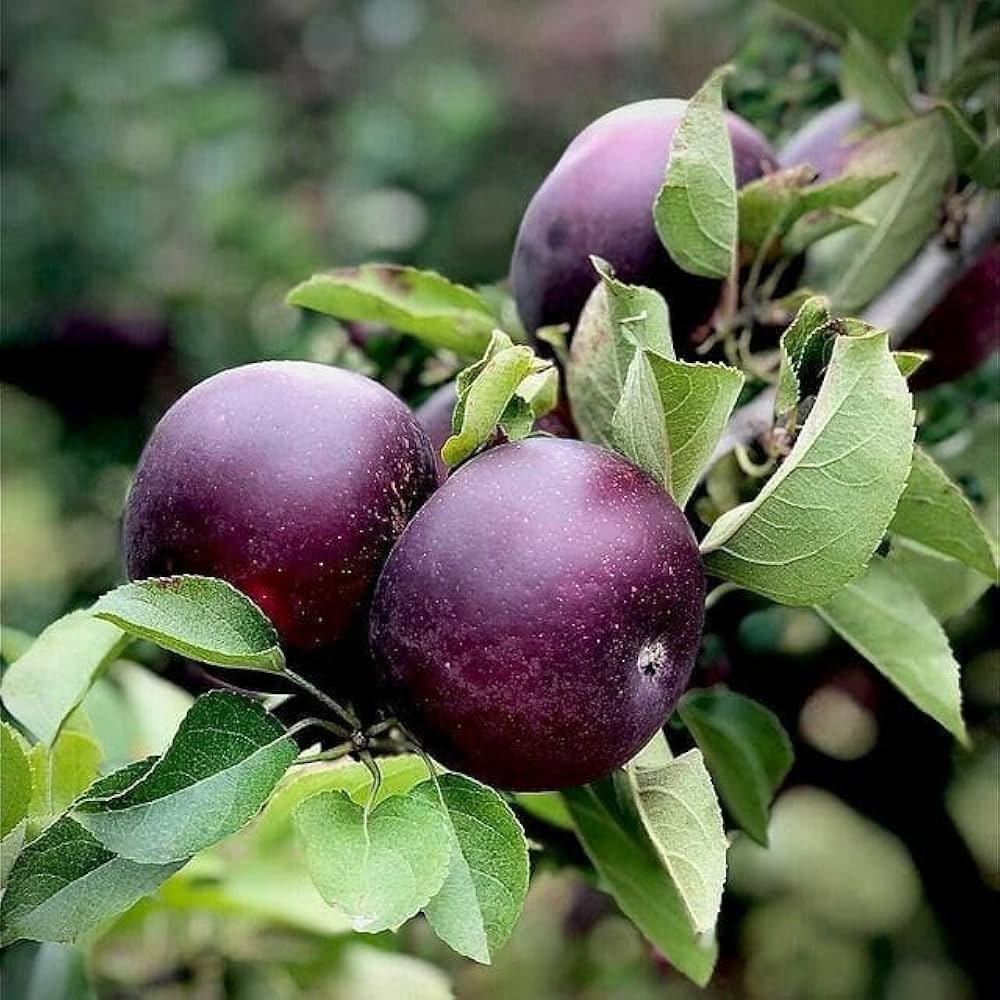
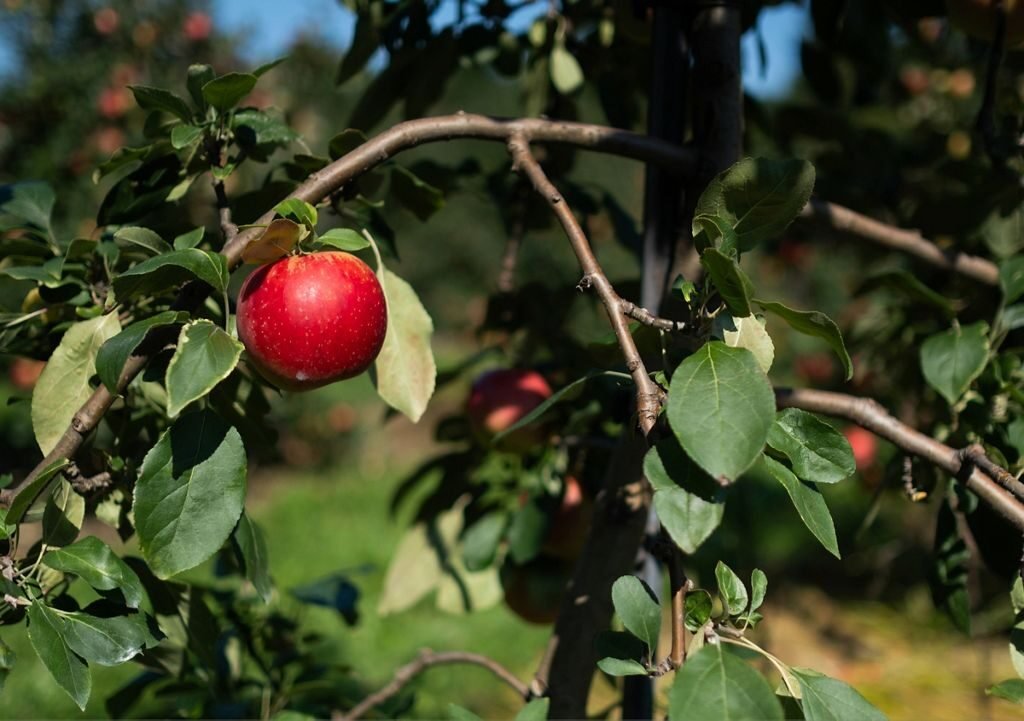
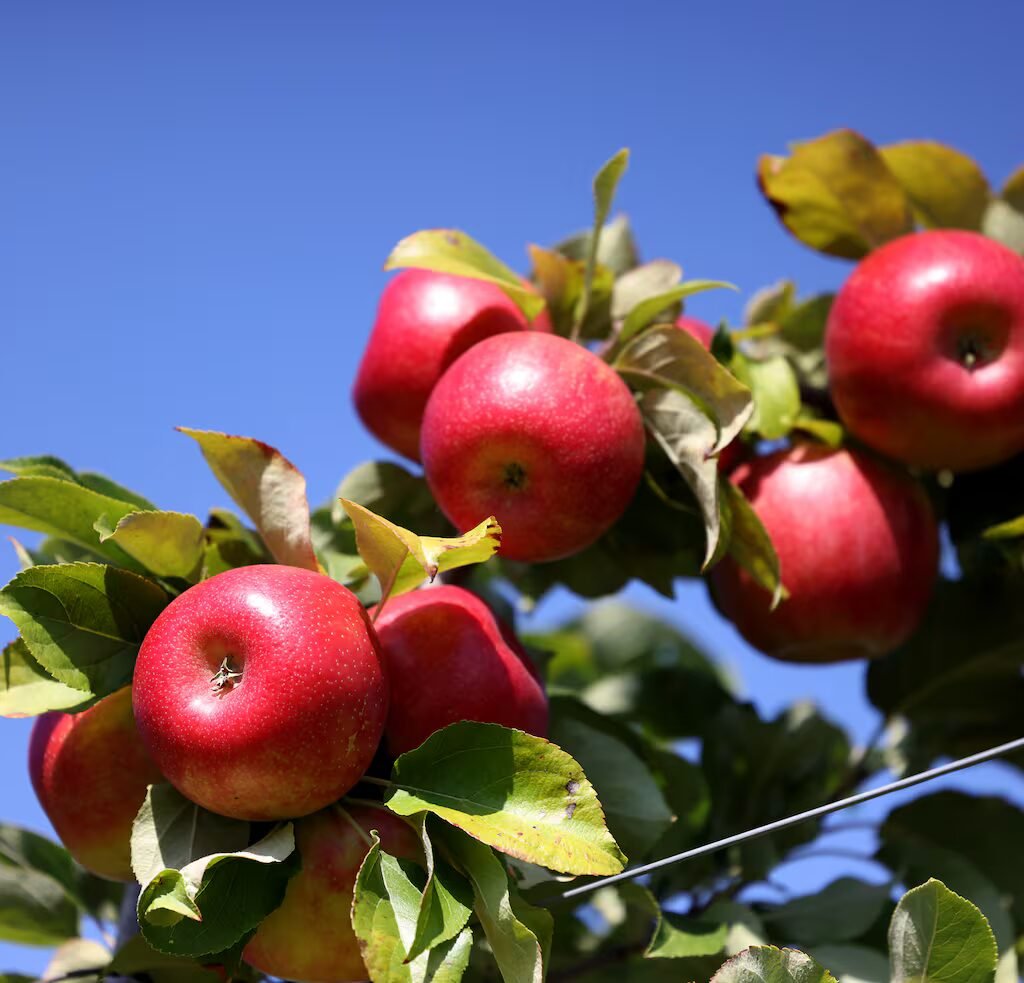
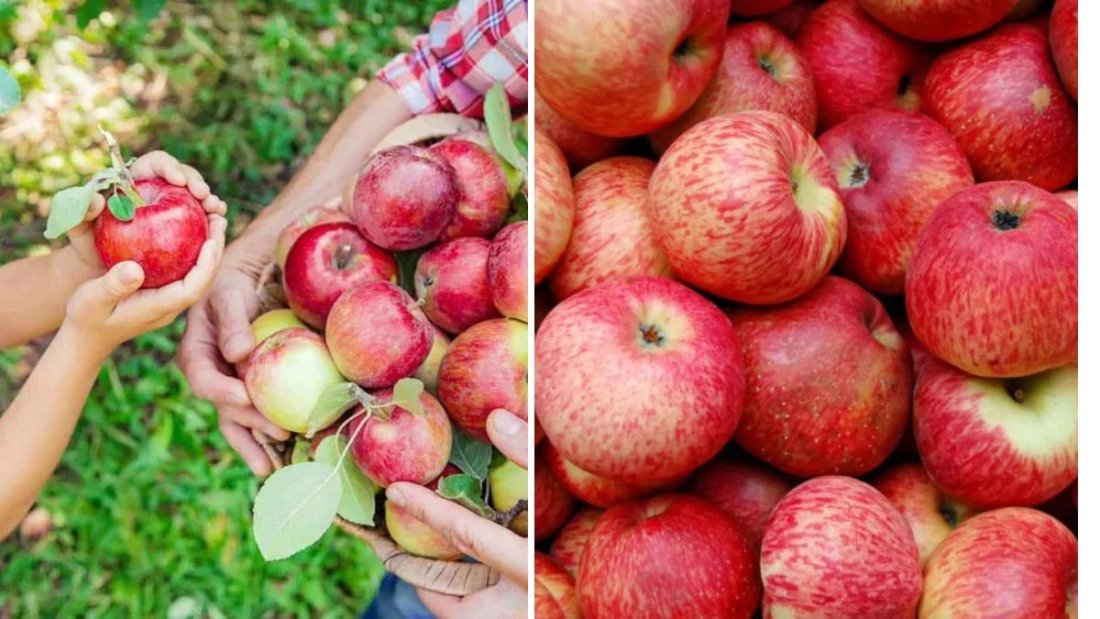
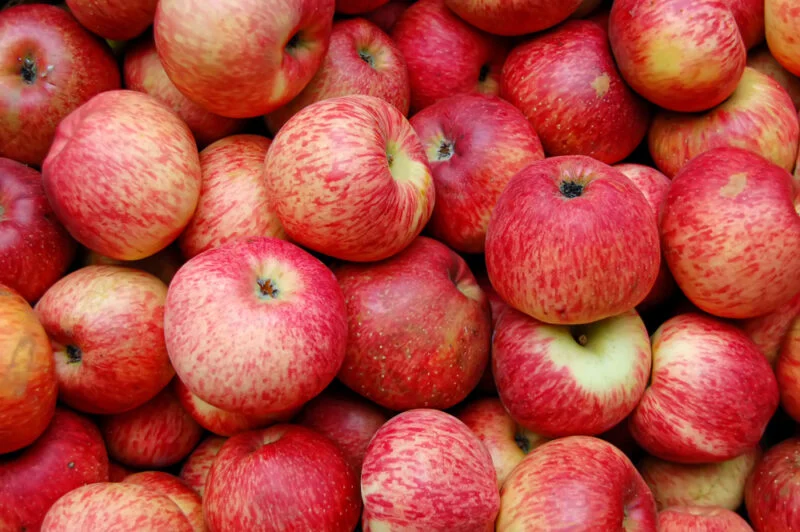
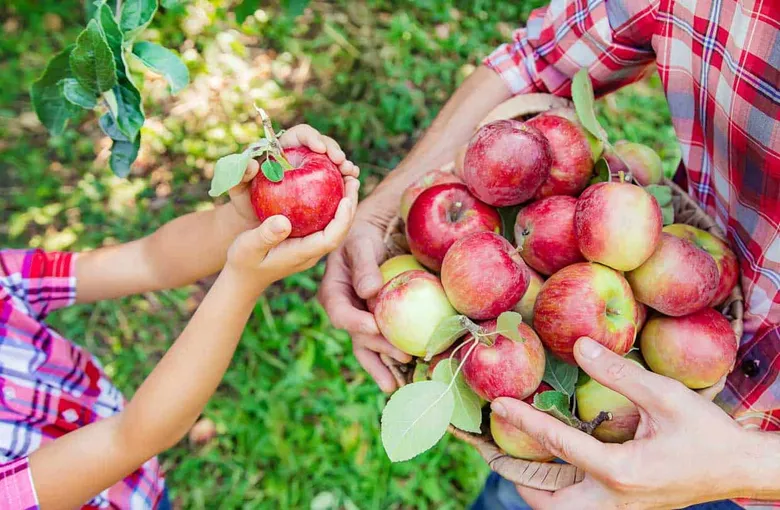
From the moment you bite into an Empire apple, you’ll notice what sets it apart. Its skin has a deep red blush over a light green background, giving it a beautiful appearance that’s hard to resist. Beneath that glossy surface lies creamy-white flesh — crisp, juicy, and bursting with flavor.

The taste of an Empire apple is a delightful harmony between sweetness and tanginess. It’s less tart than its McIntosh parent but still retains that refreshing zing that makes every bite exciting. This perfect balance is what makes the Empire apple so versatile — equally enjoyable fresh off the tree or incorporated into pies, salads, and sauces.

The aroma is another standout feature. Many tasters describe the scent as lightly floral with subtle honey undertones. This makes it not just a treat for the taste buds but also for the senses.


Growing Empire Apples in the Orchard

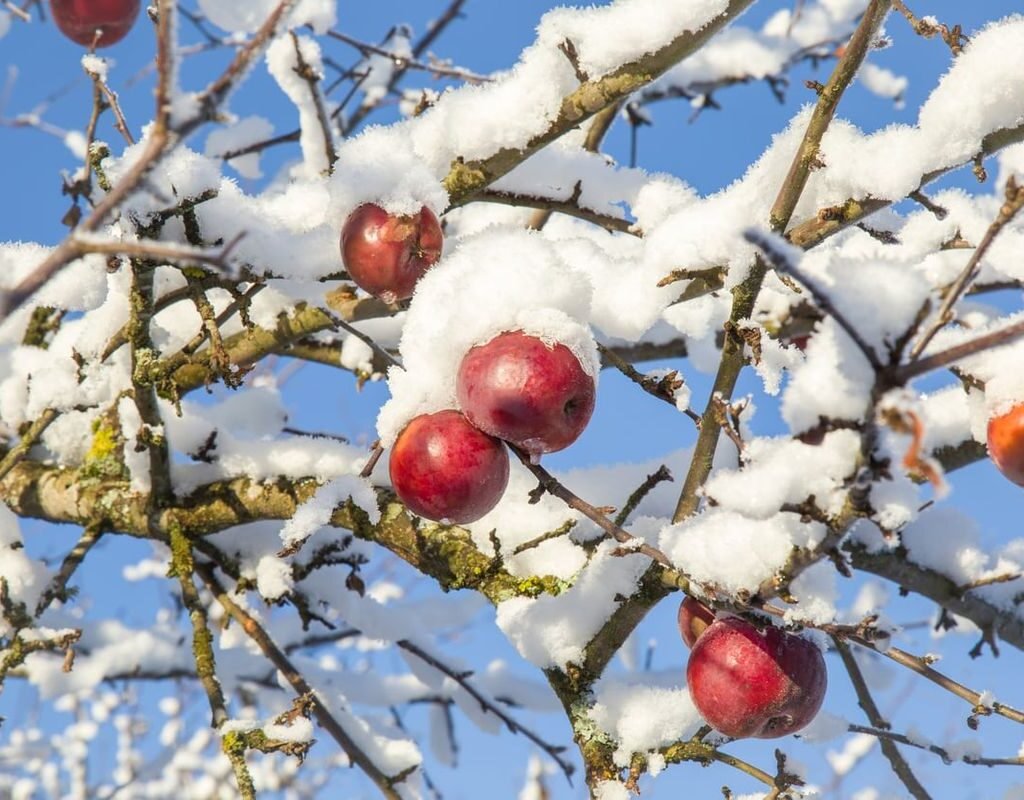
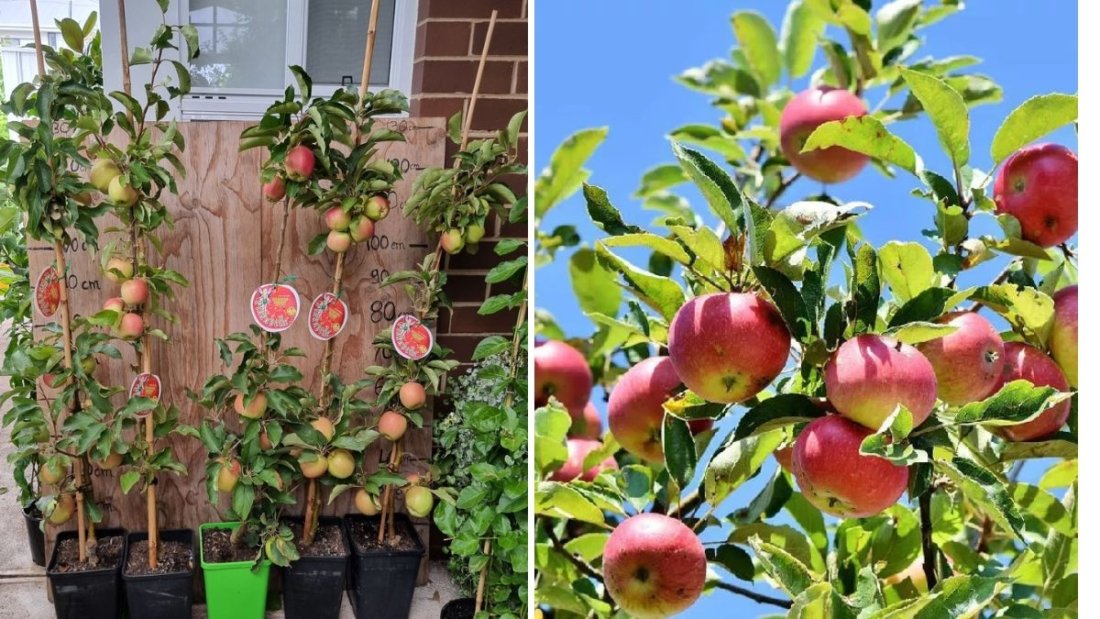
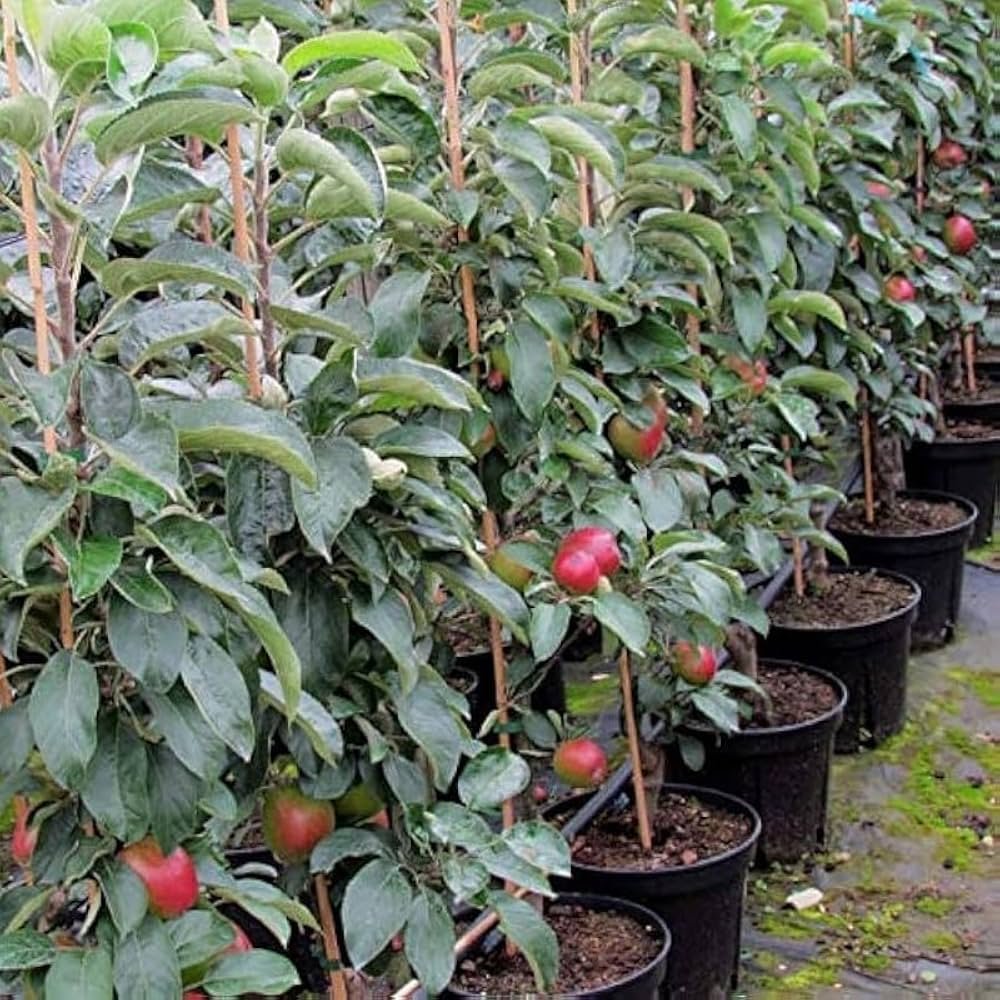
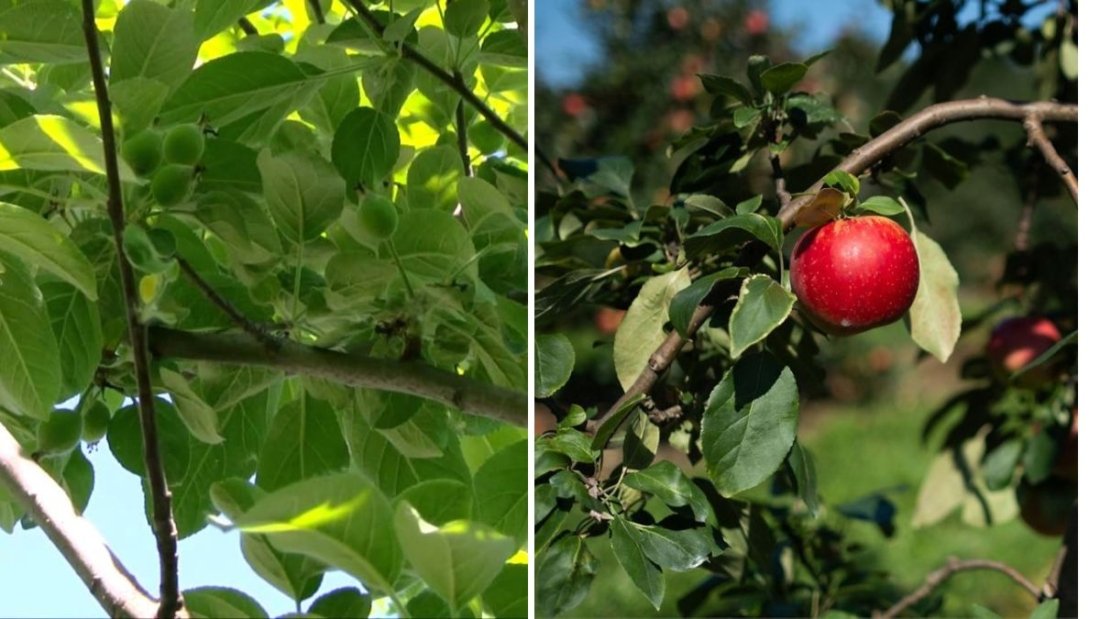
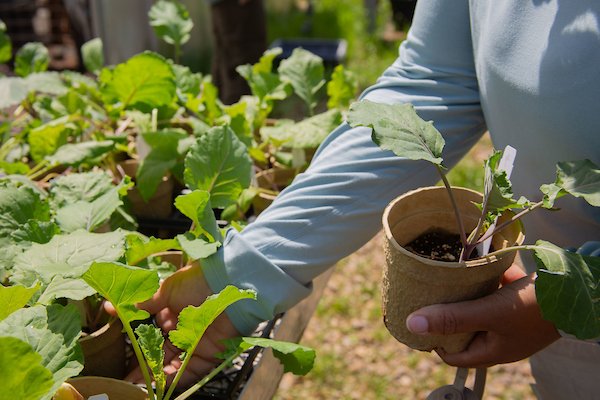
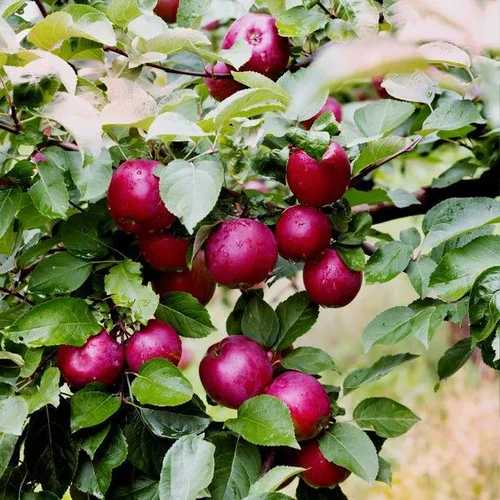
For home orchardists and small-scale growers, Empire apples are a rewarding variety to cultivate. They’re cold-hardy, thriving in USDA zones 4 through 7, and can handle chilly winters better than many other types.

Empire apple trees are moderately vigorous and tend to produce medium-sized, well-structured canopies. They’re known for consistent yields, making them a dependable choice year after year. The trees also demonstrate resistance to bruising, an important quality for those who plan to store or transport their fruit.

When planting, choose a sunny location with well-drained soil. Like most apple varieties, the Empire requires cross-pollination, so make sure to plant another compatible apple nearby, such as Cortland, Golden Delicious, or Honeycrisp.


Seasonal Care and Maintenance

Caring for an Empire apple tree involves standard orchard practices, but a few extra steps can maximize fruit quality:

  • Pruning: Annual winter pruning helps maintain an open canopy, allowing sunlight to reach all parts of the tree. This encourages better fruit color and air circulation, reducing disease risk.
  • Watering: Regular deep watering during dry spells ensures consistent fruit development and prevents premature drop.
  • Fertilizing: A balanced fertilizer in early spring supports healthy growth and flower production.
  • Pest and Disease Management: Empires can be somewhat prone to apple scab and powdery mildew, so consider using organic fungicide treatments or selecting disease-resistant rootstock.

With the right care, a mature Empire apple tree can produce fruit within 3 to 5 years after planting and will reward you with a generous harvest each season.


Tasting the Empire: A Flavor Experience

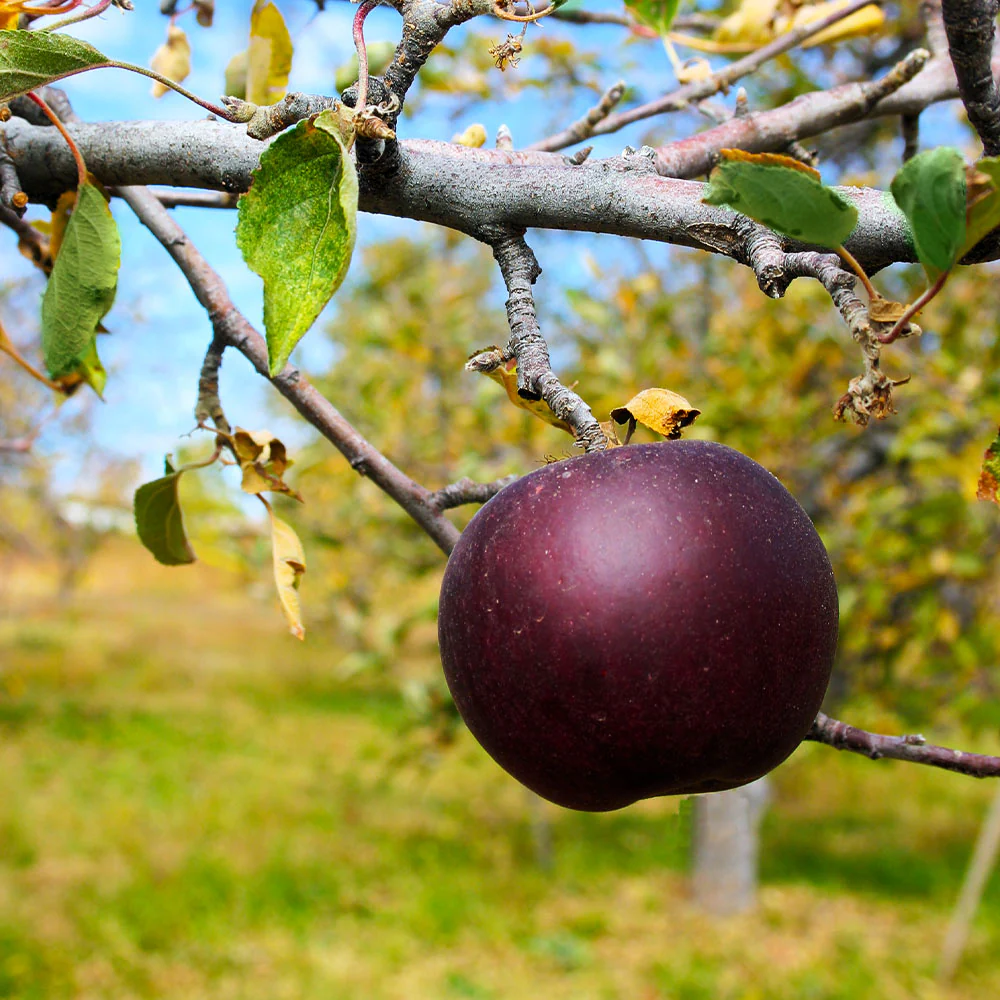
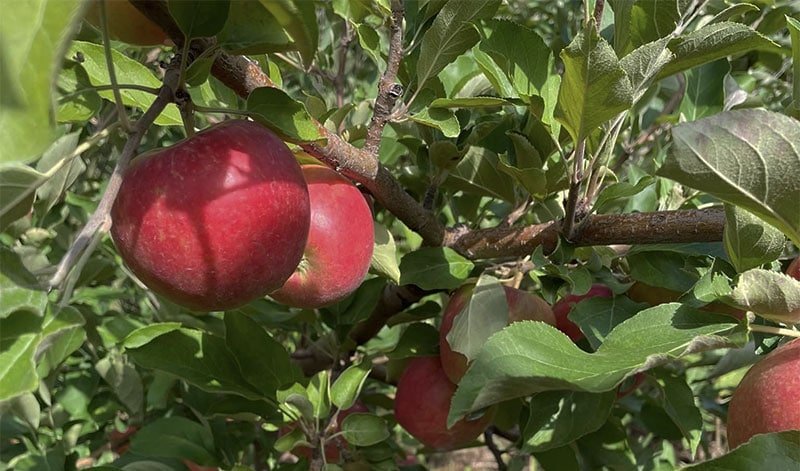
In the “Empire Apple Tasting” video, the tasting process highlights what truly defines this variety’s appeal. When bitten into, the Empire apple gives off a satisfying crunch, followed by an explosion of sweet-tart juice.

The sweetness is gentle but distinct, never cloying, while the acidity adds a refreshing contrast. Tasters often note hints of strawberry, honey, and citrus, especially when the fruit is perfectly ripe. The texture is firm yet not tough, making it a delight to chew.

Compared to softer apples like McIntosh, the Empire holds its structure even when sliced, making it ideal for lunchboxes and snacking on the go.


Empire Apples in the Kitchen

Empire apples are an excellent all-purpose variety in the kitchen. Because of their firmness, they hold up well when baked or cooked, while their balanced sweetness means you often don’t need to add extra sugar.

Here are a few delicious ways to use Empire apples at home:

  1. Apple Pies & Crisps – Their texture remains slightly firm after baking, offering a satisfying bite in every forkful.
  2. Salads – Their crisp flesh and bright flavor pair beautifully with spinach, nuts, and cheese.
  3. Apple Sauce – When simmered, they release a naturally sweet aroma and a smooth, creamy texture.
  4. Juices & Ciders – The balanced acidity makes Empire apples perfect for blending into refreshing drinks.
  5. Dehydrated Snacks – Sliced thin and dried, they become chewy, flavorful, and long-lasting treats.

Their versatility ensures they’re a favorite in both traditional and modern recipes.


Storing and Preserving Empire Apples

One of the key advantages of the Empire apple is its excellent storage ability. When kept in a cool, humid environment (around 32°F with 90–95% humidity), these apples can last for up to five months without losing much of their crispness or flavor.

Here are a few tips for optimal storage:

  • Handle apples gently to prevent bruising.
  • Store only unblemished fruit, as one spoiled apple can affect the rest.
  • Keep them in ventilated crates or perforated plastic bags in the refrigerator or a root cellar.
  • Avoid storing apples near onions or potatoes, as the gases can alter their flavor.

With proper care, you can enjoy the fresh taste of Empire apples well into the winter months.


The Empire’s Role in Backyard Orchards

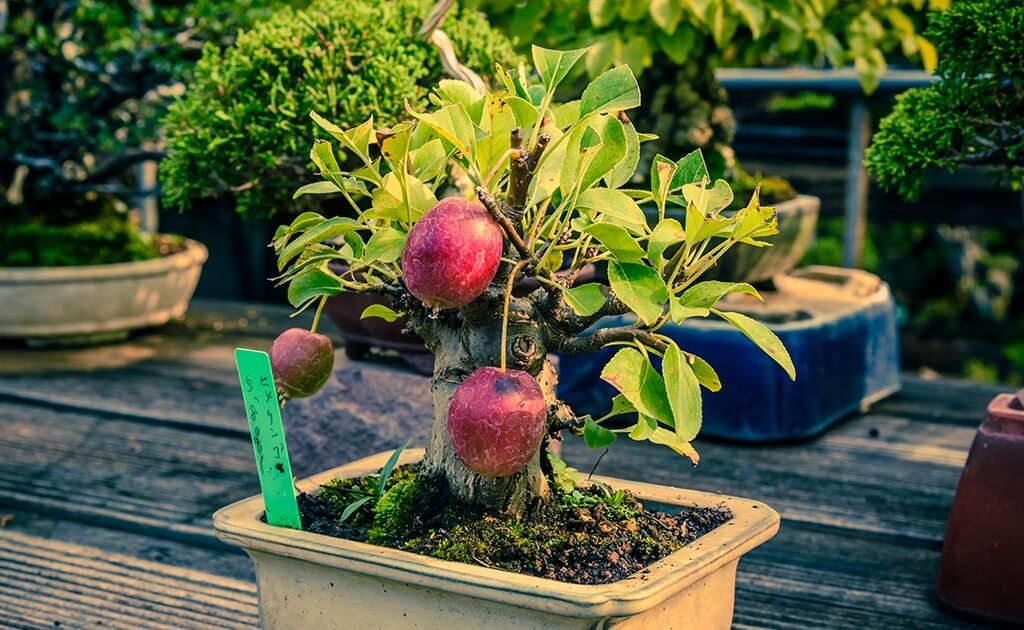
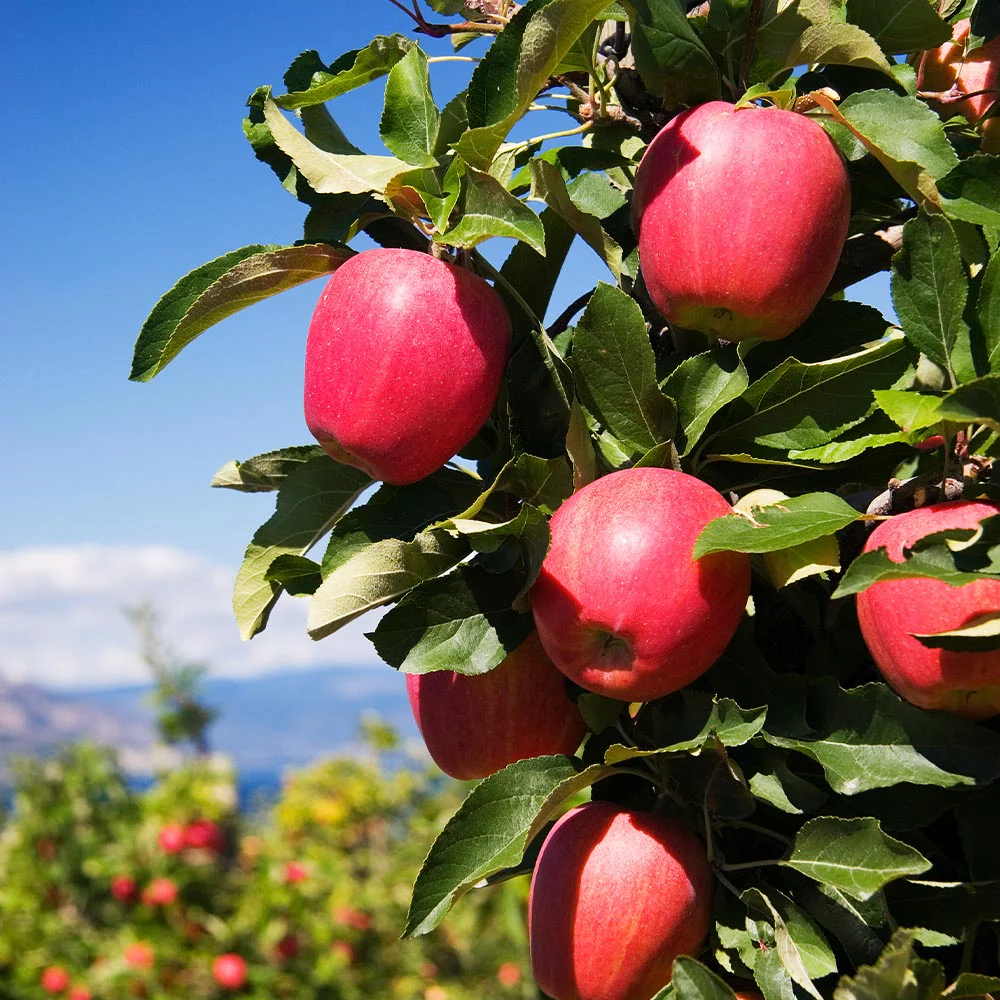
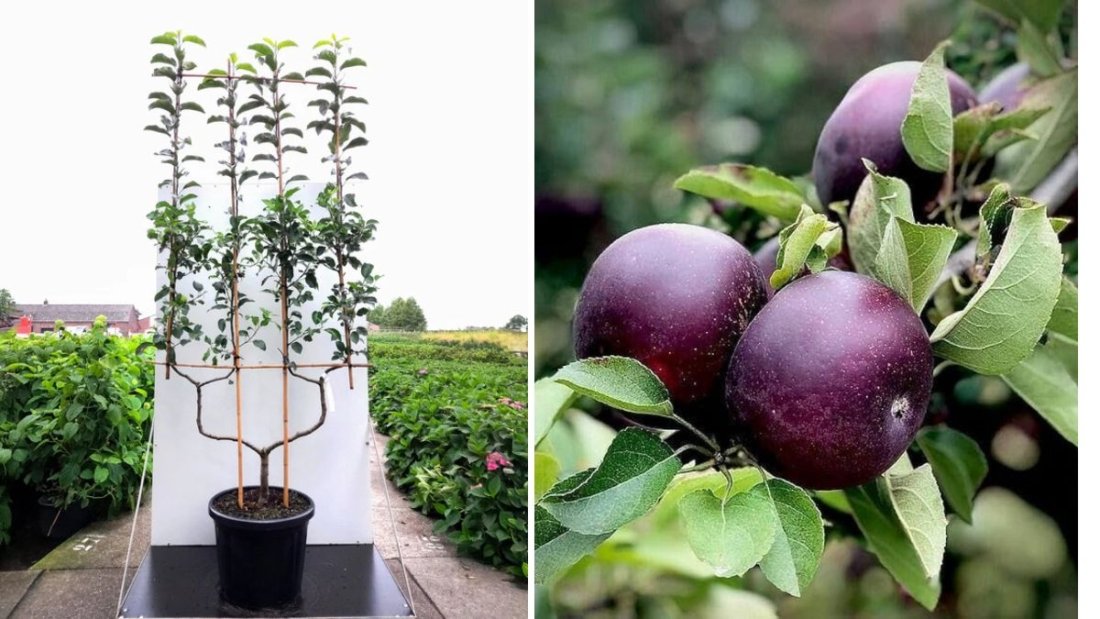
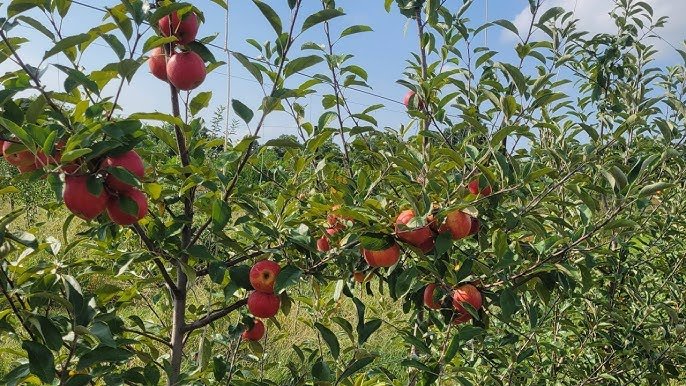
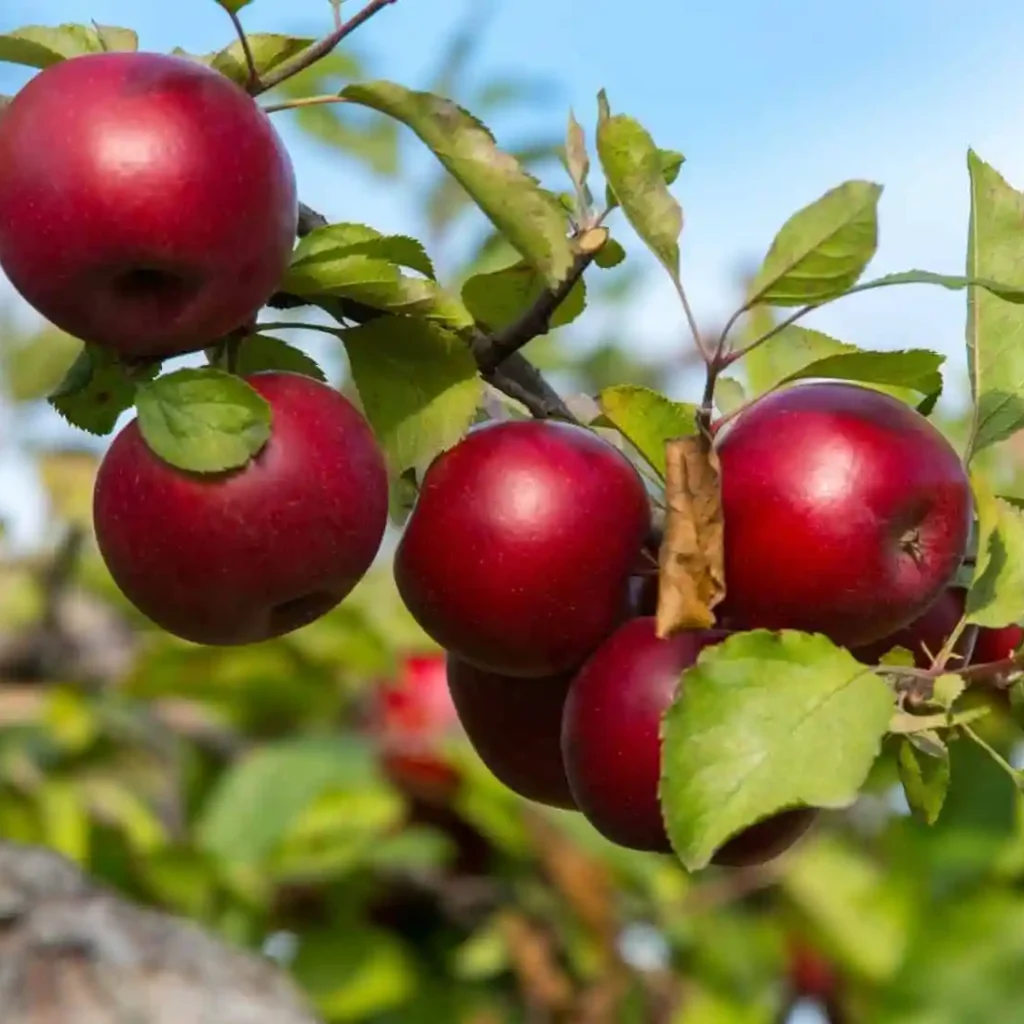
For home gardeners, adding an Empire apple tree is both practical and rewarding. Its compact growth habit makes it suitable for small spaces or backyard orchards, while its reliable yields and beautiful fruit offer a satisfying harvest.

If you’re growing multiple varieties, Empires fit perfectly among early or late-ripening apples, helping extend your overall harvest season. Plus, the stunning red fruit adds an ornamental touch to your garden landscape.


Why You Should Try Empire Apples

Whether you’re tasting them fresh or growing them yourself, Empire apples deliver a combination of flavor, durability, and visual appeal that’s hard to beat. They embody the perfect blend of their parent varieties — the lively tang of McIntosh and the satisfying sweetness of Red Delicious — creating a truly balanced apple.

Their versatility in the kitchen, resilience in storage, and beauty in the orchard make them a must-have for any fruit lover.


Final Thoughts

The Empire apple is a true classic — a variety that stands the test of time. It represents the best of traditional apple breeding, combining outstanding flavor with practicality for growers and consumers alike. From the first crisp bite to the last slice in your pie, Empire apples capture the essence of what makes this fruit so beloved.

So next time you visit your local orchard or grocery store, pick up a few Empire apples and experience for yourself why this variety continues to reign supreme among apple enthusiasts everywhere.

Winter Orchard Care: How to Prune Ambrosia Apple Trees for Healthy Growth and Better Harvests

Winter Orchard Care: How to Prune Ambrosia Apple Trees for Healthy Growth and Better Harvests

When winter arrives and the orchard falls quiet, a different kind of work begins — the careful and deliberate pruning that shapes the future of your fruit trees. For Ambrosia apple trees, winter pruning is not just about tidying up; it’s an essential step that ensures vigorous growth, improved air circulation, and abundant, high-quality fruit in the coming season.

Whether you’re maintaining a backyard tree or a small home orchard, learning how to prune Ambrosia apples correctly can make a world of difference. In this guide, we’ll walk you through the complete process — from understanding the variety’s growth habit to when and how to prune, plus expert tips to avoid common mistakes.


1. Meet the Ambrosia Apple: A Modern Orchard Favorite

The Ambrosia apple, first discovered in British Columbia, Canada, in the 1980s, has quickly become one of the most beloved apple varieties worldwide. Its name, “Ambrosia,” literally means “food of the gods” — and for good reason. These apples are crisp, honey-sweet, and low in acidity, making them perfect for fresh eating.

Ambrosia Apple Highlights:

  • Flavor: Sweet, mild, and aromatic
  • Texture: Crisp and juicy with fine flesh
  • Color: Pink to red blush over a creamy yellow background
  • Harvest time: Mid- to late-season (October–November)
  • Best zones: USDA Zones 4–8
  • Tree habit: Naturally upright, moderately vigorous, and easy to shape

Unlike some apple varieties, Ambrosia trees tend to grow upright and dense, which means regular pruning is key to maintaining an open canopy that lets in light and air.


2. Why Winter Is the Best Time to Prune Ambrosia Apple Trees

Pruning is a vital part of any apple tree’s care, but timing makes all the difference. For Ambrosia apples, late winter (January to early March) is the ideal pruning window — just before the buds begin to swell but after the coldest temperatures have passed.

Why prune in winter?

  • The tree is dormant, so pruning won’t stress it.
  • It’s easier to see the tree’s structure without leaves.
  • Cuts heal quickly in early spring as sap starts to flow.
  • Reduces risk of disease spread compared to pruning in wet, warm weather.

In short, winter pruning sets the stage for healthier spring growth and better fruit development.


3. Tools You’ll Need for Pruning

Before you begin, gather clean, sharp tools to make smooth cuts and avoid damaging the tree.

Essential tools:

  • Bypass pruning shears: For small branches (under ½ inch thick)
  • Loppers: For medium branches (up to 1½ inches)
  • Pruning saw: For large limbs or dense growth
  • Disinfectant: Rubbing alcohol or a 10% bleach solution to sterilize tools between trees
  • Gloves and eye protection: For safety and comfort

Always make clean cuts — jagged or torn wounds take longer to heal and invite disease.


4. Understanding the Structure of Your Ambrosia Apple Tree

Before making a single cut, take a few minutes to study your tree. Understanding its natural growth pattern helps you prune strategically.

Ambrosia apple trees naturally have an upright, vertical growth habit, meaning they often grow dense and crowded if left alone. Your goal when pruning is to open up the canopy, allowing sunlight to reach all branches and air to circulate freely.

A well-pruned tree should have:

  • A strong central leader (main trunk)
  • Four to six well-spaced scaffold branches forming the main structure
  • An open, balanced shape (like a Christmas tree)

This structure helps the tree support fruit evenly and reduces the risk of breakage during heavy harvests.


5. Step-by-Step Guide to Winter Pruning Ambrosia Apple Trees

Step 1: Remove Dead, Damaged, or Diseased Wood

Start by cutting away any branches that are:

  • Dead or brittle
  • Showing signs of canker, fungus, or rot
  • Broken or rubbing against other branches

This improves the tree’s health immediately and prevents disease spread.

Step 2: Identify and Maintain the Central Leader

Ambrosia trees grow naturally upright, sometimes producing multiple competing leaders. Choose one strong, central leader and remove the others to keep the structure balanced and stable.

Make sure the central leader is the tallest vertical shoot and that other main branches radiate outward from it at wide angles.

Step 3: Thin Out Crowded Branches

One of the biggest issues with Ambrosia trees is overcrowding. Thin out interior shoots and branches that:

  • Cross or rub against each other
  • Grow straight upward (water sprouts) or downward
  • Shade out the center of the tree

Aim for even spacing between branches so light can reach the inner canopy. Remember: sunlight = sweeter apples.

Step 4: Shorten Long Shoots

Cut back overly long shoots by one-third to promote stronger, fruit-bearing wood. Always prune just above an outward-facing bud to encourage growth in that direction.

Step 5: Shape the Tree

Maintain a balanced shape — wide at the bottom, narrow at the top. This ensures sunlight can penetrate all levels of the tree, leading to even ripening and easier harvesting.

Step 6: Clean Up and Seal Large Cuts (Optional)

Remove all pruned wood and fallen debris from around the tree. While most pruning cuts heal naturally, large wounds (over 2 inches) can be sealed with a tree wound compound if you live in a wet or disease-prone area.


6. The Science Behind Good Pruning

Every pruning cut affects how your Ambrosia apple tree grows. Here’s what happens:

  • Removing the tip of a branch encourages side shoot growth.
  • Thinning cuts (removing a branch entirely) open the canopy and reduce crowding.
  • Heading cuts (shortening a branch) stimulate new shoots near the cut.

The key is balance — prune enough to shape and open the tree but not so much that it struggles to regrow. As a rule of thumb, never remove more than 25–30% of the tree’s canopy in a single season.


7. Common Pruning Mistakes to Avoid

Even seasoned gardeners can make errors while pruning. Avoid these common pitfalls:

  • Over-pruning: Removing too much weakens the tree and delays fruiting.
  • Leaving stubs: Always cut flush with the branch collar to help wounds heal.
  • Topping: Never cut the main leader flat across; it encourages weak growth.
  • Neglecting lower branches: Keep lower limbs strong for stability and fruiting.
  • Ignoring tools: Dull blades crush rather than cut, increasing disease risk.

Remember, the goal of pruning isn’t just aesthetics — it’s to balance growth, structure, and productivity.


8. Post-Pruning Care for Ambrosia Apple Trees

After pruning, your tree will direct energy into healing and preparing for spring growth. Help it along with proper care:

  • Water deeply if winter is dry, especially in mild climates.
  • Mulch the base with compost or wood chips to insulate roots.
  • Fertilize lightly in early spring once buds begin to swell.
  • Monitor for pests or diseases as new growth emerges.

Avoid heavy fertilization right after pruning, as it can encourage too much leafy growth at the expense of flowers and fruit.


9. The Rewards of Pruning: What to Expect

By late spring, your Ambrosia apple tree will reward your winter work with a flush of new growth and abundant blossoms. Thanks to improved sunlight and airflow, the fruits will:

  • Be larger and more flavorful
  • Ripen evenly
  • Be less susceptible to disease

A well-pruned tree also makes harvest easier and more enjoyable, with fewer tangled branches and better access to fruit.


10. Long-Term Pruning Strategy

Ambrosia apple trees benefit from consistent, moderate pruning each year rather than aggressive cutting every few seasons.

Year 1–3 (Training Years):
Focus on establishing structure. Choose your central leader and scaffold branches.

Year 4–7 (Production Years):
Lightly thin and shape annually to maintain form and promote fruiting.

Year 8 and Beyond (Maintenance Years):
Remove aging or unproductive wood and encourage renewal growth. Keep the canopy open and balanced.

With this routine, your Ambrosia apple tree can remain productive and healthy for decades.


11. Final Thoughts: Winter Pruning for a Healthier Orchard

Pruning Ambrosia apple trees in winter is one of the most rewarding tasks in the orchard. It’s a quiet, reflective time — the hum of the shears, the rhythm of shaping branches, the promise of future blooms. Each careful cut lays the groundwork for next season’s bounty.

By understanding your tree’s natural form, following good pruning practices, and giving it the right post-pruning care, you’ll ensure your Ambrosia apple tree stays strong, beautiful, and fruitful year after year.

So, grab your tools, head into the orchard, and make the most of winter — because every great apple harvest begins with a well-pruned tree.

Backyard Orchard Bliss: How to Grow and Care for a Pink Lady Apple Tree at Home

Backyard Orchard Bliss: How to Grow and Care for a Pink Lady Apple Tree at Home

If you’ve ever bitten into a crisp, sweet-tart Pink Lady apple, you know it’s something special. Its rosy pink blush, firm texture, and refreshing balance of sugar and acidity make it one of the most sought-after apple varieties in the world. What if you could enjoy those same juicy apples straight from your backyard orchard?

In this article, we’ll dive deep into how to plant, grow, and care for a Pink Lady apple tree in your home orchard. From choosing the right spot to proper watering, pruning, and harvest tips, you’ll learn how to cultivate this beautiful and productive tree in your own space.


1. The Story Behind the Pink Lady Apple

The Pink Lady apple, also known by its cultivar name Cripps Pink, was developed in the 1970s in Western Australia by crossing two famous varieties — the Golden Delicious and the Lady Williams apple. The result was a crisp, flavorful fruit with a perfect balance of sweetness and tartness, and a stunning pink blush that gives the variety its name.

Pink Lady apples are known for:

  • Flavor: Sweet-tart with floral and honey notes
  • Texture: Extra firm and crisp, perfect for fresh eating or baking
  • Color: Bright pink blush over a pale yellow-green base
  • Harvest season: Late fall to early winter
  • Storage life: Can last up to 6 months in cold storage
  • Best zones: USDA Zones 6–9

This apple thrives in warm, sunny regions with long growing seasons, which allows its signature pink color and high sugar content to develop fully.


2. Choosing the Right Spot for Your Pink Lady Apple Tree

Like all apple trees, Pink Lady thrives in full sunlight and well-drained soil. Choosing the right location in your backyard is essential to ensure healthy growth and abundant fruiting.

Ideal conditions include:

  • Sunlight: At least 6–8 hours of direct sun daily
  • Soil: Loamy, well-drained soil enriched with organic matter
  • pH range: Slightly acidic to neutral (6.0–7.0)
  • Spacing:
    • Dwarf varieties: 8–10 feet apart
    • Semi-dwarf varieties: 12–15 feet apart
    • Standard trees: 18–25 feet apart

Avoid planting in low areas that collect water, as standing moisture can lead to root rot. A gentle slope or raised bed is ideal for better drainage and air circulation.


3. How to Plant Your Pink Lady Apple Tree

Whether you’re planting a bare-root or container-grown Pink Lady, proper planting technique makes a big difference in establishing a healthy tree.

Planting Steps:

  1. Dig the hole: Make it twice as wide as the root ball but no deeper.
  2. Inspect the roots: Trim off any damaged or broken roots before planting.
  3. Position the tree: Place the tree so the graft union (the swollen area above the roots) sits 2–3 inches above the soil line.
  4. Backfill the hole: Mix the native soil with compost and fill in gently, tamping down lightly to eliminate air pockets.
  5. Water thoroughly: Give the tree a deep watering immediately after planting.
  6. Mulch: Spread 2–3 inches of organic mulch around the base to retain moisture and suppress weeds, keeping it a few inches away from the trunk.

Plant your Pink Lady in early spring or late fall when the weather is mild. This allows the roots to establish before the heat of summer or the chill of winter sets in.


4. Pollination Partners for Pink Lady Apples

One important fact to remember: Pink Lady apple trees are not self-pollinating. They require another compatible apple variety nearby for cross-pollination to produce fruit.

Good pollination partners include:

  • Fuji
  • Granny Smith
  • Gala
  • Honeycrisp
  • Golden Delicious

Ensure the pollinator tree blooms around the same time (mid-to-late season) and is planted within 50 feet of your Pink Lady. Bees and other pollinators will take care of the rest!


5. Watering and Fertilizing

Proper watering and feeding help your Pink Lady apple tree establish strong roots and produce delicious fruit.

Watering tips:

  • First year: Water deeply once or twice a week, depending on rainfall.
  • Established trees: Water every 7–10 days during dry periods.
  • Avoid overwatering: Let the top inch of soil dry out between watering to prevent root rot.

Fertilizing tips:

  • In early spring, apply a balanced fertilizer (such as 10-10-10) around the drip line of the tree.
  • Avoid over-fertilizing, as too much nitrogen promotes leafy growth instead of fruiting.
  • Mulch with compost or aged manure once or twice a year to add nutrients naturally.

6. Pruning for Shape and Productivity

Pruning is one of the most critical aspects of growing a healthy, fruit-bearing apple tree. It encourages airflow, allows sunlight to reach inner branches, and prevents disease.

When to prune: Late winter or early spring before new growth starts.

Pruning tips:

  • In the first few years, train your tree to a central leader (main vertical trunk) system.
  • Remove weak, crossing, or inward-growing branches.
  • Maintain an open canopy that allows sunlight to penetrate all areas of the tree.
  • Shorten overly long branches to encourage strong fruiting wood.

Regular pruning keeps your Pink Lady apple tree manageable in size and ensures consistent fruit quality year after year.


7. Common Pests and Diseases

Like most apple varieties, Pink Lady can be affected by certain pests and diseases. However, with proper prevention, you can easily keep them under control.

Common pests:

  • Aphids: Small insects that suck sap from young shoots.
  • Codling moths: Lay eggs in fruit, leading to wormy apples.
  • Spider mites: Cause stippling and leaf discoloration.

Common diseases:

  • Apple scab
  • Powdery mildew
  • Fire blight

Prevention tips:

  • Prune regularly to promote airflow.
  • Avoid overhead watering to reduce leaf wetness.
  • Apply organic sprays like neem oil or insecticidal soap if pests appear.
  • Remove and dispose of fallen leaves and fruit to break disease cycles.

Healthy trees are naturally more resistant, so consistent care and observation are your best defenses.


8. Blossoms and Fruit Development

Pink Lady apple trees usually start producing blossoms in spring, typically their third or fourth year after planting. The fragrant white-pink flowers attract bees and pollinators, which are essential for fruit set.

Once pollinated, small green apples form and mature over several months, developing their distinctive pink blush as temperatures warm and sunlight increases.

To encourage larger fruit, thin the apples when they are about marble-sized, leaving about 6 inches between each one. This reduces stress on the branches and improves fruit size and flavor.


9. Harvesting Your Pink Lady Apples

Pink Lady apples are late-season harvesters, usually ready in October or November, depending on your region. You’ll know they’re ready to pick when the background skin turns pale yellow-green and the fruit blushes with pink to red color.

To harvest:

  • Twist the apple gently upward and off the branch rather than pulling.
  • Handle carefully to avoid bruising.
  • Store apples in a cool, humid environment (32–40°F).

Pink Lady apples are excellent storage apples—their flavor actually improves after a few weeks as the sugars fully develop. Properly stored, they can last up to six months without losing quality.


10. Enjoying the Fruits of Your Backyard Orchard

Few rewards match biting into your own freshly picked Pink Lady apple. Its vibrant, crisp bite and refreshing sweetness make it perfect for:

  • Fresh eating: Ideal for snacking straight from the tree.
  • Baking: Retains shape beautifully in pies, crisps, and tarts.
  • Salads: Adds color and crunch to both green and fruit salads.
  • Juicing and cider: Makes a wonderfully balanced, aromatic cider.

Their eye-catching color also makes them great for decorative displays or holiday baskets.


11. Final Thoughts: A Backyard Beauty Worth Growing

The Pink Lady apple tree is a standout addition to any backyard orchard. It’s not just beautiful—it’s productive, flavorful, and long-storing. With a little care, patience, and the right growing conditions, you can enjoy years of stunning blossoms, lush green foliage, and delicious fruit that rivals anything you’ll find in the store.

Whether you’re a seasoned grower or a backyard beginner, planting a Pink Lady apple tree is a step toward a healthier, tastier, and more sustainable lifestyle. It connects you to nature’s rhythm, rewards your effort, and fills your home with the unmatched joy of harvesting your own fruit.

So, grab your shovel, prepare your soil, and plant your own Pink Lady apple tree—you’ll thank yourself with every crisp, sweet bite for years to come.

Planting an Arkansas Black Apple Tree: A Complete Guide to Growing This Bold and Unique Apple Variety

Planting an Arkansas Black Apple Tree: A Complete Guide to Growing This Bold and Unique Apple Variety

Few apple varieties command attention quite like the Arkansas Black apple. With its dark, almost mahogany-red skin and dense, crisp flesh, it’s a fruit that looks as striking as it tastes. Known for its long storage life and bold flavor that improves with time, this heirloom apple variety has become a favorite among home orchardists and backyard growers.

If you’re thinking about planting an Arkansas Black apple tree, this guide will walk you through everything you need to know—from choosing the right planting site and soil preparation to care, pruning, and harvesting tips. Let’s dive into the journey of growing one of America’s most distinctive apple varieties.


1. Getting to Know the Arkansas Black Apple

The Arkansas Black apple originated in the mid-1800s in Benton County, Arkansas. It’s believed to be a seedling of the Winesap apple, which explains its tart, rich flavor and firm texture. The fruit is medium-sized with deep red to nearly black skin, and it becomes darker as it ripens and stores.

Fresh off the tree, the apples can be quite hard and tart, but after a few weeks or months in storage, they mellow beautifully, developing a sweet-tart balance and a wine-like complexity. This makes them ideal for both fresh eating and baking, as well as for cider production.

Key characteristics include:

  • Flavor: Tart and spicy when fresh, mellowing to sweet and rich over time
  • Texture: Dense and crisp
  • Harvest season: Late fall (October to November)
  • Storage: Can last up to 4–6 months in proper conditions
  • Hardiness zones: USDA Zones 5–9

2. Choosing the Perfect Planting Location

Apple trees need plenty of sunlight and good air circulation to thrive. When choosing a spot for your Arkansas Black apple tree, keep these essentials in mind:

  • Sunlight: At least 6–8 hours of direct sunlight per day
  • Soil type: Well-draining loam or sandy loam with good fertility
  • Soil pH: Between 6.0 and 7.0 is ideal
  • Spacing: Plant standard trees about 15–20 feet apart or dwarf varieties 8–10 feet apart

Avoid low-lying areas where cold air can settle, as this can lead to frost damage during bloom time. Planting on a gentle slope or elevated area improves drainage and reduces disease pressure.


3. Preparing the Soil and Planting the Tree

Before planting, test your soil to check pH and nutrient levels. You can amend the soil with compost or aged manure to improve fertility and structure.

Step-by-Step Planting Guide:

  1. Dig the hole: Make a hole twice as wide and just as deep as the root ball.
  2. Prepare the roots: If you’re planting a bare-root tree, soak the roots in water for a few hours before planting.
  3. Position the tree: Place the tree in the center of the hole, making sure the graft union (the swollen area above the roots) sits about 2–3 inches above the soil line.
  4. Backfill carefully: Refill the hole with soil, gently firming it around the roots to remove air pockets.
  5. Water thoroughly: Give the tree a deep watering to help the soil settle around the roots.
  6. Mulch: Apply 2–3 inches of organic mulch (like wood chips or straw) around the base, keeping it away from direct contact with the trunk.

4. Pollination Partners for Arkansas Black

The Arkansas Black apple tree is not self-pollinating, meaning it requires another apple variety nearby for cross-pollination to produce fruit.

Good pollination partners include:

  • Granny Smith
  • Honeycrisp
  • Fuji
  • Winesap
  • Jonathan

Ensure the companion trees are within 50 feet for optimal pollination. Bees and other pollinators will take care of the rest!


5. Watering and Feeding

Young Arkansas Black apple trees need consistent moisture to establish strong roots. Water deeply once a week during the first growing season, adjusting based on rainfall.

Once the tree is established, water during dry spells, especially during bloom and fruit development.

For fertilization:

  • Apply a balanced fertilizer (10-10-10) in early spring before new growth starts.
  • Avoid over-fertilizing, as excessive nitrogen can lead to lush foliage but fewer fruits.

Mulching also helps retain soil moisture and regulates temperature.


6. Pruning and Training

Proper pruning encourages a strong structure and promotes better fruiting. Start training your young Arkansas Black tree to a central leader system—the classic “Christmas tree” shape that allows sunlight to reach all parts of the canopy.

Pruning tips:

  • First year: Remove damaged or crossing branches, leaving a few well-spaced lateral limbs.
  • Following years: Thin out crowded branches and maintain good airflow.
  • Annual maintenance: In late winter, prune to remove dead, diseased, or inward-growing wood.

Remember, good pruning reduces disease risk and improves fruit size and quality.


7. Managing Pests and Diseases

Like most apple varieties, Arkansas Black can be susceptible to certain pests and diseases, although it’s generally considered hardier than many others.

Common issues include:

  • Apple scab
  • Fire blight
  • Powdery mildew
  • Codling moths and apple maggots

Preventive measures:

  • Prune regularly for good air circulation.
  • Keep the orchard floor clean of fallen fruit and leaves.
  • Use organic sprays like neem oil or horticultural oil during the growing season.
  • Introduce beneficial insects such as ladybugs to control aphids naturally.

8. Harvesting and Storing Arkansas Black Apples

The harvest season usually arrives in late October or early November. When ripe, the apples should have a deep red to almost black hue and feel firm to the touch.

After harvesting, allow the apples to “cure” for a few weeks in a cool, dark place. This resting period enhances their flavor and texture, transforming the tartness into a more balanced, rich taste.

Store them in a cool environment (around 34–40°F) with high humidity. Under the right conditions, Arkansas Black apples can last up to six months—a rarity among apple varieties!


9. Enjoying Your Arkansas Black Apples

This apple’s dense texture and complex flavor make it incredibly versatile:

  • Fresh eating: Slice thinly for a crunchy, tangy snack.
  • Baking: Perfect for pies, crisps, and tarts as they hold their shape well.
  • Cider making: Adds depth and tannins for a rich, balanced cider.
  • Storage aging: For the best flavor, let them age a few weeks before eating.

Their unique dark skin and firm flesh also make them a beautiful addition to gift baskets or decorative displays during the fall season.


10. Final Thoughts: A Heritage Apple Worth Growing

Planting an Arkansas Black apple tree isn’t just about growing fruit—it’s about preserving a piece of American history. This variety, with its striking looks and unmatched storage potential, offers both beauty and practicality to your orchard or backyard garden.

Whether you’re an experienced gardener or just starting your fruit-growing journey, the Arkansas Black is a rewarding choice that delivers flavor, longevity, and charm. With proper care and patience, you’ll be enjoying delicious, homegrown apples that continue to improve long after harvest.


My Suburban Apple Orchard: Growing Honeycrisp, Fireside & McIntosh Apples in the Backyard

My Suburban Apple Orchard: Growing Honeycrisp, Fireside & McIntosh Apples in the Backyard

There’s something truly magical about walking out your back door and picking crisp, sun-warmed apples right from your own trees. For many home gardeners, the dream of growing a small suburban apple orchard has become a rewarding reality — proving that you don’t need acres of farmland to enjoy fresh, homegrown fruit.

Inspired by the video “My Suburban Apple Orchard – Honeycrisp, Fireside & McIntosh Apples,” this guide dives into how you can grow these three classic varieties successfully in your own backyard. Each has its own unique personality — Honeycrisp with its perfect crunch, Fireside with its rich sweetness, and McIntosh with its nostalgic tartness.

In this post, we’ll explore everything from orchard planning and planting to pruning, pollination, and harvesting — along with what makes each apple variety a standout choice for suburban growers.


Planning Your Suburban Apple Orchard

Before you start planting, a little planning can make all the difference. Space may be limited in a suburban setting, but with the right varieties and layout, you can still create a thriving mini-orchard.

1. Choose the Right Location

Apples need at least 6–8 hours of full sunlight per day. Pick the sunniest spot in your yard with well-draining soil and good air circulation to reduce disease risk.

2. Know Your Soil

Apple trees prefer loamy soil with a pH of 6.0–6.8. Before planting, amend the soil with compost or aged manure to improve fertility and drainage.

3. Spacing and Tree Type

For small yards, dwarf or semi-dwarf apple trees are perfect. They grow only 8–15 feet tall and start bearing fruit within 2–4 years.

  • Dwarf trees: 8–10 feet apart
  • Semi-dwarf trees: 12–15 feet apart

4. Pollination Matters

Most apple varieties, including Honeycrisp, Fireside, and McIntosh, are not self-pollinating. Luckily, planting these three together creates excellent cross-pollination — ensuring heavy fruit production for all.

Bees are your best orchard partners, so avoid using chemical sprays during bloom season.


Meet the Stars of the Orchard

Each of these apple varieties brings something special to your backyard. Let’s take a closer look at what makes Honeycrisp, Fireside, and McIntosh stand out.


Honeycrisp: The Modern Favorite

Introduced by the University of Minnesota in the 1990s, Honeycrisp quickly became one of the most popular apple varieties worldwide.

Flavor & Texture:

  • Explosively crisp and juicy
  • Balanced sweetness with mild acidity
  • Refreshing, honey-like flavor

Appearance:

  • Large apples with mottled red and yellow skin
  • Creamy-white flesh that stays crisp for weeks after harvest

Why Grow It:
Honeycrisp apples are prized for their superb crunch and long storage life. They’re perfect for fresh eating and make a premium addition to your backyard orchard.

Tips for Growing Honeycrisp:

  • Needs cold winters (ideal in USDA Zones 3–7).
  • Prefers consistent moisture but not waterlogging.
  • Fruit tends to bruise easily — handle gently during harvest.

Fireside: The Sweet Heirloom Hybrid

Also developed by the University of Minnesota (in 1943), Fireside apples are less known but deeply loved among orchard enthusiasts.

Flavor & Texture:

  • Very sweet with low acidity
  • Crisp and juicy
  • Ideal for fresh eating or winter storage

Appearance:

  • Large apples with red-striped skin and green-yellow undertones
  • Fine-grained, firm flesh

Why Grow It:
Fireside is perfect for those who prefer a sweeter apple that stores well through winter. It’s less prone to bruising than Honeycrisp and adds diversity to your orchard’s harvest window.

Growing Notes:

  • Hardy in zones 3–7.
  • Resists bruising and stores for 3–4 months.
  • Bears consistently once mature.

Fireside trees are vigorous growers and provide excellent pollination partners for both Honeycrisp and McIntosh.


McIntosh: The Classic Old-Fashioned Favorite

No apple evokes nostalgia quite like the McIntosh. Originating in Canada in the early 1800s, this heirloom variety has long been cherished for its distinct flavor and aroma.

Flavor & Texture:

  • Tart, aromatic, and slightly spicy
  • Soft, tender flesh that breaks down beautifully when cooked

Appearance:

  • Medium-sized fruit with deep red skin and greenish highlights
  • White, fine-textured flesh that often turns pink in applesauce

Why Grow It:
McIntosh is a reliable, cold-hardy apple that thrives in northern climates. Its tangy flavor makes it ideal for cooking, cider, and sauce, though it’s equally delightful fresh off the tree.

Growing Notes:

  • Cold-tolerant and ideal for northern gardeners.
  • Produces early and abundantly.
  • Fruit softens quickly after picking, so it’s best eaten fresh or processed soon.

Seasonal Orchard Care and Growth Updates

Once your trees are in the ground, consistent care through the seasons will keep your suburban orchard productive and healthy.


Spring: Blossoms and Pollination

Spring is the most beautiful time in your orchard. The trees burst into bloom — white and pink flowers covering every branch.

  • Fertilize lightly in early spring with a balanced 10-10-10 fertilizer.
  • Prune before buds break to remove dead wood and shape the canopy.
  • Watch for pests like aphids or apple blossom weevils. Organic neem oil sprays work well.

The cross-pollination between your Honeycrisp, Fireside, and McIntosh will ensure a strong fruit set for all three.


Summer: Growth, Watering, and Thinning

As fruitlets form, the trees will focus their energy on developing healthy apples.

  • Water deeply once per week during dry spells.
  • Mulch around the base to retain moisture and discourage weeds.
  • Thin fruit so apples are spaced 5–6 inches apart — this helps them grow larger and prevents limb strain.
  • Keep an eye out for apple maggots, codling moths, and powdery mildew. Use traps or organic controls if needed.

Fall: Harvest Season

This is the most rewarding time in your suburban orchard — the payoff for your year of care.

Each of your varieties ripens at a slightly different time:

  • McIntosh: Early to mid-September
  • Honeycrisp: Late September to early October
  • Fireside: Mid to late October

Harvest apples gently by twisting them upward rather than pulling. A mature tree can produce 100–200 apples per season, depending on size and care.


Winter: Rest and Preparation

After the leaves fall, your trees enter dormancy. Use this time to prepare for next season:

  • Prune again in late winter to maintain shape.
  • Wrap trunks with tree guards to protect from frost and rodents.
  • Apply dormant oil spray to smother overwintering pests.

Your orchard may look quiet, but the trees are storing energy for another beautiful spring bloom.


Common Challenges and How to Overcome Them

Even in a small suburban orchard, apple trees can face a few challenges.

  1. Apple Scab:
    • Symptoms: Olive-green patches on leaves and fruit.
    • Fix: Choose disease-resistant rootstocks and apply sulfur sprays early in the season.
  2. Fire Blight:
    • Symptoms: Blackened, wilted shoots resembling burned tips.
    • Fix: Prune out infected wood and sterilize tools.
  3. Pests:
    • Common culprits: Codling moths, apple maggots, aphids.
    • Fix: Use pheromone traps, sticky bands, and neem oil for organic control.
  4. Uneven Fruit Set:
    • Usually caused by poor pollination or weather during bloom.
    • Fix: Encourage bees with nearby flowering plants and avoid pesticide use during bloom time.

Tasting the Harvest: Flavor Comparison

When harvest time comes, you’ll quickly learn that each apple in your orchard has its own distinct personality.

  • Honeycrisp: Sweet, crisp, and modern — perfect for fresh snacking.
  • Fireside: Mellow and sugary — great for eating fresh or making winter desserts.
  • McIntosh: Tart and aromatic — the best choice for sauces, pies, and cider.

Together, these varieties give you a full flavor spectrum from tart to sweet, ensuring you’ll never get bored of your homegrown apples.


Storing and Enjoying Your Apples

To enjoy your harvest long after fall, proper storage is key.

  • Honeycrisp: Lasts 2–3 months in cold storage.
  • Fireside: Excellent keeper — can store up to 4 months.
  • McIntosh: Best enjoyed within a few weeks after picking.

Store apples in a cool, humid basement or fridge (30–35°F). Keep them separate from strong-smelling produce and check occasionally for soft spots.


Conclusion: The Joy of a Backyard Orchard

Creating a suburban apple orchard is more than just gardening — it’s about cultivating a lifestyle of patience, care, and reward. Each spring blossom and autumn harvest connects you with the rhythm of nature, even in the middle of a neighborhood.

Growing Honeycrisp, Fireside, and McIntosh apples together gives you the perfect mix of tradition and modern taste — from McIntosh’s nostalgic tang to Fireside’s sugary sweetness and Honeycrisp’s irresistible crunch.

So, whether you’re just starting or nurturing your trees for years, remember: every apple you pick from your own backyard is more than just fruit — it’s the result of your dedication, and the taste of homegrown success.

How to Grow Boysenberries – A Raspberry-Blackberry Cross with Superb Flavor

How to Grow Boysenberries – A Raspberry-Blackberry Cross with Superb Flavor

Boysenberries, a luscious blend of raspberry, blackberry, and loganberry, are one of the most flavorful and aromatic berries you can grow in your garden. With their deep maroon color and sweet-tart taste, boysenberries make excellent jams, pies, and desserts — and their versatility has made them a favorite among berry lovers and home gardeners alike.

If you’re dreaming of harvesting baskets full of these delicious berries, this complete guide will teach you everything about how to grow boysenberries, from planting and trellising to pruning and harvesting. Let’s dive in and explore how to cultivate this unique hybrid fruit for a superb homegrown harvest.


What Are Boysenberries?

Boysenberries are a hybrid fruit developed in California during the early 20th century by Rudolph Boysen, who crossbred raspberries, blackberries, and loganberries. The result was a large, juicy berry that combined the sweetness of raspberries with the tart richness of blackberries.

The plants are trailing brambles — similar to blackberries — with long, flexible canes that can reach up to 15–20 feet in length. Each berry is about one inch long, plump, and glossy dark purple when ripe.

Boysenberries are prized not just for their flavor but also for their high nutritional value, offering antioxidants, vitamin C, and fiber — making them as healthy as they are delicious.


Ideal Growing Conditions

Before planting boysenberries, it’s essential to provide the right growing environment to ensure vigorous plants and high yields.

1. Climate

Boysenberries thrive in mild coastal or temperate climates, similar to where blackberries grow.

  • Best USDA Zones: 5 through 9.
  • Temperature Range: They prefer temperatures between 60°F and 80°F.
  • Frost Sensitivity: Boysenberries are moderately hardy but can suffer damage in harsh winters, so protection may be needed in colder zones.

2. Soil Requirements

  • Soil Type: Well-draining, loamy soil rich in organic matter.
  • Soil pH: Slightly acidic, ideally between 5.5 and 6.5.
  • Drainage: Boysenberries dislike soggy roots; raised beds or mounded rows help prevent waterlogging.

Amend your soil with compost or aged manure before planting to ensure it’s fertile and moisture-retentive but not compacted.

3. Sunlight

Boysenberries require at least 6–8 hours of full sun each day for maximum fruit production. In very hot climates, partial afternoon shade can protect them from excessive heat stress.


Propagating and Planting Boysenberries

Boysenberries can be propagated from root cuttings, tip layering, or nursery plants. The easiest and most reliable method for beginners is to purchase disease-free plants from a reputable nursery.

When to Plant

  • Spring: The best time to plant boysenberries is in early spring after the danger of frost has passed.
  • Fall: In mild climates, fall planting is also possible, giving the roots time to establish before winter.

How to Plant

  1. Prepare the Site: Remove weeds and loosen the soil about 12–18 inches deep. Mix in compost to improve fertility.
  2. Spacing: Plant boysenberry crowns or rooted cuttings 3–4 feet apart in rows spaced 8–10 feet apart.
  3. Planting Depth: Place the plant in the hole so that the crown is just above the soil surface. Cover with soil and firm gently.
  4. Water Well: Give each plant a thorough watering after planting.
  5. Mulching: Add a 2–3 inch layer of organic mulch (straw, pine needles, or wood chips) around the base to retain moisture and suppress weeds.

Trellising and Training Boysenberry Canes

Because boysenberries have long, trailing canes, a trellis system is essential for supporting growth and maximizing fruit production.

How to Build a Simple Trellis:

  • Install sturdy wooden or metal posts every 15–20 feet along the row.
  • Stretch two to three horizontal wires between the posts — one at 2 feet, one at 4 feet, and one at 5–6 feet high.
  • Train the canes along these wires, securing them loosely with garden ties.

As the canes grow, guide them horizontally or in gentle arcs along the wires. This allows sunlight to reach all parts of the plant and makes harvesting much easier.


Understanding Boysenberry Growth Cycle

Like blackberries, boysenberries are biennial plants — meaning their canes live for two years:

  1. First Year (Primocanes): The plant grows long, leafy canes but produces no fruit.
  2. Second Year (Floricanes): The same canes from the previous year bear fruit and then die after harvest.

New primocanes grow each year from the plant’s base, ensuring continuous fruit production once the plant is established.


Watering and Feeding

Boysenberries need consistent moisture for healthy growth and juicy berries.

  • Watering: Water deeply once or twice a week, ensuring the soil remains evenly moist but not soggy. Drip irrigation is ideal to prevent wetting the foliage.
  • Mulching: Maintain a mulch layer year-round to reduce evaporation and protect shallow roots.
  • Fertilizing:
    • In early spring, apply a balanced fertilizer (10-10-10) or a berry-specific mix.
    • Avoid excessive nitrogen — too much will promote leafy growth with fewer berries.
    • Side-dress with compost mid-season to boost organic matter.

Pruning for Maximum Fruit Production

Pruning is the key to keeping boysenberry plants healthy, organized, and productive year after year.

1. After Planting (First Year)

  • Let the primocanes grow freely during the first growing season.
  • When they reach about 5–6 feet long, tip prune (cut back) the ends by 2–3 inches to encourage lateral branching.

2. After Harvest (Following Years)

  • Once the canes have finished fruiting, cut the old floricanes back to the ground — they will not produce again.
  • Select 5–7 strong new primocanes to train on the trellis for next year’s crop.
  • Prune away weak, damaged, or crowded canes to improve airflow and prevent disease.

Regular pruning not only keeps the plants tidy but also directs the plant’s energy toward producing large, flavorful berries.


Pollination and Fruit Set

Boysenberries are self-fertile, meaning you only need one plant to produce fruit. However, having multiple plants nearby can enhance pollination and yield. Bees and other pollinators are essential, so avoid using pesticides during the flowering period.

The berries begin forming in late spring to early summer, and each cluster matures gradually over several weeks.


Pest and Disease Management

Boysenberries, like other brambles, can be susceptible to a few common pests and diseases.

Common Pests

  • Aphids: These sap-sucking insects cause curled leaves and weak growth. Use insecticidal soap or neem oil.
  • Spider Mites: Control them by spraying water on the undersides of leaves regularly.
  • Birds: Use bird netting during ripening to protect your harvest.

Common Diseases

  • Botrytis (Gray Mold): Affects fruit in damp weather; improve airflow and avoid overhead watering.
  • Cane Blight: Prune out infected canes and disinfect pruning tools.
  • Root Rot: Prevent by ensuring well-drained soil and avoiding overwatering.

Practicing good garden hygiene — such as removing debris, using mulch, and rotating planting sites — helps reduce disease pressure naturally.


Harvesting Boysenberries

Boysenberries typically ripen in mid to late summer, depending on your region and climate. The berries transition from green to red, then to deep purple or almost black when ripe.

How to Harvest:

  • Wait until the berries are fully colored and easily detach from the vine.
  • Handle gently — ripe boysenberries are delicate and can bruise easily.
  • Pick regularly (every 2–3 days) to prevent overripe fruit from falling or spoiling.

Storage Tips:

  • Store freshly picked boysenberries in shallow containers to avoid crushing.
  • Keep refrigerated; they last about 3–5 days.
  • For long-term storage, freeze the berries in a single layer, then transfer to freezer bags — they’ll keep for up to a year.

Uses and Benefits of Boysenberries

Boysenberries are versatile and can be used in many delicious ways:

  • Culinary Uses: Perfect for jams, jellies, pies, cobblers, sauces, and desserts.
  • Juices and Smoothies: Their rich flavor adds depth to any beverage.
  • Nutritional Benefits: High in antioxidants, vitamins C and K, and fiber. They promote heart health and support the immune system.

Their complex sweet-tart flavor makes them an excellent gourmet ingredient for both home and professional kitchens.


Preparing for Next Year’s Crop

After harvesting, focus on preparing the plant for the next fruiting season:

  1. Remove and dispose of spent canes.
  2. Train and tie the new primocanes to the trellis.
  3. Mulch and water thoroughly before winter.
  4. In colder climates, protect the canes with frost cloth or straw mulch.

By following this cycle of pruning, training, and renewal, your boysenberry patch will produce abundant fruit year after year.


Conclusion

Boysenberries combine the best qualities of raspberries and blackberries — large, juicy berries with an extraordinary flavor. While they require some attention to trellising, pruning, and care, the rewards are truly worth it. With proper soil, sun, and maintenance, these vines will provide you with a generous harvest of sweet-tart berries for many seasons.

Growing boysenberries at home brings a taste of old-fashioned charm and freshness straight to your garden. Once you experience the pleasure of picking sun-ripened boysenberries from your own vines, you’ll understand why this hybrid fruit has become a cherished favorite for gardeners and food lovers alike.

Trellis Marionberry Vines: Simple Technique for Next Year’s Fruit Production

Trellis Marionberry Vines: Simple Technique for Next Year’s Fruit Production

Marionberries, often called the “cabernet of blackberries,” are prized for their rich, complex flavor and deep purple color. Originating from Oregon, this hybrid berry — a cross between the Chehalem and Olallie blackberries — produces long, trailing canes that can yield heavy clusters of delicious fruit. However, to achieve consistent, high-quality harvests year after year, proper trellising and pruning are essential.

Training Marionberry vines on a trellis not only enhances fruit production but also simplifies maintenance, improves air circulation, and helps prevent diseases. In this comprehensive guide, you’ll learn everything about trellising Marionberry vines, pruning for next year’s fruiting canes, and caring for your plants to ensure abundant harvests season after season.


Understanding Marionberries and Their Growth Habit

Before diving into trellising, it’s important to understand how Marionberries grow. Like other trailing blackberry varieties, Marionberry plants produce two types of canes:

  1. Primocanes – These are the first-year canes that grow vigorously but do not produce fruit.
  2. Floricanes – In their second year, the same canes that were primocanes become floricanes, which bear fruit in summer.

After fruiting, floricanes die back and should be pruned away to make room for new primocanes that will produce next year’s crop.

Because Marionberries are trailing vines rather than erect canes, they can reach up to 15–20 feet in length. Without support, they sprawl across the ground, which increases the risk of disease and fruit rot. This is why trellising is essential — it keeps the canes organized, healthy, and productive.


Why Trellising Is Important

A well-designed trellis offers multiple benefits for Marionberry vines:

  • Better Sun Exposure: Elevating canes ensures even light distribution for improved fruit ripening.
  • Air Circulation: Reduces the risk of fungal diseases and mildew.
  • Ease of Harvesting: Makes picking fruit more efficient and less damaging to the plant.
  • Space Management: Keeps canes tidy and prevents them from overtaking your garden.
  • Enhanced Yield: Promotes stronger, healthier canes for next year’s fruit production.

Choosing the Right Trellis System for Marionberries

There are several trellis designs suitable for trailing blackberries like Marionberries. The best one for you depends on available space and ease of management. Here are the most effective systems:

1. Two-Wire Trellis (Simple and Effective)

This is the most common and beginner-friendly trellis setup.

How to Build It:

  • Place sturdy wooden or metal posts 15–20 feet apart in a row.
  • Stretch two wires between the posts — the bottom wire at 3 feet and the top wire at 5 feet above the ground.
  • Train the canes along the wires in opposite directions for neat, balanced growth.

Advantages:

  • Easy to construct and maintain.
  • Provides excellent support for trailing vines.

2. V-Trellis System

This design improves air circulation and sunlight exposure by spreading the canes outward.

How to Build It:

  • Set posts at an angle (forming a “V” shape) with the top ends about 3–4 feet apart.
  • Attach two wires on each side — one at 3 feet and another at 5 feet height.
  • Tie canes alternately to each side of the “V.”

Advantages:

  • Keeps canes separated for better airflow.
  • Reduces disease pressure.
  • Easier access for harvesting and pruning.

3. T-Trellis System

Ideal for larger gardens or commercial setups.

How to Build It:

  • Use posts with horizontal cross-arms at the top (about 5–6 feet high).
  • Stretch two wires on the arms — one on each side.
  • Train canes along the wires horizontally.

Advantages:

  • Supports more canes and increases fruit yield.
  • Simplifies management and harvesting.

Planting and Training Marionberry Vines

1. Planting

Marionberries prefer full sun and well-drained, slightly acidic soil (pH 5.5–6.5). Before planting, enrich the soil with compost or aged manure.

  • Spacing: Space plants about 4–6 feet apart in rows that are 8–10 feet apart.
  • Watering: Keep the soil consistently moist, especially during establishment. Avoid waterlogging.
  • Mulching: Add a 2–3 inch layer of mulch to conserve moisture and suppress weeds.

2. Training the Canes

Once the canes start growing, training begins.

  • In the first year, allow the primocanes to grow freely until they reach about 4–5 feet in length.
  • Then, gently tie the canes to the trellis wires using soft plant ties or twine.
  • Avoid tight knots — canes need room to expand as they grow.
  • As new shoots appear, train them alternately along both sides of the trellis to create a fan-like pattern.

By fall, your vines should be neatly aligned along the wires, ready to develop into productive floricanes next season.


Pruning for Next Year’s Fruit Production

Proper pruning is key to ensuring consistent fruit production each year. Marionberries follow a two-year growth cycle, so your pruning schedule should align with this cycle.

1. After Harvest (Late Summer to Early Fall)

  • Remove the old floricanes that have already fruited. They will die back naturally.
  • Cut them at ground level and dispose of them to prevent disease spread.
  • Select 4–6 of the strongest primocanes to keep for next year’s crop.

2. During Winter (Dormant Season)

  • Check the trellis for any damage and repair wires if needed.
  • Prune weak or damaged primocanes to maintain 5–7 healthy canes per plant.

3. Early Spring

  • Tip prune the selected canes to about 8–10 feet in length.
  • This encourages lateral branching and increases fruiting sites.
  • Tie these trained canes neatly along the trellis again before new growth begins.

With this pruning rhythm, your Marionberries will continuously renew themselves, giving you a fresh crop every summer.


Fertilization and Care

  • Feeding: Apply a balanced fertilizer (10-10-10) in early spring as new growth appears. Avoid over-fertilizing with nitrogen, which promotes leafy growth but fewer berries.
  • Watering: Marionberries need about 1–2 inches of water per week, especially during flowering and fruit development.
  • Mulching: Maintain a layer of mulch year-round to protect roots, prevent weeds, and retain moisture.
  • Weed Control: Hand-pull weeds or use organic mulch; avoid deep cultivation near the roots.

Pest and Disease Management

Marionberries are generally hardy but can be affected by a few common pests and diseases.

Common Pests:

  • Aphids: Cause curling leaves; control with neem oil or insecticidal soap.
  • Spider Mites: Thrive in dry conditions; spray water regularly to dislodge them.
  • Japanese Beetles: Pick off by hand or use row covers during outbreaks.

Common Diseases:

  • Anthracnose & Cane Blight: Fungal infections that thrive in humid conditions. Prune out infected canes and ensure proper airflow.
  • Root Rot: Avoid overwatering and plant in well-drained soil.
  • Powdery Mildew: Remove affected leaves and use organic fungicides if needed.

Keeping your trellis system clean and maintaining good airflow will prevent most problems naturally.


Harvesting Marionberries

Marionberries typically ripen in mid to late summer. You’ll know they’re ready when the berries turn deep purple and easily detach from the vine.

Tips for Harvesting:

  • Pick berries early in the morning when they are cool and firm.
  • Handle gently to avoid bruising.
  • Store freshly picked berries in a shallow container in the refrigerator; they’ll last up to five days.
  • For long-term storage, freeze them in a single layer before transferring to airtight containers.

Because Marionberries are soft and juicy, they’re ideal for making jams, pies, syrups, and smoothies.


Preparing for Next Year’s Crop

After harvesting, your goal shifts to preparing the plant for next season. Here’s how:

  1. Remove spent floricanes completely after fruiting.
  2. Select the strongest new primocanes and tie them neatly to the trellis for overwintering.
  3. Mulch heavily in late fall to protect roots from freezing.
  4. Avoid pruning in winter beyond light maintenance — save major pruning for spring.

With this simple annual cycle of training, pruning, and renewal, your Marionberry patch will continue to thrive for many years.


Conclusion

Trellising Marionberry vines is not only a simple technique but the key to unlocking abundant, high-quality fruit production year after year. By understanding the plant’s natural growth pattern and maintaining a consistent trellising and pruning routine, you’ll ensure vigorous canes, healthier plants, and a steady supply of delicious berries every summer.

Whether you’re a home gardener or a small-scale grower, a well-trained Marionberry vine is both beautiful and productive — a true treasure in your garden. With just a few posts, wires, and careful pruning, you can transform these vigorous vines into a flourishing berry haven for years to come.

How to Grow and Harvest Huckleberry: Complete Guide for Home Gardeners

How to Grow and Harvest Huckleberry: Complete Guide for Home Gardeners

Huckleberries are among the most delightful wild berries found in North America. Known for their sweet-tart flavor, these small, juicy berries are a favorite for jams, pies, and smoothies. Closely related to blueberries, huckleberries grow on small shrubs and thrive in cool, mountainous regions. Though traditionally harvested from the wild, huckleberries can also be cultivated successfully at home with the right care and patience.

In this detailed guide, you’ll learn everything about how to grow, care for, and harvest huckleberries, from choosing the right variety to storing your ripe fruit for maximum freshness.


Understanding Huckleberries

Huckleberries belong to the genus Vaccinium, which also includes blueberries and cranberries. The most common types are black, red, and blue huckleberries, each offering a unique flavor profile and growing environment.

  • Black Huckleberries (Vaccinium membranaceum): Sweet, flavorful, and often found in the Pacific Northwest.
  • Red Huckleberries (Vaccinium parvifolium): Tart and bright, ideal for preserves or baking.
  • Blue Huckleberries (Vaccinium pallidum): Milder in flavor, native to the eastern U.S.

While wild huckleberries thrive in acidic, nutrient-poor soils, cultivated varieties can adapt well to garden environments if soil conditions are properly managed.


Climate and Soil Requirements

Huckleberries prefer cool to moderate climates and are naturally found in mountainous or forested regions. The ideal growing conditions mimic these natural habitats:

  • USDA Zones: 4 to 8 are best for most huckleberry species.
  • Temperature: They enjoy cool summers and cold winters, tolerating frost quite well.
  • Light: Partial shade to full sun. Too much heat can stress the plants, especially in southern areas.
  • Soil: Acidic soil with a pH between 4.5 and 5.5 is essential. You can acidify your soil by adding peat moss, pine needles, or sulfur.
  • Drainage: Huckleberries dislike waterlogged conditions. Well-drained, loamy soil is ideal.

Before planting, test your soil pH using a home kit and amend it as needed. Mixing compost and organic matter helps improve both drainage and fertility.


Propagation: How to Start Huckleberries

Huckleberries can be propagated by seeds, cuttings, or root divisions. However, because the seeds are slow to germinate and sometimes unpredictable, growing from cuttings or nursery plants is easier for beginners.

1. From Seeds

  • Collect ripe huckleberries and mash them to extract seeds.
  • Rinse the seeds thoroughly and dry them for a few days.
  • Stratify the seeds by refrigerating them in a moist paper towel for 2–3 months.
  • Sow them in trays filled with an acidic potting mix and keep them in a warm, bright area.
  • Germination may take several weeks to months, so patience is key.

2. From Cuttings

  • Take semi-hardwood cuttings (4–6 inches long) from a healthy huckleberry plant during summer.
  • Remove the lower leaves and dip the cut end into rooting hormone.
  • Place the cutting in a pot filled with a mixture of peat moss and sand.
  • Keep it moist and shaded until roots form (typically 6–8 weeks).

3. From Nursery Plants

For faster results, buy young huckleberry shrubs from a nursery. They usually start fruiting within 2–3 years of planting.


Planting Huckleberries

When your huckleberry seedlings or cuttings are ready for transplanting, follow these steps for successful establishment:

  1. Choose the Right Spot: Select a location with partial shade and well-drained, acidic soil.
  2. Prepare the Soil: Mix organic matter, pine needles, and peat moss into the soil before planting.
  3. Planting Distance: Space each shrub about 3–4 feet apart to allow air circulation and growth.
  4. Planting Depth: Place the plant at the same depth it grew in the container and gently firm the soil around it.
  5. Water Thoroughly: After planting, water deeply to settle the roots.

Apply a layer of mulch around the plants to retain moisture and suppress weeds. Pine bark or pine needles make excellent mulch choices, as they also help maintain soil acidity.


Watering and Feeding

Huckleberries have shallow root systems, so they require consistent moisture—especially during dry or hot weather.

  • Watering: Keep the soil evenly moist but not soggy. Water once or twice a week, depending on rainfall and temperature.
  • Mulching: Maintain a 2–3 inch layer of organic mulch to reduce evaporation and protect roots.
  • Feeding: Huckleberries don’t need heavy fertilization. Use a fertilizer designed for acid-loving plants (like those used for blueberries or azaleas). Apply in early spring and again in midsummer. Avoid overfertilizing, as excess nitrogen promotes leaf growth at the expense of fruiting.

Pruning and Maintenance

Pruning helps maintain a healthy shape, promote air circulation, and encourage new fruiting branches.

  • When to Prune: Prune in late winter or early spring before new growth begins.
  • How to Prune: Remove dead, diseased, or damaged branches first. Thin out crowded stems to improve airflow.
  • Renewal Pruning: Every 3–4 years, remove older branches at the base to stimulate new growth.

Weed control is important because huckleberry roots are shallow and compete poorly with weeds. Hand-pull weeds rather than hoeing to avoid damaging the roots.


Pollination and Fruiting

Huckleberries are partially self-fertile, but they produce better yields when multiple plants are grown together for cross-pollination. Bees and other pollinators play a vital role in fruit set, so avoid using harmful pesticides that could deter them.

Once established, huckleberries usually begin to produce fruit in 2 to 4 years. The berries start green, then turn red, blue, or black depending on the variety, when they are fully ripe.


Harvesting Huckleberries

Harvesting is the most rewarding stage of growing huckleberries. The berries ripen gradually from midsummer to early fall, depending on your region and climate.

Steps for Harvesting:

  1. Wait until the berries are fully colored and slightly soft to the touch.
  2. Gently roll or shake ripe berries off the stems into your hand or a shallow container.
  3. Handle with care to prevent bruising.
  4. Harvest regularly, as ripe berries may fall off easily.

Because huckleberries ripen unevenly, you may need to pick them every few days during the season.


Post-Harvest Handling and Storage

Fresh huckleberries are highly perishable, so proper storage is essential:

  • Refrigeration: Store unwashed berries in a shallow container lined with paper towels. They’ll keep for about a week.
  • Freezing: Spread berries on a baking sheet and freeze individually before transferring them to airtight bags. Frozen huckleberries can last up to a year.
  • Preserving: Huckleberries make delicious jams, jellies, syrups, and pies. You can also dehydrate them for long-term storage.

Common Problems and Solutions

Even though huckleberries are relatively low-maintenance, they can face certain challenges:

  • Poor Growth: Usually due to alkaline soil. Adjust the pH with sulfur or acidic mulch.
  • Yellowing Leaves: Indicates iron deficiency, often caused by high pH. Use chelated iron supplements if needed.
  • Root Rot: Caused by overwatering or poor drainage. Ensure proper soil structure and don’t let roots sit in water.
  • Pests: Aphids, birds, and caterpillars may occasionally feed on plants. Use organic repellents or bird netting to protect your crop.

Tips for Successful Huckleberry Cultivation

  • Always maintain soil acidity for healthy growth and vibrant fruiting.
  • Provide consistent moisture without overwatering.
  • Mulch generously with pine materials.
  • Grow several huckleberry plants for better pollination and yield.
  • Be patient—huckleberries take time to establish but reward you for years once they mature.

Conclusion

Growing and harvesting huckleberries may require patience and care, but the reward is well worth the effort. These flavorful berries not only add color and sweetness to your garden but also offer valuable antioxidants and nutrients. With the right soil, climate, and maintenance, you can enjoy fresh, homegrown huckleberries season after season.

Whether you plan to eat them fresh, bake them into pies, or turn them into jam, cultivating huckleberries brings a taste of the wild right into your backyard — a true gift from nature to your home garden.

Planting American Pawpaws – The Hardiest Exotic Fruit Trees

Planting American Pawpaws – The Hardiest Exotic Fruit Trees

The American Pawpaw (Asimina triloba) is often called the “forgotten fruit of North America.” Native to the eastern United States, this tropical-tasting fruit grows on hardy trees that can withstand cold winters and still produce creamy, custard-like fruit reminiscent of banana, mango, and melon. Despite its exotic flavor, the pawpaw thrives in temperate climates, making it one of the most unique and resilient fruit trees you can grow.

In this detailed guide, we’ll explore everything you need to know about planting, growing, and harvesting American pawpaws — from selecting the right seeds or saplings to understanding their soil needs, pollination requirements, and care throughout the year.


Understanding the Pawpaw Tree

The pawpaw tree belongs to the Annonaceae family, which also includes tropical fruits like cherimoya and soursop. However, the pawpaw stands out as the only member of this family native to temperate regions. Mature trees can grow between 15 to 25 feet tall, with lush green foliage that provides excellent shade in summer and turns a bright yellow in fall.

The fruit itself is oblong, about the size of a mango, with smooth green skin that ripens to a yellow or brown hue. Inside, the flesh is soft and sweet, filled with large brown seeds. Pawpaws are sometimes nicknamed “poor man’s banana” due to their tropical taste and creamy texture.


Why Grow Pawpaws?

There are many reasons gardeners and orchard enthusiasts love planting pawpaws:

  1. Cold-Hardy Exotic Fruit: Unlike most tropical fruits, pawpaws can survive cold winters — tolerating temperatures as low as -20°F (-29°C).
  2. Unique Flavor: The fruit tastes like a blend of banana, mango, and melon, with a smooth custard consistency.
  3. Nutritional Benefits: Pawpaws are rich in vitamin C, magnesium, iron, and potassium, as well as powerful antioxidants.
  4. Low Maintenance: Once established, pawpaw trees require minimal care and are resistant to most pests and diseases.
  5. Attracts Wildlife: The flowers attract pollinators, and the fruit is enjoyed by wildlife such as raccoons, squirrels, and birds.

Choosing the Right Pawpaw Variety

There are several improved cultivars of pawpaws that you can plant depending on your region and taste preferences. Some popular ones include:

  • ‘Sunflower’: Self-fertile, productive, and known for large fruits with fewer seeds.
  • ‘Shenandoah’: Smooth texture, sweet flavor, and excellent yield.
  • ‘Susquehanna’: Large, firm fruit with a rich tropical taste.
  • ‘Overleese’: Early ripening, excellent for cooler regions.

If you want to grow pawpaws from seed, remember that it can take five to seven years before fruiting, while grafted trees typically bear fruit in three to four years.


Ideal Growing Conditions

Although pawpaws are hardy, they have specific preferences when it comes to sunlight, soil, and moisture:

  • Climate: They thrive in USDA zones 5–9.
  • Sunlight: Young pawpaw trees prefer partial shade, while mature ones produce best in full sun.
  • Soil: Pawpaws prefer well-draining, fertile soil rich in organic matter. Slightly acidic to neutral pH (5.5–7.0) works best.
  • Moisture: Keep the soil consistently moist but not waterlogged. Pawpaws dislike drought conditions.

When planting, choose a sheltered location away from strong winds and frost pockets.


How to Plant Pawpaws

1. From Seeds:

  • Collect fresh seeds from ripe fruits.
  • Clean the seeds and store them in damp peat moss or sand.
  • Refrigerate (stratify) them at around 40°F (4°C) for 3–4 months before sowing.
  • Sow seeds 1 inch deep in pots or directly outdoors in spring once the soil warms up.
  • Germination can take 6 to 10 weeks, so patience is key.

2. From Seedlings or Grafted Trees:

  • Plant saplings in early spring after the danger of frost has passed.
  • Dig a hole twice the width of the root ball and the same depth.
  • Backfill with soil mixed with compost.
  • Water thoroughly and mulch around the base to retain moisture and regulate temperature.

Pollination and Fruit Set

One unique aspect of pawpaws is their pollination challenge. The flowers are not attractive to common pollinators like bees. Instead, they rely on flies and beetles, which are less efficient.

To increase fruit set:

  • Plant at least two genetically different trees for cross-pollination.
  • Hand pollination is highly recommended — use a small brush to transfer pollen from one flower to another.
  • Keep the area around trees rich in organic material to attract natural pollinators.

Caring for Pawpaw Trees

1. Watering:
Pawpaws need consistent watering, especially in their first few years. Aim for about 1 inch of water per week.

2. Mulching:
Apply a 2–3 inch layer of organic mulch (like straw or wood chips) to keep the roots cool and moist.

3. Fertilizing:
Feed young trees in spring with a balanced, slow-release fertilizer (10-10-10). Avoid over-fertilizing — pawpaws grow slowly but steadily.

4. Pruning:
Minimal pruning is needed. Remove dead or crossing branches and shape the tree for good airflow and sunlight penetration.

5. Pest & Disease Management:
Pawpaws are naturally pest-resistant, though you may occasionally find leaf spots or mildew. Good air circulation and proper watering help prevent these issues.


Harvesting Pawpaw Fruit

Pawpaws typically begin producing fruit in 3–5 years (for grafted trees). The fruits ripen in late summer to early fall, depending on your climate and variety.

Signs of ripeness:

  • The skin changes from green to yellowish or brown.
  • The fruit softens slightly when squeezed.
  • A rich, fruity aroma develops.

Gently twist or shake ripe fruits from the branches — they bruise easily, so handle with care. Pawpaws don’t store well at room temperature and should be refrigerated or processed soon after harvesting.

You can use them in smoothies, puddings, ice creams, breads, or fresh desserts.


Propagation Tips

Pawpaws can be propagated by:

  • Seeds: For genetic diversity, though they take longer to bear fruit.
  • Grafting: Ensures known fruit quality and earlier harvest.
  • Root suckers: New shoots from the base can be transplanted.

Common Problems and Solutions

ProblemPossible CauseSolution
Poor fruit setLack of pollinationPlant multiple varieties or hand-pollinate
Yellowing leavesOverwatering or poor drainageImprove soil drainage
Leaf spotsFungal issuesRemove infected leaves, ensure airflow
Dropping fruitStress or nutrient imbalanceWater regularly, apply balanced fertilizer

Final Thoughts

Growing American pawpaws is a rewarding experience that combines exotic taste with hardy resilience. Whether you’re a home gardener or an orchard grower, pawpaw trees offer a taste of the tropics right in your backyard — without needing a tropical climate.

With the right planting site, consistent care, and patience, you can enjoy years of delicious fruit and the satisfaction of cultivating one of North America’s most fascinating native trees.

The American Pawpaw truly stands as the hardiest exotic fruit tree — a bridge between tropical flavor and temperate hardiness.

Picking Mayhaws

Picking Mayhaws

When spring paints the southern landscape in soft hues of green and gold, one of nature’s most overlooked treasures quietly ripens beneath the water-tolerant trees — the mayhaw. Known scientifically as Crataegus aestivalis or Crataegus opaca, the mayhaw is a small, tart, red fruit that grows on native hawthorn trees found in the wetlands, river bottoms, and swamps of the southeastern United States.

Each year, from late April through May, families and foragers head into these low-lying areas to collect the glistening berries, marking what’s affectionately known as “mayhaw season.” Picking mayhaws isn’t just a harvest activity; it’s a beloved Southern tradition that combines family, nature, and culinary creativity.

In this guide, we’ll explore everything you need to know about picking mayhaws — from understanding the trees and identifying ripe fruit to harvesting, cleaning, and preparing these unique berries for delicious homemade jams and jellies.


1. What Are Mayhaws?

Mayhaws are small, round fruits — typically ½ to ¾ inch in diameter — that resemble miniature crabapples. They come from native hawthorn trees, which are deciduous and part of the Rosaceae (rose) family, closely related to apples and pears.

The trees themselves are small to medium-sized, ranging from 15 to 30 feet tall, with thorny branches and clusters of white blossoms that bloom in early spring. The fruit matures in late April to May, which gives the mayhaw its name — “May” for the month and “haw” from the old English word for “hedge” or “hawthorn.”

Though mayhaws are tart when eaten raw, they’re famous for being transformed into sweet, tangy jellies, syrups, and wines that are prized across the southern U.S.


2. Natural Habitat and Growth Conditions

Mayhaws are native to the low, wet regions of the southeastern United States, especially in states like Louisiana, Texas, Mississippi, Alabama, Georgia, and Florida.

They thrive in:

  • Seasonally flooded areas
  • Riverbanks
  • Swamp edges
  • Moist, loamy soils

Because of this, traditional mayhaw picking often involves wading through shallow water or muddy terrain—a fun challenge that adds to the adventure. However, mayhaw trees can also be successfully grown in home orchards if given well-drained, slightly acidic soil and plenty of sunlight.


3. Identifying Mayhaw Trees and Fruits

Before you head out picking, it’s essential to recognize a mayhaw tree and distinguish it from other hawthorn species.

Tree Identification:

  • Leaves: Small, glossy, and serrated along the edges.
  • Bark: Gray to brown with rough, textured patches.
  • Thorns: Short and sharp, usually about ½ to 1 inch long.
  • Flowers: Clusters of white blossoms appear in early spring (March–April).
  • Fruit: Bright red to orange-red when ripe, round, and smooth-skinned.

In the wild, you’ll often find mayhaw trees growing in shallow water or damp lowlands. The presence of flowers in early spring is your cue to revisit that area a few weeks later for ripe fruit.


4. When to Pick Mayhaws

Timing is crucial when it comes to harvesting mayhaws. The fruiting season typically begins in late April and lasts through May, depending on your region and local climate.

Signs of Ripeness:

  • The fruits turn bright red, orange-red, or sometimes golden depending on the variety.
  • They soften slightly but remain firm enough to handle.
  • Many fruits begin to fall naturally into the water or grass below the trees.

The best time to pick mayhaws is early in the morning, when temperatures are cool, and the fruit is firm and fresh. Harvesting early also prevents wildlife — such as birds and raccoons — from getting to the fruit first.


5. Methods of Picking Mayhaws

There are two traditional methods of collecting mayhaws — hand-picking from the tree and gathering fallen fruit.

A. Hand-Picking:

For those who prefer precision, gently pluck ripe fruit directly from the branches. This ensures the berries are clean, unbruised, and of the best quality for cooking.

Tips:

  • Wear gloves to avoid scratches from thorns.
  • Use a small bucket or basket lined with a towel to cushion the fruit.
  • Pick selectively — only the bright red, fully ripe fruits.

B. Gathering Fallen Fruit:

Many seasoned mayhaw pickers prefer to collect fallen fruits because ripe mayhaws naturally drop from the tree when ready.

In swampy areas, pickers often use a fine-mesh net or strainer to skim floating fruit from the water surface. On dry land, a rake or leaf net can be used to gather them from the ground.

Pro Tip: Fallen fruit should be cleaned soon after collection to prevent spoilage, as they tend to ferment quickly in warm weather.


6. Cleaning and Sorting the Harvest

Once you’ve collected your mayhaws, the next step is cleaning and sorting them for processing.

Cleaning Steps:

  1. Rinse Thoroughly: Use cool water to remove dirt, leaves, or insects.
  2. Sort: Discard any bruised, shriveled, or unripe fruit.
  3. Soak: For swamp-picked mayhaws, soak them in clean water for 10–15 minutes to remove fine debris.
  4. Drain & Dry: Place on clean towels or paper to air dry.

After cleaning, you can refrigerate the fruit for up to five days or freeze it for longer storage before making jelly or juice.


7. Processing and Preserving Mayhaws

The most common use for mayhaws is making mayhaw jelly, known for its ruby-red color and delightful balance of tartness and sweetness.

Making Mayhaw Juice (for Jelly):

  1. Place clean fruit in a large pot and cover with water.
  2. Bring to a boil, then simmer for 15–20 minutes until the fruit softens.
  3. Mash gently and strain through cheesecloth or a fine sieve overnight.
  4. The resulting liquid is mayhaw juice, the base for jelly or syrup.

Preserving Options:

  • Jelly or Jam: Classic Southern recipes use equal parts juice and sugar, cooked until set.
  • Syrup: Boil juice with sugar until slightly thickened for pancakes or desserts.
  • Wine: Ferment mayhaw juice for a fruity, light wine.
  • Freezing: Store whole fruits or juice in airtight containers for future use.

8. Growing Mayhaw Trees at Home

If you fall in love with mayhaws, consider planting your own trees. Modern horticultural advancements have made mayhaw cultivation easier and more productive than ever.

Planting Tips:

  • Location: Choose a sunny, well-drained area.
  • Soil: Slightly acidic (pH 5.5–6.5).
  • Spacing: 15–20 feet apart.
  • Watering: Keep soil moist, especially during establishment.
  • Fertilizing: Apply a balanced fertilizer in spring.

Mayhaw trees begin bearing fruit in 4–6 years when grown from seed and 2–3 years if grafted. They can produce 30–50 pounds of fruit per tree annually once mature.


9. Nutritional and Health Benefits of Mayhaws

Beyond their culinary charm, mayhaws offer surprising health benefits.

Nutritional Highlights:

  • Rich in Vitamin C: Strengthens the immune system.
  • High in Antioxidants: Helps reduce inflammation and oxidative stress.
  • Low in Calories: Ideal for healthy diets.
  • Good Source of Fiber: Aids digestion and promotes heart health.

Traditionally, mayhaws were even used in folk medicine as a heart tonic, reflecting their botanical relationship to the hawthorn plant, which is known for cardiovascular support.


10. The Cultural Significance of Mayhaw Picking

Mayhaw picking is more than just a harvest—it’s a cultural celebration across many Southern communities. Each spring, festivals like the Louisiana Mayhaw Festival and Georgia Mayhaw Festival bring families together to enjoy local jelly contests, live music, and traditional food fairs.

For many, picking mayhaws is a family tradition passed down through generations, connecting people to their land, heritage, and community spirit. It’s a reminder of the South’s deep appreciation for nature’s simple gifts and seasonal bounty.


11. Challenges and Sustainability

While mayhaw trees grow naturally in the wild, their swampy habitats face threats from urban development, drainage projects, and climate change. This has made wild mayhaw harvesting less predictable.

To preserve this Southern treasure, more farmers are turning to cultivated mayhaw orchards. These controlled environments produce consistent yields and help keep the tradition alive. Home gardeners and small-scale farmers play an essential role in maintaining this ecological and cultural heritage.


12. Final Thoughts

Picking mayhaws is an experience that combines nature, nostalgia, and the joy of discovery. Whether you’re wading through shallow water with a bucket in hand or collecting fruit beneath your backyard trees, the process connects you deeply with the rhythms of the seasons.

From their fragrant spring blossoms to their vibrant red fruit, mayhaws symbolize the resilient beauty of the Southern landscape. Their tart flavor, transformed through skill and care into sweet jelly, tells a story of tradition, patience, and community.

So next May, grab a basket, head toward the wetlands, and join in one of the South’s most enduring rituals — the timeless art of picking mayhaws.