How to Plant and Grow Endive in Your Summer Vegetable Garden: A Complete Step-by-Step Guide

How to Plant and Grow Endive in Your Summer Vegetable Garden: A Complete Step-by-Step Guide

If you’re looking to add a crisp, slightly bitter leafy green to your summer garden, endive (Cichorium endivia) is a perfect choice. Often seen in gourmet salads and Mediterranean dishes, this flavorful green is part of the chicory family and brings both taste and texture to your plate. Growing endive at home is surprisingly easy—it’s adaptable, resilient, and perfect for gardeners who love experimenting with new vegetables.

In this guide inspired by “Planting Endive | Vegetable Garden | Summer Garden Part 3”, you’ll learn everything you need to know to successfully plant, grow, and harvest endive in your summer vegetable garden. Whether you’re new to gardening or a seasoned grower, these simple steps will help you cultivate fresh, organic endive right at home.


What Is Endive and Why Should You Grow It?

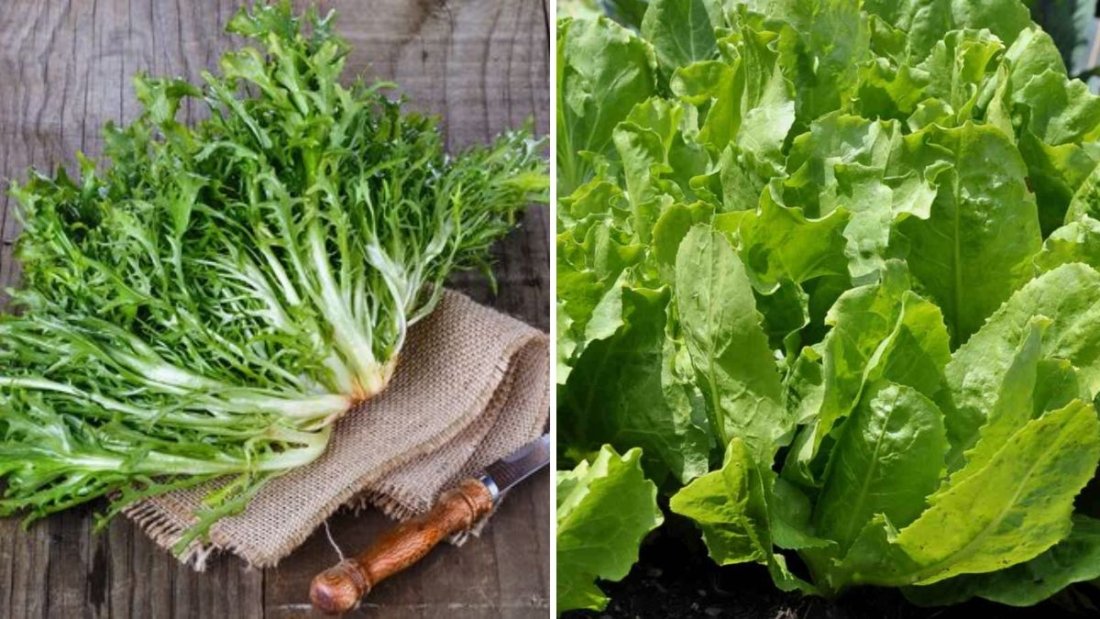
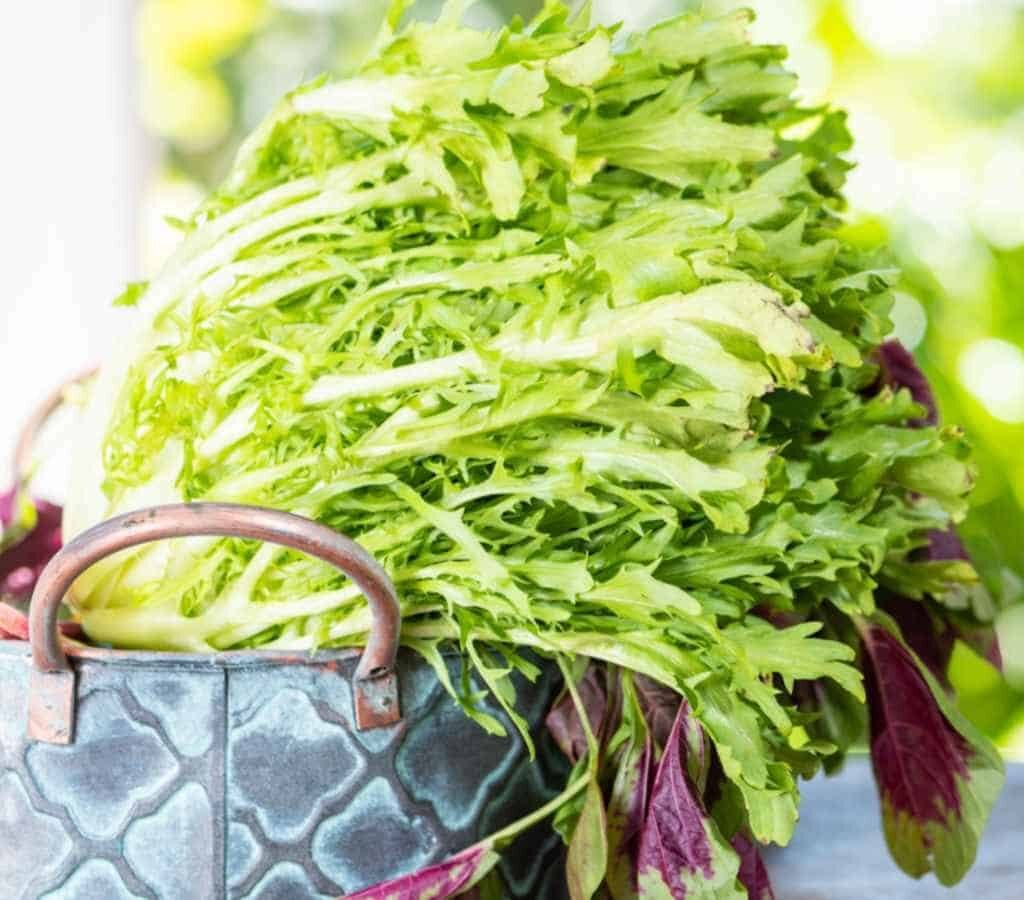
Endive is a leafy green vegetable with a pleasantly bitter flavor that intensifies as it matures. There are two main types:

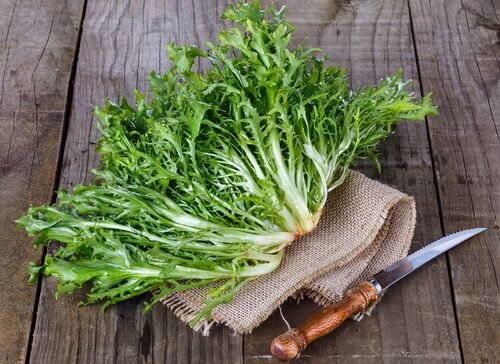
  1. Curly Endive (Frisée): Features finely cut, frilly leaves and a delicate texture—great for salads.
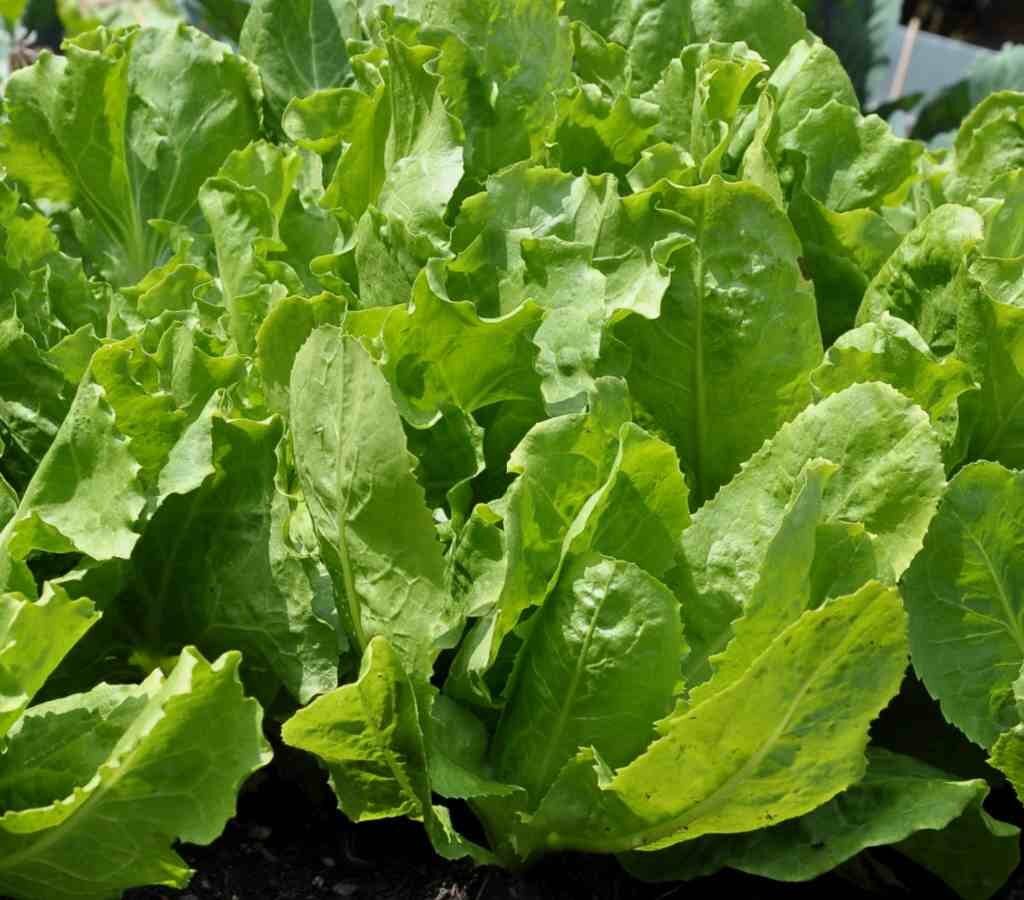
  2. Broad-Leaved Endive (Escarole): Has wider, flatter leaves and a milder flavor—ideal for soups, sautés, and stews.

Growing endive at home offers several advantages:

  • It’s fast-growing and thrives in both containers and garden beds.
  • It’s rich in vitamins A, C, and K, along with minerals like calcium and iron.
  • It adds a gourmet touch to your homegrown produce.
  • It’s a cool-weather crop that can also adapt to mild summer conditions if well-watered and shaded.

Step 1: Choosing the Right Variety

Before you start planting, decide which type of endive suits your garden and culinary needs:

  • Curly Endive (Cichorium endivia var. crispum): Best for fresh salads and decorative garnishes.
  • Escarole (Cichorium endivia var. latifolia): Best for cooking, grilling, or braising.

For a summer garden, curly endive often performs better since it tolerates slightly warmer conditions with good moisture.


Step 2: Ideal Growing Conditions for Endive

Endive thrives in well-drained, fertile soil with plenty of organic matter. While it prefers cooler temperatures, it can also be grown during summer with the right care.

Requirements for Healthy Growth:

  • Sunlight: 4–6 hours of sunlight daily; partial shade is ideal in hot climates.
  • Temperature: 15°C to 25°C (59°F to 77°F).
  • Soil: Rich, loamy soil with a pH between 6.0 and 7.0.
  • Water: Consistent moisture to prevent bitterness and bolting.

If you’re gardening in a region with intense summer heat, grow endive in raised beds or containers where you can easily control water and shade.


Step 3: Preparing the Soil

Soil preparation is key to growing lush and tender endive.

  1. Loosen the soil to a depth of 10–12 inches to encourage root development.
  2. Incorporate organic compost or well-rotted manure to enrich the soil and retain moisture.
  3. If your soil is heavy clay, mix in sand or perlite to improve drainage.
  4. Level the soil surface before sowing or transplanting.

A well-prepared bed ensures your endive grows evenly and resists common problems like root rot.


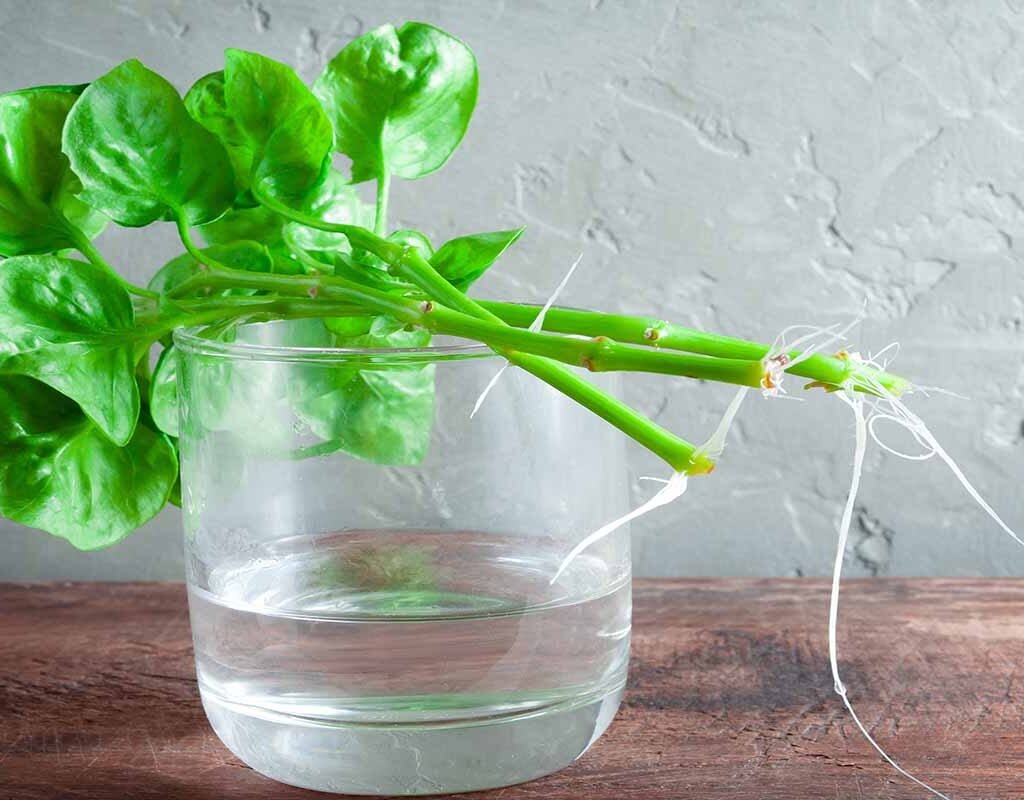
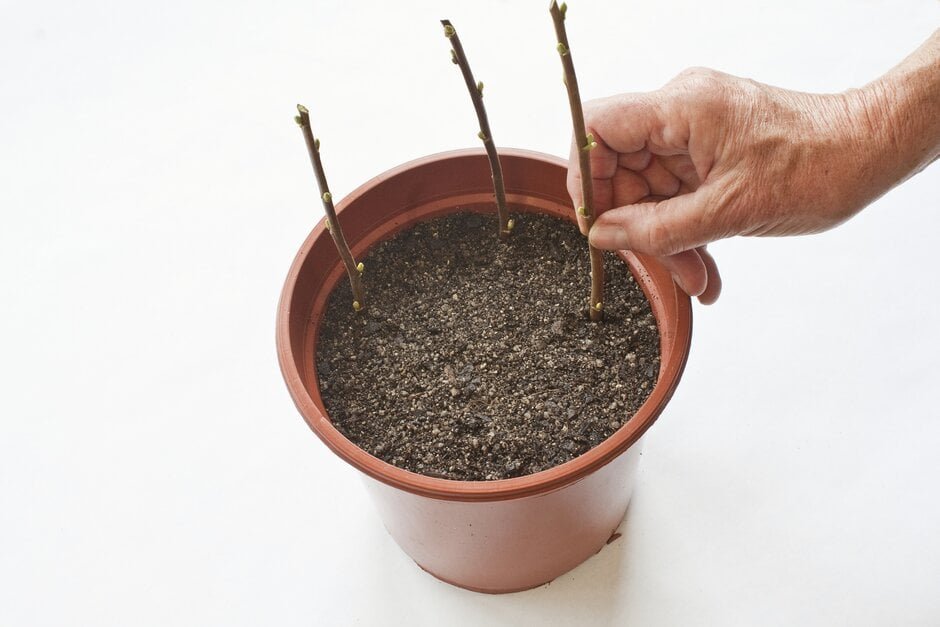
Step 4: Planting Endive Seeds

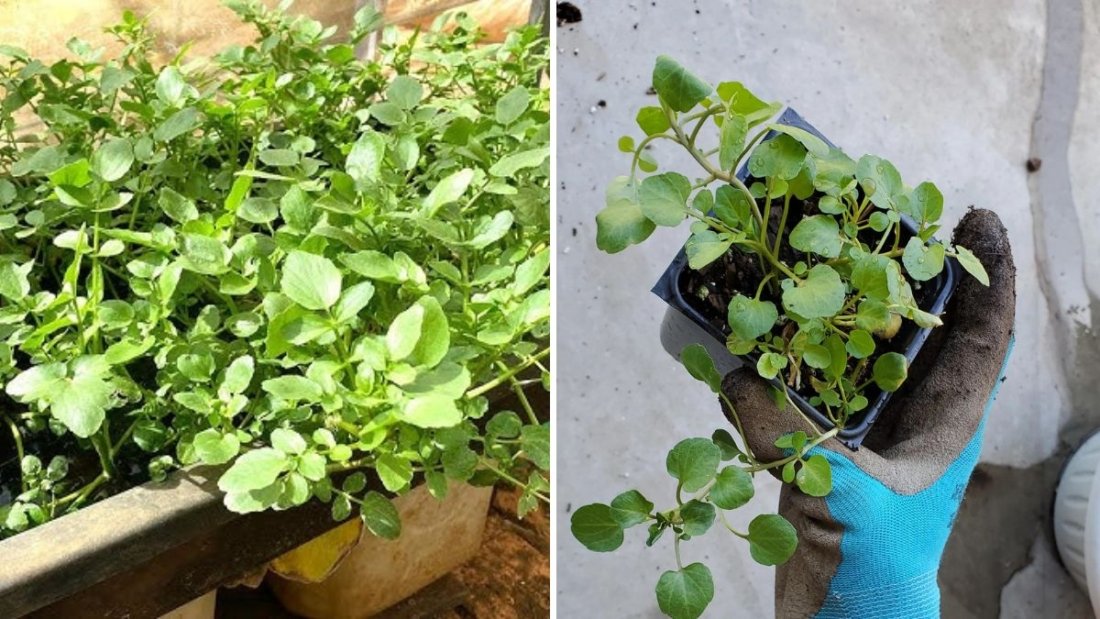
You can start endive from seeds directly in the garden or indoors for early transplanting.

Option 1: Direct Sowing (Best for Summer Gardens)

  1. Sow seeds ¼ inch deep in rows spaced 12–15 inches apart.
  2. Lightly cover with soil and mist gently with water.
  3. Thin seedlings to about 6–8 inches apart once they’re 2–3 inches tall.

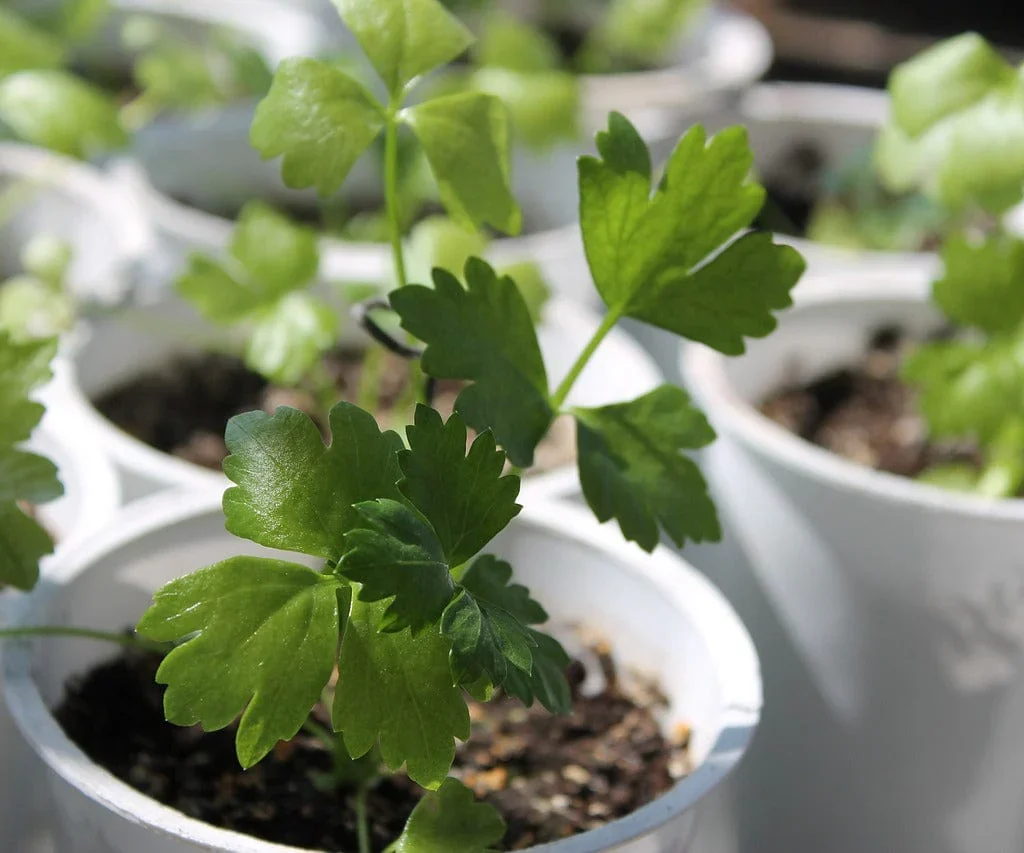
Option 2: Starting Indoors

  1. Plant seeds in small trays or pots about 4–6 weeks before transplanting.
  2. Keep the soil moist and place trays in a bright, airy spot.
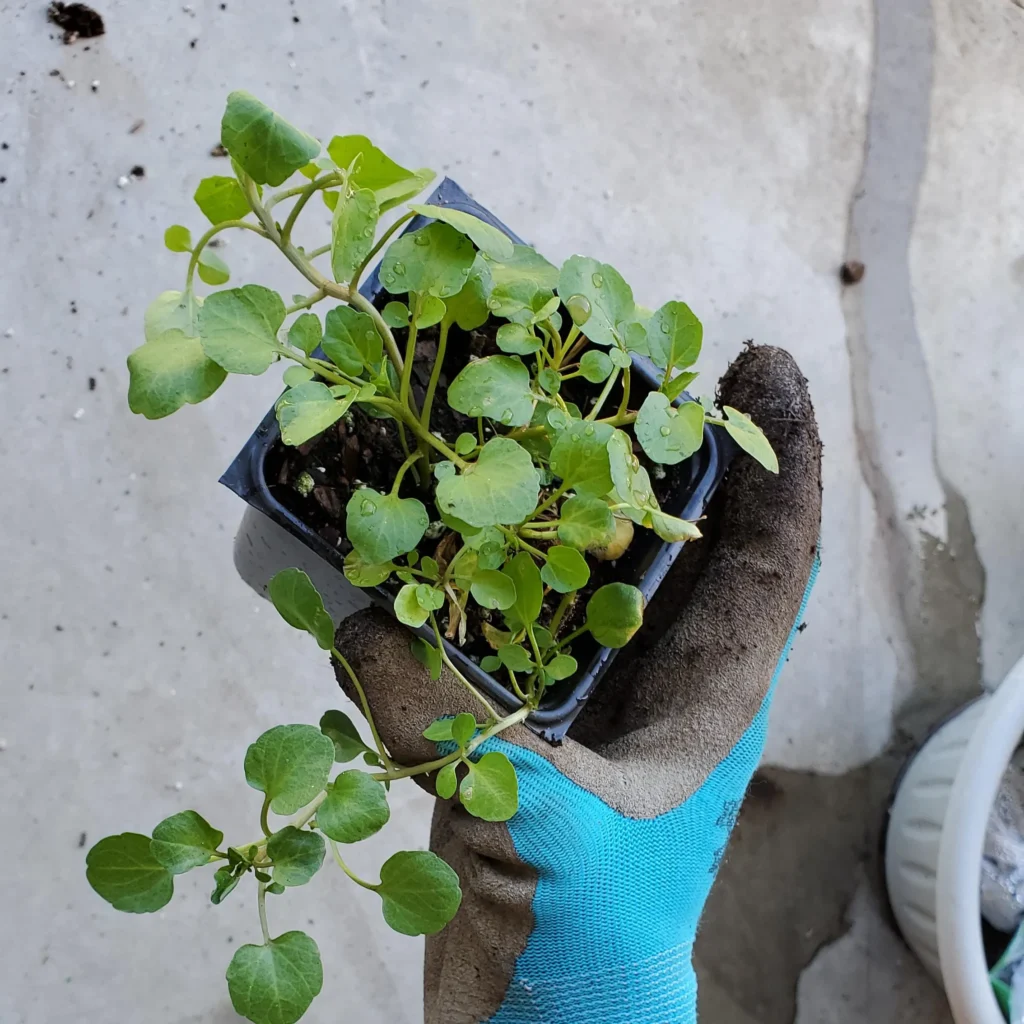
  3. Transplant seedlings outdoors when they have 3–4 true leaves.

Pro Tip: Transplant in the late afternoon or on a cloudy day to reduce transplant shock.


Step 5: Watering and Feeding

Endive loves consistent moisture. Dry soil can make the leaves tough and overly bitter.

  • Water regularly: Keep the soil evenly moist but not waterlogged.
  • Mulch around plants: Use straw, compost, or leaves to retain moisture and keep roots cool.
  • Feed every 3–4 weeks: Apply a balanced organic fertilizer or liquid seaweed solution to boost growth.

During hot summer days, consider using shade cloth or planting near taller crops (like tomatoes or beans) to provide partial shade.


Step 6: Caring for Growing Plants

Healthy endive plants need a bit of maintenance to ensure steady growth and sweet flavor.

  • Weed regularly: Weeds compete for water and nutrients. Remove them gently to avoid disturbing shallow roots.
  • Pest control: Watch out for aphids, slugs, and snails. Use neem oil spray or diatomaceous earth as organic protection.
  • Avoid bolting: High temperatures or irregular watering can cause plants to flower prematurely. Keep soil moist and harvest on time.

If you notice the leaves getting too bitter, blanching can help (see below).


Step 7: Blanching for Milder Flavor

Endive has a natural bitterness, which can be mellowed through blanching—a simple process that reduces light exposure to the inner leaves.

How to Blanch Endive:

  1. When the plants are about 10–12 inches tall, gently tie the outer leaves together over the center to form a loose bunch.
  2. Alternatively, cover the center with a pot or opaque container to block sunlight.
  3. Leave it covered for 7–10 days before harvesting.

This results in tender, pale-green inner leaves with a milder, less bitter taste—perfect for salads.


Step 8: Harvesting Endive

You can start harvesting endive 45–60 days after planting, depending on the variety.

Harvesting Tips:

  • Cut the whole plant about an inch above the soil line for full heads.
  • For continuous harvest, pick outer leaves and let the center continue growing.
  • Harvest in the morning for the crispest texture and best flavor.

Endive doesn’t store for long, so refrigerate in a damp towel or airtight bag and use within a week.


Step 9: Common Problems and How to Fix Them

Even though endive is relatively easy to grow, it can face a few issues—especially in summer gardens.

ProblemLikely CauseSolution
Bitter leavesHeat stress or dry soilProvide shade, keep soil moist
Bolting (flowering early)High temperatureMulch, water regularly, plant in partial shade
Yellow leavesNutrient deficiencyFeed with organic compost or liquid fertilizer
Pests (aphids, slugs, snails)Humid conditionsUse neem oil spray or hand-pick pests

Maintaining a clean garden and consistent care prevents most of these problems naturally.


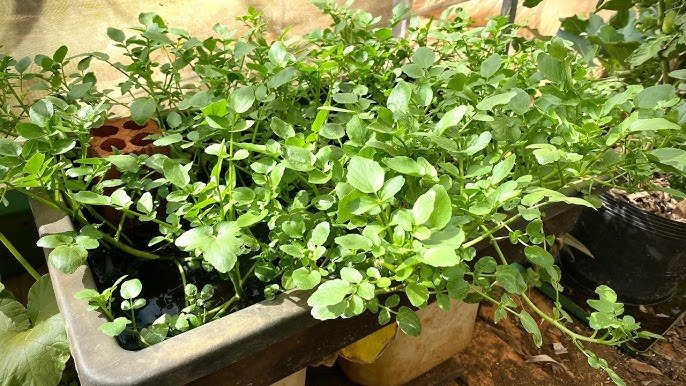
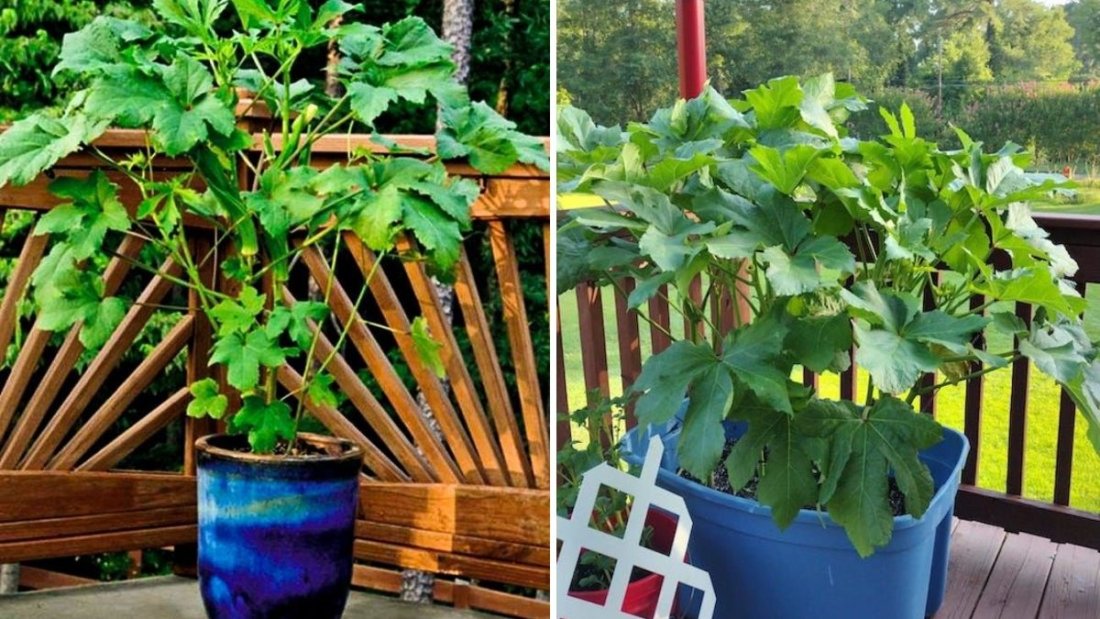
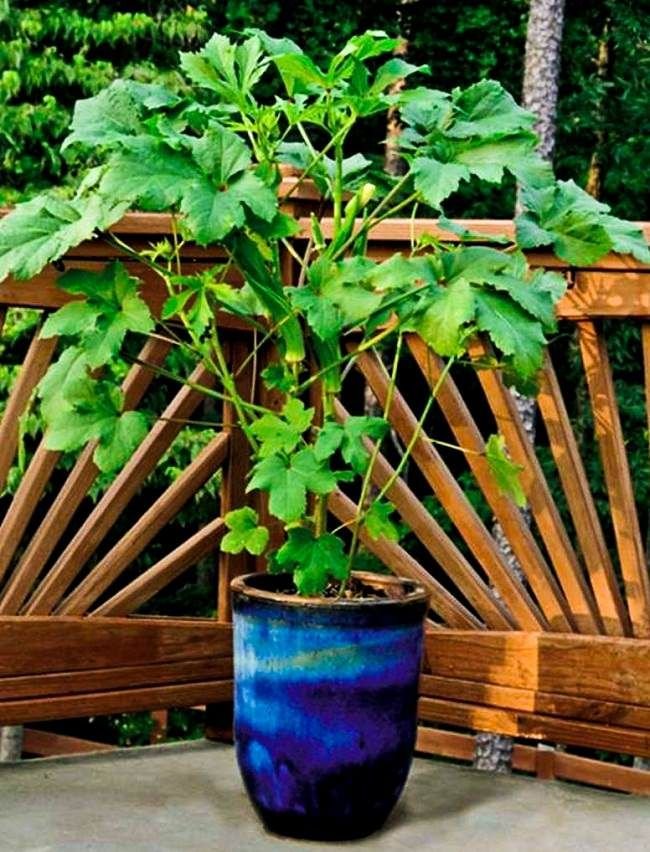
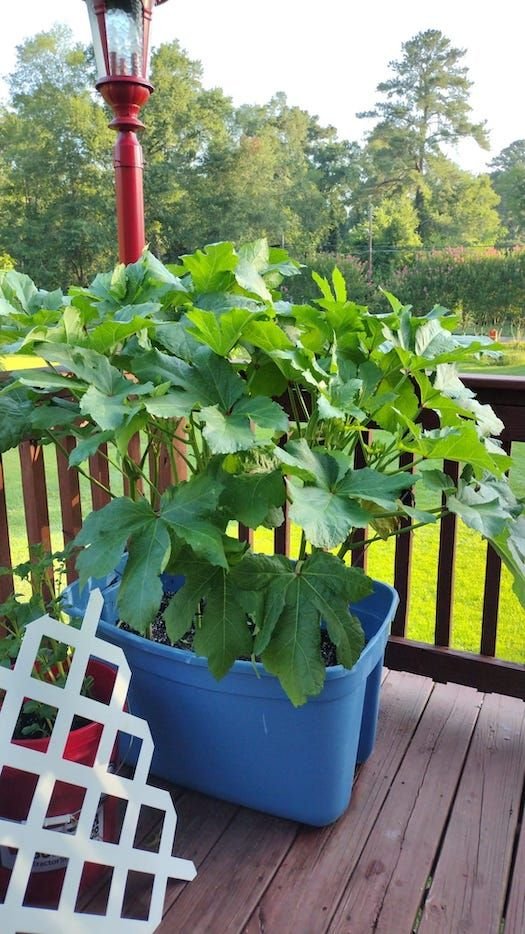
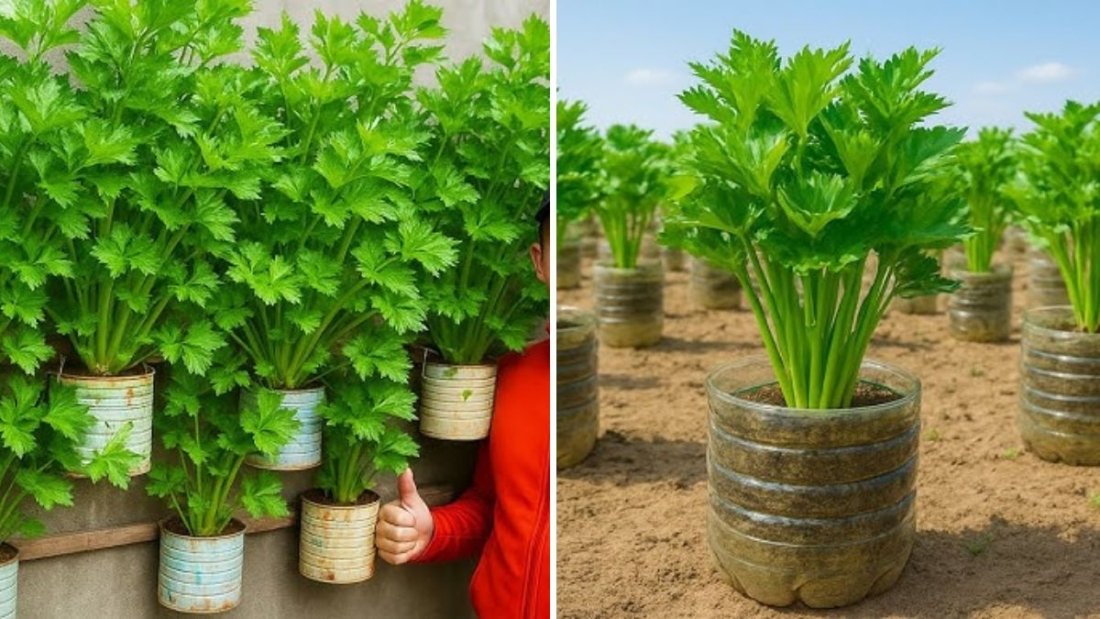
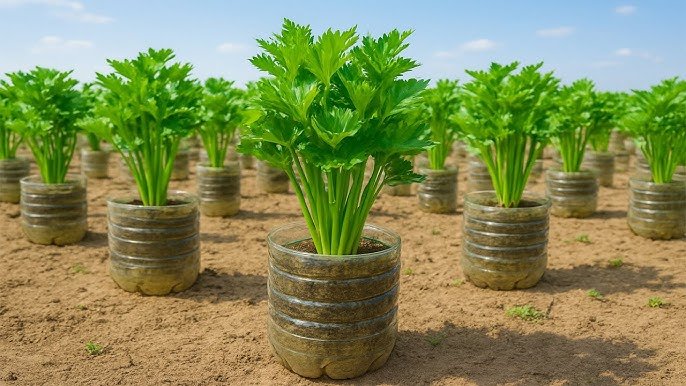
Step 10: Growing Endive in Containers

If you don’t have garden space, don’t worry—endive grows beautifully in containers too!

Container Requirements:

  • Use a 12-inch-deep pot with good drainage holes.
  • Fill with organic potting mix and compost.
  • Water daily during warm months to keep soil moist.
  • Harvest frequently to encourage new growth.

Container-grown endive is perfect for balconies, patios, or kitchen gardens, giving you fresh greens just a few steps away.


Step 11: Delicious Ways to Use Fresh Endive

Once you’ve harvested your homegrown endive, there are endless ways to enjoy it:

  • Fresh salads: Combine curly endive with lettuce, radishes, and citrus vinaigrette.
  • Sautéed dishes: Lightly cook escarole with olive oil and garlic.
  • Soups and stews: Add chopped leaves near the end of cooking for a nutrient boost.
  • Grilled endive: Drizzle olive oil and grill for a smoky, savory flavor.
  • Wraps and bowls: Use large leaves as wraps for healthy fillings.

Its crisp texture and subtle bitterness pair beautifully with rich, creamy, or tangy ingredients.


Bonus Tips for Summer Success

Growing endive in summer requires a bit of attention but yields abundant greens if managed well. Here are a few extra tips:

  • Start seeds early in trays and transplant once the weather stabilizes.
  • Use mulch generously to keep roots cool and prevent weeds.
  • Harvest frequently to encourage new leaf growth.
  • Stagger your planting every 2–3 weeks for a continuous harvest.
  • Avoid overwatering, which can cause root rot—aim for consistent moisture instead.

With these techniques, you can enjoy healthy endive greens all summer long.


Final Thoughts

Planting endive in your summer vegetable garden is one of the most rewarding ways to expand your variety of leafy greens. Its bold, slightly bitter flavor and crisp texture make it a standout addition to any meal.

By following the steps from soil preparation to harvesting, you’ll be able to grow lush, flavorful endive even in warm weather. Whether you’re cultivating it in garden beds or pots, endive proves that you don’t need perfect conditions to enjoy gourmet greens at home.

So this summer, grab a few seeds, prepare your soil, and experience the joy of growing your own endive—fresh, healthy, and full of flavor straight from your garden to your plate!

The Easiest Way to Grow Watercress at Home: A Complete Beginner’s Guide to Fresh, Healthy Greens

The Easiest Way to Grow Watercress at Home: A Complete Beginner’s Guide to Fresh, Healthy Greens

If you’re looking for a fast-growing, nutrient-rich leafy green that thrives even in small spaces, watercress (Nasturtium officinale) is an excellent choice. Known for its peppery flavor and exceptional nutritional value, watercress is a superfood that’s often found in streams and rivers—but with the right approach, you can easily grow it right at home, even without a flowing water source.

This comprehensive guide will walk you through the easiest way to grow watercress at home, from choosing the right growing setup to harvesting and caring for your plants. Whether you live in an apartment, have a backyard, or prefer container gardening, watercress can flourish with minimal effort.


Why Grow Watercress at Home?

Watercress is not just another leafy green—it’s one of the most nutrient-dense vegetables in the world, packed with vitamins A, C, and K, calcium, and antioxidants. Growing it at home offers several benefits:

  • Always fresh and chemical-free greens at your fingertips
  • Fast growth—ready to harvest within 4–6 weeks
  • Low maintenance and perfect for hydroponic or soil setups
  • Beautiful and functional, adding greenery to your space

It’s also a sustainable choice, as it grows quickly and can be harvested multiple times.


Step 1: Understanding Watercress Growing Conditions

Before planting, it’s important to understand what watercress loves. It naturally grows near clean, flowing water—so to recreate that at home, you’ll need constant moisture and good drainage.

Ideal Growing Conditions:

  • Light: Partial sunlight to light shade (4–6 hours daily)
  • Temperature: 10°C to 25°C (50°F to 77°F)
  • Soil: Rich, loamy soil that stays consistently moist
  • Water: Clean, non-chlorinated water is ideal
  • Humidity: High humidity helps watercress thrive indoors

If you can maintain a moist environment, watercress will reward you with continuous growth.


Step 2: Choosing Your Growing Method

There are several easy ways to grow watercress at home. Choose one based on your available space and tools.

1. Growing Watercress in Soil

This method is ideal if you have garden space or planters.

You’ll need:

  • A shallow container or pot (6–8 inches deep)
  • Moisture-retaining potting mix
  • Water tray or saucer

Steps:

  1. Fill the container with potting mix rich in compost or organic matter.
  2. Plant the seeds about ¼ inch deep and cover lightly with soil.
  3. Place the pot in a tray filled with water to keep the soil constantly moist.
  4. Keep in partial sunlight, ensuring the soil never dries out.
  5. Mist regularly to maintain humidity.

As the seedlings emerge, thin them out to avoid overcrowding. In 3–4 weeks, your plants will be lush and ready for light harvesting.


2. Growing Watercress in Water (Hydroponic Style)

Watercress naturally loves water, so growing it hydroponically is one of the easiest and cleanest ways to maintain it indoors.

You’ll need:

  • A shallow bowl, jar, or container
  • Clean water (filtered or rainwater preferred)
  • Watercress seeds or cuttings
  • Pebbles or mesh for support

Steps:

  1. Place pebbles or a small mesh base at the bottom of your container.
  2. Sprinkle seeds or place cuttings on top.
  3. Fill with water so that the roots or seed base stay submerged.
  4. Change the water every 2–3 days to prevent stagnation.
  5. Keep the container in bright, indirect light.

Within a week, you’ll notice tiny roots forming. Once established, you can start trimming and using your homegrown greens.


3. Regrowing Watercress from Store-Bought Stems

You can also regrow watercress from supermarket bunches—a great zero-cost option.

Here’s how:

  1. Take healthy watercress stems and cut off about 3–4 inches from the base.
  2. Remove the lower leaves, leaving a few at the top.
  3. Place the stems in a glass of water, ensuring only the lower part is submerged.
  4. Keep the glass in a bright spot (but out of direct sunlight).
  5. Change the water every two days.

Within 5–7 days, roots will appear. Once they’re about an inch long, transplant the cuttings into moist soil or a hydroponic container for continuous growth.


Step 3: Light and Temperature Tips

Watercress prefers cooler, mild weather, making it perfect for spring or fall planting. Too much direct sun can cause the leaves to turn yellow or bitter. Indoors, place your container near a bright window or under grow lights for 10–12 hours of light daily.

If you live in a warm region, consider growing watercress in partial shade or on a balcony with indirect light to prevent overheating.


Step 4: Watering and Maintenance

Water is key to success with watercress. The goal is to maintain constant moisture without creating stagnant water that could cause root rot.

For soil-grown plants:

  • Keep the tray filled with water to maintain a shallow pool around the pot base.
  • Mist the leaves every couple of days to keep humidity high.

For hydroponic plants:

  • Replace the water regularly (every 2–3 days).
  • Occasionally rinse the roots to prevent algae buildup.

You can add a diluted organic fertilizer once every two weeks, but avoid overfeeding—watercress thrives best in nutrient-rich water and doesn’t require heavy fertilization.


Step 5: Harvesting Your Watercress

Watercress grows rapidly, and you can start harvesting within 4–6 weeks after planting.

How to Harvest:

  • Use clean scissors to snip the tops, leaving at least 2 inches of stem for regrowth.
  • Harvest regularly to encourage new shoots and prevent the plants from flowering too soon.
  • Avoid cutting all the leaves at once—pick selectively for a continuous supply.

Freshly harvested watercress tastes best immediately but can be stored in the refrigerator for up to 3 days wrapped in a damp paper towel.


Step 6: Common Problems and Solutions

Even though watercress is easy to grow, a few minor issues can arise:

ProblemCauseSolution
Yellow leavesToo much sun or poor nutrientsMove to partial shade, add compost or mild fertilizer
Algae or slime in waterStagnant waterChange water every 2–3 days
WiltingLow humidity or dry soilKeep soil moist, mist regularly
Pests (aphids, snails)Moist environmentUse neem oil spray or rinse plants gently

Keeping the environment clean and maintaining airflow will prevent most issues naturally.


Step 7: Using Your Homegrown Watercress

Once you’ve harvested your lush greens, there are countless delicious ways to use them:

  • Add to salads for a peppery kick
  • Blend in smoothies for extra nutrition
  • Use in sandwiches or wraps
  • Make creamy watercress soup
  • Garnish for fish, pasta, or egg dishes

Because of its mild spice, watercress pairs beautifully with citrus, garlic, or creamy ingredients.


Bonus Tip: How to Keep Watercress Growing Year-Round

To enjoy fresh watercress all year long:

  • Grow multiple small batches at different times.
  • Move containers indoors during cold months.
  • Use LED grow lights if natural sunlight is limited.
  • Re-root fresh cuttings every few months for continuous growth.

This rotation ensures you’ll always have a supply of crisp, peppery leaves ready to harvest.


Final Thoughts

Growing watercress at home is truly one of the easiest and most rewarding gardening projects you can take on. Whether in soil, water, or recycled containers, watercress thrives with just a bit of care and attention.

In just a few weeks, you’ll have a lush, green patch of nutritious leaves ready to elevate your salads, soups, and daily meals. With its quick growth, minimal space requirements, and refreshing flavor, watercress proves that you don’t need a stream or a large garden to enjoy this aquatic supergreen—all you need is a little water, patience, and love for growing your own food.

How to Grow Rhubarb in a Pot: A Complete Guide to Thriving Container Rhubarb from Start to Harvest

How to Grow Rhubarb in a Pot: A Complete Guide to Thriving Container Rhubarb from Start to Harvest

If you love the tangy-sweet flavor of rhubarb pies, jams, or desserts but don’t have much space for a traditional garden, here’s great news — you can easily grow rhubarb in a pot! Rhubarb is a hardy perennial vegetable (often treated like a fruit in cooking) that adapts well to container growing when given the right care. Whether you’re a beginner gardener or looking for a compact way to grow more food at home, this guide will walk you through how to grow rhubarb in a pot—from planting to harvest.


Understanding Rhubarb

Rhubarb (Rheum rhabarbarum) is a cool-season perennial known for its large green leaves and thick, red or pink edible stalks. It’s one of the easiest crops to grow, thriving for years with minimal attention. However, it’s important to note that only the stalks are edible—the leaves contain oxalic acid and are toxic to humans and pets.

When grown in containers, rhubarb offers an attractive, leafy addition to patios, balconies, or decks. With proper soil, water, and feeding, potted rhubarb can be just as productive as those grown in garden beds.


Choosing the Right Variety for Containers

Not all rhubarb varieties are equal when it comes to container growing. You’ll want to pick compact or high-yielding varieties that adapt well to smaller spaces. Some excellent options include:

  • Victoria: A classic, reliable, and easy-to-grow variety with greenish-red stalks.
  • Canada Red: Deep red stalks and a sweeter flavor—ideal for desserts.
  • Glaskin’s Perpetual: A great option for continuous harvesting and fast growth.
  • Timperley Early: Known for early harvests and robust growth even in cooler climates.

These varieties are known for their resilience and productivity, even in pots.


Choosing the Right Pot and Location

Rhubarb has deep roots, so container size is crucial. A pot that’s too small can stunt growth or dry out too quickly.

  • Container Size: At least 20–24 inches in diameter and 18–24 inches deep.
  • Material: Use large plastic, terracotta, or wooden planters with good drainage holes.
  • Drainage: Add a layer of gravel or broken pottery at the bottom to prevent root rot.

Location Tip:
Place your rhubarb pot in a sunny spot where it can get 6–8 hours of direct sunlight daily. In hotter regions, a bit of afternoon shade helps protect the plant from stress.


Preparing the Soil

Rhubarb loves rich, fertile, and well-draining soil. In containers, the right mix is essential for root health and consistent growth.

Ideal Soil Mix:

  • 1 part garden soil or compost
  • 1 part peat moss or coconut coir (for moisture retention)
  • 1 part perlite or coarse sand (for aeration)

You can also use a high-quality vegetable potting mix enriched with organic matter. Rhubarb prefers slightly acidic to neutral soil with a pH between 6.0 and 6.8.

Before planting, mix in a slow-release organic fertilizer or compost to provide nutrients for the long growing season.


Planting Rhubarb in Pots

You can start rhubarb either from crowns (roots) or seeds, but crowns are faster and more reliable.

If Planting from Crowns:

  1. Fill the pot with your prepared soil mix, leaving a few inches at the top.
  2. Create a small mound in the center and spread the roots over it.
  3. Cover with soil, leaving the crown’s top just 1 inch below the surface.
  4. Water thoroughly to settle the soil and eliminate air pockets.

If Starting from Seed:

  1. Soak seeds in warm water for a few hours before planting.
  2. Sow seeds about ½ inch deep in small pots or seed trays.
  3. Keep the soil moist and warm (around 60–70°F or 15–21°C).
  4. Transplant seedlings into the large pot once they have a few true leaves.

Note: Seed-grown rhubarb takes about a year longer to mature compared to crown-planted ones.


Watering and Feeding Your Rhubarb

Rhubarb loves moisture but hates soggy soil. In containers, the balance is key.

Watering Tips:

  • Keep the soil consistently moist, especially during dry or hot weather.
  • Avoid waterlogging—empty saucers after watering to prevent root rot.
  • Water early in the day so excess moisture can evaporate before nightfall.

Feeding Schedule:

  • In early spring, top-dress with compost or organic manure.
  • Every 4–6 weeks during the growing season, feed with a balanced liquid fertilizer (10-10-10).
  • Stop fertilizing by mid-summer to allow the plant to prepare for dormancy.

For organic gardeners, seaweed extract or fish emulsion works wonderfully to promote healthy stalk growth.


Temperature and Light Needs

Rhubarb grows best in cool climates and goes dormant during extreme heat. If you live in a warmer region:

  • Move pots to partially shaded areas in midsummer.
  • Mulch the top of the soil to keep roots cool.
  • In cold regions, overwinter rhubarb by moving pots to a sheltered area or insulating them with straw or leaves.

Maintenance and Care

To keep your rhubarb healthy and productive for years, regular care is essential.

Mulching:

Add a 2-inch layer of organic mulch (like straw or compost) around the plant to conserve moisture, suppress weeds, and regulate soil temperature.

Pruning:

Remove any yellow or damaged leaves promptly to encourage new growth. If flower stalks appear, cut them off—they can divert energy away from stalk production.

Overwintering:

In winter, rhubarb enters dormancy. Cut back the dead leaves and store the pot in a frost-free, sheltered spot such as a garage or shed. Resume watering and feeding once spring arrives.


Harvesting Rhubarb

Patience pays off when growing rhubarb! Avoid harvesting in the first year to let roots establish well.

Harvesting Tips:

  • Begin harvesting in the second year after planting.
  • Pull (don’t cut) the stalks gently from the base when they’re 12–18 inches long.
  • Leave at least a third of the stalks to allow the plant to continue growing.
  • Stop harvesting by mid-summer so the plant can recover for the next season.

Fresh rhubarb stalks can be stored in the refrigerator for up to a week or frozen for later use.


Important Note: Rhubarb Leaves Are Toxic

Never eat rhubarb leaves—they contain oxalic acid and anthraquinone glycosides, which can cause poisoning. Always discard leaves safely and only use the stalks for cooking.


Common Problems and How to Fix Them

Even though rhubarb is a hardy plant, a few issues can arise when growing in pots.

  • Root Rot: Caused by poor drainage or overwatering. Use well-draining soil and avoid waterlogging.
  • Aphids or Slugs: Use neem oil spray or diatomaceous earth to control them organically.
  • Weak Growth: Indicates nutrient deficiency—top-dress with compost or use a balanced fertilizer.
  • Bolting (Flowering): Remove flower stalks immediately to maintain stalk production.

Enjoying Your Homegrown Rhubarb

Once harvested, rhubarb can be used in many delicious ways:

  • Classic rhubarb pie or crumble
  • Rhubarb compote or jam
  • Rhubarb and strawberry tarts
  • Homemade rhubarb syrup for cocktails or desserts

Its tangy flavor adds a refreshing twist to both sweet and savory dishes!


Final Thoughts

Growing rhubarb in a pot is not only possible—it’s rewarding, beautiful, and surprisingly easy. With the right container, rich soil, and consistent care, you can enjoy years of harvests from this perennial favorite. Whether you have a small balcony or a sunny patio, potted rhubarb brings vibrant greenery and a taste of the garden to any space.

So grab a pot, choose your favorite rhubarb variety, and get growing! You’ll soon be harvesting fresh, tart stalks perfect for your favorite homemade recipes.

How to Grow Okra in Raised Beds or Containers: From Seed to Harvest – The Complete Easy Guide

How to Grow Okra in Raised Beds or Containers: From Seed to Harvest – The Complete Easy Guide

Okra, also known as lady’s finger or bhindi, is a warm-weather vegetable prized for its tender pods and distinctive flavor. Whether fried, stewed, or added to soups and curries, okra is a garden favorite around the world. The best part? You don’t need a large farm or garden to grow it successfully. With just a raised bed or a few containers, you can enjoy a bountiful harvest of fresh, homegrown okra right at your doorstep!

In this complete guide, we’ll walk you through every step of growing okra from seed to harvest—including soil preparation, planting tips, care, and harvesting. Let’s get started.


Why Grow Okra at Home?

Growing okra in raised beds or containers offers several advantages:

  • Thrives in heat: Okra loves warm temperatures and sunny spots.
  • Easy to grow: Once established, it’s low-maintenance and drought-tolerant.
  • Space-efficient: Ideal for small gardens, balconies, or patios.
  • Nutritious: Rich in fiber, vitamin C, magnesium, and antioxidants.
  • Beautiful plants: Okra produces stunning hibiscus-like flowers that add beauty to your garden.

If you’ve been looking for a simple, rewarding crop that produces well all summer long, okra is a fantastic choice.


Step 1: Choose the Right Variety

There are many varieties of okra to choose from, depending on your region and growing space. For container or raised-bed gardening, pick compact or high-yielding types.

Popular varieties include:

  • ‘Clemson Spineless’ – A classic, high-yielding variety with smooth pods.
  • ‘Baby Bubba’ – Compact and perfect for containers; grows just 2–3 feet tall.
  • ‘Emerald’ – Known for its tender, dark green pods and heat resistance.
  • ‘Red Burgundy’ – Produces beautiful red pods with mild flavor and ornamental appeal.

Choose seeds from a reliable supplier or collect from a mature okra plant from the previous season.


Step 2: Prepare Your Raised Bed or Container

For Raised Beds:

  • Ensure the bed is at least 12–18 inches deep to support okra’s long taproot.
  • The soil should be loose, well-draining, and rich in organic matter.
  • Mix in aged compost or well-rotted manure before planting.
  • Maintain a soil pH between 6.0 and 6.8 for optimal growth.

For Containers:

  • Choose large containers—at least 12 inches deep and 12 inches wide per plant.
  • Use pots made of terracotta, plastic, or fabric grow bags with good drainage.
  • Fill with a high-quality potting mix combined with compost or coco peat.
  • Avoid heavy clay soil as it retains too much water.

Okra thrives in full sun, so place containers or raised beds where they receive 6–8 hours of direct sunlight daily.


Step 3: Planting Okra Seeds

Okra seeds have a tough outer coat that benefits from pre-treatment for better germination.

Seed Preparation:

  • Soak the seeds in warm water overnight (8–12 hours) before planting.
  • Alternatively, lightly rub them with sandpaper to break the seed coat.

Sowing:

  • Sow seeds directly into the soil after all danger of frost has passed and the soil temperature is above 70°F (21°C).
  • Plant seeds ½ to 1 inch deep.
  • Space them 12–18 inches apart in raised beds or one plant per large container.
  • Water gently after sowing to settle the soil.

Seedlings will emerge in 7–10 days, depending on temperature.


Step 4: Thinning and Transplanting

If multiple seeds germinate too close together, thin them out to leave only the strongest plant in each space. Okra doesn’t like being transplanted once established, so handle seedlings gently.

If you started seeds indoors:

  • Transplant when seedlings are 3–4 inches tall and outdoor temperatures are consistently warm.
  • Harden them off for a few days before transplanting to reduce shock.

Step 5: Watering and Mulching

Okra loves warmth but needs consistent moisture for healthy pod production.

  • Water deeply 2–3 times per week, depending on weather.
  • Avoid waterlogging; soggy roots can cause rot.
  • Apply organic mulch (like straw, dry leaves, or compost) around the base of the plants to retain moisture and suppress weeds.

During flowering and fruiting, slightly increase watering frequency to encourage steady pod development.


Step 6: Feeding and Fertilizing

Okra is a moderate feeder that benefits from nutrient-rich soil.

  • Before planting, mix in compost or organic manure.
  • Every 3–4 weeks, apply a balanced fertilizer (10-10-10 NPK) or compost tea.
  • When plants begin flowering, side-dress with compost or a fertilizer rich in potassium and phosphorus for better pod production.

Avoid excessive nitrogen; it can cause lush foliage but fewer pods.


Step 7: Caring for Your Okra Plants

Sunlight:

  • Okra loves full sun, so ensure plants receive at least 6 hours of sunlight daily.

Temperature:

  • Ideal growing range: 75–95°F (24–35°C).
  • Okra is very heat-tolerant but stops growing below 60°F (15°C).

Pruning:

  • Remove yellowing or damaged leaves to promote airflow and prevent disease.
  • Pinch off the top of tall plants (above 5 feet) to encourage more branching and pods.

Support:

In windy areas, provide a small stake to support tall okra plants and prevent them from falling over.


Step 8: Pests and Diseases

Okra is relatively hardy, but some common pests can appear.

Common pests:

  • Aphids – Spray with neem oil or insecticidal soap.
  • Whiteflies – Use sticky traps or neem oil spray.
  • Spider mites – Rinse plants with water and apply organic pesticide if needed.
  • Caterpillars or beetles – Handpick or use organic controls.

Common diseases:

  • Powdery mildew – Avoid overhead watering and ensure good air circulation.
  • Root rot – Prevent by using well-drained soil and proper watering.

Healthy, well-fed plants are more resistant to pests and diseases, so regular care pays off.


Step 9: Flowering and Pollination

Okra plants begin to flower around 45–60 days after planting. The large, cream-colored flowers resemble hibiscus blooms since both belong to the mallow family.

Each flower lasts just one day but produces a pod within a few days after pollination. Bees and insects usually handle pollination naturally, but if you’re growing indoors or in an enclosed space, you can gently tap the flowers to help distribute pollen.


Step 10: Harvesting Okra

When to Harvest:

  • Okra pods are ready for harvest 50–70 days after sowing, depending on the variety and growing conditions.
  • Pick pods when they are 3–5 inches long—young and tender.
  • Older pods become fibrous and tough.

How to Harvest:

  • Use a sharp knife or pruning shears to cut pods from the stem.
  • Wear gloves, as some okra varieties have tiny spines that can irritate the skin.
  • Harvest every 2–3 days to encourage continuous production.

Regular picking ensures the plant keeps producing new pods until the end of the season.


Step 11: Post-Harvest Care and Storage

  • Store freshly harvested okra in a perforated plastic bag in the refrigerator.
  • It stays fresh for 3–5 days.
  • Avoid washing before storing, as excess moisture can cause decay.

For long-term storage, blanch and freeze the pods for use in soups or stews later.


Step 12: Companion Planting for Okra

Companion planting helps boost yields and protect okra from pests.

Good companions:

  • Basil and marigold – Deter aphids and beetles.
  • Peppers and tomatoes – Thrive under similar conditions.
  • Radishes and lettuce – Grow quickly and make use of space between okra plants.

Avoid planting with:

  • Sweet potatoes or cucumbers, as they may compete for space and nutrients.

Step 13: Growing Okra Year-Round

In warm or tropical regions, okra can be grown nearly year-round.

  • In spring and summer, it thrives naturally.
  • In cooler climates, start seeds indoors and transplant after the last frost.
  • In very hot regions, consider shading during peak afternoon heat.

By staggering plantings every 3–4 weeks, you can enjoy a continuous harvest throughout the growing season.


Common Problems and Solutions

ProblemLikely CauseSolution
Poor germinationHard seed coatSoak seeds overnight before planting
Stunted plantsCold weather or poor soilPlant in warmer soil and enrich with compost
Yellow leavesOverwatering or nutrient deficiencyWater moderately and feed regularly
Few podsToo much nitrogen or lack of pollinatorsUse balanced fertilizer and encourage bees

Final Thoughts

Learning how to grow okra in raised beds or containers is one of the easiest and most rewarding gardening experiences you can have. With the right setup, a bit of sunshine, and regular care, you can grow abundant, tender okra pods all summer long—right at home.

Okra’s resilience, heat tolerance, and high yield make it perfect for beginners and experienced gardeners alike. Whether you’re working with a sunny balcony, a patio, or a backyard raised bed, this tropical gem will reward you with a vibrant harvest and plenty of delicious meals.

Soak your seeds, prepare your soil, and start planting today—because your journey from seed to harvest with homegrown okra is just a few weeks away!

How to Grow Jalapeño Peppers from Seed to Harvest: A Complete Home Gardening Guide

How to Grow Jalapeño Peppers from Seed to Harvest: A Complete Home Gardening Guide

Jalapeño peppers are among the most popular chili varieties in the world — known for their mild to medium heat, vibrant green color, and delicious flavor that enhances everything from salsas to stir-fries. What’s even better is that growing jalapeños at home is surprisingly easy. With the right soil, sunlight, and care, you can enjoy a continuous harvest of fresh, spicy peppers right from your kitchen garden.

In this complete 1200-word guide, you’ll learn how to grow jalapeño peppers from seed to harvest, including soil preparation, watering tips, fertilizing routines, pest management, and harvesting techniques — all using simple, organic methods.


Why Grow Jalapeño Peppers at Home?

Before getting into the growing process, let’s see why jalapeños are perfect for home gardeners:

  1. Compact Plants: They grow beautifully in pots and small garden spaces.
  2. Long Harvest Season: A single plant can produce peppers for several months.
  3. Culinary Versatility: Jalapeños are great for fresh use, pickling, or drying.
  4. Nutritional Benefits: Packed with vitamin C, antioxidants, and capsaicin — great for immunity and metabolism.
  5. Attractive Plants: Their glossy green fruits and white flowers add beauty to your kitchen garden.

Step 1: Choosing the Right Jalapeño Variety

There are several types of jalapeños, each with a slightly different flavor and heat level. Popular varieties include:

  • Early Jalapeño: Fast-growing, ideal for short growing seasons.
  • Jalapeño M: The classic, medium-hot pepper often found in stores.
  • Purple Jalapeño: Adds ornamental beauty with a colorful twist.
  • Mucho Nacho Jalapeño: Larger, spicier, and perfect for stuffing.

For beginners, Early Jalapeño is a great choice because it matures quickly and performs well in containers.


Step 2: Preparing the Soil and Pot

Jalapeños thrive in well-drained, fertile soil rich in organic matter. Whether you’re growing in the ground or in pots, proper soil preparation is essential.

Container Requirements:

  • Use a 12–14-inch-deep pot with drainage holes.
  • Grow one plant per pot for best results.

Ideal Soil Mix:

Combine the following ingredients for an organic mix:

  • 40% garden soil or coco peat
  • 30% compost or well-rotted cow dung
  • 20% vermicompost
  • 10% sand or perlite for aeration

Add a handful of bone meal (for phosphorus) and neem cake powder (for pest prevention). Mix everything thoroughly before filling your pot.


Step 3: Starting Jalapeño Seeds

Seed Preparation:

You can start with either store-bought jalapeño seeds or seeds from a ripe, healthy pepper.

  1. Choose a fully ripe red jalapeño, as mature seeds germinate best.
  2. Slice the pepper open and remove the seeds carefully.
  3. Dry them for 1–2 days in shade.
  4. Soak the seeds in warm water for 8–12 hours before planting to improve germination.

Sowing Seeds:

  1. Fill small pots or seed trays with moist seed-starting mix.
  2. Plant seeds ¼ inch deep and cover lightly with soil.
  3. Mist with water to keep the soil moist.
  4. Place the tray in a warm, bright location (25°C–30°C / 77°F–86°F).
  5. Seeds germinate in 7–14 days, depending on temperature.

Once seedlings grow 4–6 inches tall and develop 4–5 true leaves, they are ready for transplanting.


Step 4: Transplanting Seedlings

Transplanting Steps:

  1. Choose healthy seedlings with sturdy stems.
  2. Water them before transplanting to minimize shock.
  3. Dig a small hole in your prepared pot or bed.
  4. Gently remove the seedling with its root ball intact.
  5. Place it in the hole and firm the soil around the base.
  6. Water immediately after planting.

Keep the transplanted plants in partial shade for 2–3 days before moving them into full sunlight.


Step 5: Sunlight and Temperature

Jalapeños are warm-weather plants that thrive under bright sunlight.

  • Provide 6–8 hours of direct sunlight daily.
  • Ideal temperature range: 22°C–32°C (72°F–90°F).
  • Avoid exposing them to frost or temperatures below 15°C (59°F).
  • During very hot afternoons, offer light shade to prevent leaf burn.

The more sunlight your plants receive, the spicier and healthier your jalapeños will be.


Step 6: Watering Techniques

Consistent watering is key to growing healthy, productive plants.

Watering Tips:

  • Water the plants deeply 2–3 times a week, depending on climate.
  • Keep the soil evenly moist — neither dry nor soggy.
  • Water at the base, not on leaves, to avoid fungal infections.
  • Use mulch (dry leaves or straw) around the plant base to retain moisture and reduce weeds.

As the peppers begin to ripen, slightly reduce watering to enhance flavor and heat intensity.


Step 7: Feeding and Fertilizing Organically

Jalapeños are heavy feeders that need regular nutrition for strong growth and abundant fruiting.

Fertilizer Schedule:

  • Every 15 days: Add compost or vermicompost to the soil surface.
  • Every 2 weeks: Feed with organic liquid fertilizers such as:
    • Compost tea or vermiwash – for overall plant health.
    • Banana peel fertilizer – provides potassium for flowering and fruiting.
    • Seaweed extract or fish emulsion – encourages vigorous root and fruit development.
    • Wood ash – adds potassium and improves flavor.

Avoid over-fertilizing with nitrogen (too much compost or manure), as it leads to lush foliage but fewer peppers.


Step 8: Supporting and Pruning the Plants

Jalapeño plants can get bushy and heavy with fruits. Light pruning and staking help improve yield.

Support:

Use small bamboo sticks or plant supports to prevent the stems from bending under the weight of the fruits.

Pruning Tips:

  • Pinch off the top growing tips when the plant is about 10–12 inches tall to encourage branching.
  • Remove yellow or dead leaves regularly.
  • Trim small side shoots that crowd the plant base.

Pruning promotes air circulation, prevents pests, and increases fruit production.


Step 9: Flowering and Pollination

Jalapeño plants start flowering about 45–60 days after transplanting.

Pollination Tips:

  • Jalapeños are self-pollinating, but you can improve success by gently shaking the plant to spread pollen.
  • Keep pollinator-friendly flowers like marigold or basil nearby to attract bees.

Once pollinated, the flowers will drop and small green peppers will begin forming.


Step 10: Pest and Disease Management

While generally hardy, jalapeño plants can face some common pests and diseases.

Common Pests:

  • Aphids
  • Whiteflies
  • Spider mites
  • Thrips

Organic Pest Control:

  • Spray neem oil (5 ml per liter of water) once a week.
  • Use garlic or chili spray to repel insects.
  • Remove and destroy infested leaves.
  • Ensure good air circulation and avoid overwatering.

For fungal issues like powdery mildew, spray a solution of 1 teaspoon baking soda + 1 liter of water once weekly.


Step 11: Fruit Development and Ripening

After successful pollination, you’ll notice small green jalapeños growing rapidly.

  • Early fruits are green and firm.
  • Over time, they mature and turn red for a slightly sweeter flavor.
  • Harvest regularly to encourage continuous fruiting.

Each plant can yield 30–50 peppers during a growing season.


Step 12: Harvesting Jalapeño Peppers

When to Harvest:

  • Jalapeños are ready about 70–90 days after transplanting.
  • You can harvest when they’re firm, glossy green, or let them ripen to red for a different flavor.
  • Mature green jalapeños typically measure 2–3 inches long.

How to Harvest:

  • Use scissors or pruning shears to cut the peppers with a small portion of stem attached.
  • Handle the fruits carefully — avoid bruising them.

Regular harvesting encourages the plant to produce more peppers over time.


Step 13: Storing and Using Jalapeños

Once harvested, jalapeños can be used fresh or preserved for later.

  • Refrigerate: Keeps fresh for up to 10 days.
  • Freeze: Wash, dry, and freeze whole or sliced jalapeños.
  • Dry: Air dry or sun dry for chili flakes.
  • Pickle: Preserve in vinegar for long-term use.

Step 14: Saving Seeds for Next Season

To save seeds:

  1. Select the ripest red jalapeño from a healthy plant.
  2. Extract and dry the seeds on paper for 2–3 days.
  3. Store in an airtight container in a cool, dry place.

Seeds remain viable for up to 2 years if stored properly.


Step 15: Common Mistakes to Avoid

  1. Overwatering: Causes root rot and leaf drop.
  2. Too Much Shade: Leads to poor flowering and fewer fruits.
  3. Excess Nitrogen: Results in lush leaves but low yield.
  4. Skipping Pruning: Can cause pest buildup and poor air circulation.
  5. Harvesting Too Late: Overripe fruits reduce new flower production.

Step 16: Health Benefits of Jalapeño Peppers

Homegrown jalapeños are not just tasty — they’re packed with health benefits too:

  • Boost Immunity: High in vitamin C and antioxidants.
  • Support Weight Loss: Capsaicin increases metabolism.
  • Improve Heart Health: Helps lower cholesterol and blood pressure.
  • Aid Digestion: Stimulates stomach enzymes and gut health.
  • Anti-inflammatory Properties: Reduce pain and swelling naturally.

Final Thoughts

Growing jalapeño peppers from seed to harvest is an easy and rewarding experience that brings fresh spice right to your kitchen. With proper soil, sunlight, and organic care, your plants will thrive and produce flavorful peppers for months.

Whether you love mild heat in your recipes or enjoy pickling spicy jalapeños, growing them at home ensures you always have the freshest, most flavorful peppers at your fingertips. Start with just a few seeds today — and soon, you’ll be harvesting your very own homegrown jalapeños, one delicious pepper at a time!

How to Grow Thai Chili Peppers at Home from Fresh Chili: A Complete Step-by-Step Guide

How to Grow Thai Chili Peppers at Home from Fresh Chili: A Complete Step-by-Step Guide

Thai chili peppers — small, fiery, and bursting with flavor — are a must-have for anyone who loves spicy food and vibrant garden plants. These compact yet highly productive plants thrive beautifully in pots, balconies, or kitchen gardens, making them ideal for both beginners and experienced gardeners.

If you’ve ever wondered how to grow Thai chili peppers at home starting from fresh chilies, this comprehensive 1200-word guide will take you from seed extraction all the way to harvest. You don’t need expensive tools or advanced gardening skills — just a little care, patience, and love for spice!


Why Grow Thai Chili Peppers at Home?

Before diving into the growing process, let’s see why Thai chilies deserve a spot in your home garden:

  1. Compact and Productive: Thai chili plants are small yet produce dozens of peppers throughout the season.
  2. Ideal for Pots: They thrive in containers, making them perfect for balconies, patios, and window gardens.
  3. High Yield: Even one healthy plant can supply enough chilies for your kitchen for months.
  4. Flavor and Heat: Thai chilies pack a spicy punch that enhances curries, stir-fries, sauces, and pickles.
  5. Decorative Appeal: The vibrant red, orange, and green fruits add stunning color to your garden.

Step 1: Collecting and Preparing Seeds from Fresh Thai Chilies

The most exciting part of this process is that you can grow Thai chili plants directly from fresh chilies — the ones you buy from a market or use in your cooking.

How to Extract Seeds:

  1. Choose fully ripe red Thai chilies, as mature seeds germinate better.
  2. Slice the chili open carefully with a knife.
  3. Use a spoon or your fingers to remove the seeds.
  4. Spread the seeds on a paper towel and let them dry for 1–2 days in a shaded, well-ventilated area.

Optional Step – Pre-soaking the Seeds:

To speed up germination, soak the seeds in warm water for 8–12 hours before planting. This softens the outer seed coat and encourages faster sprouting.


Step 2: Choosing the Right Container and Soil

Thai chili peppers are heat-loving plants that thrive in rich, well-draining soil.

Container Requirements:

  • Choose a pot that’s 10–12 inches deep with good drainage holes.
  • Use one plant per pot to give it enough space to grow and produce fruits.

Best Soil Mix for Chilies:

Make a nutrient-rich organic soil mix using:

  • 40% garden soil or coco peat
  • 30% compost or cow dung manure
  • 20% vermicompost
  • 10% sand or perlite for drainage

You can also add:

  • 1 tablespoon bone meal for phosphorus (root growth and flowering)
  • A handful of neem cake to prevent pests and fungus

Mix well and fill your pot, leaving an inch of space at the top.


Step 3: Sowing the Seeds

Once your seeds are dry and your soil mix is ready, it’s time to plant.

Seed Sowing Steps:

  1. Moisten the soil lightly before sowing.
  2. Place 2–3 seeds in the center of the pot, about ¼ inch deep.
  3. Cover gently with soil and mist with water.
  4. Keep the pot in a warm, shaded area until the seeds germinate.
  5. Maintain moisture by misting regularly — don’t overwater.

Germination Time:

  • Seeds usually sprout within 10–20 days depending on temperature.
  • Ideal temperature range: 25°C–32°C (77°F–90°F).

Once seedlings appear, place them in a bright location with plenty of indirect sunlight.


Step 4: Transplanting Seedlings (If Started in Seed Trays)

If you started your seeds in seed trays or small pots, transplant them once they’re about 4–6 inches tall and have 4–5 true leaves.

Transplanting Steps:

  1. Water seedlings before transplanting to reduce shock.
  2. Make a hole in your prepared pot.
  3. Carefully remove the seedling, keeping its roots intact.
  4. Place it in the hole and press the soil gently around the base.
  5. Water immediately after transplanting.

Keep the plant in partial shade for 2–3 days before moving it into full sun.


Step 5: Sunlight and Temperature Requirements

Thai chili peppers love the sun!

  • Provide 6–8 hours of direct sunlight every day.
  • Ideal growing temperature: 24°C–35°C (75°F–95°F).
  • If temperatures drop below 18°C (65°F), growth slows down.
  • During very hot days, use a shade cloth or keep the pots where they get morning sun and afternoon shade.

Consistent sunlight is key to healthy plants and spicy fruits.


Step 6: Watering and Mulching

Watering is one of the most important parts of growing Thai chilies.

Watering Tips:

  • Keep the soil consistently moist but not soggy.
  • Water deeply every 2–3 days, depending on weather.
  • Reduce watering slightly during the ripening stage to increase fruit heat.
  • Avoid overhead watering; always water at the base to prevent leaf diseases.

Add a mulch layer (dry leaves or straw) around the base to retain moisture and prevent weeds.


Step 7: Feeding the Plants (Organic Fertilizers)

Thai chili peppers are heavy feeders and respond well to organic nutrients.

Fertilizer Schedule:

  • Every 15 days: Add a handful of compost or vermicompost.
  • Once every 2 weeks: Apply a liquid fertilizer such as:
    • Compost tea (for overall growth)
    • Banana peel fertilizer (for potassium to boost flowering)
    • Seaweed extract or fish emulsion (for stronger plants and more fruits)
  • During flowering: Add a small amount of wood ash or bone meal for better fruit formation.

Avoid overfeeding nitrogen (too much compost or urea), as it will lead to lush leaves but few chilies.


Step 8: Supporting and Pruning the Plant

Although Thai chili plants are small, they can get heavy with fruits.

Support:

Use a thin bamboo stick or garden stake to support the plant and prevent it from bending.

Pruning Tips:

  • Pinch off the top growing tips once the plant reaches about 10–12 inches tall to encourage branching.
  • Remove yellow or damaged leaves to allow better airflow and sunlight.

Pruning helps the plant focus its energy on producing more flowers and chilies.


Step 9: Pest and Disease Management

Like most pepper plants, Thai chilies can attract common pests.

Common Pests:

  • Aphids
  • Whiteflies
  • Spider mites
  • Thrips

Organic Pest Control Methods:

  • Spray neem oil (5 ml per liter of water) once a week.
  • Use a soap-water spray to wash off small insects.
  • Grow basil, marigold, or garlic nearby — these repel pests naturally.
  • Ensure good air circulation around the plants to prevent fungal infections.

If leaves show signs of fungus (like black or white spots), remove affected parts and spray a mix of baking soda and water (1 teaspoon per liter).


Step 10: Flowering and Fruit Development

After 40–60 days, your Thai chili plant will begin to flower.

Pollination Tips:

  • Thai chili flowers are self-pollinating, but you can help by gently shaking the plant or using a soft brush to transfer pollen.
  • Keep pollinators like bees around by planting flowers nearby.

After successful pollination, small green chilies start to appear, growing larger and eventually turning red as they ripen.


Step 11: Harvesting Thai Chili Peppers

Thai chili peppers are ready to harvest about 70–90 days after transplanting.

How to Harvest:

  • You can pick chilies when they’re green for mild heat or wait until they turn red for maximum spice.
  • Use scissors or a knife to cut the fruit with a short stem.
  • Regular harvesting encourages the plant to produce more chilies.

Each plant can yield 50–100 chilies during a single growing season if well cared for.


Step 12: Saving Seeds for Future Planting

You can easily save seeds from your own harvest for next season.

  1. Select the ripest red chili from a healthy plant.
  2. Remove and dry the seeds on paper for 2–3 days.
  3. Store them in an airtight container in a cool, dry place.

These seeds can remain viable for up to 2 years when stored properly.


Step 13: Common Growing Mistakes to Avoid

  1. Overwatering: Causes root rot and yellowing leaves.
  2. Low Sunlight: Results in weak plants and poor fruiting.
  3. Too Much Nitrogen: Produces more leaves and fewer chilies.
  4. Neglecting Pollination: Reduces yield.
  5. Using Cold Water: Always water with room-temperature water for best growth.

Step 14: Benefits of Growing Thai Chili at Home

Homegrown Thai chilies aren’t just about spice — they come with many benefits:

  • Fresh and Chemical-Free: 100% organic and safe for your family.
  • Nutrient-Rich: High in Vitamin C, Vitamin A, and antioxidants.
  • Supports Digestion and Immunity: Capsaicin in chilies aids metabolism and boosts circulation.
  • Long-Lasting Plants: With good care, Thai chili plants can live up to 2 years, giving multiple harvests.

Final Thoughts

Growing Thai chili peppers at home from fresh chilies is one of the most rewarding experiences for any gardener. With just a few fresh peppers, good soil, sunlight, and basic care, you can enjoy a year-round supply of spicy, flavorful chilies right from your kitchen garden.

Whether you use them fresh in curries or dry them for storage, your homegrown Thai chilies will bring unmatched flavor and satisfaction. Start today — your next spicy harvest is just a few months away!

How to Grow Bell Peppers (Capsicums) in Pots from Seed to Harvest: The Super Easy Way for Home Gardeners

How to Grow Bell Peppers (Capsicums) in Pots from Seed to Harvest: The Super Easy Way for Home Gardeners

Bell peppers — also known as capsicums — are one of the most colorful, versatile, and rewarding vegetables to grow at home. Whether you enjoy them crisp in salads, roasted in dishes, or stuffed for a hearty meal, growing your own peppers is surprisingly easy, even in limited space.

If you’ve ever wanted to learn how to grow bell peppers in pots from seed to harvest, this complete 1200-word guide walks you through every step of the process — from choosing seeds and preparing organic soil to caring for your plants and harvesting vibrant, juicy peppers. Let’s get started on your journey to homegrown success!


Why Grow Bell Peppers at Home?

Before diving into the growing process, let’s understand why bell peppers are perfect for container gardening:

  1. Compact Growth: Bell pepper plants grow well in pots and small spaces, making them ideal for balconies, terraces, or kitchen gardens.
  2. Colorful Harvest: From green to red, yellow, and orange, bell peppers bring beauty and variety to your garden and plate.
  3. Nutritious and Delicious: Packed with vitamins A, C, and antioxidants, bell peppers support immune health and add flavor to your meals.
  4. Productive Plants: With proper care, a single plant can yield dozens of peppers over several months.

Step 1: Choosing the Right Variety

The first step in growing healthy bell peppers is choosing a variety that suits your climate and container size.

Popular Bell Pepper Varieties:

  • California Wonder: A classic green-to-red variety, perfect for pots.
  • Golden Bell: Produces bright yellow fruits with a sweet flavor.
  • Purple Beauty: A striking deep-purple variety ideal for ornamental gardens.
  • Red Beauty: Sweet, vibrant, and great for salads or grilling.

If you’re a beginner, go with California Wonder or Red Beauty, as they’re reliable and easy to grow.


Step 2: Preparing the Pot and Soil

Bell peppers thrive in well-drained, nutrient-rich soil. They don’t like “wet feet,” but they do love consistent moisture and warmth.

Container Requirements:

  • Choose a pot at least 12–14 inches deep and wide.
  • Ensure good drainage holes at the bottom to prevent root rot.
  • You can grow one healthy pepper plant per pot for best results.

Soil Preparation (Organic Mix):

Bell peppers love light, fertile soil. Create an organic mix using:

  • 40% garden soil or coco peat
  • 30% compost or well-rotted cow dung manure
  • 20% vermicompost
  • 10% sand or perlite for drainage
  • Add a handful of neem cake powder to protect against soil pests.

Mix the ingredients thoroughly and fill your pot, leaving 2–3 inches of space at the top for watering.


Step 3: Starting Bell Peppers from Seeds

Starting bell peppers from seeds is simple if you give them warmth and patience.

Seed Preparation:

  1. Extract Seeds: You can use store-bought seeds or seeds from a ripe, healthy bell pepper.
  2. Pre-Soak: Soak seeds in warm water for 6–8 hours to speed up germination.
  3. Sow Shallowly: Place seeds ¼ inch deep in a seed tray or small pots filled with moist seed-starting mix.
  4. Cover Lightly: Gently cover with soil and mist water.
  5. Keep Warm: Maintain a temperature between 25°C and 30°C (77°F–86°F) for germination.
  6. Germination Time: Seeds sprout in 7–14 days, depending on temperature.

Once seedlings reach about 3–4 inches in height and develop 4–5 true leaves, they are ready for transplanting.


Step 4: Transplanting Seedlings into Pots

Steps for Transplanting:

  1. Choose healthy seedlings with sturdy stems.
  2. Water them well before transplanting to reduce shock.
  3. Make a small hole in the center of your prepared pot.
  4. Gently remove the seedling, keeping its root ball intact.
  5. Place it in the hole and firm the soil around the base.
  6. Water thoroughly to help roots settle.

Keep the pots in a partially shaded area for 2–3 days to let the seedlings adjust before moving them into full sun.


Step 5: Sunlight and Temperature Requirements

Bell peppers are sun-loving plants and grow best in warm conditions.

  • Provide 6–8 hours of direct sunlight daily.
  • Ideal temperature range: 21°C–30°C (70°F–86°F).
  • If temperatures drop below 15°C (59°F), move pots to a sunny indoor spot or use a transparent cover.
  • Avoid exposing plants to extreme afternoon heat by giving partial shade during very hot days.

Step 6: Watering and Mulching

Consistent watering is essential for healthy pepper plants.

  • Water deeply 2–3 times a week, depending on weather.
  • Keep the soil evenly moist, but never soggy.
  • Use mulch (dry leaves, straw, or grass clippings) around the base to retain moisture and regulate soil temperature.

Avoid overhead watering to prevent fungal issues; instead, water at the base of the plant.


Step 7: Feeding the Plants Organically

Bell peppers are moderate feeders that benefit from regular organic fertilization.

Feeding Schedule:

  • Every 15–20 days: Add a handful of compost or vermicompost.
  • Every 2 weeks: Apply liquid organic fertilizer such as:
    • Compost tea or vermiwash for balanced nutrients.
    • Seaweed extract for strong root and fruit development.
    • Banana peel fertilizer for potassium to support fruiting.
    • Fish emulsion for nitrogen and trace minerals.

This feeding routine helps plants produce more flowers and healthy, thick-skinned peppers.


Step 8: Pollination

Bell peppers are self-pollinating, but you can improve fruit set through gentle assistance:

  • When flowers bloom, gently shake the plant to help pollen transfer.
  • You can also use a small brush or cotton swab to move pollen between flowers.
  • Keep pollinator-friendly plants like basil or marigold nearby to attract bees and beneficial insects.

Step 9: Pest and Disease Control

Bell peppers are relatively low-maintenance but can face occasional pests like aphids, spider mites, and whiteflies.

Organic Pest Management:

  • Spray neem oil weekly (5 ml per liter of water).
  • Use garlic-chili spray to repel insects naturally.
  • Introduce natural predators like ladybugs if you see aphid infestations.
  • Remove any yellowing or damaged leaves to prevent disease spread.

For fungal issues like leaf spot or powdery mildew, use a spray made from 1 teaspoon baking soda in 1 liter of water once a week.


Step 10: Flowering and Fruit Development

Bell pepper plants usually start flowering 40–60 days after transplanting.

  • The flowers will appear in clusters.
  • Ensure consistent watering and organic feeding during this phase.
  • Avoid over-fertilizing with nitrogen—it will cause excessive leaves and fewer fruits.

When flowers fall off naturally, small green peppers begin forming. Within a few weeks, they grow larger and start changing color depending on the variety.


Step 11: Harvesting Bell Peppers

Time to Harvest:
Bell peppers are ready for harvest about 70–90 days after transplanting.

How to Harvest:

  • Pick when fruits are firm, glossy, and of full size.
  • For colored varieties, wait until they turn red, yellow, or orange.
  • Use scissors or a sharp knife to cut the fruit with a small stem attached.

Harvesting regularly encourages the plant to produce more fruits over time.


Step 12: Aftercare for Continuous Yield

  • After the first harvest, continue watering and feeding the plant lightly every 2–3 weeks.
  • Remove old or dried leaves to promote new growth.
  • With good care, bell pepper plants can continue producing for 4–6 months.

If you’re growing in tropical regions, prune the plant after each flush to extend its lifespan.


Common Mistakes to Avoid

  1. Overwatering: Leads to root rot and yellowing leaves.
  2. Insufficient Sunlight: Causes weak stems and small fruits.
  3. Too Much Nitrogen: Encourages leafy growth but fewer peppers.
  4. Neglecting Pollination: Reduces fruit set.
  5. Poor Drainage: Creates fungal problems in roots.

Health Benefits of Homegrown Bell Peppers

Homegrown bell peppers are fresher, tastier, and more nutritious than store-bought ones.

  • Rich in Vitamin C: Boosts immunity and skin health.
  • High in Fiber: Supports digestion and weight control.
  • Loaded with Antioxidants: Helps reduce inflammation and oxidative stress.
  • Low in Calories: Ideal for a healthy diet.
  • Contains Capsaicin (in some varieties): Improves metabolism and heart health.

Final Thoughts

Growing bell peppers in pots from seed to harvest is truly one of the easiest and most satisfying gardening projects. With just a little attention to soil preparation, regular watering, and organic feeding, your plants will reward you with a steady supply of colorful, crisp peppers for months.

Whether you live in a city apartment or have a small backyard, you can enjoy the beauty and flavor of fresh, organic bell peppers right from your garden. Follow these steps, stay patient, and soon you’ll be harvesting your own vibrant capsicums — the ultimate proof that home gardening is both simple and deliciously rewarding.


How to Plant Celery Successfully: 3 Keys to Organic Growth, Soil Preparation, and Seed Starting

How to Plant Celery Successfully: 3 Keys to Organic Growth, Soil Preparation, and Seed Starting

Celery is one of those vegetables that many gardeners find challenging to grow — but once you understand its needs, it can become one of the most rewarding plants in your kitchen garden. Its crisp stalks, aromatic leaves, and versatility in cooking make celery a must-have for any organic gardener.

In this comprehensive 1200-word guide, we’ll walk you through how to plant celery successfully, focusing on the three keys to success: proper soil preparation, organic care, and seed starting techniques. By the end, you’ll know exactly how to grow healthy, flavorful celery right in your own backyard or containers.


Why Grow Celery at Home?

Before we dive into the growing steps, here’s why celery deserves a place in your kitchen garden:

  1. Nutrient-Rich Vegetable: Celery is packed with vitamins A, C, K, folate, and antioxidants that support overall health.
  2. Perfect for Small Gardens: It can thrive in containers or raised beds when provided with rich soil and steady moisture.
  3. Long Harvest Period: Once mature, you can harvest stalks over several weeks.
  4. Fresh and Chemical-Free: Growing celery organically ensures you get clean, flavorful produce without harmful pesticides.

Understanding Celery’s Growing Needs

Celery is a cool-season crop that requires rich soil, consistent moisture, and patience. It’s a slow-growing vegetable, usually taking 120 to 140 days from seed to harvest.

It prefers temperatures between 15°C and 24°C (60°F–75°F) and doesn’t tolerate extreme heat or frost well.

If you live in a warm region, plan to grow celery during the cooler months of autumn to early spring. In cooler areas, it can be planted from spring through early summer.


Key 1: Preparing the Soil Organically

Celery loves nutrient-rich, moisture-retentive soil. Since it’s a heavy feeder, organic soil preparation is the foundation of success.

Here’s how to prepare the perfect organic soil for celery:

1. Choose the Right Location

Pick a spot that receives at least 6 hours of sunlight daily. While celery enjoys sun, it can benefit from light afternoon shade in hot regions.

2. Soil Composition

Celery prefers loamy, fertile soil with a pH between 6.0 and 7.0.
If your soil is heavy clay or sandy, improve it by adding organic matter:

  • Compost: Enriches the soil with essential nutrients.
  • Well-Rotted Manure: Boosts nitrogen for lush stalk growth.
  • Coco Peat or Leaf Mold: Improves moisture retention and soil texture.

3. Add Organic Fertilizers

Before planting, mix in organic soil enhancers such as:

  • Bone meal or rock phosphate for phosphorus.
  • Neem cake powder for pest resistance.
  • Vermicompost for steady nutrient release.

Ensure the soil remains loose and airy — celery roots need space to grow deeply and evenly.

4. Moisture Matters

Celery thrives in damp soil but hates waterlogging. To maintain the right balance:

  • Add organic mulch (like straw or dried leaves) after planting to retain moisture.
  • Ensure the bed has good drainage so water doesn’t stagnate.

Key 2: Seed Starting and Germination

Celery seeds are tiny and slow to germinate, so patience and proper technique are crucial.

1. Starting Indoors

Since celery has a long growing period, it’s best to start seeds indoors 8–10 weeks before your region’s last frost date.

Steps to Start Celery Seeds:

  1. Pre-Soak Seeds: Soak them in warm water for 12–24 hours to speed up germination.
  2. Sow Seeds Shallowly: Sprinkle seeds on top of moist seed-starting mix and gently press them into the soil without covering completely (they need light to germinate).
  3. Keep Warm and Moist: Maintain a temperature of about 21°C (70°F) and mist regularly to keep the soil damp but not soggy.
  4. Germination Time: Seeds take 2–3 weeks to sprout, so don’t lose patience.

2. Transplanting Seedlings

Once seedlings reach about 3–4 inches in height and have at least 4–5 true leaves, they’re ready to move outdoors.

Harden Off Seedlings:
Before transplanting, gradually expose the seedlings to outdoor conditions for 5–7 days. Start by placing them outside for a few hours each day, increasing exposure daily.

Transplanting Steps:

  • Dig holes 8–10 inches apart in rows spaced 12–18 inches apart.
  • Gently remove seedlings from trays, keeping the root ball intact.
  • Plant them slightly deeper than they were in the tray for better stalk support.
  • Water thoroughly after planting.

Key 3: Proper Care and Organic Maintenance

Once your celery plants are in the ground, consistent care is essential for healthy, crisp stalks.

1. Watering

Celery has shallow roots and needs steady moisture:

  • Water deeply 2–3 times per week.
  • Never allow the soil to dry out completely — dryness can lead to bitter stalks.
  • Avoid waterlogging by ensuring proper drainage.

If you live in a dry climate, drip irrigation or regular misting helps maintain consistent moisture levels.

2. Feeding the Plants Organically

Feed your celery plants every 2–3 weeks with organic fertilizers. Some effective options include:

  • Compost tea or vermiwash: Boosts microbial life and nutrient absorption.
  • Seaweed extract: Provides trace minerals and strengthens plant cells.
  • Banana peel fertilizer: Adds potassium for thick, juicy stalks.
  • Fish emulsion: Promotes robust leaf and stalk growth.

3. Mulching

Mulch around the base of each plant with dry leaves, straw, or grass clippings. Mulching helps:

  • Retain soil moisture.
  • Suppress weed growth.
  • Keep roots cool and protected.

4. Pest and Disease Control

Common pests that affect celery include aphids, snails, and leaf miners. To control them organically:

  • Spray neem oil weekly (5 ml per liter of water).
  • Use garlic or chili spray to repel insects.
  • Handpick snails early in the morning.
  • Grow companion plants like marigold, basil, or mint to deter pests naturally.

Also, ensure good air circulation between plants to reduce fungal issues like leaf spot or blight.


Optional: Blanching for Tender Stalks

Blanching is a traditional technique to produce tender, pale celery stalks with a milder flavor.

Here’s how to blanch celery naturally:

  • When plants are about 30–40 cm tall, start covering the lower stalks with mulch, straw, or cardboard tubes.
  • Gradually add more material every few days as the plant grows.
  • This keeps sunlight away from the stalks, reducing chlorophyll and making them softer and sweeter.

If you prefer greener celery with a stronger flavor, you can skip blanching.


Harvesting Celery

Celery typically takes 120–140 days to mature from seed. You can harvest the entire plant or cut stalks as needed.

How to Harvest:

  • When stalks are about 8–10 inches tall and firm, cut the entire bunch at the base with a sharp knife.
  • Alternatively, cut individual stalks from the outside, allowing the center ones to keep growing.

Pro Tip: Water the plant a day before harvesting for crisp, juicy stalks.


Post-Harvest Storage

  • Fresh celery can be stored in the refrigerator for up to two weeks.
  • Wrap in damp paper towels or store in a container with water to retain crispness.
  • For longer storage, blanch and freeze chopped celery for use in soups or stews.

Common Mistakes to Avoid

  1. Inconsistent Watering: Dry spells lead to hollow, bitter stalks.
  2. Poor Soil Preparation: Celery struggles in low-nutrient or compact soil.
  3. Skipping Hardening Off: Sudden outdoor exposure can shock young seedlings.
  4. Too Much Sun in Hot Climates: Causes leaves to wilt and stalks to turn tough.
  5. Overcrowding: Leads to poor airflow and pest issues.

Health Benefits of Homegrown Celery

Homegrown celery isn’t just fresher — it’s also more nutritious and flavorful than store-bought options. Here are some benefits:

  • Supports digestion: High in fiber and natural enzymes.
  • Reduces inflammation: Contains antioxidants and anti-inflammatory compounds.
  • Promotes hydration: 95% water content helps maintain fluid balance.
  • Boosts heart health: Rich in potassium and low in sodium.
  • Aids detoxification: Acts as a natural diuretic to flush toxins.

Final Thoughts

Learning how to plant celery successfully may take time, but once you understand the three keys — organic soil preparation, proper seed starting, and consistent care — you’ll find it’s easier than you think.

Celery rewards patience. By nurturing it with organic compost, steady watering, and pest-free care, you’ll enjoy fresh, crisp stalks bursting with flavor straight from your garden. Whether in soups, salads, or juices, nothing beats the satisfaction of harvesting your own homegrown celery — pure, organic, and full of life.

How to Grow Brussels Sprouts for Beginners: A Complete Step-by-Step Gardening Guide

How to Grow Brussels Sprouts for Beginners: A Complete Step-by-Step Gardening Guide

Brussels sprouts are among the most rewarding vegetables you can grow at home — compact, nutrient-rich, and perfect for cool-season gardens. Known for their small, cabbage-like heads packed with vitamins, Brussels sprouts are a must-have for home gardeners looking to expand their vegetable collection. If you’ve never grown them before, don’t worry — with the right approach, even beginners can produce a healthy, abundant crop.

In this detailed 1200-word guide, you’ll learn everything you need to know about how to grow Brussels sprouts from seeds to harvest — including soil preparation, watering, pest control, and harvesting tips.


Why Grow Brussels Sprouts at Home?

Before getting into the step-by-step process, let’s see why Brussels sprouts deserve a place in your garden:

  1. Nutritional Powerhouse: Brussels sprouts are packed with vitamins C, K, and A, as well as folate, fiber, and antioxidants.
  2. Cold-Tolerant Crop: They thrive in cooler temperatures, making them ideal for winter or early spring gardens.
  3. Long Harvest Period: Once mature, a single plant can produce dozens of small sprouts over several weeks.
  4. Great for Small Gardens: They grow vertically, making efficient use of limited space.

Step 1: Choosing the Right Variety

There are several types of Brussels sprouts to choose from, each with different growing times and characteristics. Some popular beginner-friendly varieties include:

  • Long Island Improved: A classic, reliable variety with excellent flavor.
  • Diablo: Uniform and disease-resistant, perfect for new gardeners.
  • Jade Cross: Compact and early-maturing hybrid ideal for small gardens.
  • Churchill: Fast-growing and tolerant of variable weather conditions.

Choose a variety that suits your climate and the length of your growing season.


Step 2: Understanding the Growing Season

Brussels sprouts are cool-season vegetables. They perform best in temperatures between 10°C and 24°C (50°F to 75°F).

  • In cooler regions: Start seeds indoors in early spring for a summer harvest.
  • In warmer regions: Start seeds in late summer for a fall or winter harvest.

The plants take 90 to 120 days to mature, so plan accordingly.


Step 3: Starting Brussels Sprouts from Seeds

Seed Starting Indoors:

  1. Start seeds indoors 6 to 8 weeks before the last frost date.
  2. Sow seeds about ½ inch deep in seed trays or small pots filled with organic seed-starting mix.
  3. Keep the soil moist and maintain a temperature around 18°C–21°C (65°F–70°F).
  4. Seeds will germinate in 7 to 10 days.
  5. Once seedlings are about 4 inches tall and have 4–5 true leaves, they’re ready for transplanting.

Transplanting Outdoors:

  • Harden off seedlings by placing them outdoors for a few hours daily for 5–7 days before planting.
  • Choose a sunny location with well-drained, fertile soil.
  • Plant seedlings 18 to 24 inches apart in rows spaced about 30 inches apart.

Step 4: Soil Preparation for Strong Growth

Brussels sprouts love rich, fertile soil packed with organic matter. Prepare the soil before transplanting:

  1. Add compost or well-rotted manure to improve fertility.
  2. Ensure the soil pH is between 6.5 and 7.5 for optimal nutrient absorption.
  3. Mix in some bone meal or organic fertilizer before planting for slow-release nutrients.
  4. If your soil is heavy or clay-like, add sand or coco peat to improve drainage.

Good soil preparation sets the foundation for fast, healthy growth.


Step 5: Sunlight and Watering Needs

Brussels sprouts require full sunlight — at least 6 to 8 hours daily. Insufficient sunlight can result in weak plants and loose sprouts.

For watering:

  • Keep the soil consistently moist, but never soggy.
  • Water deeply once or twice a week depending on weather conditions.
  • Avoid overhead watering to prevent fungal diseases.
  • Use mulch (dry leaves or straw) to retain soil moisture and regulate temperature.

Consistent watering is key, as fluctuations can cause the sprouts to become bitter or loose.


Step 6: Feeding the Plants Organically

Brussels sprouts are heavy feeders and benefit from regular organic fertilization.

Fertilizer Schedule:

  • Apply compost or vermicompost every 2–3 weeks.
  • Use liquid seaweed extract or fish emulsion every 15 days for better leaf growth.
  • During head formation, side-dress with organic nitrogen fertilizer like composted cow dung or neem cake powder.

This steady nutrient supply promotes lush leaves and tightly packed sprouts.


Step 7: Supporting Plant Growth

As the plants grow tall (up to 2–3 feet), they may need staking to prevent toppling in windy weather.

You can use bamboo sticks or garden stakes to gently tie and support each plant.

Topping Tip:
Once sprouts begin to form along the stem, pinch off the top growing tip of the plant. This helps redirect energy into sprout formation and ensures a more uniform harvest.


Step 8: Pest and Disease Management

Brussels sprouts can attract a few common garden pests. Luckily, organic control methods work effectively.

Common Pests:

  • Aphids
  • Cabbage worms
  • Whiteflies
  • Slugs and snails

Natural Control Methods:

  1. Neem Oil Spray: Mix 5 ml neem oil with 1 liter of water and spray weekly.
  2. Garlic or Chili Spray: Repels most pests naturally.
  3. Handpicking: Inspect leaves and remove visible pests manually.
  4. Companion Planting: Grow marigolds, mint, or basil nearby to deter harmful insects.

Diseases to Watch:

  • Downy mildew (caused by high humidity)
  • Black rot (spread by contaminated soil or water)

To prevent diseases, ensure proper air circulation, avoid waterlogging, and rotate crops each season.


Step 9: Monitoring Growth and Sprout Development

Brussels sprouts form small buds along the stem — these are the mini “sprouts” that will mature into edible vegetables.

Here’s what to expect during their development:

  • Day 0–30: Plants establish roots and grow strong leafy stems.
  • Day 30–60: Leaves expand, and the main stalk elongates.
  • Day 60–90: Small buds start forming at the leaf bases.
  • Day 90–120: Sprouts grow larger, firm, and ready for harvest.

Remove yellowing lower leaves as the plant matures to encourage air circulation and better sprout development.


Step 10: Harvesting Brussels Sprouts

Brussels sprouts are ready to harvest 90 to 120 days after transplanting, depending on variety and growing conditions.

How to Know They’re Ready:

  • The sprouts are firm, round, and about 1 to 2 inches in diameter.
  • They start forming from the bottom of the stem upward.

How to Harvest:

  1. Start from the base and pick mature sprouts by twisting them gently or cutting them off.
  2. Continue harvesting every few days as upper sprouts mature.
  3. After the main harvest, leave the plant — smaller buds near the top may continue to grow.

Pro tip: Light frost can enhance the sweetness of Brussels sprouts, so harvesting after a cool spell can make them taste even better.


Step 11: Post-Harvest Care

After harvesting, you can extend the life of your Brussels sprout plants:

  • Remove any remaining yellow leaves.
  • Continue watering lightly for a few weeks.
  • Compost the old plants once they finish producing.

Sprouts can be stored in the refrigerator for up to 2 weeks or blanched and frozen for long-term storage.


Common Growing Mistakes to Avoid

  1. Planting in hot weather: Causes premature bolting and bitter taste.
  2. Overcrowding: Leads to poor air circulation and fungal growth.
  3. Inconsistent watering: Produces loose, uneven sprouts.
  4. Ignoring pests: Early infestation can destroy the crop quickly.
  5. Neglecting soil preparation: Low fertility results in slow, stunted growth.

Health Benefits of Brussels Sprouts

Brussels sprouts aren’t just tasty — they’re incredibly healthy too.

  • Rich in vitamin C, which boosts immunity.
  • High in antioxidants that fight inflammation.
  • Good source of fiber for digestive health.
  • Contains compounds that may support heart and bone health.
  • Low in calories, making them great for weight management.

Final Thoughts

Growing Brussels sprouts at home may take patience, but the results are absolutely worth it. With their rich flavor, long shelf life, and numerous health benefits, these little green gems are a gardener’s delight.

By following the steps in this beginner-friendly guide — from seed to harvest — you can enjoy fresh, organic Brussels sprouts straight from your garden. The key is to give them consistent care, maintain moisture, and keep pests away using natural methods.

Once you master the process, your kitchen garden will reward you with a steady supply of crisp, flavorful sprouts that elevate every meal.

How to Grow Red Gooseberries from Cuttings: A Complete Gardening Guide for Cold Climates (Inspired by Gardening in Alaska)

How to Grow Red Gooseberries from Cuttings: A Complete Gardening Guide for Cold Climates (Inspired by Gardening in Alaska)

Growing your own fruit bushes is one of the most rewarding experiences for home gardeners—especially when you can propagate them yourself from cuttings. Among the many hardy fruit plants, the red gooseberry stands out as a perfect choice for cold-weather gardeners. With its tart, ruby-colored berries, compact growth, and impressive resilience to frost, the red gooseberry thrives even in places like Alaska, where short summers and long winters can challenge most fruit crops.

Inspired by the YouTube video “Red Gooseberry Cuttings / Gardening in Alaska,” this post will walk you through everything you need to know about propagating red gooseberries from cuttings, caring for them in cold climates, and ensuring a healthy, productive bush for years to come. Whether you’re an Alaskan gardener or simply living in a cooler region, this guide will help you master the art of gooseberry propagation and enjoy a bounty of fresh, tangy fruits every summer.


What Makes Red Gooseberries Special?

Red gooseberries (Ribes uva-crispa) are hardy shrubs known for producing clusters of small, tart berries that ripen to a deep red hue. They’re loved for their versatility—great eaten fresh, made into jams, or baked into classic desserts like gooseberry pie.

Here’s why gardeners, especially in northern climates, love red gooseberries:

  • Cold-Hardy: They can withstand freezing temperatures down to -40°F, making them ideal for places like Alaska or northern Canada.
  • Compact Size: Perfect for container gardening or small garden spaces.
  • Productive: Even a single bush can yield several pounds of fruit each summer.
  • Low Maintenance: Once established, they require minimal care and produce reliably for up to 15–20 years.

In short, gooseberries are a must-have for gardeners who want reliable fruit production with minimal fuss.


Understanding Propagation: Why Use Cuttings?

Growing red gooseberries from cuttings is one of the simplest and most reliable ways to propagate the plant. It ensures you get a true-to-type clone of the parent plant—meaning the same fruit quality, color, and disease resistance.

Other benefits of propagation through cuttings include:

  • Faster establishment compared to growing from seeds.
  • Guaranteed consistent fruit characteristics.
  • Cost-effective—you can create multiple new plants from a single bush.

Gooseberries can be propagated from either softwood cuttings (taken in spring/early summer) or hardwood cuttings (taken in late fall or winter). In Alaska or other cold climates, hardwood cuttings are the best choice since they can root indoors during the colder months before being transplanted outdoors in spring.


When to Take Red Gooseberry Cuttings

Timing is crucial for successful propagation. In Alaska or similar regions, the best time to take cuttings is during late fall to early winter, once the plant has gone dormant but before severe frost sets in.

If growing indoors or in a greenhouse, you can also take softwood cuttings in early summer when new shoots are still flexible but mature enough to root.


How to Take and Prepare Gooseberry Cuttings

Here’s a step-by-step guide for collecting and preparing your red gooseberry cuttings:

1. Select a Healthy Parent Plant

Choose a mature, disease-free gooseberry bush with strong, healthy canes. Avoid taking cuttings from old or diseased branches.

2. Choose the Right Stems

For hardwood cuttings, select one-year-old shoots that are firm and woody, roughly the thickness of a pencil.

3. Cut the Stems Properly

Using clean, sharp pruning shears, cut 8–10 inch sections of stem.

  • Make the bottom cut just below a bud.
  • Make the top cut about 1 inch above a bud.

4. Remove Lower Leaves and Thorns

Strip off any leaves or thorns from the lower half of the cutting to prevent rot and make room for root growth.

5. Dip in Rooting Hormone (Optional but Recommended)

Dip the cut end in a rooting hormone powder or gel. This encourages quicker root formation and higher success rates.


Planting the Cuttings

You can root gooseberry cuttings either in pots indoors or directly in garden soil, depending on your climate and available space.

For Indoor Rooting (Perfect for Alaskan Winters):

  1. Fill pots or trays with a mix of 50% peat moss and 50% perlite or sand.
  2. Insert each cutting about halfway into the medium.
  3. Water thoroughly and cover the container with a clear plastic dome or bag to maintain humidity.
  4. Place in a bright, cool area (around 60°F) but out of direct sunlight.
  5. Check weekly to ensure the soil remains moist but not soggy.

Roots typically begin forming within 4–8 weeks.

For Outdoor Rooting (Milder Regions):

  • Choose a sheltered, frost-free spot with well-drained soil.
  • Insert cuttings into the ground at a 45-degree angle, leaving the top bud above the soil.
  • Cover with mulch to protect from temperature swings and retain moisture.

By spring, your cuttings should have developed roots and started showing new growth.


Transplanting Rooted Cuttings

Once your cuttings are well-rooted (usually by late spring), they’re ready to move into larger pots or directly into the garden.

Steps:

  1. Choose a sunny or partially shaded spot.
  2. Space plants about 3–4 feet apart to allow airflow and growth.
  3. Dig holes large enough to accommodate the roots.
  4. Plant the cutting slightly deeper than it was growing before to encourage new shoots from the base.
  5. Water thoroughly and mulch around the base.

Soil, Watering, and Fertilizer Tips

Soil:
Gooseberries thrive in well-drained loamy soil with a pH between 6.0 and 6.5. Mix compost or aged manure into the planting area for a nutrient boost.

Watering:

  • Keep soil consistently moist, especially during the first year.
  • Avoid overwatering—too much moisture can cause root rot.
  • In greenhouse or container setups, check pots frequently, as soil dries faster indoors.

Fertilizer:

  • Apply an organic, slow-release fertilizer in early spring.
  • Top-dress with compost each year to improve soil structure and fertility.

Pruning and Maintenance

Pruning helps maintain plant shape, encourages fruiting, and prevents overcrowding.

  • First Year: Let the plant focus on root development—avoid heavy pruning.
  • Second Year Onward: Prune in late winter or early spring, removing dead or weak canes. Keep about 8–10 strong branches evenly spaced.
  • Rejuvenation Pruning: Every few years, remove older stems to encourage new, productive growth.

Protecting Gooseberries in Cold Climates

In Alaska’s extreme winters, proper protection ensures survival and productivity.

  1. Mulch Heavily: Apply a 3–4 inch layer of straw, leaves, or wood chips around the base before winter.
  2. Wind Protection: Use windbreaks or plant near fences to shield from cold gusts.
  3. Snow Cover: Snow acts as insulation—don’t clear it away from your plants.
  4. Container Plants: Move pots into an unheated garage or greenhouse during winter to prevent root freezing.

Gooseberries are tough plants, but these precautions can make all the difference in regions where winters are long and severe.


Harvesting Red Gooseberries

You’ll usually get your first crop in the second or third year after propagation. Harvest time depends on your region, but in Alaska, it typically occurs between mid to late summer.

When to Pick:

  • For cooking or preserves: Pick while slightly under-ripe (firm and tart).
  • For fresh eating: Wait until fully red and soft for a sweeter flavor.

Always harvest carefully with gloves—the thorny branches can prick your fingers!


Common Pests and Problems

Even in colder climates, gooseberries can face a few challenges:

  • Aphids: Spray with insecticidal soap or neem oil.
  • Powdery Mildew: Improve air circulation and avoid overhead watering.
  • Sawfly Larvae: These pests can strip leaves quickly—handpick them or apply organic BT spray.

Good sanitation—like removing fallen leaves and debris—helps prevent most diseases.


Final Thoughts

Growing red gooseberries from cuttings is not only simple but deeply rewarding. From a few well-prepared branches, you can develop a thriving patch of fruit-bearing shrubs that will last decades—even in the harsh conditions of Alaska.

Their cold tolerance, low maintenance needs, and tangy, jewel-like berries make them one of the best fruit crops for northern gardeners. Whether you’re propagating indoors during winter or planting rooted cuttings outdoors in spring, the process is straightforward and yields beautiful results.

So, the next time you see a healthy red gooseberry bush, don’t just admire it—take a few cuttings, nurture them through the cold months, and soon you’ll have your very own mini-orchard of these hardy, delicious fruits right at home.