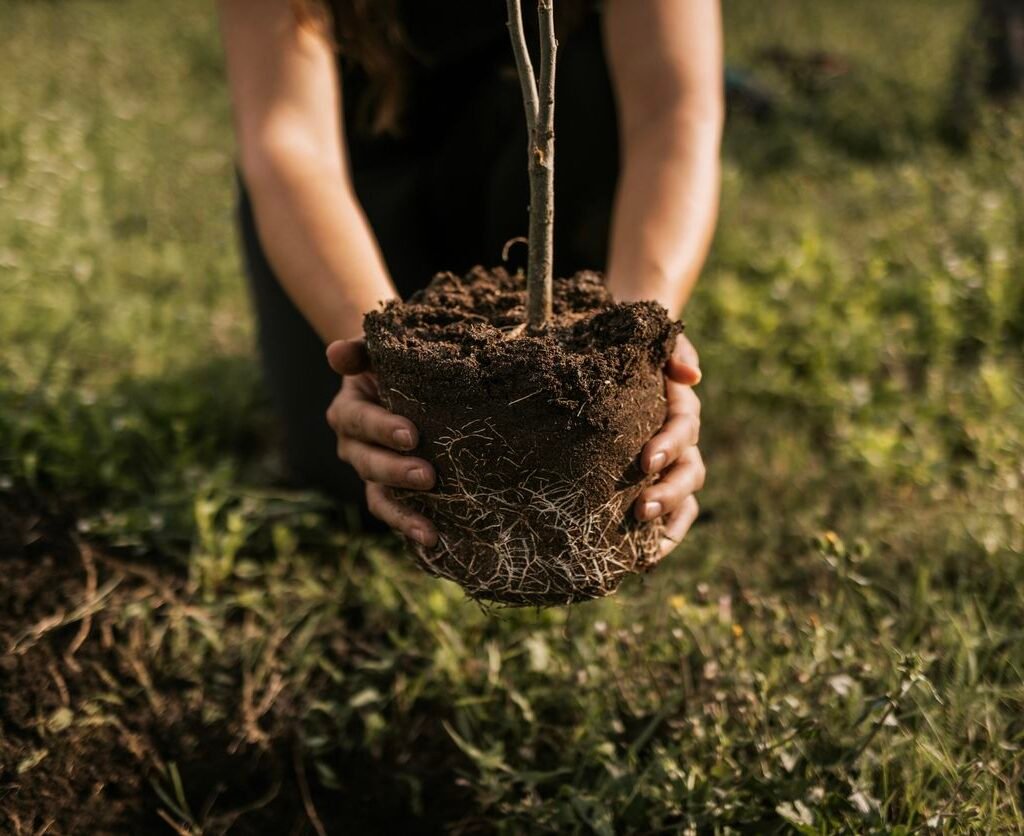
How to Rescue a Sickly Bacon Avocado Tree: Bare-Rooting and Effective Treatment Tips

How to Rescue a Sickly Bacon Avocado Tree: Bare-Rooting and Effective Treatment Tips

Avocado trees are an incredibly rewarding addition to any garden, offering lush foliage and creamy fruit right from your backyard. However, even experienced gardeners can encounter challenges — like a struggling or sickly tree. In this guide, inspired by the video “Avocado Bacon, investigating my very sickly plant and appropriate treatment (bare rooting),” we’ll take a deep dive into understanding why your Bacon avocado might be declining, how to diagnose problems, and step-by-step techniques to revive it — including the effective method of bare-rooting.

Whether you’re a first-time avocado grower or have years of experience, this comprehensive guide will give you the tools to bring a stressed tree back to life.


Understanding the Bacon Avocado Tree

The Bacon avocado is a versatile, cold-hardy variety prized for its smooth, light-green flesh and mild flavor. Named after its discoverer rather than the breakfast staple, the Bacon avocado is a Type B flowering variety, making it an excellent pollinator companion for Type A avocados like Fuerte or Hass.

Key Features of Bacon Avocado:

  • Cold tolerance: Can survive temperatures as low as 28°F (-2°C).
  • Fruit: Medium-sized, creamy, mild-flavored, and great for salads or guacamole.
  • Tree growth: Medium-sized, with an upright canopy that spreads naturally.
  • Growth preference: Thrives in well-draining soil, full sun, and moderate watering.

Despite its resilience, Bacon avocados are not immune to stress, disease, or poor growing conditions. Recognizing the early signs of trouble is essential for effective treatment.


Common Causes of a Sickly Bacon Avocado

A sickly avocado tree can display yellowing leaves, drooping foliage, stunted growth, or poor fruiting. Here are common causes:

1. Poor Soil Drainage

Avocado trees are highly sensitive to waterlogged soil. Roots can suffocate in standing water, leading to root rot (Phytophthora cinnamomi), one of the most common and deadly avocado diseases.

2. Nutrient Deficiencies

Avocados require nitrogen, potassium, magnesium, zinc, and iron for healthy growth. Deficiencies can cause:

  • Yellow leaves: Often nitrogen or iron deficiency.
  • Brown leaf edges: Possible potassium or magnesium deficiency.
  • Weak growth: Lack of essential micronutrients.

3. Overwatering or Underwatering

Both extremes stress the tree. Overwatering encourages root rot, while underwatering causes wilting and leaf drop.

4. Pests and Disease

Common pests include spider mites, thrips, and root aphids. Disease threats include fungal infections and sunburn on the trunk or branches.

5. Environmental Stress

  • Sudden temperature changes
  • Frost or extreme heat
  • Wind damage
  • Transplant shock or poor planting techniques

If your Bacon avocado is showing multiple symptoms, it may be a combination of these factors.


Step 1: Inspect and Diagnose

Before rushing into treatment, carefully inspect your tree:

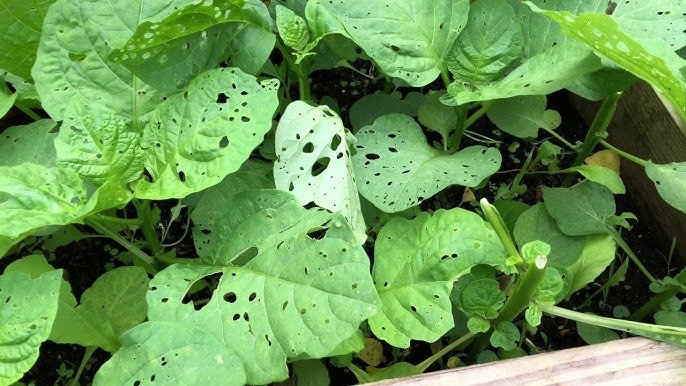
  • Leaves: Check for yellowing, spots, curling, or holes.
  • Branches: Look for dieback, cracks, or weak growth.
  • Roots: If visible, roots that are brown, mushy, or smell rotten indicate root rot. Healthy roots should be white or cream-colored and firm.
  • Soil: Check moisture levels, drainage, and soil compaction.

Accurate diagnosis is critical. Misidentifying the problem can make treatment less effective or even harmful.


Step 2: Bare-Rooting the Bacon Avocado

Bare-rooting is a powerful method to revive a sickly avocado tree. It involves removing the tree from the soil, inspecting, and treating the roots, then replanting in optimal conditions.

Why Bare-Rooting Helps

  • Removes diseased or damaged roots.
  • Reduces the risk of soil-borne pathogens.
  • Allows you to apply treatments directly to the root system.
  • Gives the tree a fresh start in well-prepared soil.

Step-by-Step Bare-Rooting Process

  1. Preparation:
    • Water the tree a day before bare-rooting to reduce stress.
    • Gather tools: sharp pruning shears, a clean bucket, fungicide (if needed), and fresh soil or potting mix.
  2. Remove the Tree:
    • Dig carefully around the root zone, about 1–2 feet from the trunk.
    • Lift the tree gently, keeping as many roots intact as possible.
  3. Inspect and Prune Roots:
    • Remove any brown, mushy, or rotten roots.
    • Trim minor damaged roots to encourage new growth.
    • If root rot is present, soak the roots in a fungicide solution according to label instructions.
  4. Prepare a Healthy Planting Site:
    • Choose a well-draining location in full sun.
    • Amend soil with compost and perlite or sand to improve aeration.
    • If planting in a container, use a mix designed for citrus or succulents.
  5. Replanting:
    • Place the tree so that the root crown is slightly above soil level.
    • Backfill with fresh soil, gently pressing around roots to remove air pockets.
    • Water deeply to settle the soil and reduce transplant shock.

Bare-rooting is stressful for the tree, so careful aftercare is essential.


Step 3: Post-Bare-Root Care

After bare-rooting, your Bacon avocado will need extra attention:

Watering

  • Water consistently, keeping soil moist but not soggy.
  • For the first two weeks, monitor daily to prevent drying out.
  • Gradually reduce watering frequency as roots re-establish.

Sunlight and Shelter

  • Provide partial shade for 1–2 weeks if the tree was stressed by heat.
  • Protect from strong wind or frost during recovery.

Fertilization

  • Avoid heavy fertilization immediately after bare-rooting.
  • After 3–4 weeks, apply a balanced avocado fertilizer with micronutrients.
  • Ensure trace elements like zinc and magnesium are included, as they support new growth.

Monitoring Growth

  • Watch for new leaves and shoots as indicators of recovery.
  • Remove any dead or dying branches to focus energy on healthy growth.

Step 4: Preventing Future Problems

Once your tree is healthy again, implement these practices to maintain its vigor:

  1. Proper Watering: Adjust to seasonal needs; reduce watering during cool or rainy periods.
  2. Mulching: Apply a 3–4 inch layer of organic mulch to retain soil moisture and suppress weeds.
  3. Nutrient Management: Conduct soil tests every 1–2 years to fine-tune fertilization.
  4. Pest and Disease Monitoring: Regularly inspect for signs of spider mites, aphids, or fungal infections.
  5. Pruning: Remove weak, crossing, or dead branches to encourage strong structure and airflow.

Step 5: Patience and Observation

Recovering a sickly Bacon avocado tree takes time. Expect several months for visible improvement. Key signs of recovery include:

  • New leaf growth
  • Strong, green shoots
  • Reduced leaf drop
  • Improved root vigor

Patience and careful observation are essential. Treat minor issues early and avoid overreacting with chemicals, which can further stress the tree.


Bonus Tips for Container-Grown Bacon Avocados

Many gardeners grow avocados in pots, which makes bare-rooting a bit easier and helps control soil quality:

  • Use a 20–25 gallon container with drainage holes.
  • Avoid compacted potting soil; a mix of compost, perlite, and sandy loam works well.
  • Fertilize with liquid avocado food every 6–8 weeks.
  • Rotate the pot to ensure even sunlight exposure.
  • Move indoors or provide frost protection during winter if you live in a cooler climate.
Container-grown trees respond well to bare-rooting since you can inspect roots without extensive digging.

Final Thoughts

A sickly Bacon avocado tree is not a lost cause. With careful diagnosis, proper bare-rooting, and attentive aftercare, you can bring your tree back to health and enjoy years of delicious, creamy fruit.

Key takeaways:

  • Identify the root cause of stress before treating.
  • Bare-rooting is an effective method to remove diseased roots and rejuvenate growth.
  • Provide consistent water, balanced nutrients, and proper shelter during recovery.
  • Monitor carefully and practice preventive care to avoid future issues.

By following these steps, your Bacon avocado can recover, grow strong, and eventually reward you with bountiful harvests — making all the effort worthwhile.

Healthy roots mean a healthy tree, and a healthy Bacon avocado tree means creamy, delicious fruit straight from your garden!

5 Easy Tips to Grow Strong Avocado Trees: Proven Secrets for Healthy Fuerte and Aravaipa Varieties

5 Easy Tips to Grow Strong Avocado Trees: Proven Secrets for Healthy Fuerte and Aravaipa Varieties

If you’ve ever dreamed of harvesting rich, creamy avocados from your own backyard, you’re in for a treat. Avocado trees are not only rewarding to grow but also surprisingly easy to maintain when given the right care from the start. Two of the most beloved varieties among home gardeners — Fuerte and Aravaipa — are known for their exceptional flavor, adaptability, and resilience.

In this guide, inspired by the video “Five Easy Tips to Grow Strong Avocado Trees: Fuerte and Aravaipa Trees,” we’ll break down five simple yet powerful techniques that will help your avocado trees thrive year after year. Whether you’re growing them in your yard or in large containers, these tips will ensure strong roots, healthy foliage, and abundant fruiting.


Meet the Stars: Fuerte and Aravaipa Avocado Varieties

Before diving into the growing tips, let’s take a closer look at why Fuerte and Aravaipa avocados stand out.

Fuerte Avocado

  • Origin: Developed in California, Fuerte is one of the oldest commercial avocado varieties.
  • Type: Hybrid between Mexican and Guatemalan species.
  • Flavor: Smooth, buttery, and slightly nutty — excellent for guacamole or slicing fresh.
  • Tree traits: Strong branches, vigorous growth, and good cold tolerance (down to about 28°F / -2°C).
  • Pollination: Type B flower — pairs well with Hass or Aravaipa for cross-pollination.

Aravaipa Avocado

  • Origin: Discovered in Arizona’s Aravaipa Canyon, this variety is famous for its heat and cold tolerance — surviving temperatures as high as 120°F (49°C) and as low as 14°F (-10°C).
  • Flavor: Mild, rich, and creamy.
  • Tree traits: Hardy, adaptable, and perfect for tough climates or low-water gardens.
  • Pollination: Type A flower — great for pairing with Fuerte.

Together, Fuerte and Aravaipa form an excellent pair: they complement each other’s flowering patterns, making pollination and fruit set much easier.


Tip #1: Choose the Right Location — Sunlight and Soil are Everything

Avocado trees love sunshine. Whether you’re planting Fuerte or Aravaipa, location determines long-term success.

Sunlight Requirements

  • Choose a full-sun location, with at least 6–8 hours of direct sunlight daily.
  • Avoid shaded or windy areas — avocado trees prefer warmth and protection from harsh wind that can damage tender young branches.

Ideal Soil Conditions

  • Avocados require well-draining soil. Heavy clay or compacted soil leads to root rot — their number-one enemy.
  • For in-ground planting, mix compost, sand, and perlite to improve drainage.
  • If you’re growing in containers, choose a loose, airy mix — a blend of cactus soil, coco coir, and compost works beautifully.

Pro Tip: Create a slight mound (6–12 inches high) when planting in the ground. This improves drainage and prevents the crown from sitting in wet soil.

The Aravaipa avocado is particularly tolerant of poor soil and high heat, but both varieties thrive best when their roots can breathe and drain freely.


Tip #2: Water Wisely — Keep Roots Moist, Not Soaked

It’s tempting to water avocado trees frequently, but overwatering is a common mistake that weakens roots and leads to fungal diseases.

Watering Guidelines

  • Young trees (first year): Water 2–3 times per week. The top 2–3 inches of soil should stay moist but not soggy.
  • Established trees: Deeply water once per week during the growing season. Let the soil dry slightly between waterings.
  • Container trees: Check soil moisture more often — containers dry out faster.

To test moisture, stick your finger a few inches into the soil. If it feels dry, it’s time to water.

Mulching for Moisture Retention

Apply a 3–4 inch layer of organic mulch (wood chips, straw, or shredded leaves) around the base of the tree. Keep it 4–6 inches away from the trunk to avoid rot.

Mulch not only keeps the roots cool and moist but also improves soil health over time.

Bonus Tip: Aravaipa trees handle heat better, but both varieties appreciate deep watering before and after hot spells.


Tip #3: Feed for Strength — Balanced Nutrition Matters

Avocados are heavy feeders that need the right nutrients to develop strong roots, lush foliage, and abundant fruit.

Best Fertilizer for Avocados

Use a slow-release, balanced fertilizer with nitrogen, phosphorus, potassium, and trace minerals like zinc, magnesium, and iron.

  • Young trees (under 3 years): Feed every 6–8 weeks in spring and summer.
  • Mature trees: Feed three times a year — early spring, midsummer, and late summer.

Avoid fertilizers high in salts or urea — they can burn delicate roots. Organic options like compost tea, fish emulsion, and worm castings are excellent for building soil health naturally.

Leaf Health Indicators

  • Yellow leaves: May indicate nitrogen or iron deficiency.
  • Burned edges: Could signal salt buildup or overfertilization.
  • Pale new growth: Add a micronutrient supplement with zinc and magnesium.

Pro Tip: For potted trees, flush soil every few months with plain water to wash away salts.


Tip #4: Prune and Shape for Strength and Sunlight

Pruning isn’t just for aesthetics — it’s essential for creating a strong structure and healthy airflow in avocado trees.

Why Prune?

  • Encourages sturdy branches that can support heavy fruit.
  • Allows sunlight to reach inner growth, improving fruiting potential.
  • Reduces disease risk by improving air circulation.

When and How to Prune

  • First 2 years: Focus on shaping the tree. Pinch off the top after 2–3 feet of growth to encourage branching.
  • Established trees: Lightly prune in early spring before new growth begins. Remove dead, crossing, or overcrowded branches.
  • Avoid heavy pruning — avocado trees don’t respond well to severe cuts.

Fuerte trees tend to grow tall and open, while Aravaipa trees develop denser canopies. Gentle shaping helps both varieties produce better yields.

Tip: Use clean, sharp tools to prevent spreading diseases.


Tip #5: Protect and Pollinate — Boost Resilience and Fruit Set

Pollination for Abundance

Avocado trees have unique flowering behavior. Their flowers open as female one day and male the next. Fuerte (Type B) and Aravaipa (Type A) complement each other perfectly, so planting both ensures excellent cross-pollination.

To attract pollinators:

  • Plant bee-friendly flowers like lavender, marigold, or borage nearby.
  • Avoid pesticide sprays during bloom.
  • Provide a shallow water dish for bees in dry climates.

Protection from Climate Extremes

  • Frost: Young avocado trees are frost-sensitive. Cover them with frost blankets or bring containers indoors if temperatures drop below 30°F (-1°C).
  • Heat: During heatwaves, use shade cloth and water deeply in the early morning.
  • Wind: Stake young trees and shield them from strong gusts until their trunks thicken.

Pest and Disease Prevention

Common issues include:

  • Root rot (Phytophthora): Prevent with good drainage and by avoiding overwatering.
  • Spider mites & thrips: Wash leaves occasionally with a gentle spray of water or apply neem oil.
  • Sunburn: Protect exposed bark by painting it with a diluted white latex paint (50/50 paint and water).

Healthy trees are naturally more resistant, so focus on balanced care rather than frequent chemical treatments.


Bonus: Container Growing Tips for Fuerte and Aravaipa

If you live in a cooler climate or have limited yard space, don’t worry — both Fuerte and Aravaipa avocados can thrive in large pots.

  • Container size: Start with at least a 20–25 gallon pot with drainage holes.
  • Soil: Use a mix of cactus soil, perlite, and compost.
  • Watering: Check moisture frequently; containers dry faster than ground soil.
  • Pruning: Keep trees under 8–10 feet by trimming lightly each year.
  • Winter care: Move pots to a greenhouse or sunny indoor area when temperatures drop below freezing.

Aravaipa’s hardiness makes it one of the best varieties for container growers in hot or cold regions.


Common Mistakes to Avoid

  1. Overwatering: The number one cause of death in avocado trees. Always let soil drain well.
  2. Planting too deep: Keep the root crown slightly above soil level.
  3. Ignoring pollination: Single trees can fruit, but pairing with a complementary type boosts yield.
  4. Over-fertilizing: More is not better — it can burn roots and damage foliage.
  5. Skipping pruning: Unpruned trees can become leggy and produce fewer fruits.

Avoiding these mistakes will make the difference between a struggling tree and a strong, productive one.


Final Thoughts

Growing strong, healthy avocado trees like Fuerte and Aravaipa doesn’t have to be complicated. With the right combination of sunlight, well-drained soil, proper watering, balanced feeding, and thoughtful pruning, your trees will reward you with lush green foliage and a bounty of creamy, delicious fruit.

Remember, patience is key — avocado trees often take 3–5 years to bear fruit, but once they start, you’ll enjoy harvests for decades.

Whether you’re nurturing a hardy Aravaipa in the desert heat or a classic Fuerte in a coastal garden, these five easy tips will help you grow the kind of strong, resilient avocado trees that every gardener dreams of.

So grab your shovel, pick your favorite variety, and get started today — because the sooner you plant your avocado tree, the sooner you’ll be enjoying homegrown guacamole straight from your garden!

How to Grow Hass Avocados: The Ultimate Quick Care Guide for a Thriving Tree

How to Grow Hass Avocados: The Ultimate Quick Care Guide for a Thriving Tree

If you’ve ever dreamed of harvesting creamy, buttery Hass avocados straight from your backyard, you’re not alone. The Hass variety is by far the world’s favorite avocado — rich, flavorful, and perfect for everything from guacamole to avocado toast. The good news? With the right care, patience, and a few simple steps, you can grow your own Hass avocado tree and enjoy years of delicious fruit.

In this comprehensive guide, we’ll walk through how to grow Hass avocados — from planting to pruning, watering to harvesting — so you can have a lush, productive tree that thrives season after season.


What Makes Hass Avocados So Special?

The Hass avocado (Persea americana) is a hybrid variety first discovered in California in the 1920s. It’s loved globally for its rich flavor, creamy texture, and long shelf life. Unlike smooth-skinned varieties such as Fuerte or Bacon, Hass avocados have thick, pebbly, dark-green-to-black skin when ripe.

Here are a few reasons gardeners adore Hass avocados:

  • Flavor: Buttery and nutty with a hint of sweetness — perfect for any dish.
  • Texture: Creamy and dense with higher oil content than most varieties.
  • Productivity: Mature trees can produce hundreds of fruits per year.
  • Longevity: Once established, a Hass avocado tree can produce fruit for decades with minimal upkeep.

Whether you’re growing it in the ground or in a large container, a Hass avocado can become a showstopper in your home garden.


Step 1: Choosing the Right Growing Method

You can start your Hass avocado in two ways — from seed or from a grafted tree.

1. Growing from Seed

Starting from seed is fun and educational, but it requires patience. Hass avocados grown from seed often take 7–10 years (or more) to bear fruit, and the fruit may not be identical to the parent tree.

To sprout a seed:

  • Remove the pit from a ripe Hass avocado and wash it clean.
  • Insert 3–4 toothpicks into the sides and suspend it over a jar of water with the bottom half submerged.
  • Place the jar in a warm, bright area but out of direct sunlight.
  • In 3–6 weeks, you’ll see roots and a stem sprouting.
  • When the stem is about 6 inches tall, cut it back to about 3 inches to encourage stronger growth.
  • Once the seedling has a good root system, transplant it into a pot with rich, well-draining soil.

2. Buying a Grafted Tree

If you want fruit faster (within 3–5 years), buy a grafted Hass avocado tree from a nursery. These are trees grown on hardy rootstock with a branch from a mature fruiting tree grafted on top.

Grafted trees are preferred because:

  • They produce consistent, high-quality fruit.
  • They’re more disease-resistant.
  • They mature and bear fruit much earlier.

Step 2: Selecting the Perfect Planting Site

Avocado trees love warmth and sunshine. For the best growth:

  • Sunlight: Choose a spot that gets at least 6–8 hours of full sun daily.
  • Soil: Well-draining soil is crucial — sandy loam is ideal. Avoid heavy clay that traps water.
  • Drainage: Poor drainage leads to root rot, the most common avocado killer. If your soil drains slowly, build a raised bed or mound 2–3 feet high.
  • Space: Give your tree room to grow. Mature Hass avocado trees can reach 25–35 feet tall and wide if unpruned.

If you’re growing in a container, choose one that’s at least 20–25 gallons with drainage holes. Use a potting mix formulated for citrus or succulents.


Step 3: Planting Your Hass Avocado Tree

Planting in the Ground

  1. Dig a hole twice as wide and slightly deeper than the root ball.
  2. Gently remove the tree from its container and place it in the hole so the top of the root ball sits slightly above soil level.
  3. Backfill with native soil mixed with compost and perlite for drainage.
  4. Water thoroughly right after planting.
  5. Apply a 3–4 inch mulch layer around the base (keep it a few inches from the trunk).

Planting in a Container

  1. Fill your pot halfway with loose, well-draining mix (cactus soil + compost works well).
  2. Place the tree in the center, add more soil, and gently press it down.
  3. Water until moisture runs out the drainage holes.
  4. Place the pot in a sunny, sheltered location.

Step 4: Watering and Feeding

Watering

Hass avocados love consistent moisture but hate waterlogged roots.

  • First year: Water 2–3 times per week, depending on temperature and rainfall.
  • After establishment: Deeply water once a week in warm weather.
  • Tip: Let the top 2 inches of soil dry before watering again.

A moisture meter can help prevent overwatering — a common issue with young trees.

Fertilizing

Hass avocado trees are moderate feeders. They need nitrogen and trace elements like zinc, iron, and magnesium.

Use a balanced citrus or avocado fertilizer. Feed:

  • Young trees: Every 6–8 weeks during spring and summer.
  • Mature trees: 3 times a year — spring, midsummer, and early fall.

Avoid fertilizing during winter when growth slows.


Step 5: Pruning for Health and Shape

Avocado trees naturally have a rounded canopy, but light pruning encourages airflow and manageable growth.

  • First few years: Pinch back growing tips to promote branching.
  • Established trees: Prune in late winter or early spring before new growth starts.
  • Remove dead or crossing branches.
  • Avoid heavy pruning — it can reduce fruit production.

For container-grown trees, regular pruning helps maintain a compact size while still producing fruit.


Step 6: Pollination Tips

Hass avocados are Type A flowering trees. Their blossoms open as female one day and male the next. While a single tree can self-pollinate, you’ll get a heavier yield if you have a Type B variety (like Bacon or Fuerte) nearby for cross-pollination.

To attract pollinators:

  • Grow flowers like lavender, alyssum, or marigold nearby.
  • Avoid pesticide sprays during bloom season.

Step 7: Protecting from Pests and Diseases

Common avocado pests and problems include:

  • Root rot (Phytophthora): Prevent by ensuring excellent drainage and avoiding overwatering.
  • Spider mites and thrips: Use neem oil or insecticidal soap as needed.
  • Sunburn: Young trees may need shade cloth in extremely hot climates.
  • Frost damage: Protect with frost blankets or bring container plants indoors if temperatures drop below 30°F (-1°C).

Healthy, well-watered trees are naturally more resistant to pests and diseases.


Step 8: Harvesting Hass Avocados

Patience is key with avocados — they don’t ripen on the tree!

  • Harvest time: Hass avocados typically mature 8–18 months after flowering, depending on climate.
  • The fruit stays hard on the tree. Pick one and let it ripen indoors at room temperature for 7–10 days.
  • If it softens evenly, your crop is ready.
  • Store ripe avocados in the refrigerator for up to 2 weeks.

Mature trees can yield 200–300 fruits annually, making them a long-term investment for any gardener.


Step 9: Growing Hass Avocados in Containers (Urban Gardener’s Guide)

If you don’t have a yard, you can still grow a thriving Hass avocado in a pot.

Here’s how to keep it healthy:

  • Choose a dwarf grafted variety or prune regularly.
  • Rotate the pot monthly for even sun exposure.
  • Move indoors or under cover during winter.
  • Repot every 2–3 years to refresh the soil and encourage new growth.

Container trees usually stay under 8–10 feet, making them perfect for patios, balconies, or greenhouses.


Bonus Tips for Success

  • Mulching magic: Use wood chips or straw to retain soil moisture and protect roots.
  • Temperature range: Avocados prefer 60–85°F (15–29°C). Prolonged frost can damage flowers and young fruit.
  • Companion planting: Avoid planting too close to lawns or heavily fertilized garden beds — they dislike excessive nitrogen.
  • Patience pays: A young grafted Hass tree may take 3–5 years to bear fruit, but it’s worth the wait!

Final Thoughts

Growing a Hass avocado tree isn’t just about the fruit — it’s about the experience. Watching your tree flourish, flower, and eventually bear those iconic green-black fruits is one of the most satisfying rewards for any gardener.

With a bit of sunlight, proper drainage, and consistent care, your Hass avocado tree will thrive and supply you with creamy, flavorful fruit year after year. Whether planted in the ground or grown in a large pot on your patio, it’s a rewarding project that connects you to nature and your food in a delicious way.

So why wait? Start planting today and look forward to your first homegrown Hass avocado harvest — straight from tree to toast! .

Asian Pears: The Ultimate Rare Fruit You Must Try Growing in Your Home Garden

Asian Pears: The Ultimate Rare Fruit You Must Try Growing in Your Home Garden

If you’re looking to grow something truly unique, delicious, and rewarding in your garden, Asian pears deserve a top spot on your list. Known for their crisp texture, refreshing juiciness, and apple-like crunch, Asian pears are often called “apple pears” because they combine the best traits of both fruits. Sweet, fragrant, and beautiful, they’re a standout among orchard fruits — and growing them at home is easier than you might think.

Inspired by the video “Asian Pears: The Ultimate RARE Fruit You Must Try Growing!”, this comprehensive guide will explore everything about these extraordinary fruits: their origins, types, planting techniques, care tips, harvesting, and why they’re a must-have addition to any fruit garden.


What Makes Asian Pears So Unique?

Asian pears (Pyrus pyrifolia) are a distinct species of pear native to East Asia, cultivated for thousands of years in Japan, China, and Korea. Unlike European pears — which soften as they ripen — Asian pears are crisp and firm even when ripe, offering a delightful crunch similar to apples but with the aromatic sweetness of a pear.

Their flavor can vary by variety, but most Asian pears combine honeyed sweetness with a refreshing, floral note that makes them perfect for fresh eating, salads, or juicing.

Here’s what sets them apart:

  • Crisp, juicy texture — unlike any other pear.
  • Naturally high in water content, making them incredibly refreshing.
  • Long shelf life — they store well for months without losing quality.
  • Visually stunning — round, golden, or bronze-skinned fruits that look like apples.
  • Disease-resistant and productive, making them ideal for home gardeners.

Because they’re still relatively uncommon in home gardens, Asian pears are often considered a rare fruit in Western orchards — but one that’s quickly gaining popularity for its flavor and resilience.


The Origins and Global Appeal of Asian Pears

Asian pears have been cultivated for more than 3,000 years in East Asia, prized not only for their flavor but also for their symbolism. In many Asian cultures, pears represent longevity, purity, and prosperity. The fruit spread across the world through trade routes, reaching the United States in the 19th century.

Today, varieties like ‘Hosui,’ ‘Shinseiki,’ ‘Chojuro,’ and ‘Nijisseiki (20th Century Pear)’ are widely grown in both Asia and North America. They thrive in climates similar to apples, making them perfect for gardeners in USDA zones 5 through 9.


Why Every Gardener Should Try Growing Asian Pears

Asian pears are the ultimate fruit for home growers — not only for their rare beauty but also for their versatility and ease of cultivation.

Here’s why they’re worth growing:

  1. High Yields: Even young trees produce abundant crops once established.
  2. Low Maintenance: They require less pruning and are less prone to disease compared to European pears.
  3. Beautiful Blooms: In spring, the trees burst into clusters of white flowers, adding ornamental charm.
  4. Extended Storage: Unlike most fruits, Asian pears keep their crisp texture for months.
  5. Health Benefits: Rich in fiber, vitamin C, and antioxidants, they make a nutritious addition to any diet.

Choosing the Right Variety

Before planting, it’s important to select a variety suited to your climate and taste preferences. Here are some popular choices among gardeners:

  • Hosui: Golden-brown skin with a rich, honey-sweet flavor. Excellent fresh eating variety.
  • Shinseiki (New Century): Yellow-skinned, crisp, and juicy with a mild, refreshing taste.
  • Chojuro: Bronze-colored fruit with a spiced, butterscotch-like sweetness.
  • Nijisseiki (20th Century): Pale yellow fruit that’s extremely juicy and delicately sweet.
  • Ya Li: More elongated and pear-shaped, popular in Chinese orchards for its floral aroma.

If you live in a cooler climate, ‘Shinseiki’ and ‘Nijisseiki’ are great choices due to their cold tolerance.


How to Plant Asian Pear Trees

1. Pick the Perfect Location

Asian pears need full sun—at least 6 to 8 hours of direct sunlight daily. Choose a site with well-drained soil, as standing water can cause root rot. Slightly acidic to neutral soil (pH 6.0–7.0) works best.

2. Prepare the Soil

Before planting, enrich the soil with organic compost or aged manure. Loosen the top 12–18 inches of soil to promote healthy root spread.

3. Planting the Tree

You can plant bareroot or container-grown Asian pear trees in early spring or late winter when the tree is dormant.

  • Dig a hole twice as wide and just as deep as the root ball.
  • Place the tree in the hole, ensuring the graft union (the bump above the rootstock) sits 2 inches above soil level.
  • Backfill with native soil and firm it gently around the roots.
  • Water thoroughly to settle the soil.

4. Mulching and Watering

Add a 2–3 inch layer of organic mulch (wood chips, straw, or compost) around the base of the tree, keeping it a few inches away from the trunk. This helps retain moisture and regulate soil temperature.

During the first year, water deeply once or twice a week. Mature trees need watering during dry spells, especially in fruiting season.


Pollination: Ensuring a Good Harvest

Most Asian pear varieties are not self-pollinating, meaning they require a second compatible pear variety for cross-pollination. Planting two varieties that bloom at the same time will significantly increase yields.

Excellent pollination partners include:

  • Hosui × Shinseiki
  • Chojuro × Nijisseiki
  • Ya Li × Tsu Li

You can also plant a European pear nearby, though cross-pollination success varies between species. Bees are the primary pollinators, so avoid using pesticides during flowering.


Pruning and Training for Strong Growth

Pruning is essential for maintaining size, encouraging air circulation, and promoting fruiting.

When to Prune

  • Late winter or early spring: Perform major pruning before new growth begins.
  • Summer: Lightly thin crowded shoots after fruit set.

How to Prune

  • Remove dead, diseased, or crossing branches.
  • Maintain an open center (vase shape) or central leader system.
  • Thin crowded fruit clusters to prevent branch breakage — Asian pears can produce heavily!

Proper pruning also helps sunlight reach developing fruit, improving flavor and color.


Organic Care: Feeding and Pest Control

Feeding

Feed your Asian pear tree each spring with a balanced organic fertilizer (like 10-10-10) or compost tea. Mature trees need less frequent feeding — usually just a compost top-dress once a year.

Pest and Disease Prevention

Asian pears are naturally more resistant to common pear diseases like fire blight, but you should still monitor for:

  • Aphids: Use neem oil or insecticidal soap.
  • Pear psylla: Introduce beneficial insects like ladybugs.
  • Codling moths: Use pheromone traps or bag the fruit.
  • Rust or leaf spot: Prune for better airflow and apply copper-based fungicides if needed.

Healthy soil, mulching, and proper pruning are your best long-term defenses against problems.


Harvesting and Storing Asian Pears

Asian pears are typically ready to harvest in late summer through early autumn, depending on variety and climate.

When to Harvest

Unlike European pears, Asian pears ripen fully on the tree. You’ll know they’re ready when:

  • The skin color changes from green to golden-yellow or bronze.
  • The fruit feels firm but aromatic.
  • It easily twists off the branch.

Avoid waiting too long — overripe fruits can fall and bruise easily.

Storage Tips

One of the best features of Asian pears is their remarkable shelf life. Store them:

  • In a cool, dark place for up to 1–2 months.
  • In the refrigerator for up to 4–6 months, maintaining crispness and flavor.

Their long storage life makes them perfect for extended enjoyment and gifting.


Using and Enjoying Your Harvest

Asian pears are incredibly versatile in the kitchen. Their crisp texture and delicate sweetness make them perfect for both fresh and cooked dishes.

Here are some delicious ways to use your harvest:

  • Slice fresh for a refreshing snack or salad.
  • Pair with cheese, nuts, and honey for an elegant appetizer.
  • Add to stir-fries or grilled dishes for a sweet crunch.
  • Use in desserts like tarts, poached pears, or cakes.
  • Juice or blend into smoothies for a natural sweetness boost.

Because of their high water content, they’re also excellent for hydration and detox drinks.


Why Asian Pears Are the “Ultimate Rare Fruit”

In a world dominated by apples and European pears, Asian pears offer something refreshingly different. They combine beauty, flavor, resilience, and longevity — making them a perfect choice for both new and experienced gardeners.

Their rarity in Western home gardens adds to their allure. When friends visit and see round, golden “apple-like” fruits on your tree, you’ll be introducing them to a fruit that’s both ancient and exotic.

Plus, the joy of plucking a perfectly crisp, sweet pear straight from your own tree is an experience no store-bought fruit can match.


Final Thoughts

Growing Asian pears is one of the most rewarding experiences for any fruit lover. With their crisp texture, honeyed flavor, and elegant appearance, they truly live up to their reputation as a rare fruit worth growing.

These trees are hardy, productive, and stunning throughout the seasons — from fragrant spring blossoms to golden autumn harvests. And best of all, they bring a taste of Asian heritage and natural sweetness right into your backyard.

So, if you’re searching for a fruit that stands out from the ordinary, offers generous harvests, and fills your garden with beauty, Asian pears are the ultimate choice. Start with one tree (or two for pollination), nurture them with care, and you’ll soon enjoy baskets of crisp, aromatic fruit unlike anything you’ve ever tasted.

Because sometimes, the rarest things in life aren’t hard to find — you just have to plant them.

Planting a Bare Root Seckel Pear Tree: A Complete Guide to Growing America’s Sweetest Pear

Planting a Bare Root Seckel Pear Tree: A Complete Guide to Growing America’s Sweetest Pear

There’s something incredibly rewarding about planting a tree — especially one that will feed you for years to come. In the gardening world, few experiences compare to planting a bareroot fruit tree and watching it take root, leaf out, and eventually bear its first harvest. One of the most delightful trees to plant is the Seckel Pear, a small but mighty fruit tree known for producing one of the sweetest pears on earth.

Inspired by the video “Gardening 2021: Planting a Bare Root Seckel Pear Tree and a Couple More Seeds,” this guide will take you through everything you need to know about growing the Seckel Pear tree from a bareroot start. We’ll also touch on seed planting, soil preparation, and tips for long-term care — helping you create your own thriving mini orchard.


What Makes the Seckel Pear Special?

The Seckel Pear (Pyrus communis ‘Seckel’) is often affectionately called the “Sugar Pear” — and for good reason. This heirloom variety, first discovered near Philadelphia in the late 1700s, is famous for its exceptionally sweet, spicy, and honey-like flavor. It’s one of the few pears native to America and remains a cherished favorite among gardeners and fruit lovers alike.

Here’s why Seckel Pears are so adored:

  • Unmatched sweetness with a crisp, firm texture
  • Compact tree size (12–15 feet), perfect for small gardens
  • Cold-hardy and disease-resistant
  • Long storage life — fruits can last several months in cool storage
  • Beautiful spring blooms that attract pollinators

The fruits themselves are petite — about the size of a plum — but don’t let that fool you. Each pear is a burst of pure sugary delight, perfect for fresh eating, preserves, or dessert recipes.


What Is a Bare Root Tree and Why Choose It?

A bareroot tree is a young, dormant tree that’s shipped and sold without soil around its roots. While it might look unimpressive at first, bareroot trees have several major advantages:

  • Affordability: They cost less than potted trees.
  • Faster establishment: Roots grow directly into native soil with no pot shock.
  • Lighter weight: Easier to handle and transport.
  • Broader variety: Nurseries offer more options when bareroot season arrives.

The ideal time to plant a bareroot tree is late winter to early spring, when the tree is still dormant but the soil is workable.


Step-by-Step: How to Plant a Bare Root Seckel Pear Tree

Let’s walk through the process of planting your Seckel pear the right way so it establishes strong roots and thrives for years to come.

1. Choose the Perfect Location

Pears love sunshine. Choose a spot that gets at least 6–8 hours of direct sunlight daily. The area should have well-draining soil — pears don’t tolerate soggy roots. Avoid low-lying areas where water collects after rain.

If you’re planting more than one pear tree (for cross-pollination), space them about 15–20 feet apart.

2. Check Soil and Amend if Needed

Seckel pears prefer slightly acidic to neutral soil (pH 6.0–7.0). Loosen the top 18 inches of soil and mix in compost or aged manure to improve fertility and drainage.

If your soil is heavy clay, add sand or perlite to help aeration. If it’s sandy, add organic matter to hold moisture.

3. Soak the Roots

Before planting, soak the bareroot tree in a bucket of water for 4–6 hours. This rehydrates the roots after storage and helps prevent transplant shock.

4. Dig the Planting Hole

Dig a hole wide enough to spread the roots comfortably — usually twice as wide as the root spread and deep enough to accommodate them. Create a small mound of soil in the center to support the tree.

5. Position the Tree

Place the tree on top of the mound, spreading the roots evenly in all directions. Make sure the graft union (the bump above the rootstock) sits 2 inches above the soil line to prevent rot.

Backfill with native soil, gently firming as you go to eliminate air pockets. Water thoroughly to settle the soil.

6. Mulch and Stake

Apply a 2–3 inch layer of mulch (wood chips, straw, or compost) around the base to retain moisture and suppress weeds. Keep the mulch a few inches away from the trunk to prevent rot.

If the area is windy or the tree is tall, use a stake for support during the first growing season.


Watering and Feeding Your Seckel Pear Tree

Watering

In the first year, keep the soil consistently moist — not soggy, but never completely dry. Deep watering once or twice a week encourages strong root growth.

Mature trees are drought-tolerant but benefit from consistent moisture during flowering and fruiting.

Feeding

Feed your Seckel pear in early spring with an organic fertilizer (such as compost or a balanced 10-10-10 formula). Avoid excessive nitrogen, which encourages leaf growth at the expense of fruit.

Top-dress annually with compost or aged manure to maintain soil fertility.


Pollination and Fruit Production

One of the great things about the Seckel Pear is that it’s partially self-fertile, meaning it can produce some fruit on its own. However, for heavier harvests, plant it near another European pear variety such as:

  • Bartlett (Williams)
  • Bosc
  • Anjou

Cross-pollination improves both yield and fruit size. Bees and other pollinators will happily do the work for you.


Pruning and Training Your Seckel Pear Tree

Pruning is crucial for shaping the tree, improving airflow, and promoting strong fruiting branches.

When to Prune

  • Late winter or early spring: Before new growth starts, prune for shape and structure.
  • Summer: Light pruning can help control excessive growth and redirect energy into fruit development.

How to Prune

  1. Remove dead, damaged, or crossing branches.
  2. Keep an open center for sunlight penetration.
  3. Shorten overly long shoots to maintain balance.

Aim for a strong central leader or open vase shape depending on your garden style.


Starting “A Couple More Seeds” — Companion Planting and Diversity

In the video, the gardener also plants a few other seeds alongside the pear tree — a practice that’s both practical and ecologically beneficial. Companion planting around fruit trees can help attract pollinators, deter pests, and improve soil health.

Here are some excellent companions for your Seckel pear:

  • Comfrey: Adds potassium to the soil and acts as living mulch.
  • Chives or garlic: Repel aphids and borers.
  • Clover or vetch: Fix nitrogen naturally.
  • Calendula and alyssum: Attract beneficial insects like ladybugs.

When starting seeds near your new pear tree, just be sure they won’t compete too heavily for water and nutrients. Shallow-rooted herbs and flowers work best.


Organic Pest and Disease Management

The Seckel pear is naturally resistant to many common pear diseases, including fire blight, which makes it a great choice for organic gardeners. Still, occasional pests or fungal issues can occur.

Common Problems and Organic Solutions

  • Aphids: Spray neem oil or insecticidal soap; encourage ladybugs.
  • Pear psylla: Wash leaves with water jets and apply horticultural oil.
  • Codling moths: Use pheromone traps or cover young fruit with mesh bags.
  • Fungal leaf spots: Ensure good airflow through pruning and avoid overhead watering.

Keep the ground clean by raking up fallen leaves and fruit, which can harbor disease.


The Joy of Watching Your Seckel Pear Grow

There’s something special about nurturing a tree from bareroot form. In the first year, you’ll see tender shoots and new leaves emerging — a sign your pear is settling in. By the third or fourth year, you can expect your first small harvest of golden-green, red-blushed Seckel pears.

When fully ripe, Seckel pears have:

  • Smooth, yellow-green skin with a hint of russet and blush
  • Dense, sweet flesh with rich, spicy undertones
  • A honey-like aroma that fills your garden or kitchen

Harvest pears slightly firm, as they ripen off the tree. Store them in a cool, dark place or refrigerate for several weeks.


Benefits of Growing Your Own Seckel Pear Tree

Growing a Seckel pear tree is about more than just fruit — it’s about sustainability, beauty, and connection to nature. Here’s why every home gardener should consider one:

  1. Compact and manageable — ideal for small gardens or even large containers.
  2. Eco-friendly — supports pollinators and reduces reliance on store-bought fruit.
  3. High yields — a single mature tree can produce dozens of sweet pears.
  4. Low maintenance — less prone to diseases and pests than other varieties.
  5. Longevity — a well-cared-for tree can live and bear fruit for decades.

Final Thoughts: Growing Sweet Success

Planting a bareroot Seckel pear tree is a small act that yields a lifetime of sweetness. Whether you’re growing it in a backyard orchard, an urban garden, or alongside other seeds and companions, this tree will reward your care with beautiful blossoms in spring and honeyed fruits in autumn.

The key to success lies in the basics — choosing the right spot, enriching the soil, providing steady care, and letting nature work its quiet magic. The Seckel pear’s resilience and flavor make it one of the most rewarding trees any gardener can grow.

As you watch your young pear tree take root and grow stronger each season, you’ll be reminded that gardening is as much about patience as it is about harvest. And when those first tiny, golden pears appear, you’ll know that every shovel of compost, every drop of water, and every moment spent nurturing your tree was worth it.

Because in the end, few things taste as sweet as fruit you’ve grown yourself — especially when it’s a Seckel Pear, America’s little “Sugar Pear” with a big heart.


How to Grow Serviceberry from Seed from Start to Finish: A Complete Step-by-Step Guide

How to Grow Serviceberry from Seed from Start to Finish: A Complete Step-by-Step Guide

If you’re looking for a rewarding plant to grow that offers stunning blossoms, delicious fruits, and beautiful fall color — the Serviceberry (Amelanchier) is a perfect choice. This native North American shrub or small tree is an all-season performer, gracing your garden with white spring flowers, edible summer berries, and fiery autumn foliage. Growing Serviceberry from seed might take time, but it’s a fulfilling process that allows you to cultivate hardy, resilient plants right from the start.

In this detailed guide, we’ll walk you through every stage — from collecting seeds to germination, transplanting, and long-term care — so you can grow your own Serviceberry from seed successfully.


What Is a Serviceberry?

Serviceberry (also called Juneberry, Saskatoon, or Shadbush) belongs to the Amelanchier genus. It’s a hardy deciduous shrub or small tree that grows across many regions of North America and Europe. Serviceberries produce clusters of delicate white flowers in early spring, followed by sweet, dark purple berries that resemble small blueberries and are loved by both people and birds.

These berries can be eaten fresh, baked into pies, or made into jams and jellies. Serviceberries are also rich in antioxidants, fiber, and vitamins, making them both ornamental and useful.


Step 1: Collecting and Preparing Serviceberry Seeds

If you want to grow Serviceberry from seed, start by harvesting ripe berries in mid to late summer — usually around June or July, depending on your region. Look for fully ripened, deep purple or black berries that are soft to the touch.

Here’s how to prepare the seeds:

  1. Collect ripe fruits directly from the tree or pick freshly fallen ones.
  2. Mash the berries gently in a bowl with a little water to separate the seeds from the pulp.
  3. Allow the mixture to sit for a few minutes — viable seeds usually sink, while the pulp and bad seeds float.
  4. Rinse the good seeds several times under running water.
  5. Spread them out on a paper towel or fine mesh screen to dry for 24–48 hours in a shaded, well-ventilated area.

Once dried, your Serviceberry seeds are ready for stratification, a crucial step for breaking seed dormancy.


Step 2: Stratifying the Seeds (Cold Treatment)

Serviceberry seeds have a hard dormancy period, meaning they need exposure to cold and moist conditions to trigger germination. This process is called cold stratification and mimics the natural winter cycle.

Here’s how to do it:

  1. Mix the cleaned seeds with moist peat moss, vermiculite, or sand in a small plastic bag.
  2. Label the bag with the date and type of seed.
  3. Place the bag in the refrigerator (not freezer) at around 1–5°C (34–41°F).
  4. Keep the seeds in the fridge for 90 to 120 days.
  5. Check the bag monthly to ensure the medium remains moist but not soggy.

During this cold stratification period, the seeds slowly break dormancy and prepare for germination once they’re exposed to warmer conditions.


Step 3: Sowing the Seeds

After the stratification period, it’s time to plant your Serviceberry seeds.

You’ll need:

  • Seed trays or small pots
  • A well-draining seed-starting mix (peat, sand, and perlite mix works well)
  • A spray bottle for gentle watering

Sowing process:

  1. Fill the seed trays or pots with your seed-starting mix.
  2. Moisten the mix lightly before sowing.
  3. Place seeds about ¼ inch (6 mm) deep into the soil.
  4. Lightly cover with a thin layer of mix and mist with water.
  5. Place the pots in a warm area with bright, indirect light — ideally around 20–25°C (68–77°F).

Keep the soil evenly moist but not waterlogged. Germination can take anywhere from 4 to 8 weeks, depending on the seed’s age and environmental conditions. Be patient — some seeds may take longer to sprout.


Step 4: Caring for Seedlings

Once your Serviceberry seeds germinate, you’ll see small green shoots emerging. This is an exciting stage, but also delicate — the young seedlings need consistent care.

Tips for healthy seedlings:

  • Keep them in bright, indirect sunlight for at least 6 hours daily.
  • Avoid direct scorching sun, which can dry them out.
  • Water regularly, keeping the soil moist but never soggy.
  • Once seedlings grow 2–3 sets of true leaves, start feeding with a diluted organic liquid fertilizer (about ¼ strength).

When seedlings reach about 4–6 inches tall and develop strong root systems, they’re ready for transplanting into larger containers or outdoor beds.


Step 5: Transplanting Outdoors

Before transplanting, it’s essential to harden off your young Serviceberry plants — this helps them adapt from indoor to outdoor conditions.

Hardening off process:

  • Start by placing seedlings outdoors in partial shade for 2–3 hours daily.
  • Gradually increase their outdoor exposure each day for about a week.

Once hardened, choose a suitable planting spot.

Ideal planting conditions:

  • Sunlight: Full sun to partial shade.
  • Soil: Moist, well-draining, and slightly acidic to neutral (pH 6.0–7.0).
  • Spacing: For shrubs, space them about 4–6 feet apart. For trees, 10–12 feet spacing works best.

Dig a hole twice as wide as the root ball, place the seedling in, and backfill with rich organic soil. Water thoroughly after planting.

Mulch around the base with straw, bark chips, or compost to retain moisture and suppress weeds.


Step 6: Watering and Feeding

Serviceberries love moisture, especially when young. Keep the soil consistently moist, particularly during the first year after planting. Once established, Serviceberries are moderately drought-tolerant, but regular watering during dry spells helps maintain healthy growth and fruit production.

Fertilizing tips:

  • Use a balanced organic fertilizer in early spring to encourage growth.
  • Avoid high-nitrogen fertilizers — they promote excessive foliage growth at the expense of flowers and fruits.
  • Compost or well-rotted manure can be added annually around the base for steady nutrient supply.

Step 7: Pruning and Maintenance

Pruning helps maintain shape, encourage air circulation, and remove any damaged or diseased branches.

How to prune Serviceberry:

  • Prune during late winter or early spring before new growth starts.
  • Remove crossing or crowded branches to create an open structure.
  • Trim off any suckers (new shoots from the base) if you want a single-trunk tree form.

Serviceberries are generally low-maintenance and resistant to most pests, though you should watch for aphids or powdery mildew. Good airflow and avoiding overwatering prevent most problems.


Step 8: Fruiting and Harvesting

Your patience will pay off — Serviceberry plants usually start bearing fruit after 3 to 5 years when grown from seed. The fruits ripen in early summer and turn deep purple or nearly black when ready.

To harvest, simply pick the ripe berries by hand. They’re delicious fresh, or you can use them for pies, smoothies, jams, or even homemade wine. Birds adore them too, so consider using netting if you want to save some for yourself!


Step 9: Seasonal Care and Longevity

Serviceberries are hardy plants that thrive in USDA zones 3–9. Each season brings a new layer of beauty:

  • Spring: Stunning white flowers.
  • Summer: Sweet, edible fruits.
  • Fall: Fiery orange and red foliage.
  • Winter: Smooth gray bark and graceful structure.

They can live for several decades with minimal care. Regular pruning, mulching, and occasional feeding will keep them thriving for years.


Final Thoughts

Growing Serviceberry from seed is a rewarding journey that connects you deeply with nature’s rhythm — from cold stratification to sprouting, transplanting, and watching your own tree bear fruit. Though it takes time and patience, the result is worth it: a hardy, beautiful, and fruitful plant that attracts pollinators, wildlife, and admiration.

Whether you’re a beginner gardener or an experienced horticulturist, Serviceberries are an excellent choice for a multi-purpose landscape plant — offering beauty, shade, and nutrition all in one.

Start your Serviceberry growing adventure today, and within a few years, you’ll be enjoying your own homegrown “Juneberries” straight from the garden!

Sowing Bilberry and Strawberry Seeds: A Complete Guide to Growing These Delicious Berries from Scratch

Sowing Bilberry and Strawberry Seeds: A Complete Guide to Growing These Delicious Berries from Scratch

Growing your own berries at home can be one of the most rewarding gardening experiences. Among the many berries you can cultivate, bilberries and strawberries stand out for their delicious taste, nutritional benefits, and beauty in the garden. While many gardeners prefer buying young plants, growing these fruits from seeds offers the joy of nurturing them right from the start. In this guide, we’ll walk through the process of sowing bilberry and strawberry seeds, how to care for the seedlings, and the best conditions for ensuring a successful harvest.


Understanding Bilberry and Strawberry Plants

Before diving into sowing techniques, it’s essential to understand what makes these two plants unique:

  • Bilberry (Vaccinium myrtillus):
    A close relative of the blueberry, bilberries are small, dark-blue berries native to Europe. They are rich in antioxidants, vitamin C, and anthocyanins, making them great for improving eye health and reducing inflammation. Bilberries grow on small shrubs that prefer acidic, well-draining soil and cool climates.
  • Strawberry (Fragaria × ananassa):
    Strawberries are among the most popular fruits worldwide, known for their sweet, juicy flavor and versatility in desserts and beverages. They grow low to the ground and produce runners that spread easily, making them excellent for pots, raised beds, or garden borders.

Growing both these berries from seeds requires patience and the right technique, but with proper care, you can enjoy fresh, homegrown fruit right from your balcony or backyard.


Step 1: Collecting and Preparing the Seeds

For Bilberries:

You can extract bilberry seeds from fresh or frozen fruits. Mash the berries gently in water and allow the pulp to separate from the tiny seeds. The seeds will sink to the bottom—collect and rinse them well.

For Strawberries:

Cut a ripe strawberry and gently scrape off the outer layer containing seeds. Soak the seeds in water for 24 hours to separate viable ones (which will sink). Dry them on a paper towel before planting.

Both bilberry and strawberry seeds benefit from a cold stratification process—a period of simulated winter that helps break seed dormancy and improves germination rates.


Step 2: Cold Stratification

This step mimics natural winter conditions, signaling the seeds that it’s time to sprout when temperatures rise.

  1. Mix the seeds with a small amount of moist peat moss or sand.
  2. Place this mixture in a sealed plastic bag or container.
  3. Keep it in the refrigerator (not freezer) at 3–5°C (37–41°F).
    • Bilberry seeds: 2 to 3 months
    • Strawberry seeds: 3 to 4 weeks
  4. Check the mixture every couple of weeks to ensure it remains moist, not soggy.

After stratification, the seeds are ready for sowing.


Step 3: Sowing the Seeds

Prepare shallow seed trays or small pots with a light, acidic soil mix—a combination of peat moss, perlite, and sand works well for both plants.

How to Sow Bilberry Seeds:

  • Sprinkle the seeds evenly on the soil surface.
  • Lightly press them into the soil but do not cover them completely; bilberry seeds need light to germinate.
  • Mist the soil gently with water.

How to Sow Strawberry Seeds:

  • Scatter the seeds evenly over the soil.
  • Lightly press them into the surface or cover them with a very thin layer of soil.
  • Mist with water and cover the tray with clear plastic wrap or a humidity dome.

Keep the trays in a warm, bright spot (around 20–25°C / 68–77°F). Germination can take anywhere from 2 to 6 weeks, depending on seed quality and environmental conditions.


Step 4: Providing the Right Conditions

Seedlings of both bilberries and strawberries need light, moisture, and gentle warmth to grow strong and healthy.

  • Light: Place the trays under grow lights or near a sunny window. At least 12–14 hours of light daily helps prevent leggy growth.
  • Watering: Keep the soil consistently moist but never soggy. Mist or bottom-water the trays to avoid disturbing the seeds.
  • Temperature: Maintain a stable temperature between 18–24°C (65–75°F). Avoid cold drafts or excessive heat.

Once the seedlings appear, remove the plastic cover to allow airflow and prevent fungal growth.


Step 5: Transplanting the Seedlings

When the seedlings have 2–3 true leaves, it’s time to transplant them into individual pots.

  • Use small containers (4–6 inches) with good drainage holes.
  • Fill with acidic potting mix (for bilberries) or a balanced mix with compost (for strawberries).
  • Gently lift the seedlings from the tray using a spoon or small stick, taking care not to damage their roots.
  • Water lightly after transplanting.

Keep the young plants in partial shade for the first week to help them adjust to their new environment.


Step 6: Caring for Your Young Plants

Once the seedlings are established, they’ll need consistent care to develop into productive fruit-bearing plants.

For Bilberry Plants:

  • Soil: Keep it acidic (pH 4.5–5.5). Use peat moss or pine needle mulch to maintain acidity.
  • Watering: Bilberries prefer slightly moist soil but not waterlogged.
  • Feeding: Use an acid-loving plant fertilizer once a month during the growing season.
  • Light: Provide partial shade; they don’t thrive in harsh, direct sunlight.

For Strawberry Plants:

  • Soil: Slightly acidic to neutral (pH 5.5–6.8).
  • Watering: Strawberries need regular watering, especially during flowering and fruiting.
  • Fertilizing: Use a balanced organic fertilizer every 3–4 weeks.
  • Light: Full sun for at least 6–8 hours daily encourages better fruiting.

Mulching around the plants helps retain moisture and keeps fruits clean.


Step 7: Encouraging Flowering and Fruiting

It may take one to two years for bilberry plants to produce fruit, while strawberries can bear fruit in their first year if grown under optimal conditions.

  • For Bilberries: Be patient and provide consistent care. Once mature, each shrub can yield berries for up to 15 years.
  • For Strawberries: Remove the first few flowers to allow the plant to strengthen its root system, leading to a more productive harvest later.

Pollination is crucial—if you’re growing indoors, gently shake the flowers or use a soft brush to transfer pollen.


Step 8: Harvesting Your Homegrown Berries

  • Bilberries: Usually ready for harvest in late summer. The berries will turn deep blue or black and easily detach from the plant when ripe.
  • Strawberries: Harvest when the berries are fully red and fragrant. Pick them with a bit of the stem attached to prolong freshness.

Always handle the fruits gently to avoid bruising. Freshly picked berries can be eaten immediately or stored in the refrigerator for a few days.


Tips for Success

  1. Use rainwater or filtered water if possible—both plants dislike high mineral content.
  2. Avoid over-fertilizing; this can lead to excessive leafy growth and poor fruiting.
  3. Protect young plants from slugs and aphids using organic pest control methods.
  4. Regular pruning of dead leaves and runners (in strawberries) keeps plants healthy.
  5. Repot every 2–3 years for bilberries to refresh the soil and maintain vigor.

Final Thoughts

Growing bilberries and strawberries from seeds may take patience, but the rewards are worth it. From watching the first tiny seedlings emerge to tasting your first homegrown berries, the process is filled with joy and learning.

Whether you’re an experienced gardener or a beginner trying container gardening, these two plants are a wonderful addition to any space. They not only provide delicious, healthy fruits but also beautify your garden with their lovely flowers and lush green leaves.

Start your journey today—sow your bilberry and strawberry seeds, nurture them with care, and soon you’ll be enjoying the sweet taste of success right from your garden!

How to Grow Salak (Snake Fruit) Plant from Seeds: A Complete Step-by-Step Guide

How to Grow Salak (Snake Fruit) Plant from Seeds: A Complete Step-by-Step Guide

Have you ever heard of Salak, also known as Snake Fruit? Native to Indonesia, Malaysia, and other parts of Southeast Asia, this fascinating fruit gets its name from its reddish-brown scaly skin that resembles a snake. Beneath that tough exterior lies a sweet, tangy, and aromatic flesh — one of the most exotic tropical treats you can grow at home.

If you’ve ever wondered how to grow a Salak plant from seeds, this detailed guide inspired by the video “How to Grow Salak Plant from Seeds (Snake Fruit)” will walk you through every step. From seed selection and germination to transplanting and care, you’ll learn everything you need to successfully cultivate this remarkable tropical fruit in your garden or even in a large container.


What Is the Salak (Snake Fruit) Plant?

The Salak palm (Salacca zalacca) is a tropical fruiting palm that belongs to the Arecaceae (palm) family. It’s a short, clumping palm that rarely grows taller than 6–8 feet. Its long, feather-like leaves are covered in sharp spines, but they protect one of nature’s most unique fruits — the Snake Fruit.

Each tree produces clusters of reddish-brown fruits at its base. The skin looks scaly like a snake’s, but once peeled, you’ll find a firm, creamy, and sweet flesh inside, often with a pleasant tang. The taste is a combination of apple, banana, and pineapple, making it a prized delicacy across Southeast Asia.

There are several popular varieties, including:

  • Salak Pondoh (Indonesia) – Sweet and aromatic
  • Salak Bali (Bali, Indonesia) – Juicy with a mild sour flavor
  • Salak Gula Pasir – Considered the sweetest variety
  • Salak Thai (Thailand) – Larger and often cultivated commercially

Growing Salak from seed takes patience, but the process is fascinating and deeply rewarding.


Step 1: Collecting and Preparing Salak Seeds

You can start growing Salak right from the seeds inside the fruit. However, fresh seeds are crucial — old or dried seeds will have very low germination rates.

How to Prepare Salak Seeds:

  1. Choose Ripe Fruits: Select fully ripe Salak fruits with a rich reddish-brown skin. The riper the fruit, the better the seed quality.
  2. Extract the Seeds: Carefully peel the fruit and remove the large, shiny brown seeds from the flesh.
  3. Clean the Seeds: Rinse the seeds under running water to remove all fruit residue. Leftover pulp can attract fungus during germination.
  4. Soak the Seeds: Soak them in clean water for 24 hours to soften the outer shell and promote quicker sprouting.

Some gardeners also recommend lightly scratching or nicking the outer seed coat with a file to speed up germination — but do it carefully to avoid damaging the inner seed.


Step 2: Germinating the Seeds

Salak seeds take time to sprout, but with proper conditions, they can germinate successfully in 4–8 weeks.

Best Germination Method:

  1. Prepare a Germination Tray or Plastic Bag:
    Use a shallow tray, seedling container, or even a resealable plastic bag.
  2. Use a Moist Medium:
    Mix 50% coco peat and 50% sand or perlite. This ensures good drainage and moisture balance.
  3. Plant the Seeds:
    Place the seeds horizontally about 1 inch deep into the medium.
  4. Moisture & Warmth:
    Keep the medium consistently moist (not soggy). Cover with plastic wrap or close the bag to retain humidity.
  5. Ideal Temperature:
    Maintain a warm environment — around 28°C–32°C (82°F–90°F) — to trigger germination.

Keep the setup in a bright spot but away from direct sunlight. Check every few days to ensure the medium stays moist.


Step 3: Transplanting Seedlings

Once the seedlings reach 3–5 inches tall and develop small roots, they’re ready for transplanting into pots or the ground.

Transplanting Steps:

  1. Prepare the Soil Mix:
    Combine:
    • 40% garden soil
    • 30% compost or cow dung manure
    • 20% sand for drainage
    • 10% coco peat or leaf mold
  2. Choose a Pot:
    Start with a 10–12 inch deep pot with drainage holes. Salak palms have fibrous roots that prefer loose, airy soil.
  3. Plant Carefully:
    Gently remove the seedling from the germination medium without disturbing its delicate roots. Place it in the pot and cover the roots with soil.
  4. Water Thoroughly:
    After transplanting, water the plant deeply and place it in partial shade for about a week to help it recover.

Once the young plant stabilizes, move it gradually to a brighter spot with filtered sunlight.


Step 4: Light and Temperature Requirements

Salak is a tropical plant, so it thrives in warm, humid, and partially shaded environments.

  • Sunlight:
    Young plants prefer partial shade. As they mature, they can tolerate 4–6 hours of filtered sunlight daily. Direct scorching sunlight may burn the leaves.
  • Temperature:
    Ideal range: 25°C to 35°C (77°F to 95°F).
    Avoid exposure to cold or frost — temperatures below 15°C (59°F) can slow growth or cause damage.
  • Humidity:
    Keep humidity above 60%. In dry climates, mist the leaves occasionally or use a humidity tray.

Step 5: Watering and Moisture Management

Snake fruit plants love consistently moist soil, much like their native rainforest habitat. However, avoid waterlogging, which can lead to root rot.

  • Water regularly, especially during hot months. The soil should never dry out completely.
  • Use mulch (like coconut husk, straw, or dry leaves) around the base to retain moisture and regulate soil temperature.
  • During monsoon or high-humidity seasons, reduce watering slightly to prevent fungal infections.

Step 6: Fertilizing for Healthy Growth

To encourage strong root development and fruiting later, Salak plants need regular feeding with organic nutrients.

Fertilizer schedule:

  • For young plants (first year):
    Apply compost or well-rotted cow dung once a month.
  • For mature plants:
    Use organic fertilizers such as vermicompost, bone meal, or banana peel fertilizer every 2–3 months.
  • For fruiting trees:
    During flowering and fruiting stages, feed with potassium-rich fertilizer (wood ash, seaweed extract, or NPK 10-10-20) to enhance fruit quality.

Avoid excessive nitrogen — it encourages leafy growth but delays fruiting.


Step 7: Pruning and Maintenance

Salak palms naturally form dense clumps, and their leaves are covered in sharp spines. Regular maintenance makes the plant manageable and safe to handle.

Tips for Pruning:

  • Remove dead or old leaves at the base.
  • Trim away excess offshoots or suckers to direct the plant’s energy toward fruit production.
  • Use protective gloves and long sleeves when pruning — the thorns can be sharp!

Keep the base of the plant clean and well-ventilated to discourage pests and fungal problems.


Step 8: Pest and Disease Control

Although Salak is relatively hardy, it can sometimes attract pests like aphids, scales, and mealybugs. Here’s how to manage them organically:

  • Neem oil spray: Mix 5 ml neem oil with 1 liter of water and spray weekly.
  • Soap spray: Use mild liquid soap to remove small insects.
  • Avoid stagnant water: This prevents fungal root infections.

If grown in pots, periodically change the topsoil layer to reduce the risk of disease buildup.


Step 9: Flowering and Fruiting

Salak palms are dioecious, meaning male and female flowers grow on separate plants. To get fruits, you’ll need at least one male and one female plant for pollination.

  • Flowering Time: Usually begins 3–5 years after planting.
  • Pollination: Hand pollination can improve fruit set, especially in potted or indoor plants.
  • Fruiting: Fruits develop in clusters at the base of the plant and take about 6–7 months to mature after flowering.

Each fruit contains one to three large seeds and a sweet, crisp flesh that can range from mildly acidic to sugary, depending on the variety.


Step 10: Harvesting and Enjoying Your Snake Fruit

You’ll know it’s harvest time when the fruits turn deep brownish-red and the scales look shiny. The fruit should feel firm but not hard.

Harvesting Tips:

  • Wear gloves — the spines on the plant are sharp.
  • Cut the fruit clusters gently from the base.
  • Consume fresh or use in jams, pickles, or desserts.

Salak fruit is rich in fiber, vitamin C, and antioxidants, making it not only delicious but also healthy. It’s known to improve digestion and boost energy naturally.


Bonus: Growing Salak in Containers

Even if you don’t have space for a full garden, you can still grow Salak in large containers on your terrace or balcony.

  • Use a 25–30 inch deep container with good drainage.
  • Place in bright filtered sunlight.
  • Keep the soil consistently moist.
  • Add compost every 30–45 days.
  • Repot every 2–3 years to refresh soil and allow root expansion.

Container-grown Salak may be smaller but can still produce fruits when properly pollinated.


Final Thoughts

Growing Salak (Snake Fruit) from seeds is a slow but highly rewarding process. From the moment your seeds sprout to the day you harvest those glossy, snake-like fruits, every stage offers a sense of wonder and accomplishment.

The key to success is patience, consistent care, and a tropical-like environment. Whether you live in a humid region or use containers in a greenhouse, you can enjoy the beauty and bounty of this unique palm tree right at home.

With the right mix of love and attention, your small seed will eventually transform into a fruit-bearing Salak palm — a true tropical gem that’s as beautiful as it is delicious.

How to Plant and Grow a Jabuticaba Tree (Brazilian Grape): Complete Guide for Home Gardeners

How to Plant and Grow a Jabuticaba Tree (Brazilian Grape): Complete Guide for Home Gardeners

If you’ve ever wanted to grow something truly unique and exotic in your garden, the Jabuticaba tree — also known as the Brazilian Grape Tree (Plinia cauliflora) — is a perfect choice. Native to Brazil and adored across the tropics, this rare fruit tree is famous for its unusual habit of producing grapes directly on its trunk and branches. The sight of glossy, deep-purple fruits covering the bark is nothing short of magical.

In this detailed guide inspired by the video “How to Plant & Grow a Jabuticaba Tree (Brazilian Grape)”, we’ll explore everything you need to know to grow your own Jabuticaba tree — from choosing the right variety and soil to watering, pruning, and harvesting those sweet, grape-like fruits.


What Makes the Jabuticaba Tree Special?

The Jabuticaba tree stands out from almost every other fruit tree in the world because of its cauliflorous fruiting habit — meaning the fruits grow directly on the trunk and main branches, not at the tips of new shoots like most trees.

When the tree is in full fruit, it looks as if someone glued shiny black grapes all over its bark. It’s both a botanical wonder and an ornamental masterpiece.

The fruits are sweet, juicy, and slightly tart — similar to grapes but with a hint of tropical richness. They can be eaten fresh, or used to make jellies, wines, juices, and liqueurs.

Apart from its beauty and taste, the Jabuticaba tree has cultural and medicinal value. In traditional Brazilian medicine, its fruits and bark are believed to have antioxidant, anti-inflammatory, and digestive benefits.


Varieties of Jabuticaba

There are several types of Jabuticaba trees, each with its own fruiting habits and characteristics. The most common varieties include:

  1. Plinia cauliflora (Sabará) – The classic Brazilian variety with small, sweet fruit and smooth skin.
  2. Plinia jaboticaba (Paulista) – Produces larger fruits and grows faster.
  3. Plinia trunciflora (Cabinho) – Slightly more acidic, excellent for making wines and jams.
  4. Plinia phitrantha (White Jabuticaba) – Rare, with white or pale-green fruits.

If you’re new to Jabuticaba cultivation, start with Sabará — it’s the most common and well-adapted for home gardens and containers.


How to Plant a Jabuticaba Tree

1. Choosing the Right Location

Jabuticaba trees thrive in warm, humid tropical or subtropical climates. They prefer full sun to partial shade. However, young trees can be sensitive to direct heat, so it’s best to give them filtered sunlight during their first year.

  • Ideal temperature: 18°C to 30°C (65°F to 86°F)
  • Protection: Shelter from strong winds and frost

If you live in a cooler region, the tree can be grown in a large pot or container and brought indoors during winter.


2. Selecting the Right Soil

Jabuticaba trees love rich, well-draining, and slightly acidic soil.

Soil mix recommendation:

  • 40% garden soil
  • 30% compost or organic manure
  • 20% river sand or perlite for drainage
  • 10% coco peat or peat moss to maintain moisture

Keep the pH between 5.5 and 6.5. You can add a handful of coffee grounds or pine bark to maintain soil acidity.


3. Propagation Methods

You can grow Jabuticaba from seeds, air layering, or grafting.

  • Seeds: Germination can take 30–60 days. The seed-grown trees take 6–10 years to bear fruit, so patience is required.
  • Grafted Plants: These start fruiting in 3–4 years and maintain the parent tree’s characteristics.
  • Air Layering: This method also produces faster fruiting trees (around 4–5 years).

If you want quicker results, it’s best to buy a nursery-grown grafted Jabuticaba sapling.


4. Planting Steps

  1. Dig or prepare a pit or pot about twice the size of the root ball.
  2. Add organic compost and mix it well into the soil.
  3. Place the sapling carefully and fill in with soil, pressing gently to remove air pockets.
  4. Water thoroughly right after planting.
  5. Apply a 2–3 inch layer of mulch (dry leaves, coco husk, or straw) around the base to conserve moisture.

For container planting, use a minimum 20–25 inch pot. The tree can grow quite tall over time, so you may need to repot it every few years.


Sunlight and Water Requirements

Sunlight:

Jabuticaba trees need at least 5–6 hours of direct sunlight daily. They can tolerate partial shade but produce the best fruit in bright light.

Watering:

This tree loves moisture — in fact, it’s one of the few fruit trees that can tolerate occasional waterlogging. However, it dislikes drought.

  • Keep the soil consistently moist but not soggy.
  • In summer, water daily or every alternate day.
  • In rainy or cool seasons, reduce watering to avoid fungal problems.
  • Mist the leaves occasionally to maintain humidity.

If the leaves start to curl or turn brown at the edges, it’s usually a sign of underwatering.


Fertilizing the Jabuticaba Tree

To support healthy growth and abundant fruiting, feed your Jabuticaba tree with organic fertilizers regularly.

Fertilizer schedule:

  • Young plants (under 2 years): Use compost or liquid organic fertilizer once a month.
  • Mature trees: Apply a balanced organic fertilizer (like NPK 10-10-10 or composted manure) every 2–3 months.
  • Before flowering: Add a bit of bone meal or fish emulsion to encourage blooms and fruiting.

The Jabuticaba tree also benefits from foliar sprays — a light misting of seaweed extract or compost tea helps boost leaf health and flowering.


Flowering and Fruiting

Jabuticaba trees typically flower once or twice a year — but under ideal tropical conditions, they may flower three to four times annually.

The small white flowers bloom directly on the trunk and main branches. Within a few weeks, they transform into dark purple, grape-like fruits.

Time to fruit:

  • Seed-grown: 6–10 years
  • Grafted: 3–4 years
  • Air-layered: 4–5 years

Once mature, a single tree can produce dozens to hundreds of fruits in a single flush.


Harvesting the Brazilian Grapes

The fruits mature quickly after flowering — usually within 20–30 days. They’re ready to pick when they turn deep purple or almost black and have a glossy skin.

  • Harvest by hand: Gently twist the fruit to detach it.
  • Storage: Jabuticaba fruits are best eaten fresh. They last only 3–4 days at room temperature but can be refrigerated for up to a week.
  • Uses: Enjoy them raw, or turn them into jam, jelly, syrup, or wine. The flavor is refreshing — sweet, tangy, and distinctly tropical.

Pruning and Maintenance

Pruning is essential for keeping your Jabuticaba tree healthy, especially if grown in pots.

Tips:

  • Remove dead or crowded branches after harvest.
  • Thin out the canopy slightly to allow sunlight penetration.
  • Avoid cutting the main trunk where flowers and fruits emerge.
  • Keep the base weed-free and mulched.

Light pruning also helps control the tree’s height and promotes better air circulation, reducing the risk of fungal diseases.


Pests and Diseases

Jabuticaba trees are relatively hardy, but they can face issues like:

  • Aphids, scales, and fruit flies: Spray neem oil once every 2 weeks as a preventive measure.
  • Fungal infections (anthracnose, rust): Ensure good airflow and avoid water stagnation.
  • Leaf spot: Use organic fungicide or neem-based sprays if necessary.

Keeping the tree clean, well-fed, and properly watered is the best way to prevent most problems.


Growing Jabuticaba in Containers

If you don’t have a backyard, don’t worry — Jabuticaba grows beautifully in large pots.

  • Use a 25–30 inch wide container with drainage holes.
  • Place it in a sunny spot where it gets morning light and afternoon shade.
  • Water more frequently than in-ground trees, as containers dry out faster.
  • Repot every 2–3 years to refresh the soil mix.

A container-grown Jabuticaba makes a stunning ornamental tree — compact, glossy, and full of charm.


Health Benefits of Jabuticaba Fruit

Apart from its visual appeal and taste, the Jabuticaba fruit is loaded with nutrients and antioxidants:

  • Rich in Vitamin C – Boosts immunity and skin health.
  • High in Anthocyanins – Powerful antioxidants that protect against cell damage.
  • Contains Dietary Fiber – Aids digestion.
  • Anti-inflammatory Properties – Supports overall well-being.

Including these fruits in your diet can be both a delicious and healthy choice.


Final Thoughts

Growing a Jabuticaba tree, or the Brazilian Grape Tree, is a slow but deeply satisfying journey. From its glossy leaves and unusual trunk fruits to its rich, sweet flavor, every stage of its growth feels like a reward.

With patience, care, and consistency, you can enjoy your own homegrown Jabuticaba harvest — right from your backyard or balcony.

Whether you’re a tropical gardener, a plant collector, or simply love rare fruit trees, the Jabuticaba will never disappoint. Its beauty, uniqueness, and taste make it one of the most enchanting fruit trees you can grow at home.

Miracle Fruit Tree Malayalam Guide: How to Grow Fruit Plants in Pots for Successful Container Gardening

Miracle Fruit Tree Malayalam Guide: How to Grow Fruit Plants in Pots for Successful Container Gardening

Growing your own fruit trees at home is one of the most rewarding gardening experiences — and you don’t need a big backyard to do it! In fact, with a little creativity and care, you can successfully grow a variety of fruit plants right on your balcony, terrace, or even in your front yard using containers. This detailed guide, inspired by the video “Fruit Tree Malayalam | How to Grow Fruit Plants in Pot | Miracle Fruit Tree | Container Gardening,” will walk you through the essential steps, from choosing the right containers to caring for your miracle fruit tree and other fruit-bearing plants.

Whether you’re an urban gardener in Kerala or anywhere else in the world, this Malayalam-based guide will help you transform your small space into a lush, fruit-filled paradise.


Why Grow Fruit Trees in Pots?

Container gardening has become increasingly popular for those who live in apartments or have limited space. But even for those with larger gardens, growing fruit trees in pots offers many benefits:

  1. Space-Saving: Perfect for balconies, rooftops, and patios.
  2. Easy Mobility: You can move plants to catch sunlight or protect them from heavy rain.
  3. Controlled Growth: Pots naturally restrict root expansion, helping manage tree size.
  4. Pest & Disease Management: Containers reduce soil-borne problems common in the ground.
  5. Decorative Appeal: Fruit plants in pots look stunning and can be part of your home décor.

Best Fruit Trees for Container Gardening

Not all fruit trees are ideal for pots, but several species thrive in containers with the right care. Here are some excellent choices suited for tropical climates like Kerala and southern India:

  • Miracle Fruit (Synsepalum dulcificum) – The star of this guide! Known for its ability to make sour foods taste sweet.
  • Lemon and Lime Trees – Compact and produce fruit year-round.
  • Guava (Perakka) – Fast-growing and fragrant.
  • Papaya (Omakka) – Dwarf varieties do well in large pots.
  • Pomegranate (Mathalam) – Hardy and beautiful with bright red fruits.
  • Mango (Mavu) – Dwarf hybrid varieties like ‘Amrapali’ are perfect for containers.
  • Banana (Vaazha) – Dwarf species grow beautifully in tubs.
  • Fig (Athipazham) – Thrives in containers and provides a steady yield.

These plants, including the Miracle Fruit, adapt well to pot life and can yield an abundant harvest when given the right growing conditions.


Understanding the Miracle Fruit Tree

The Miracle Fruit Tree (also known as Synsepalum dulcificum) is native to West Africa and has gained popularity worldwide due to its unique property: after eating the fruit, anything sour tastes sweet! For example, lemons taste like sugary lemonade after consuming the berry. This natural sweetness enhancer is due to a glycoprotein called miraculin.

In addition to its fascinating taste-altering effects, it’s an attractive, slow-growing evergreen shrub that produces glossy green leaves and small red berries. It’s a wonderful addition to any home garden, especially if you’re interested in rare and exotic plants.


Choosing the Right Container

Selecting the right pot is the first and most crucial step in container fruit gardening. For the Miracle Fruit and other trees, consider the following:

  • Size:
    Start with a medium-sized pot (around 12–16 inches in diameter) and later move the plant to a larger pot (up to 20–24 inches) as it matures.
  • Material:
    Clay pots, plastic containers, or grow bags all work well. Clay offers better air circulation, while plastic retains moisture.
  • Drainage:
    Ensure your container has drainage holes at the bottom. Good drainage prevents root rot and fungal diseases.
  • Tray or Base Plate:
    Use a tray to collect excess water and keep your balcony or terrace clean.

Soil Mix for Fruit Plants in Pots

Fruit trees need a well-draining yet nutrient-rich soil mix. A recommended potting mix for Miracle Fruit and similar plants includes:

  • 1 part garden soil
  • 1 part compost or cow dung manure
  • 1 part coco peat or sand for aeration

You can also add bone meal or neem cake powder to enhance nutrient content and protect against pests.

Miracle Fruit prefers slightly acidic soil (pH 4.5 to 5.8). If your soil is too alkaline, mix in a bit of peat moss or coffee grounds to maintain the right pH level.


Sunlight and Temperature Requirements

Most fruit plants, including the Miracle Fruit, love sunlight. Ensure your pots receive at least 4–6 hours of direct sunlight daily. If you live in an extremely hot area, provide partial shade during the harsh midday sun.

Ideal temperature for Miracle Fruit: 20°C to 30°C (68°F–86°F).
The plant is sensitive to frost and cold winds, so during winters, move your pots indoors or to a warmer corner of your garden.


Watering Tips

Watering is key to healthy fruit growth. Overwatering or underwatering can both harm the plant.

  • Watering Frequency: Once or twice a week, depending on the weather.
  • Check Moisture: Insert your finger an inch into the soil. If it feels dry, it’s time to water.
  • Avoid Stagnant Water: Always empty the tray beneath your pot to prevent mosquito breeding and root rot.
  • Mulching: Use coconut husk or dry leaves on top of the soil to retain moisture and reduce evaporation.

Fertilizing for Healthy Growth

For best results, feed your container fruit plants regularly. Use:

  • Organic Compost: Apply every 30 days.
  • Liquid Fertilizer: Mix vermicompost tea or fish emulsion in water once a month.
  • Slow-Release Fertilizer: You can also use organic NPK pellets once every 45–60 days.

For the Miracle Fruit tree, avoid using chemical fertilizers — it prefers natural, organic feed that maintains acidic soil conditions.


Pruning and Maintenance

Pruning keeps your fruit trees healthy, encourages new growth, and improves fruit yield.

  • Remove Dead or Yellow Leaves: This prevents pests and improves airflow.
  • Trim Branches After Harvest: Encourage new shoots by pruning the top branches lightly.
  • Support Stems: Use a stick or small pole for tall plants to prevent bending.

Regular pruning and shaping also make the tree more compact and suitable for container growth.


Pest and Disease Control

Container plants can still attract pests like aphids, mealybugs, and spider mites. Here’s how to keep them at bay:

  • Neem Oil Spray: Mix 5ml neem oil in 1 liter of water and spray weekly.
  • Soap Spray: Mix mild liquid soap with water to wash leaves if pests appear.
  • Keep Clean Surroundings: Remove fallen leaves and debris to prevent fungal infections.

Harvesting and Enjoying Your Miracle Fruit

Miracle Fruit trees usually take about 2–3 years to produce berries when grown from seed. However, grafted or nursery plants can fruit within 1–1.5 years. The berries turn bright red when ripe — that’s the best time to harvest.

After eating the fruit, try a slice of lemon or tamarind — you’ll be amazed as the sourness disappears, replaced by a sweet flavor! The effect can last up to one hour.

Aside from being a fun garden experiment, these berries are rich in antioxidants and vitamins, making them both unique and nutritious.


Additional Tips for Success

  • Rotate pots weekly for even sunlight exposure.
  • Avoid overfertilizing; fruit trees prefer balanced feeding.
  • Repot every 2–3 years to refresh the soil.
  • Use rainwater or filtered water if your tap water is highly alkaline.

With these steps, you’ll soon enjoy a thriving, fruit-bearing garden even in a small space.


Final Thoughts

Container gardening is a blessing for modern households, and growing fruit trees like the Miracle Fruit in pots brings a sense of wonder and satisfaction. From the joy of nurturing a seedling to tasting your first homegrown fruit, every step is a reminder of nature’s magic.

In Malayalam households, where traditional gardening space may be limited, this method opens up a new world of sustainable, healthy living. Whether it’s a sunny balcony in Kochi or a shaded terrace in Thiruvananthapuram, you can cultivate your own tiny orchard — one pot at a time.

So, get your hands dirty, prepare your containers, and experience the miracle of fruit gardening at home!