If you’re searching for a vegetable that’s easy to grow, highly productive, and delicious in countless dishes — zucchini is the perfect choice. Many gardeners call zucchini the “garden miracle” because it grows quickly, produces abundantly, and thrives in small spaces.
Inspired by the video “Garden | Why is it so easy to grow zucchini? Discover how to grow zucchini at home”, this article will take you through a detailed step-by-step process on how to grow zucchini easily at home — whether you have a backyard garden, terrace, or just a few containers.
Let’s dive into the secrets behind why zucchini is so beginner-friendly and how you can grow a thriving crop yourself.
Why Zucchini Is So Easy to Grow
Zucchini (also called courgette) is one of the most forgiving vegetables. Even if you’re new to gardening, you’ll find it simple because:
- It germinates quickly — seeds sprout in just 5–7 days.
- It’s a fast grower — ready to harvest within 45–60 days.
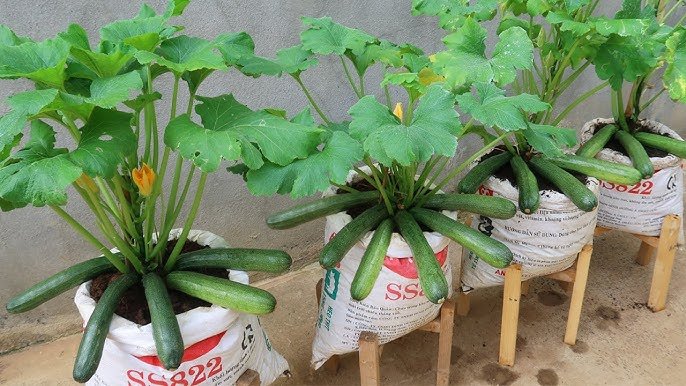
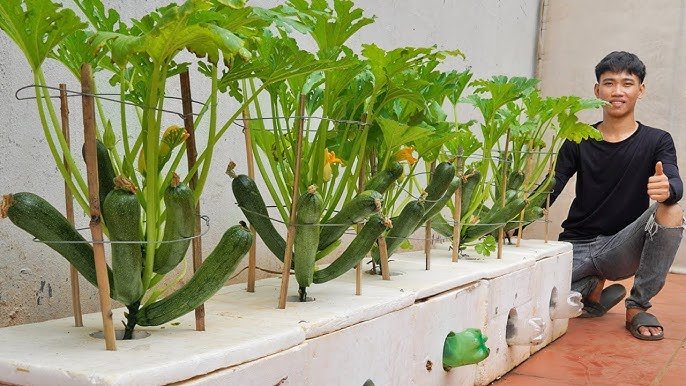
- The plant produces heavily — one plant can yield 10–15 zucchinis.
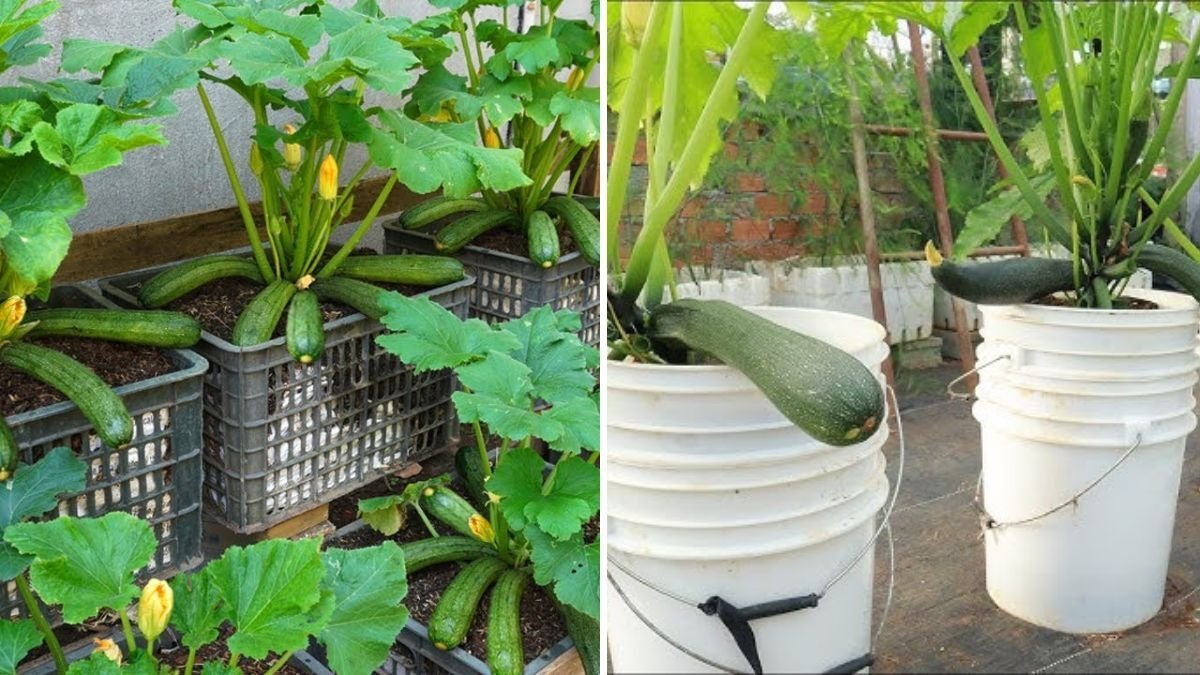
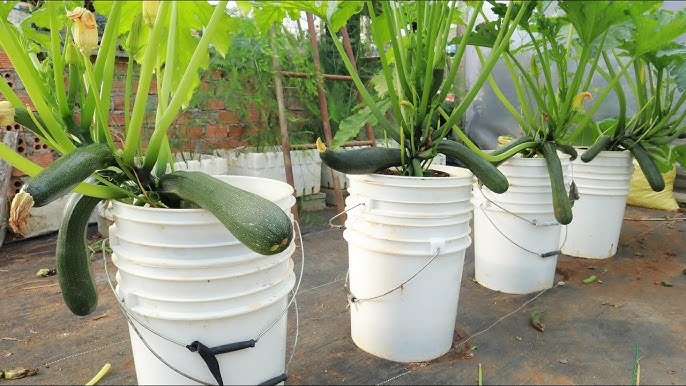
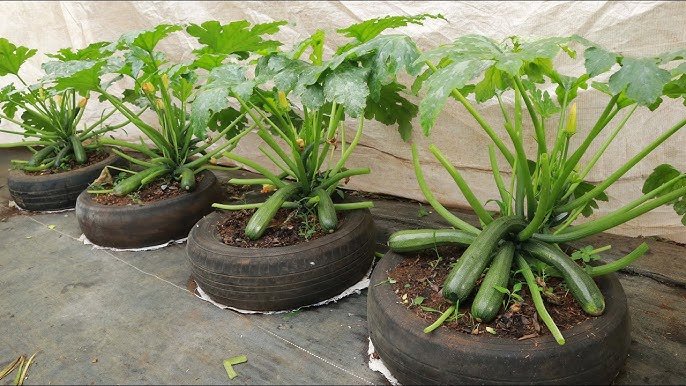
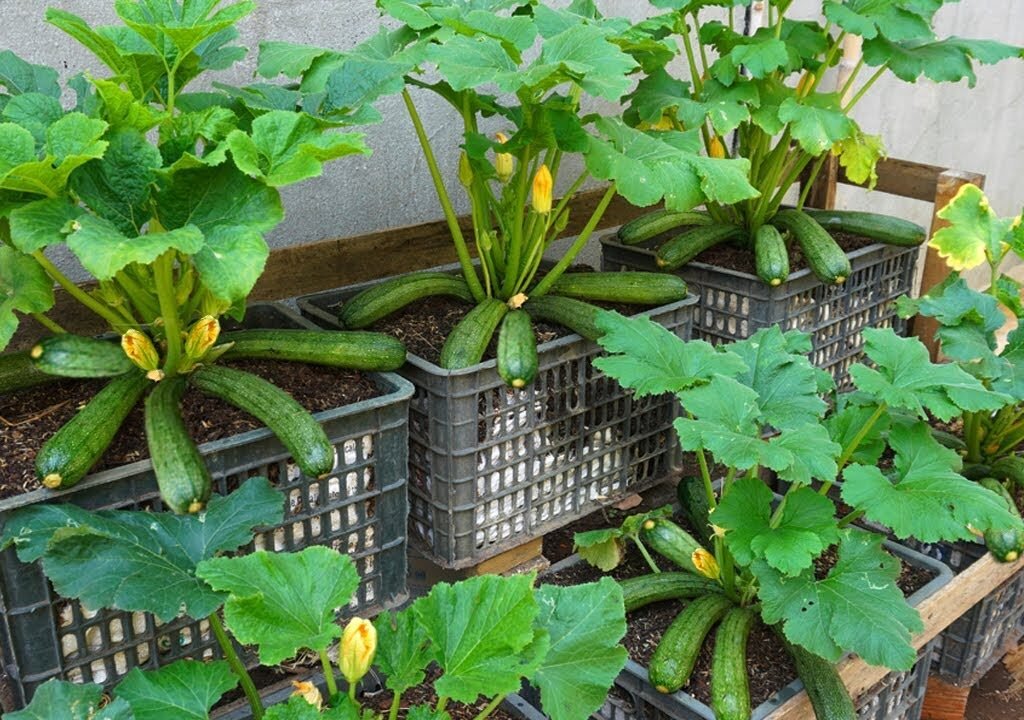
- It thrives in pots, grow bags, or ground soil.
- It requires minimal maintenance — just sunlight, water, and organic compost.
Now that you know why zucchini is such a winner, let’s explore how to grow it successfully from seed to harvest.
Step 1: Choose the Right Variety
Different zucchini varieties perform differently depending on space and climate. For home gardens and containers, bush varieties are ideal because they don’t spread too much.
Recommended Varieties:
- Black Beauty: Classic green zucchini, high-yielding, and flavorful.
- Golden Zucchini: Bright yellow fruits that add color to your meals.
- Raven: Compact and perfect for terrace gardens.
- Astia: Specially bred for containers and urban gardening.
Choose seeds from a reputable brand or local nursery to ensure good germination and disease resistance.

Step 2: Pick the Perfect Growing Spot
Zucchini plants love sunlight and warmth. Choose a sunny location that receives 6–8 hours of direct sunlight daily.
You can grow zucchini:
- In large containers or grow bags on your terrace or balcony
- In raised garden beds
- Directly in the ground if space allows
For container gardening, use pots that are at least 12–16 inches deep and 18 inches wide. Make sure there are proper drainage holes to prevent root rot.
Step 3: Prepare the Ideal Soil Mix
Zucchini thrives in loose, nutrient-rich, and well-draining soil. Heavy clay or waterlogged soil can hinder growth.
DIY Soil Mix for Zucchini:
- 40% garden soil or cocopeat
- 30% compost (cow dung, vermicompost, or homemade compost)
- 20% sand or perlite for aeration
- 10% organic matter (leaf mold or kitchen compost)
Add a handful of neem cake powder or wood ash to the mix to boost fertility and protect against pests.
Step 4: Sowing Zucchini Seeds
Zucchini is best grown directly from seeds because it doesn’t transplant well.
How to Sow:

- Make 1-inch-deep holes in the soil.
- Place 2–3 seeds per hole and cover lightly with soil.
- Keep the soil moist but not soggy.
- Seeds will sprout within 5–7 days.
- Once the seedlings reach 3–4 inches tall, keep the strongest one and remove the others.
If you’re growing multiple plants, maintain a spacing of 2–3 feet between each to allow proper air circulation.
Step 5: Watering — Keep It Balanced
Zucchini loves consistent moisture but not overwatering. Irregular watering can cause fruits to become small or misshapen.
Watering Tips:
- Water deeply every 2–3 days (daily in summer).
- Always water at the base — avoid wetting the leaves to prevent fungal diseases.
- Mulch with dry leaves or straw to retain soil moisture.
In terrace gardens, self-watering pots or drip systems work great to maintain steady moisture.
Step 6: Feeding Your Zucchini Organically
Zucchini is a heavy feeder, meaning it needs regular nutrition for strong growth and abundant fruiting.
Feeding Schedule:
- Every 2 weeks: Add liquid compost tea or diluted cow dung slurry.
- Once a month: Sprinkle bone meal or banana peel fertilizer (rich in potassium).
- During flowering and fruiting: Add wood ash or fish emulsion for better yield.
A simple home trick — blend banana peels and eggshells, mix into the soil — this provides calcium and potassium naturally, helping fruits grow larger and sweeter.
Step 7: Sunlight and Temperature Needs
Zucchini grows best in warm temperatures between 20°C and 30°C (68–86°F).

If you’re growing on your terrace, make sure the plants get plenty of sunlight. In extremely hot weather, you can use a shade net during peak afternoon hours to prevent leaf burn.
Zucchini is a summer crop but can also be grown year-round in mild climates with a bit of care.
Step 8: Pollination — The Secret to Fruit Formation
Zucchini plants produce both male and female flowers. The male flowers appear first, followed by female ones (with a tiny baby fruit at the base).
If pollination doesn’t occur, those small fruits may fall off. To ensure good fruiting:
Manual Pollination:
- In the morning, pluck a male flower (thin stem) and gently brush its pollen onto the center of the female flower (thick stem with baby fruit).
- Alternatively, attract pollinators by planting marigolds, zinnias, or basil nearby.
Once pollinated, fruits will start growing rapidly within a few days.
Step 9: Supporting and Pruning the Plants
Zucchini grows fast and spreads wide, even in containers. To keep it neat and productive:
Support Tips:

- Use bamboo stakes or trellises to lift the leaves and keep fruits off the ground.
- Train the vines slightly upward to save terrace space.
Pruning Tips:
- Remove yellowing or old leaves to improve airflow.
- Cut off leaves blocking sunlight to the fruits.
- Keep the base of the plant open for easy watering and pest inspection.
Proper pruning reduces the risk of diseases and promotes more flower and fruit production.
Step 10: Common Problems and Organic Solutions
Even though zucchini is hardy, it can occasionally face pest or disease issues. Here’s how to handle them naturally:
| Problem | Cause | Solution |
|---|---|---|
| Powdery mildew | Humidity or poor airflow | Spray baking soda (1 tsp) + water (1 L) |
| Aphids or whiteflies | Insects on leaves | Use neem oil spray weekly |
| Fruit rot | Overwatering | Improve drainage and airflow |
| Blossom-end rot | Calcium deficiency | Add eggshell powder or lime |
Inspect plants regularly to catch early signs of problems before they spread.
Step 11: Harvesting — The Most Rewarding Step
Zucchini grows so quickly that you’ll be amazed by how fast the fruits appear.
When to Harvest:
- Within 45–60 days from sowing.
- Harvest when fruits are 6–8 inches long — tender and flavorful.
- Don’t let them grow too large; overripe zucchinis become seedy and tough.
Use a sharp knife to cut the fruit, leaving a small part of the stem attached. Frequent harvesting encourages the plant to keep producing — sometimes every other day!
Step 12: Enjoying Your Homegrown Zucchini
Once you’ve harvested your zucchinis, enjoy them fresh in countless dishes — stir-fries, soups, fritters, pasta, or even zucchini noodles. Homegrown zucchini has a rich, natural taste that store-bought ones can’t match.

The best part? You’ll know exactly what went into your food — no chemicals, no pesticides, just pure homegrown goodness.
Final Thoughts: From Terrace to Table
Growing zucchini at home is truly one of the easiest and most rewarding gardening experiences. With just a few seeds, some organic compost, and consistent care, you can transform your small terrace or balcony into a mini vegetable farm.
Zucchini proves that gardening doesn’t require vast land — just passion, patience, and the joy of watching life grow before your eyes.
So next time you step out onto your terrace, imagine baskets full of fresh green zucchinis waiting to be picked. Start today — you’ll be amazed at how easy and fulfilling it is to grow your own food right at home.
Leave A Comment