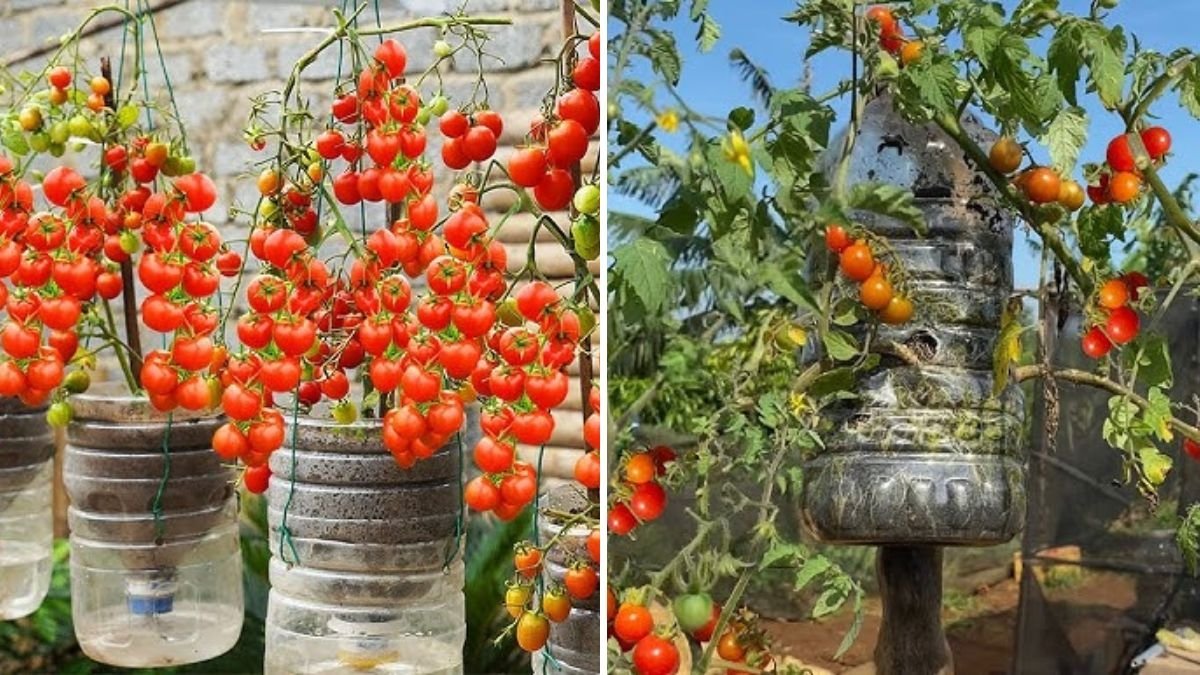
Growing your own Roma tomatoes at home can be incredibly rewarding — and it’s easier than you might think! Whether you have a small balcony, limited garden space, or simply want to try vertical gardening, using plastic hanging bottles is a creative and space-saving way to cultivate healthy tomato plants. With just a few simple materials, you can grow juicy Roma tomatoes from seed, right at home.
In this guide, we’ll walk you through the easy steps to grow Roma tomato plants in plastic hanging bottles, including preparing seeds, making DIY hanging containers, caring for your plants, and harvesting fresh, homegrown tomatoes. By the end, you’ll see that growing Roma tomatoes doesn’t require any fancy equipment or prior gardening experience — just a little patience and love for your plants.
Why Grow Roma Tomatoes in Plastic Hanging Bottles?
Roma tomatoes are perfect for vertical or container gardening for several reasons:
- Compact and productive: Roma tomato plants are bushy and grow well in containers, producing plenty of fruit.
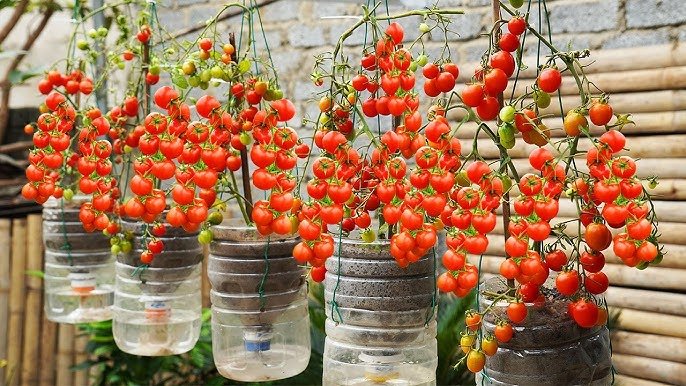
- Space-saving: Hanging bottles utilize vertical space, making them ideal for apartments or balconies.
- Reusable and eco-friendly: Plastic bottles are easy to repurpose, reducing waste.
- Easy maintenance: Container-grown Roma tomatoes are easier to monitor for pests, diseases, and water needs.
- Beginner-friendly: Even novice gardeners can successfully grow tomatoes using this method.
This method combines DIY creativity with practical gardening, turning unused bottles into productive tomato containers.
Step 1: Choosing Seeds and Preparing Them
The journey starts with Roma tomato seeds. These plum-shaped tomatoes are known for their firm flesh, rich flavor, and suitability for sauces and salads.
Seed preparation tips:

- Buy high-quality Roma tomato seeds from a reputable nursery or online store.
- Before planting, soak the seeds in lukewarm water for 2–4 hours. This helps soften the seed coat and improves germination.
- Fill a small seed tray or cup with seed-starting mix — light, well-draining, and nutrient-rich soil works best.
- Plant 1–2 seeds per cup, about ¼ inch deep, and lightly cover with soil.
- Mist gently with water to keep the soil moist but not soggy.
Keep the trays in a warm, sunny spot (70–85°F) or use a seedling heat mat for faster germination. Within 7–14 days, your seeds should sprout.
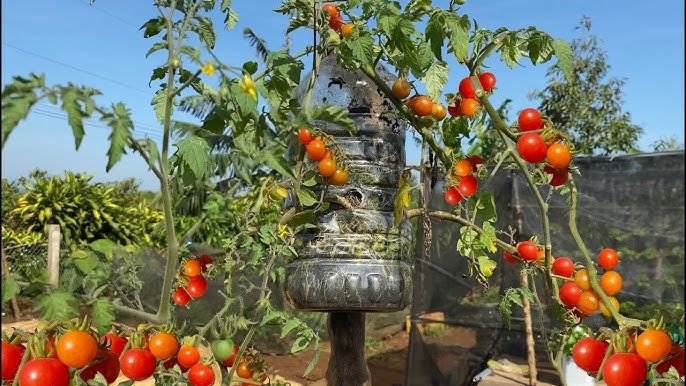
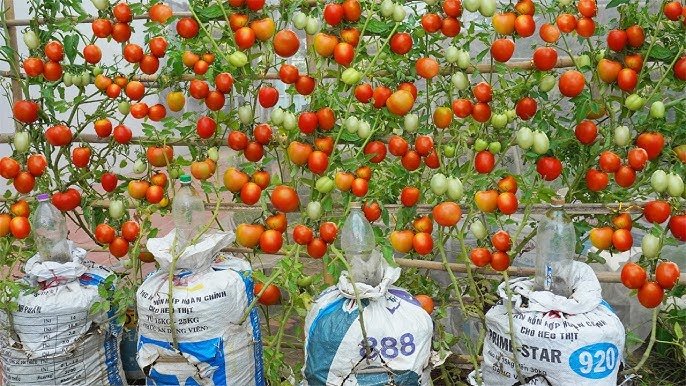
Step 2: Preparing Plastic Hanging Bottles
Using plastic bottles is a creative, low-cost, and eco-friendly way to grow tomatoes.
Materials needed:
- 2–3 liter plastic bottles (cleaned and labeled if necessary)
- Scissors or a craft knife
- Cotton string, rope, or strong twine for hanging
- Small saucer or tray for drainage
Steps to prepare the bottles:
- Cut a large rectangular window along one side of the bottle. This will hold soil and give room for the plant to grow.
- Make small drainage holes at the bottom to prevent waterlogging.
- Poke a few holes on the bottle cap or top for hanging support.
- Insert the string or twine through the top holes, creating a secure hanger.
- Optionally, you can add a small hole near the side to help water the plant directly.
Now your DIY hanging container is ready for soil and seedlings.
Step 3: Planting the Roma Tomato Seedlings
Once your seedlings have grown 3–4 sets of true leaves, they’re ready for transplanting.

Transplanting steps:
- Fill the prepared bottle with well-draining potting mix mixed with compost.
- Gently remove the seedling from the tray, being careful not to damage the roots.
- Plant it deep into the soil, burying part of the stem. Roma tomatoes grow additional roots along buried stems, making them stronger.
- Water lightly to settle the soil around the roots.
When hanging your bottles, ensure each plant has enough vertical space for growth. Roma tomato plants will need at least 12–16 inches of height for optimal fruiting.
Step 4: Sunlight and Ideal Growing Conditions
Roma tomatoes thrive in sunlight. To ensure a strong, healthy plant:
- Place the hanging bottles where they get 6–8 hours of direct sunlight daily.
- The ideal temperature is 70–85°F for daytime and no lower than 55°F at night.
- Rotate the bottles occasionally so all sides of the plant receive even sunlight.
If growing indoors or in a shaded balcony, consider LED grow lights to supplement natural sunlight.
Step 5: Watering and Maintaining Moisture
Container plants dry out faster than garden soil, so consistent watering is essential.
Watering tips:

- Check soil moisture daily. Water when the top inch feels dry.
- Water gently at the base to avoid wetting leaves, which can cause fungal infections.
- Use a small funnel or a side hole in the bottle for precise watering.
- Mulch the soil surface with straw, coconut husk, or dried leaves to retain moisture.
Hanging bottles make it easy to monitor water runoff, keeping your plants healthy without overwatering.
Step 6: Fertilizing for Healthy Growth
For strong growth and high yields, feed your Roma tomato plants regularly.
Fertilization schedule:
- During early growth: Use a balanced liquid fertilizer every 2–3 weeks.
- During flowering and fruiting: Switch to fertilizer high in phosphorus and potassium to promote flowers and fruit.
- Organic alternatives: Compost tea, fish emulsion, or diluted cow manure are great natural options.
Avoid too much nitrogen fertilizer — it encourages leaf growth but reduces fruit production.
Step 7: Supporting Your Plants
Even in hanging bottles, Roma tomato plants benefit from support as they grow and bear fruit.
- Use a small bamboo stick or wooden skewer inside the bottle to support the main stem.
- Tie the plant loosely with soft cloth strips or garden ties.
- Regularly remove any side shoots that aren’t producing fruit to focus energy on the main stems.
Supporting the plant keeps it healthy, prevents bending or breaking, and allows better airflow around leaves and fruit.

Step 8: Flowering and Pollination
Roma tomatoes produce small yellow flowers before fruiting. Proper pollination ensures healthy tomatoes.
- Outdoor plants are naturally pollinated by bees and wind.
- Indoor plants may need hand pollination — gently shake the flowers or use a soft brush to transfer pollen.
- Once pollinated, tiny green tomatoes appear in clusters.
Within a few weeks, you’ll start seeing your first Roma tomatoes forming!
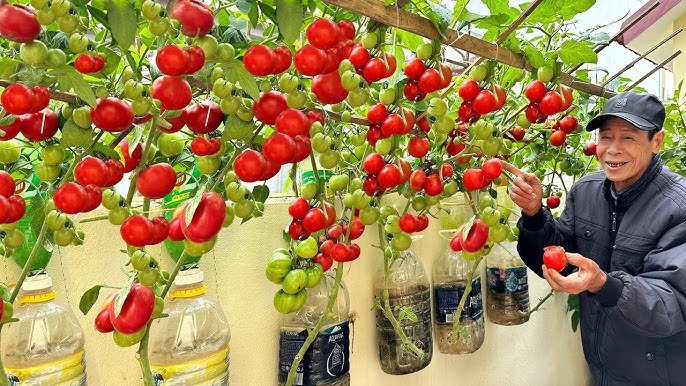
Step 9: Harvesting Roma Tomatoes
Roma tomatoes are usually ready to harvest in 70–90 days from transplanting.
Harvesting tips:
- Fruits turn bright red (or deep yellow in some varieties) and feel firm.
- Use scissors or pruning shears to cut tomatoes — don’t pull to avoid damaging the plant.
- Regular harvesting encourages the plant to produce more fruit.
You can pick them at full ripeness for a sweeter taste, or slightly early if you prefer firmer tomatoes for cooking and sauces.
Step 10: Tips for Maximizing Yield
- Rotate bottles occasionally for even sunlight.
- Check regularly for pests like aphids or whiteflies.
- Remove yellow or damaged leaves to maintain airflow.
- Feed consistently during flowering and fruiting for higher yields.
- Save seeds from your best plants to grow next season.
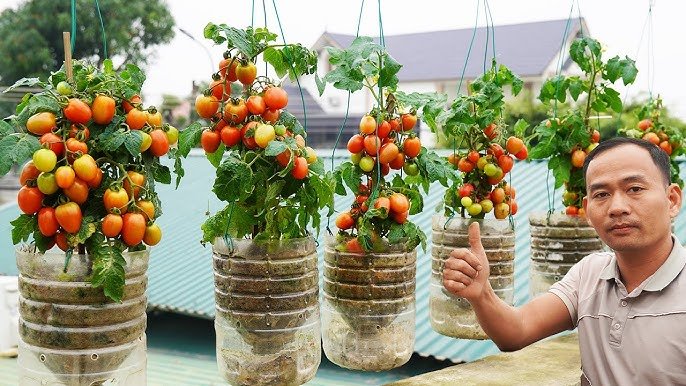
Even first-time gardeners can grow bountiful Roma tomatoes using this method with minimal effort.

Conclusion
Growing Roma tomatoes in plastic hanging bottles is an easy, space-saving, and eco-friendly way to enjoy fresh, homegrown tomatoes. This method allows even beginners with no prior gardening experience to cultivate healthy plants, from seed to harvest, without a traditional garden.
By repurposing plastic bottles, providing sunlight, watering consistently, and offering minimal care, you can enjoy juicy, flavorful Roma tomatoes all season long. It’s not only a practical gardening solution for small spaces but also a fun and rewarding project for anyone looking to grow their own food.
So grab a few plastic bottles, sow some Roma tomato seeds, and watch your vertical garden flourish — fresh, homegrown tomatoes are now just a hanging bottle away!
Leave A Comment