Turnip greens are a true garden treasure — fast-growing, nutritious, and versatile. Whether you’re planting them for their tender leaves or flavorful roots, these cool-season vegetables are among the easiest and most rewarding crops to grow. If you’ve ever wanted to enjoy homegrown greens rich in vitamins and flavor, learning how to plant turnip greens is the perfect place to start.
In this detailed guide, we’ll walk you through every step — from preparing the soil and sowing seeds to caring for your plants and harvesting fresh, healthy greens straight from your garden.
Why Grow Turnip Greens?
Turnip greens are the leafy tops of the turnip plant (Brassica rapa), a close relative of kale, mustard, and collard greens. Many gardeners grow turnips mainly for the roots, but the greens are equally valuable — in fact, some varieties are cultivated primarily for their tender leaves.
Here are a few great reasons to plant turnip greens in your garden:
- Fast Growth: Turnip greens can be ready for harvest in as little as 30 days, making them one of the quickest leafy vegetables to grow.
- Nutrient-Rich: They’re loaded with vitamins A, C, and K, plus calcium, iron, and antioxidants.
- Cool-Season Friendly: Perfect for early spring or fall gardens when temperatures are mild.
- Dual Harvest: You can enjoy both the greens and the turnip roots if desired.
- Low Maintenance: They grow well in most soil types and need minimal care.
With their quick growth and nutritional punch, turnip greens are an ideal crop for both beginners and experienced gardeners.
When to Plant Turnip Greens

Turnip greens thrive in cool weather, so timing is key. You can plant them in early spring or late summer to early fall, depending on your local climate.
- Spring Planting:
Sow seeds 2–4 weeks before your last expected frost date. As the weather warms up, the greens will mature quickly. - Fall Planting:
For a fall harvest, sow seeds about 8–10 weeks before the first expected frost. Turnip greens taste even better after light frost exposure, which enhances their flavor and tenderness.
If you live in a mild climate, you can even grow turnip greens through the winter using row covers or frost blankets.

Choosing the Right Variety
While most turnip varieties produce edible greens, some are specifically bred for leafy production.
Here are some popular types to consider:
- Seven Top Turnip: A popular variety grown solely for its lush greens — it doesn’t form a bulb.
- Shogoin: Produces both tasty roots and abundant greens.
- Purple Top White Globe: A classic dual-purpose turnip, offering both flavorful roots and greens.
- Topper Turnip: A leafy variety ideal for continuous harvests.
Choose the type that best fits your garden goals — whether that’s tender greens, hearty roots, or both.
Preparing the Soil
Turnip greens prefer loose, well-draining soil that’s rich in organic matter. Proper soil preparation is crucial for fast growth and vibrant flavor.
Here’s how to prepare your garden bed:
- Loosen the Soil:
Use a garden fork or tiller to loosen the top 8–10 inches of soil. This helps roots grow freely and improves drainage. - Add Compost or Organic Matter:
Mix in 2–3 inches of well-rotted compost or organic manure to enrich the soil. - Check pH Levels:
Turnips prefer slightly acidic to neutral soil, with a pH between 6.0 and 7.0. If your soil is too acidic, add a little lime to balance it. - Remove Weeds and Stones:
Clear the bed thoroughly to prevent competition for nutrients and moisture.
Healthy soil means faster growth and better-tasting greens.
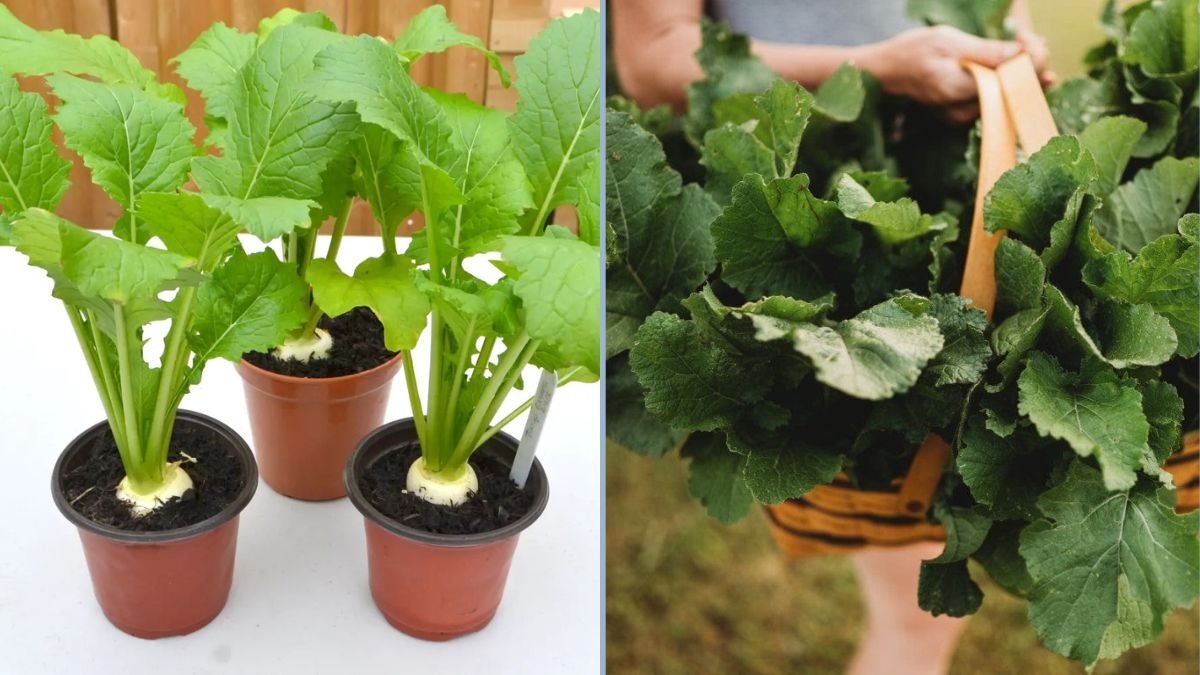
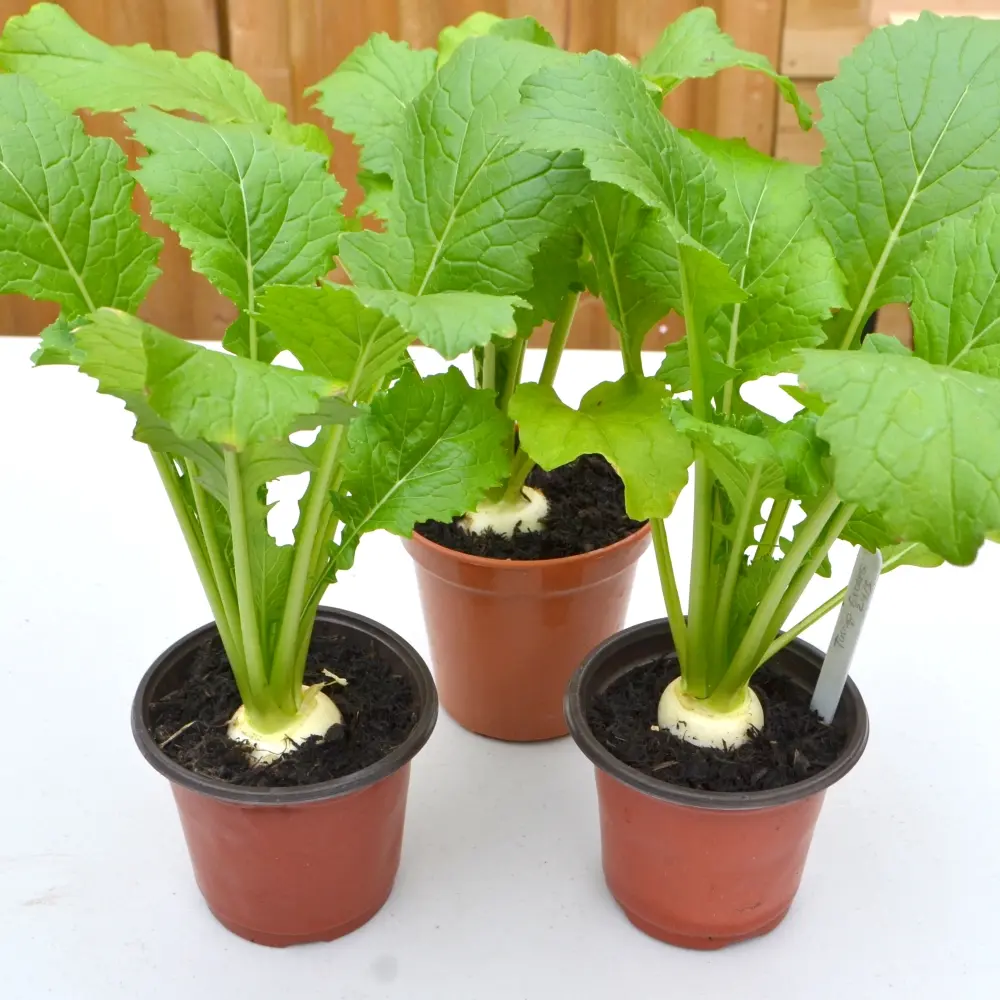
How to Plant Turnip Greens
Now that your soil is ready, it’s time to plant your seeds. You can grow turnip greens directly in garden beds, raised beds, or even containers.

Step 1: Sow the Seeds
Turnip greens grow best from seeds rather than transplants.
- Direct Sowing: Scatter seeds evenly over the prepared soil or plant them in shallow rows about ½ inch deep.
- Spacing: If planting in rows, keep 12–18 inches between rows and thin seedlings later to 3–4 inches apart for leafy greens, or 6 inches apart if you also want to develop roots.
Step 2: Cover and Water
Lightly cover the seeds with a fine layer of soil and gently pat down to ensure good contact. Water thoroughly but gently to moisten the soil without washing away the seeds.
Step 3: Germination
Turnip seeds usually germinate within 5–7 days in moist soil. Keep the soil consistently damp but not waterlogged during this period.
Step 4: Thinning Seedlings
Once seedlings are about 2 inches tall, thin them to allow enough space for air circulation and proper growth. The removed seedlings can be eaten as microgreens or baby greens!
Caring for Turnip Greens
Turnip greens don’t need much fuss, but regular care helps them thrive and remain tender.
1. Watering
Turnip greens love consistent moisture. Water them 1–1.5 inches per week, depending on rainfall. Keep the soil evenly moist, especially during dry spells, to prevent leaves from becoming tough or bitter.
2. Mulching
Apply a layer of straw, leaves, or compost around the plants to retain moisture, suppress weeds, and keep the soil cool.

3. Fertilizing
If your soil is fertile, you may not need additional fertilizer. However, if growth is slow, apply a nitrogen-rich fertilizer (such as fish emulsion or compost tea) every 3–4 weeks. Avoid over-fertilizing, as it can lead to excessive leaf growth with poor root development.
4. Weed Control
Keep the garden bed weed-free to avoid competition for nutrients. Pull weeds carefully by hand to prevent disturbing young turnip plants.
Protecting Turnip Greens from Pests and Diseases
Like other leafy greens, turnip greens can attract pests such as:
- Aphids – These small insects suck sap from the leaves. Spray with neem oil or a mild soapy water solution.
- Flea Beetles – Tiny black beetles that chew small holes in leaves. Use row covers or diatomaceous earth for protection.
- Cabbage Worms – Green caterpillars that can quickly defoliate plants. Handpick or use organic Bacillus thuringiensis (Bt) spray.
Preventing Disease:
Avoid overhead watering to reduce fungal issues. Water at the base of the plants, and rotate crops every season to prevent soil-borne diseases.
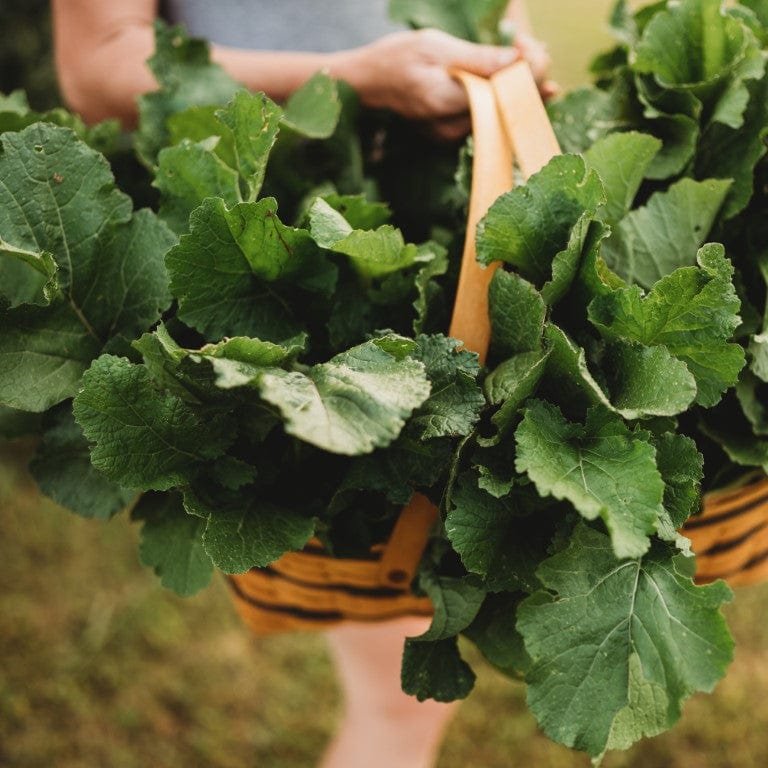
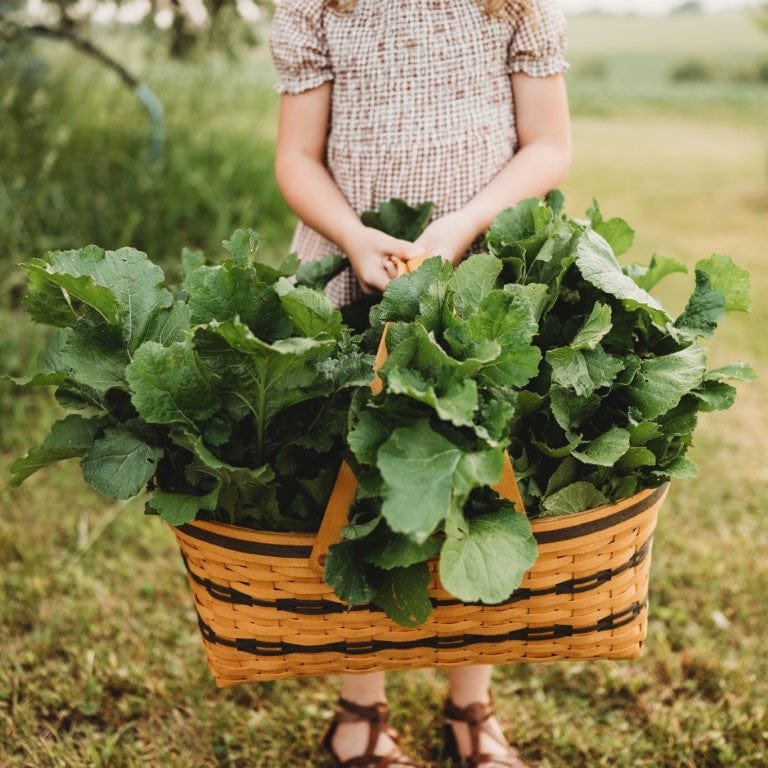
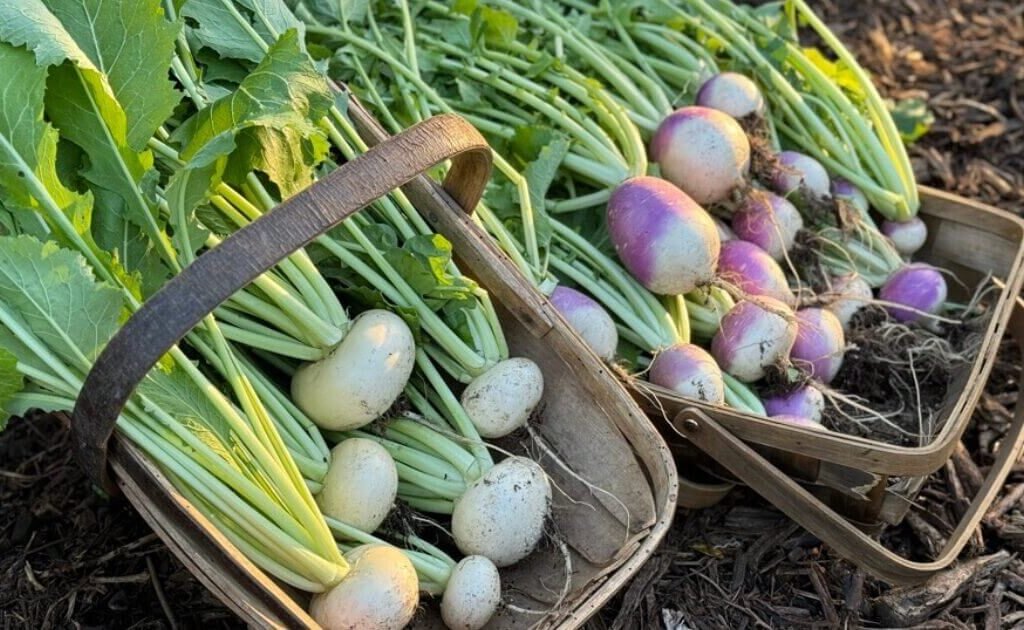
Harvesting Turnip Greens
You can start harvesting turnip greens in as little as 30 days after sowing, depending on the variety and weather conditions.
For Baby Greens:
Pick the tender young leaves when they’re about 3–4 inches long. These are great for salads and light sautés.
For Mature Greens:
Wait until leaves reach 6–8 inches in length. Cut the outer leaves about an inch above the crown, allowing the inner leaves to keep growing.

For Dual Harvest (Greens + Roots):
If you want both greens and turnip roots, harvest only a few leaves at a time. Removing too many leaves can reduce root growth. Once roots reach 2–3 inches in diameter, you can harvest the entire plant.
Tip: Turnip greens taste sweeter and more tender after exposure to light frost, especially in fall gardens.
Storing and Using Turnip Greens
Freshly picked turnip greens are best eaten right away, but you can store them for a few days if needed.
Storage Tips:
- Do Not Wash Before Storing: Moisture causes them to wilt faster.
- Wrap in Paper Towels: Keep them in a perforated plastic bag or container in the refrigerator.
- Shelf Life: They stay fresh for up to 4–5 days.
Freezing Turnip Greens:
If you have an abundant harvest, blanch the greens in boiling water for 2–3 minutes, cool in ice water, drain, and freeze them for later use.
Culinary Ideas:
- Sauté with garlic, olive oil, and lemon for a simple side dish.
- Add to soups, stews, or stir-fries for a nutritious boost.
- Combine with mustard or collard greens for a Southern-style dish.
Turnip greens have a slightly peppery flavor that pairs beautifully with smoked meats, beans, and potatoes.

Common Mistakes to Avoid When Planting Turnip Greens
- Overcrowding: Crowded plants compete for light and nutrients, leading to small, weak greens. Thin seedlings early.
- Inconsistent Watering: Dry soil leads to bitter leaves and stunted roots. Keep soil evenly moist.
- Too Much Heat: Turnip greens grow best in cool weather. Hot temperatures can cause bolting (premature flowering).
- Neglecting Pests: Small pests can quickly damage young plants — check leaves regularly.
- Ignoring Crop Rotation: Avoid planting turnips in the same spot where cabbage, kale, or radishes grew last season to prevent disease buildup.
Final Thoughts: Growing Turnip Greens for a Healthy, Flavorful Harvest
Learning how to plant turnip greens is one of the most satisfying gardening experiences you can have. With quick germination, minimal care, and a fast harvest, turnip greens offer a steady supply of fresh, nutritious leaves almost year-round.
By sowing seeds in rich soil, keeping them consistently moist, and harvesting regularly, you’ll enjoy a continuous bounty of greens that can elevate your meals and boost your health.
Whether you grow them in a garden bed or a small container, turnip greens prove that you don’t need a big garden to produce big results — just a little care, patience, and love for homegrown food.
Leave A Comment