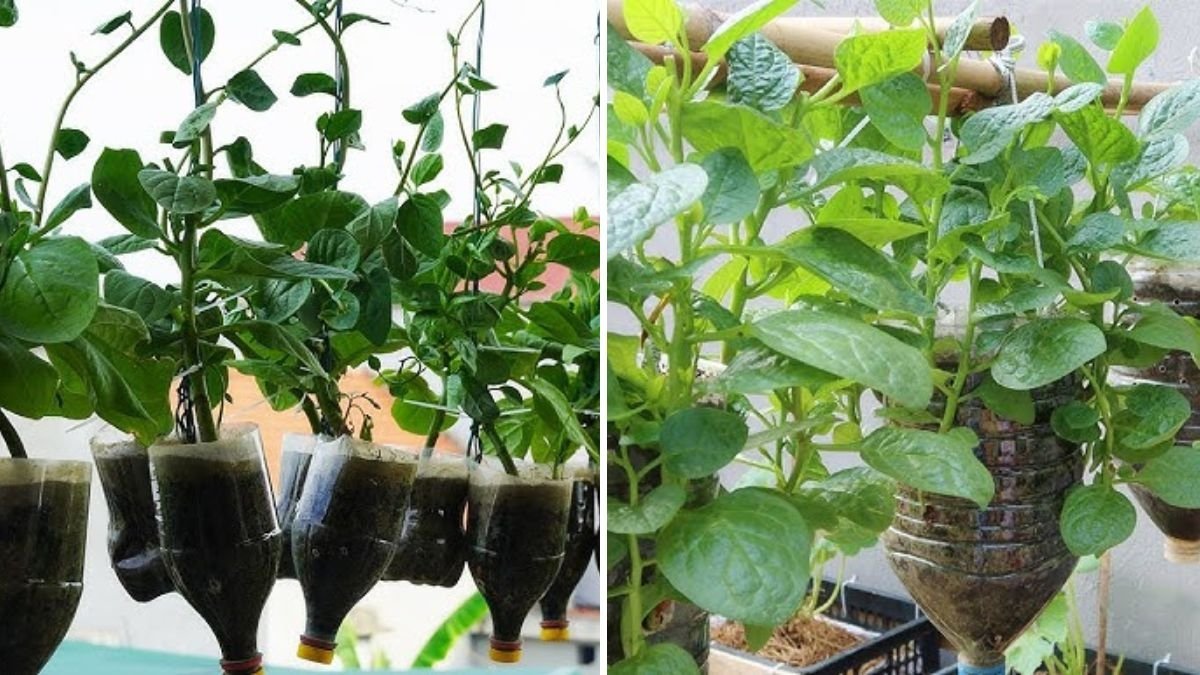
Urban gardening has taken a creative turn in recent years, with gardeners discovering new ways to grow fresh vegetables even in limited spaces. One of the most practical, affordable, and eco-friendly methods is growing spinach in plastic bottles. Yes, those empty soda or water bottles you usually throw away can actually become perfect little planters for growing lush, green spinach leaves right at home.
This method not only saves space but also promotes sustainability by recycling plastic waste into something useful. Whether you live in a small apartment, have a tiny balcony, or want to teach your kids about eco-gardening, growing spinach in plastic bottles is a simple and rewarding experience.
In this comprehensive guide, we’ll cover everything you need to know — from choosing the right bottles and preparing the soil mix to watering, sunlight, and harvesting. By the end, you’ll see how easy and enjoyable it is to grow your own organic spinach right from discarded bottles.
Why Grow Spinach in Plastic Bottles?
Before diving into the steps, let’s understand why this method is gaining popularity among urban gardeners and eco-conscious growers.
1. Space-Saving Solution
Plastic bottle gardening allows you to grow spinach vertically, horizontally, or even hanging from walls and railings. It’s perfect for balconies, windowsills, or small backyards.
2. Eco-Friendly Recycling
Instead of contributing to plastic waste, you repurpose bottles that would otherwise end up in landfills. It’s a small but meaningful step toward environmental sustainability.
3. Low-Cost Gardening
No need for expensive pots or containers — plastic bottles are free and easily available. All you need is a few basic gardening supplies.
4. Water Efficiency
Plastic bottles can be modified to include drainage and water storage systems, helping conserve water and maintain consistent moisture for the plants.
5. Year-Round Freshness
Spinach is a cool-weather vegetable, but with proper care, you can grow it indoors or outdoors almost any time of the year.

Step-by-Step Guide: Growing Spinach in Plastic Bottles
Let’s get into the practical part — how to actually grow spinach in a plastic bottle garden.
Step 1: Choosing the Right Bottles
You can use any 1 to 2-liter plastic bottles, such as soda or mineral water bottles. Transparent or semi-transparent bottles are best because they allow you to monitor root growth and soil moisture.
Tips:
- Make sure bottles are clean and free of chemical residues.
- Avoid using bottles that previously contained toxic substances.
- If possible, use bottles of the same size to make your setup neat and uniform.
Step 2: Cutting and Preparing the Bottles
There are several ways to cut and arrange the bottles depending on how you want to set up your garden.
Horizontal Bottle Planter
- Cut out a rectangular opening on one side of the bottle (lengthwise).
- Keep the top and bottom intact for holding soil and water.
- Poke 3–4 small holes in the bottom for drainage.
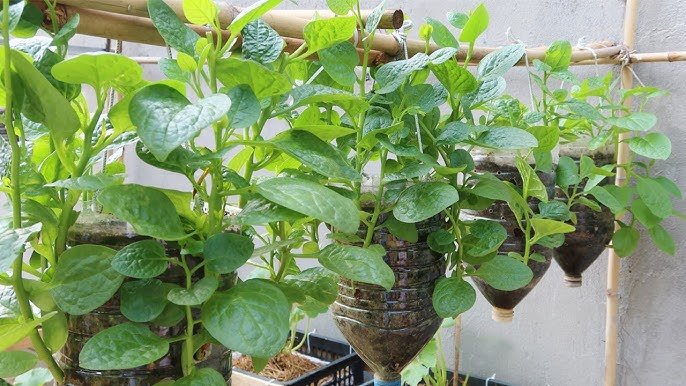
Vertical Hanging Planter
- Cut the upper portion (neck side) off the bottle.
- Make small holes near the top for hanging with strings or wire.
- Drill 2–3 holes at the bottom for drainage.
Both setups work great for spinach, but the horizontal design allows more space for roots and leaf expansion.
Step 3: Preparing the Soil Mix
Spinach grows best in loose, nutrient-rich, and well-draining soil. Since the container size is small, it’s essential to create a light and fertile mix that retains moisture without becoming soggy.
Recommended Soil Mix:
- 40% garden soil or loamy soil
- 40% organic compost or vermicompost
- 10% coco peat or sand (for drainage)
- 10% leaf mold or well-rotted manure
Optional: Add a handful of wood ash or bone meal to improve potassium and phosphorus levels.
Mix everything well before filling the bottles. Ensure the soil is moist but not wet.

Step 4: Planting the Spinach Seeds

You can grow spinach directly from seeds — it’s simple and reliable.
How to Sow Spinach Seeds:
- Fill the bottles with the prepared soil mix, leaving about 1 inch of space from the top.
- Sow 2–3 spinach seeds per bottle about ½ inch deep.
- Cover lightly with soil and gently water.
- Place the bottles in a bright, shaded area until germination.
Germination Time: Spinach seeds usually sprout within 7–10 days.
Once the seedlings are about 3 inches tall, thin them out, leaving the healthiest one or two plants in each bottle.
Step 5: Providing Sunlight and Temperature
Spinach thrives in cool weather and indirect sunlight.
Ideal Conditions:
- Temperature: 15°C to 25°C (59°F to 77°F)
- Sunlight: 4–6 hours of indirect or filtered sunlight per day
If you live in a hot climate, place the bottles in a shaded balcony, under a net, or indoors near a bright window. During winter, move them to a spot where they get mild morning sun.
Step 6: Watering and Maintenance

Proper watering is crucial when growing spinach in bottles. Because of limited soil volume, water can evaporate quickly.
Watering Tips:

- Water lightly every 1–2 days, or when the topsoil feels dry.
- Avoid overwatering; make sure excess water can drain out through holes.
- For vertical hanging bottles, drip irrigation using a small tube or bottle cap with holes can make watering easier.
You can also add a thin layer of mulch (like dry leaves or coco husk) on top of the soil to retain moisture.
Step 7: Fertilizing for Healthy Growth
Since bottle gardens have limited nutrients, periodic feeding helps spinach grow lush and green.
Fertilizing Schedule:
- After 15 days of germination, apply liquid compost tea or diluted cow dung solution.
- Repeat every 10–12 days for steady nutrient supply.
- Alternatively, sprinkle a spoonful of vermicompost around each plant every two weeks.
Avoid synthetic fertilizers; organic feeding ensures healthier, chemical-free leaves for your kitchen.
Step 8: Managing Pests and Diseases
Spinach grown in bottles usually faces fewer pests due to the controlled environment. However, you may encounter occasional issues like aphids, leaf miners, or fungal infections.
Natural Remedies:
- Spray neem oil or garlic water once every two weeks.
- Avoid water stagnation to prevent fungal growth.
- Remove any yellow or damaged leaves immediately.
Keeping your mini-garden clean and well-aerated reduces pest risk significantly.
Step 9: Harvesting Spinach
Spinach can be harvested in 35–45 days after sowing, depending on the variety and growing conditions.
Two Ways to Harvest:

- Cut-and-Come-Again Method:
Harvest outer leaves when they are 4–6 inches long, leaving the center leaves to continue growing. This allows multiple harvests from one plant. - Full Harvest:
Cut the entire plant 1 inch above the soil when leaves are mature. You can replant new seeds immediately.
Harvest early in the morning for the freshest, most flavorful leaves.
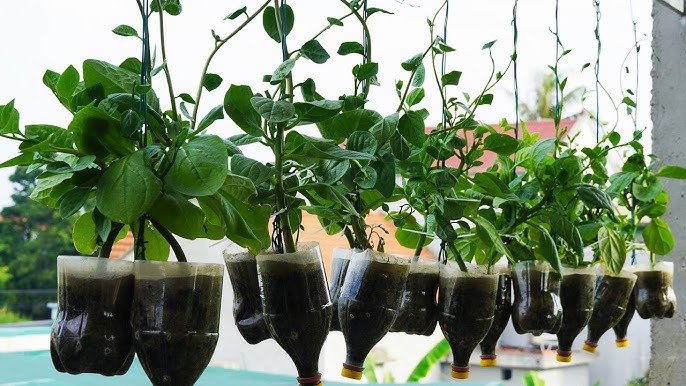
Step 10: Reusing and Expanding Your Bottle Garden
Once you’ve successfully grown your first batch of spinach, it’s easy to expand. Simply prepare more bottles and hang them on a wall, arrange them on shelves, or build a vertical rack.
After each harvest, refresh the soil by adding new compost before planting again. The bottles can be reused several times, making it a sustainable and long-term gardening solution.
Additional Tips for Success
- Rotate Crops: Occasionally grow herbs like coriander, basil, or lettuce to keep the soil healthy.
- Label Bottles: Write planting dates and plant names for better tracking.
- Use Drip Caps: Create self-watering systems using old bottle caps with small holes.
- Combine with Vertical Gardens: Attach bottles to a wooden or metal frame for a stunning green wall look.
These little adjustments will not only make your spinach plants thrive but also make your garden visually appealing.
Benefits of Growing Spinach in Plastic Bottles
Let’s summarize why this technique is worth trying:
- Eco-Conscious Gardening: Turns waste plastic into productive planters.
- Affordable and Accessible: Requires no expensive materials or tools.
- Ideal for Urban Settings: Perfect for balconies, rooftops, or kitchen windows.
- Low Maintenance: Easy watering, minimal weeding, and quick harvesting.
- Continuous Supply: Spinach grows quickly, offering fresh greens every few weeks.
Plus, you’ll enjoy the satisfaction of harvesting your own organic spinach, free from harmful chemicals and full of nutrients.
Nutritional and Health Benefits of Homegrown Spinach
Spinach is one of the healthiest leafy vegetables you can grow. It’s packed with vitamins A, C, and K, along with iron, calcium, and antioxidants that support bone health, improve eyesight, and boost immunity.
Homegrown spinach is fresher, cleaner, and richer in flavor compared to store-bought ones. Since you control what goes into your soil, there are no pesticides or chemical residues.
Adding spinach to your diet helps with:

- Better digestion
- Stronger immunity
- Healthy skin and hair
- Reduced fatigue and stress
By growing your own spinach in bottles, you not only eat healthier but also contribute positively to the environment.
Conclusion
Growing spinach in plastic bottles is one of the easiest and most rewarding gardening projects anyone can try. It doesn’t require much space, money, or effort — just creativity and care.
From turning waste plastic into planters to enjoying a steady supply of fresh, nutritious greens, this method reflects the essence of sustainable urban gardening. It’s a perfect example of how small actions can create big environmental impacts while improving your food quality and lifestyle.
So, next time you finish a soda or water bottle, don’t throw it away — turn it into a spinach garden instead! Your balcony will look greener, your kitchen will stay stocked with healthy greens, and you’ll be contributing to a cleaner planet.
Leave A Comment