If you love home gardening but don’t have much space, growing gourds in plastic containers might just be your new favorite hobby! Many gardeners assume gourds need large plots or farm fields to thrive, but the truth is — you can grow them successfully right on your balcony, terrace, or backyard using simple plastic containers.
Gourds, known for their climbing vines and unique fruit shapes, are not only easy to grow but also highly productive. Whether it’s bottle gourds, ridge gourds, or bitter gourds, container gardening makes it possible to enjoy a continuous harvest of these healthy vegetables, even in limited spaces.
In this detailed guide, we’ll show you how to grow gourds in plastic containers step-by-step — from selecting the right seeds and soil mix to ensuring abundant fruiting and proper care. By the end, you’ll see why gardeners everywhere are amazed by how easy and rewarding this method is.
Why Grow Gourds in Plastic Containers?
Container gardening is perfect for city dwellers and small-space gardeners. Plastic containers, in particular, offer several benefits that make them ideal for growing gourds:
- Space Efficiency: Even a small terrace or balcony can host multiple containers for climbing gourds.
- Portability: Plastic containers are lightweight and can be easily moved to adjust sunlight or weather exposure.
- Moisture Retention: Plastic holds water better than clay, keeping the soil consistently moist for the vines.
- Temperature Control: The material warms up quickly, encouraging faster seed germination and early growth.
- Sustainability: Using recycled plastic containers or tubs is an eco-friendly way to reuse waste materials.
So, with just a few affordable supplies, you can enjoy a thriving gourd garden right at home.
Step 1: Choose the Right Gourd Variety
Before you start, decide which type of gourd you’d like to grow. Some popular container-friendly varieties include:
- Bottle Gourd (Lagenaria siceraria) – Great for soups and curries.
- Ridge Gourd (Luffa acutangula) – Fast-growing and ideal for trellises.
- Bitter Gourd (Momordica charantia) – Perfect for tropical climates.
- Sponge Gourd (Luffa cylindrica) – Produces edible fruits and natural loofahs.
- Round Gourd (Tinda) – Compact and very productive.
Choose seeds suitable for your local climate, and make sure they come from a trusted source for healthy, vigorous growth.

Step 2: Selecting the Right Container
Gourds have long roots, so they need deep and wide containers to spread comfortably. Here’s what to look for:
- Container Size: At least 18–24 inches deep and 16–20 inches wide.
- Material: Plastic tubs, old paint buckets, or recycled storage bins work perfectly.
- Drainage: Ensure at least 5–6 holes at the bottom for water drainage.
If you’re reusing old containers, clean them thoroughly with soap and water to remove any chemical residue. Place small stones or gravel at the bottom before adding soil — this helps prevent root rot by improving drainage.
Step 3: Prepare a Nutrient-Rich Soil Mix
Healthy soil equals healthy plants. Gourds are heavy feeders, meaning they need nutrient-rich and well-draining soil. You can prepare the perfect mix using:
- 40% garden soil
- 40% organic compost or cow dung manure
- 20% sand or coco peat
Mix all ingredients thoroughly. Optionally, add a handful of bone meal or neem cake powder for long-term nutrition and pest resistance.
This combination ensures your gourd plants receive enough nutrients while keeping the soil loose and airy for root growth.
Step 4: Sowing the Seeds
You can start gourd plants either by direct sowing into containers or by germinating seeds first in small cups or trays.
To germinate:

- Soak the seeds in warm water for 8–10 hours to soften the shell.
- Wrap them in a damp cloth and keep in a warm place for 2–3 days until they sprout.
To sow directly:
- Make 2–3 small holes (about 1 inch deep) in the center of the container.
- Place one seed in each hole and cover lightly with soil.
- Water gently.
Within a week, you’ll see the seedlings emerging — a sure sign your gourd plants are off to a strong start!
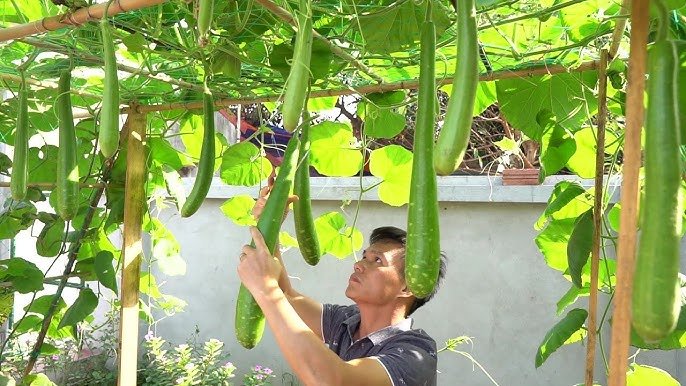
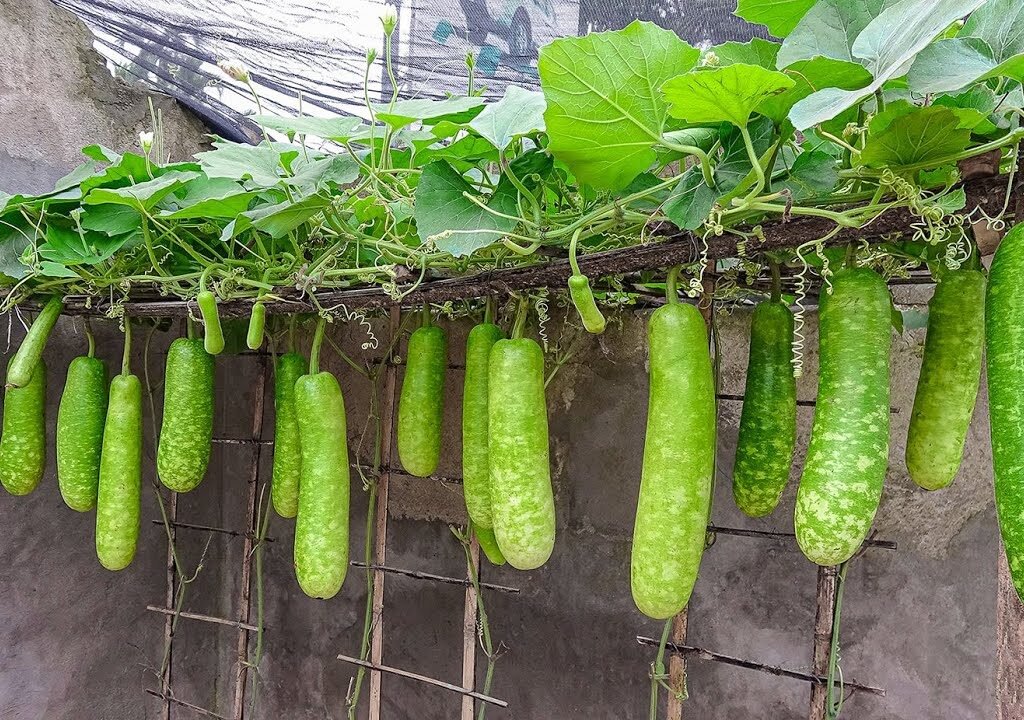
Step 5: Provide Support for the Vines
Gourd plants are vigorous climbers. Without proper support, their vines will sprawl everywhere, reducing air circulation and fruit yield.
Set up a strong trellis or bamboo frame beside each container. You can also use ropes or wires fixed to your balcony railing or terrace wall.
As the vines grow, gently guide them to climb upward by tying them loosely to the support using soft twine. This setup helps sunlight reach all leaves, encourages more flowers, and makes harvesting easier.
Step 6: Watering and Sunlight Requirements
Gourds love sunlight and moisture — the two most important factors for abundant growth.
- Sunlight: Place containers where they receive at least 6–8 hours of direct sunlight daily.
- Watering: Keep the soil consistently moist but not soggy. Water every morning, especially during dry or hot weather.
Avoid overhead watering; instead, water near the roots to prevent fungal infections on leaves.

Adding mulch (dry leaves or straw) on top of the soil helps retain moisture and keeps weeds away.
Step 7: Feeding for Better Growth
For continuous flowering and fruiting, gourds require regular feeding. Every 10–15 days, apply any of these organic fertilizers:
- Compost tea (a liquid extract made from soaking compost in water for two days)
- Banana peel fertilizer – provides potassium for better flowering
- Eggshell powder – supplies calcium to strengthen stems and fruits
- Vermicompost – encourages healthy root development
Avoid chemical fertilizers, as they can harm soil microbes and reduce long-term fertility. Organic feeding ensures sweet, healthy, and chemical-free fruits.
Step 8: Pollination and Flowering
Gourd plants produce separate male and female flowers. Male flowers usually appear first, followed by female ones (you can identify them by the tiny fruit at the base).
Pollination is essential for fruit formation. In open gardens, bees and insects do the job naturally. However, if you’re growing gourds on a terrace or balcony, hand pollination may help:
- Pick a freshly opened male flower in the morning.
- Gently rub its pollen onto the stigma of a female flower.
This simple process increases your chances of getting more fruits.
Step 9: Pest and Disease Management
Like all vegetables, gourds may face pest problems such as aphids, fruit flies, and powdery mildew. But with simple natural care, you can easily manage them:

- Neem Oil Spray: Mix 2 teaspoons of neem oil with 1 liter of water and spray weekly.
- Garlic-Chili Spray: Blend garlic and chili with water, strain, and spray to repel insects.
- Regular Inspection: Remove infected leaves to prevent spread.
Avoid chemical pesticides — they can harm beneficial pollinators and reduce fruit sweetness.
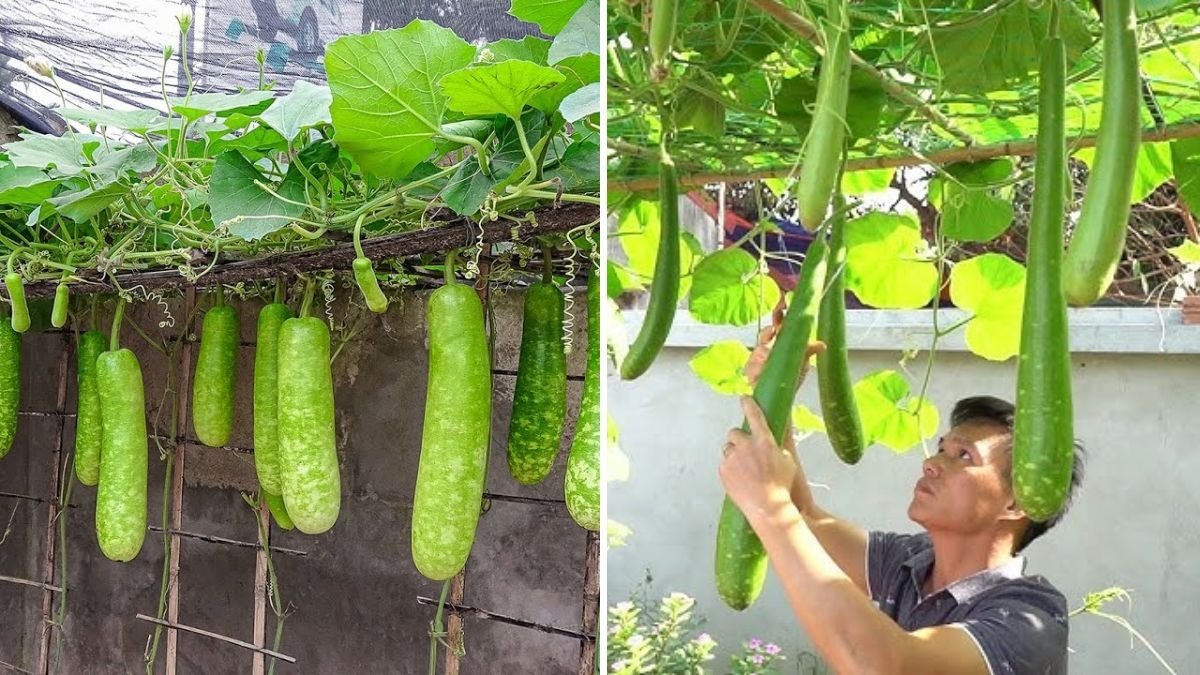
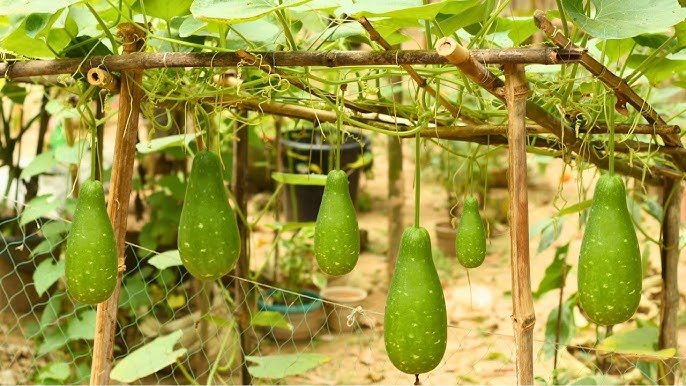
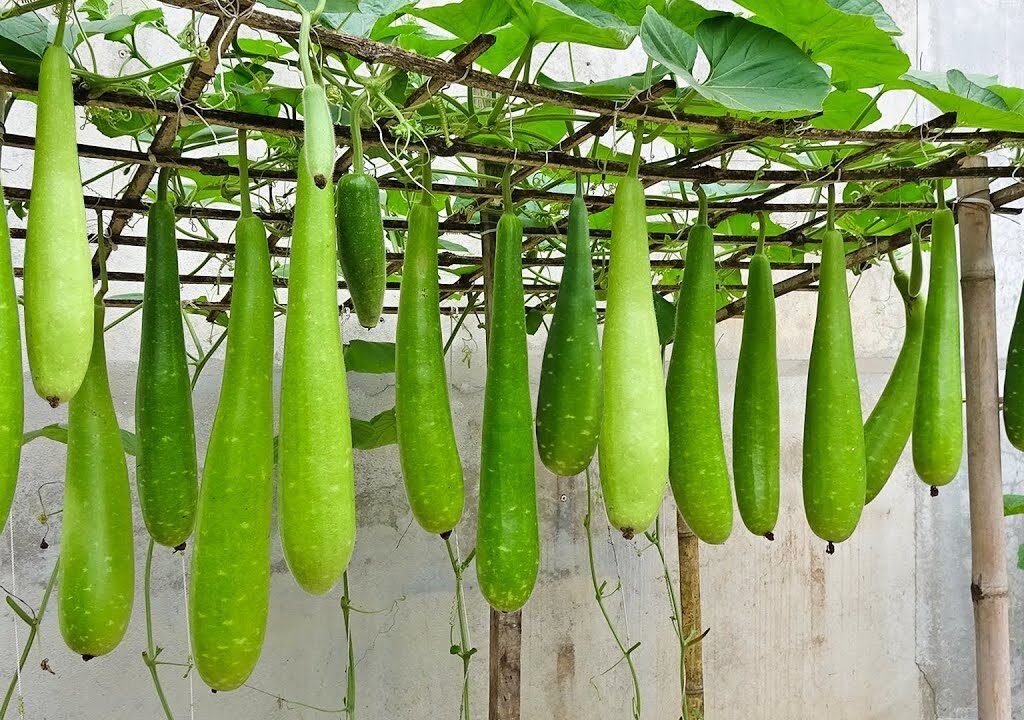
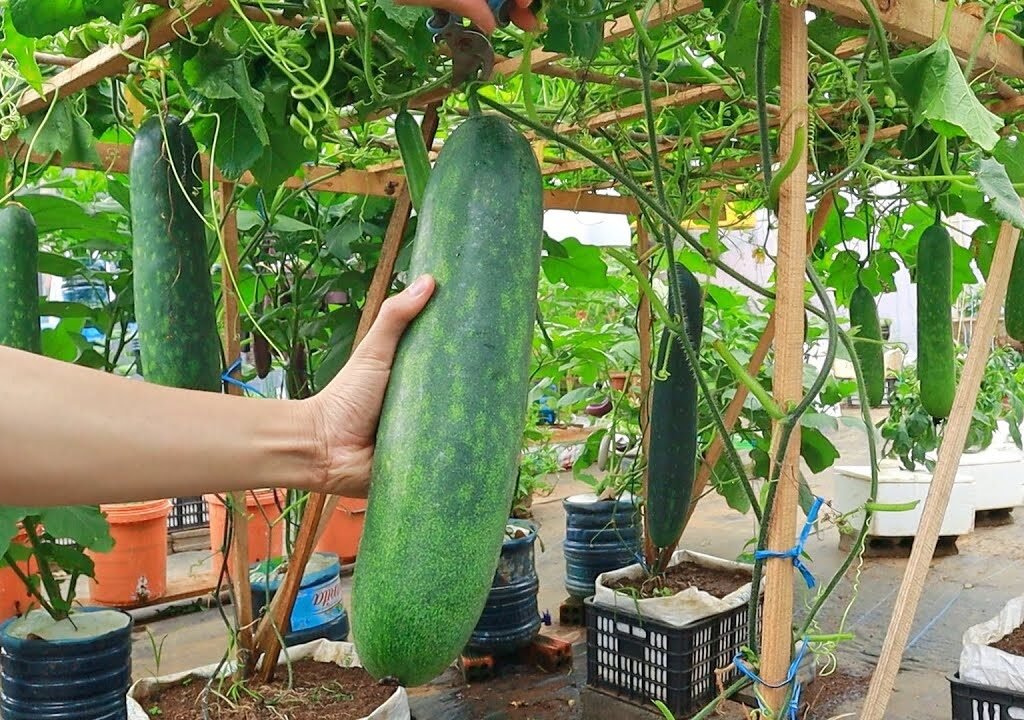
Step 10: Harvesting Your Gourds
After 50–70 days of sowing, you’ll see long vines covered in bright yellow flowers turning into beautiful green fruits.
Here’s how to know when to harvest:
- The fruit reaches full size but remains tender when pressed.
- The skin turns shiny and firm.
- For sponge gourds, pick before they become too fibrous.
Use a sharp knife or scissors to cut the fruit carefully, leaving a small portion of the stem attached.
With proper care, your plant will continue to produce fruits for several weeks — giving you a steady, abundant harvest from just one container.
Tips for Higher Yield
- Prune regularly to remove dry or overcrowded leaves.
- Train the vines properly along trellises for good sunlight exposure.
- Feed consistently with organic compost every two weeks.
- Harvest frequently to encourage new fruit growth.
- Protect from strong winds by positioning containers in sheltered areas.
Advantages of Growing Gourds in Plastic Containers
- Ideal for limited spaces like balconies or rooftops.
- Reusable containers save money and reduce waste.
- Easy to maintain and move as needed.
- Clean harvesting since fruits hang above the ground.
- Eco-friendly approach to urban gardening.
With just a few containers, you can enjoy a mini farm producing fresh, organic gourds right at home!
Conclusion
Growing gourds in plastic containers is one of the easiest, most rewarding ways to experience the joy of gardening. It’s perfect for beginners, budget-friendly, and produces a surprising number of healthy, delicious fruits in a small space.

All you need is a few plastic tubs, some quality soil, sunlight, and consistent care — and within a couple of months, you’ll have lush vines full of tender, fresh gourds ready for your kitchen.
So, don’t wait for the perfect garden plot — turn your plastic containers into thriving mini-gourd gardens today! You’ll not only enjoy the harvest but also the satisfaction of growing your food sustainably and effortlessly.
Leave A Comment